People > Old Tenants
PEOPLE>OLD
How can I search for the evicted tenant?
Need to find a tenant who has already moved out? The Old Tenants section makes it easy to search and access their records quickly. This is useful for reviewing past tenancy details, rent history, or other relevant information.
Here’s how you can find and review old tenant records efficiently:
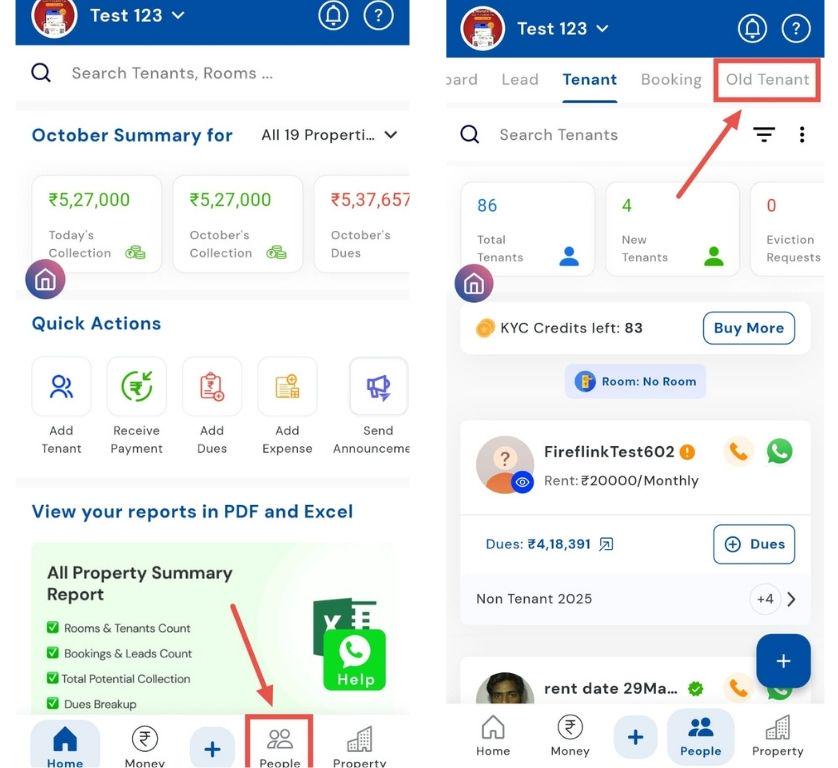
- Step 1: Open Old Tenants Tap the People icon in the bottom navigation menu, then select Old.
- Step 2: Search for the tenant Tap the Search option and enter the tenant’s name to locate their record.
How can I access a list of all previously evicted tenants?
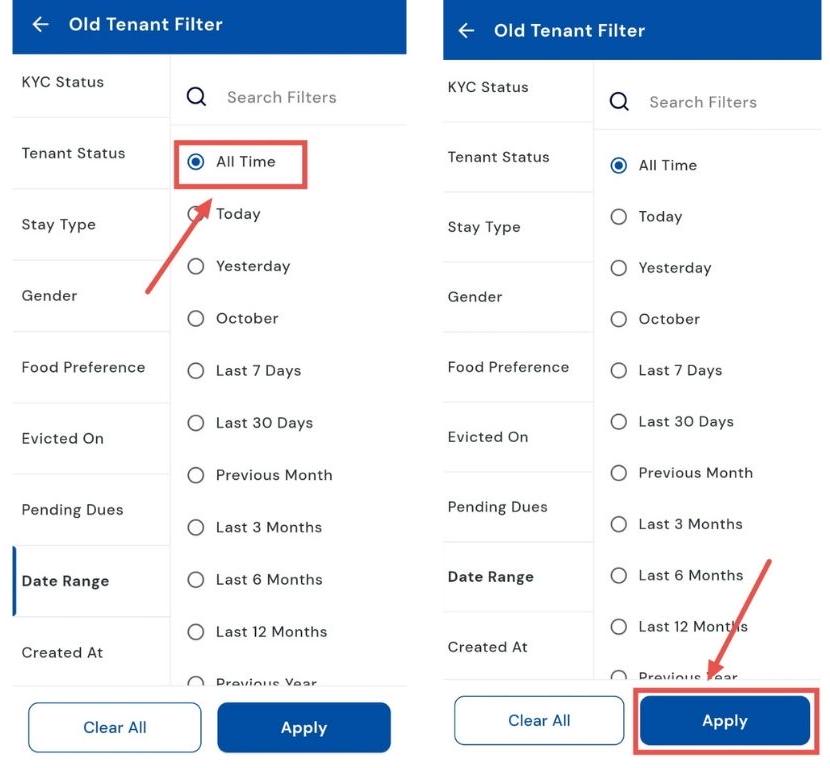
Want to see a complete list of all past tenants? The All Time filter in the Old Tenants section gives you access to every tenant who has moved out. This makes it easy to review tenancy history, check past rent details, or audit records.
Here’s how you can view all past tenants quickly and efficiently:
- Step 1: Open Old Tenants Tap the People icon in the bottom navigation menu, then select Old.
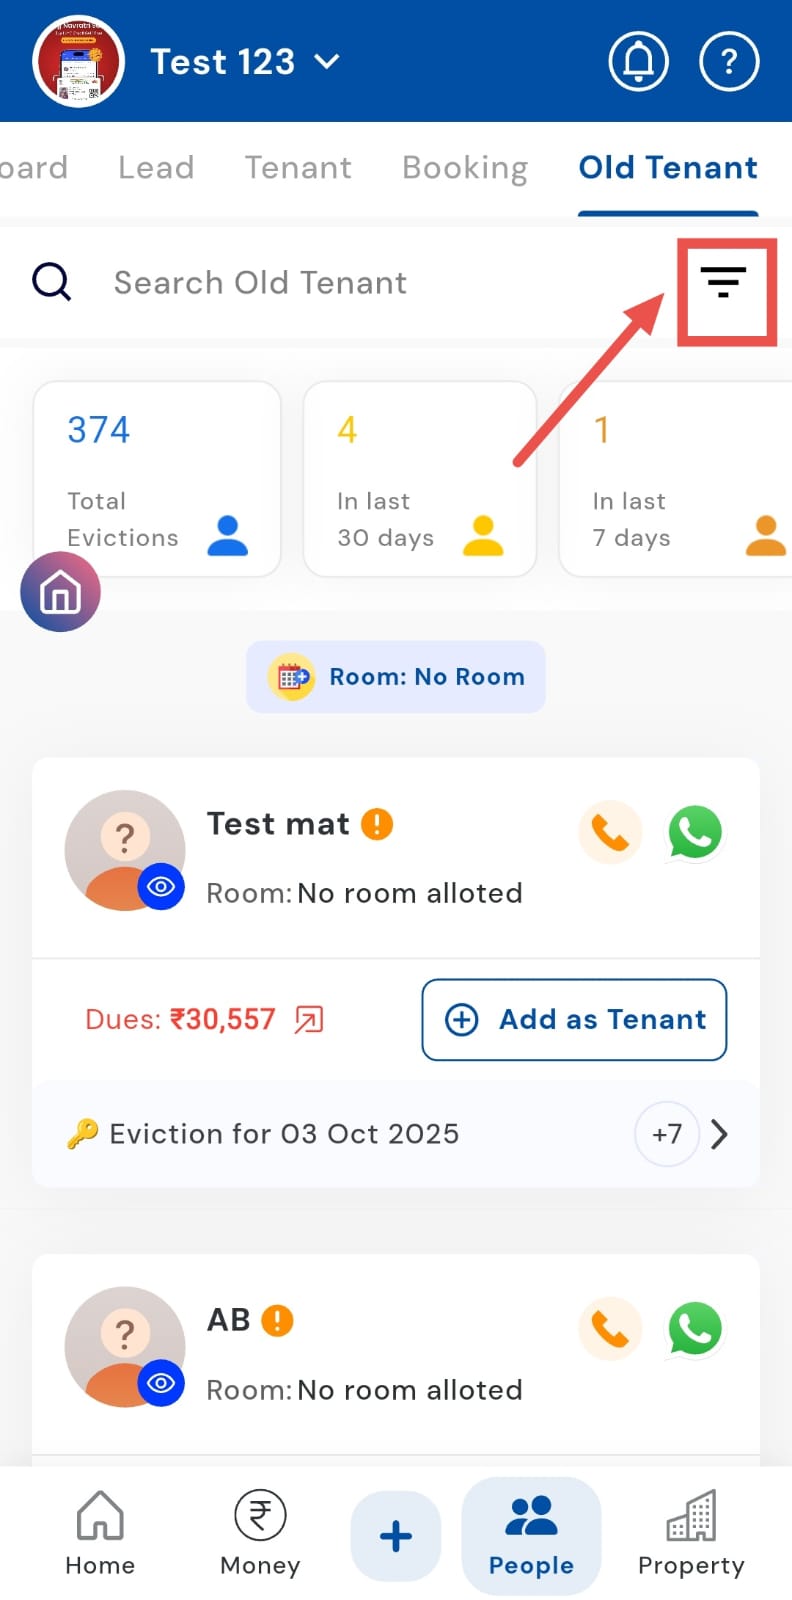
- Step 2: Open the filter Click on the Filter option in the search box.
- Step 3: Choose date range In the filter menu that appears, select Date Range.

- Step 4: Select All Time Pick All Time to include every past tenant, then tap Apply.
How can I see the list of tenants who were evicted for a specific time period?
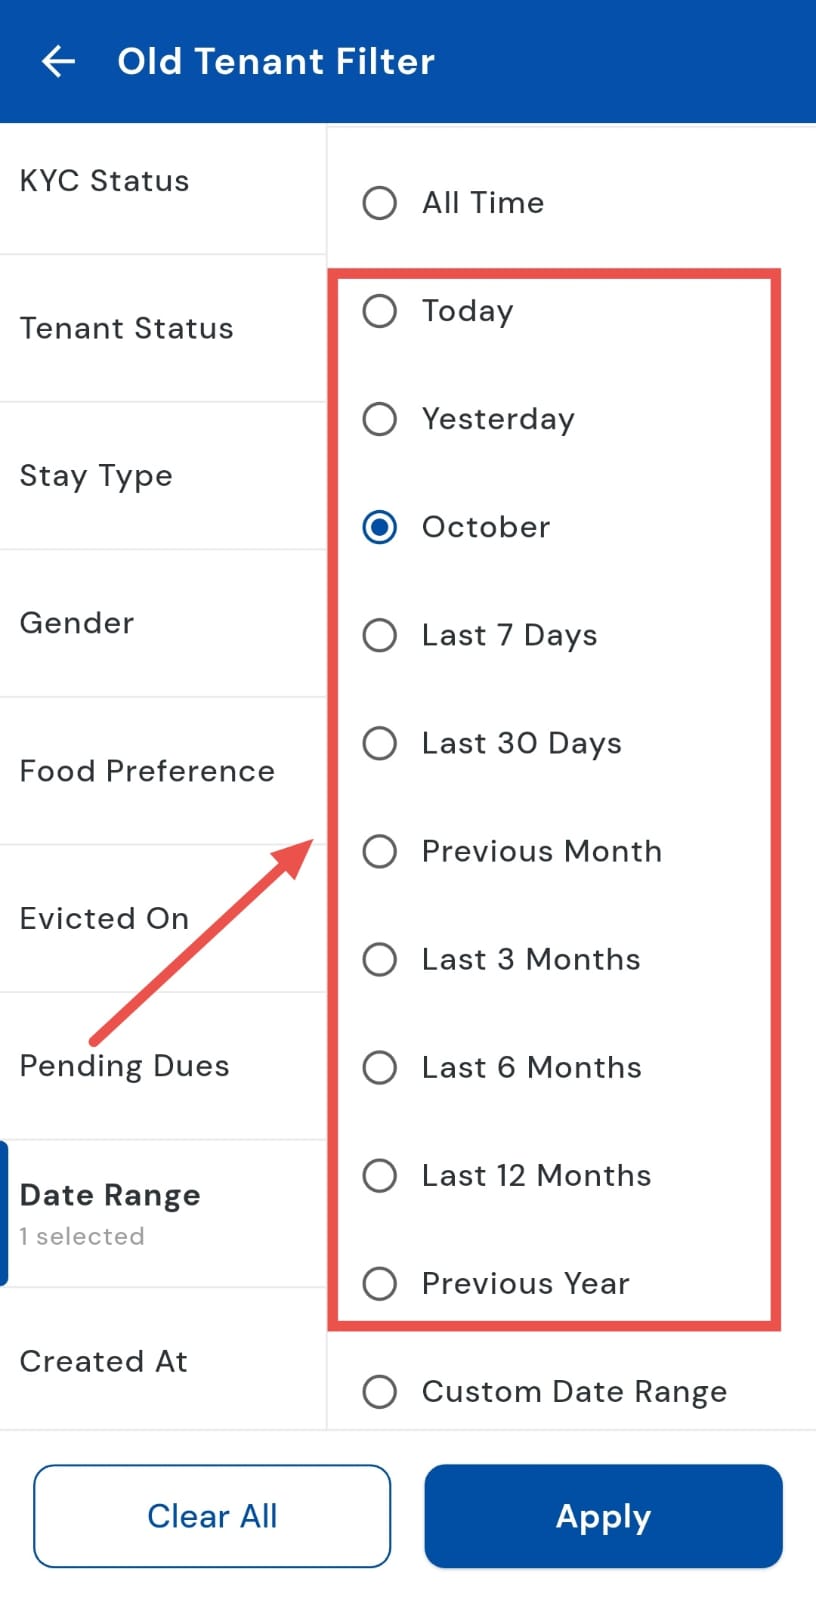
Want to review eviction history for a specific period? The Date Range filter in the Old Tenants section lets you see which tenants were evicted during any custom time frame. This makes it easy to analyze eviction patterns, generate reports, or review tenancy history.
Here’s how you can check eviction history for a chosen period efficiently:
- Step 1: Open Old Tenants Tap the People icon in the bottom navigation menu, then select Old.
- Step 2: Open the filter Click on the Filter icon in the search box.
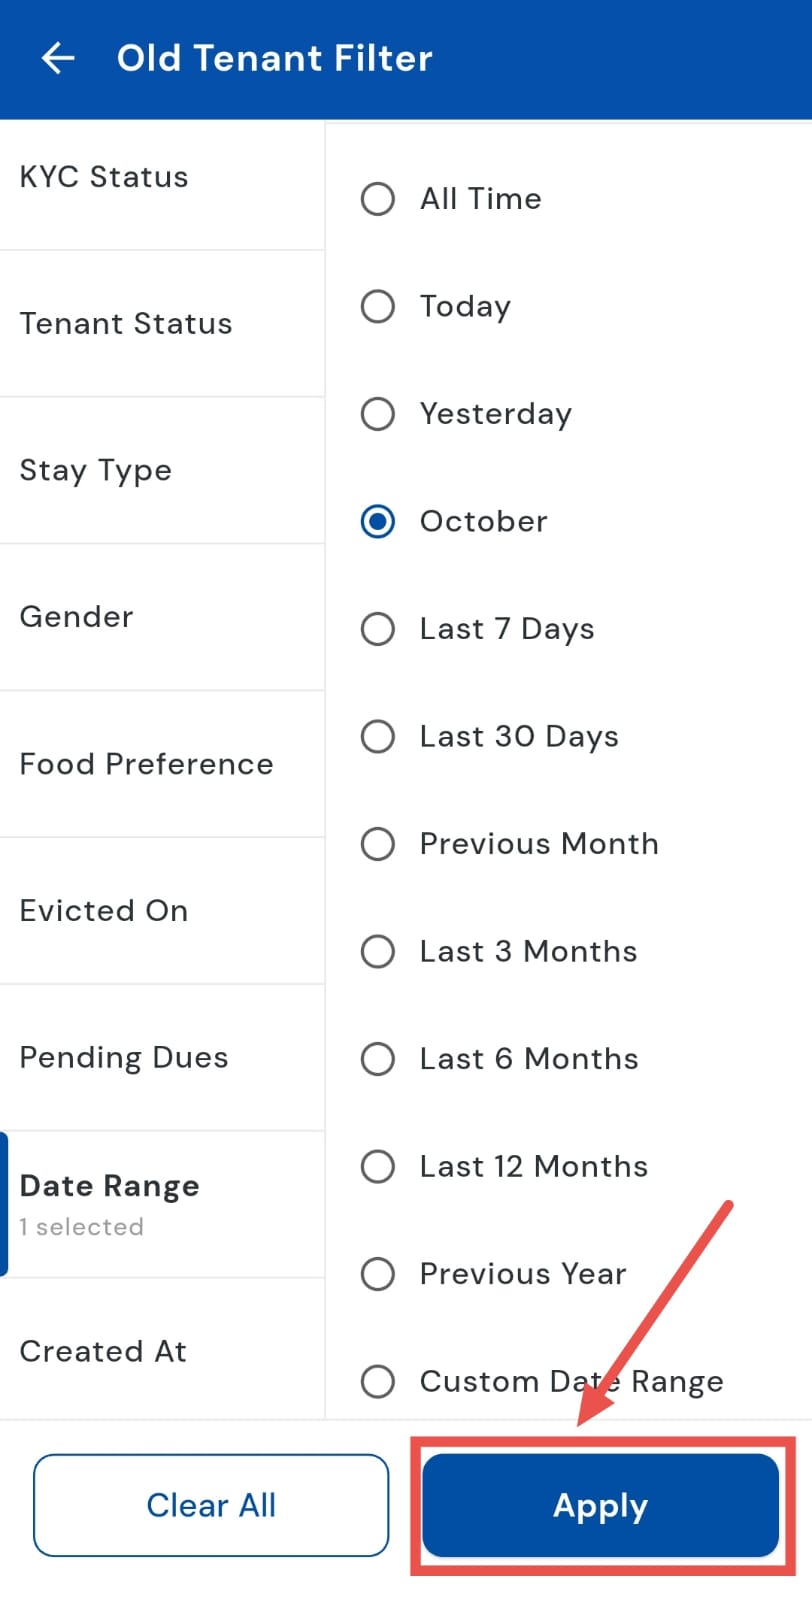
- Step 3: Select date range In the filter menu that appears, choose Date Range.
-
Step 4: Choose the desired period Select from options such as:
-
Today – tenants evicted today
-
Yesterday – tenants evicted yesterday
-
Last 7 days – tenants evicted in the past week
-
Last 30 days – tenants evicted in the past month
-
Previous month – tenants evicted in the last calendar month
-
Last 3 months – tenants evicted in the past 3 months
-
Last 6 months – tenants evicted in the past 6 months
-
Last 12 months – tenants evicted in the past year
-
Previous year – tenants evicted in the previous calendar year
-
- Step 5: Apply filter Tap Apply to view the filtered list of evicted tenants.
| Tip: Using specific date ranges helps you quickly generate reports or analyze eviction trends for any period without manually checking each tenant. |
|---|
How can I view the list of tenants who were evicted within a specific custom date range?
If you need eviction records for specific dates, the Custom Date Range filter makes it simple to track them. You can select exact start and end dates to quickly find tenants evicted during any chosen period. This is helpful for detailed reporting or analyzing eviction trends over a specific timeframe.
Here’s how you can use the Custom Date Range option to review eviction records efficiently:
- Step 1: Open Old Tenants Tap the People icon in the bottom navigation menu, then select Old.
- Step 2: Open the filter Click on the Filter option in the search box.
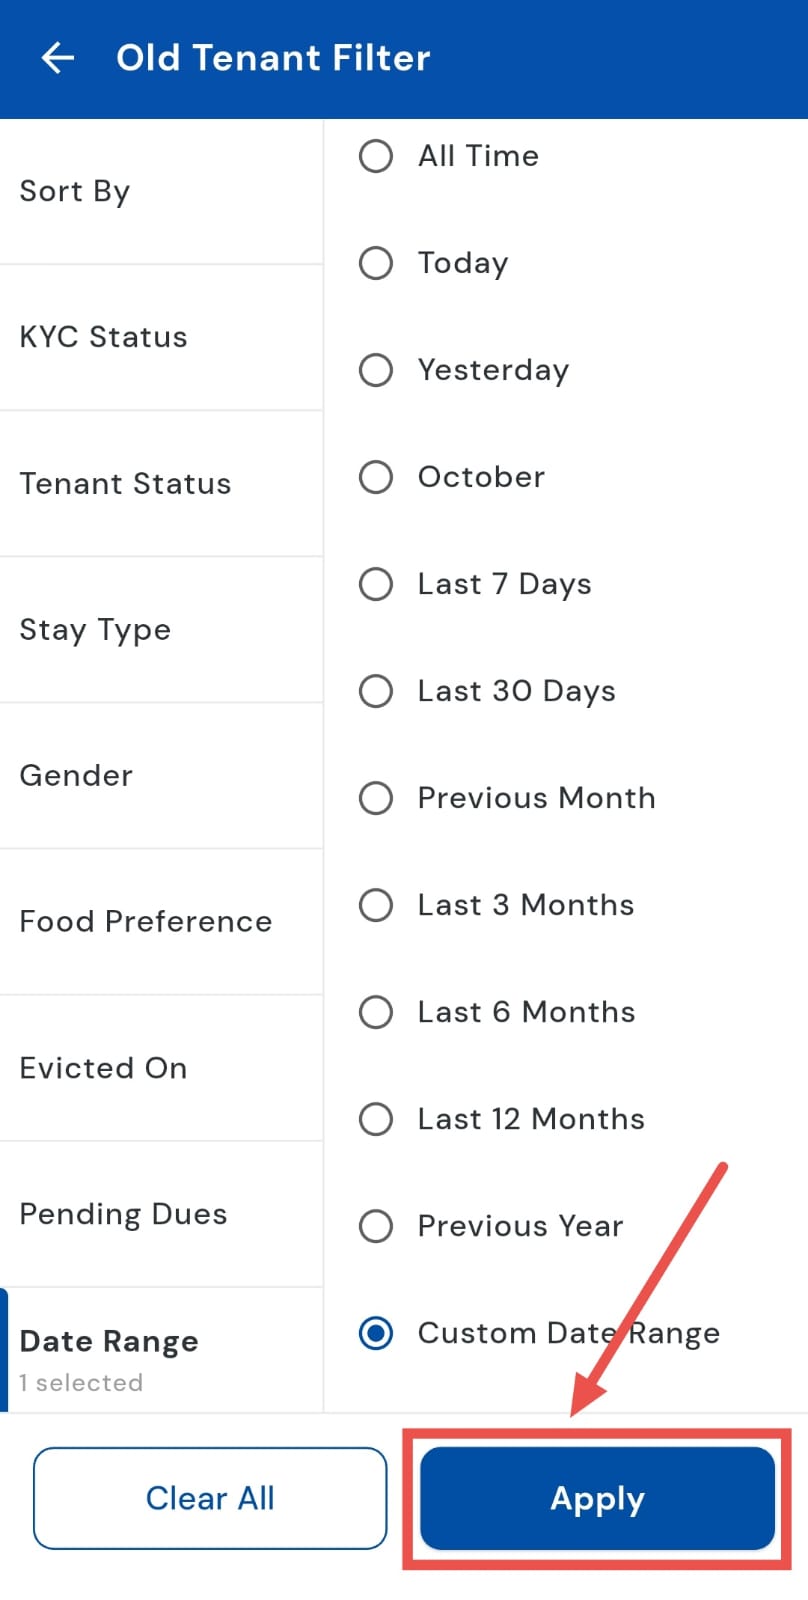
- Step 3: Select date range In the filter menu that appears, choose Date Range.
-
Step 4: Choose Custom Date Range Select Custom Date Range, then pick the specific start and end dates.
-
Step 5: Apply filter Tap Save, then tap Apply to view the list of tenants evicted within the chosen dates.
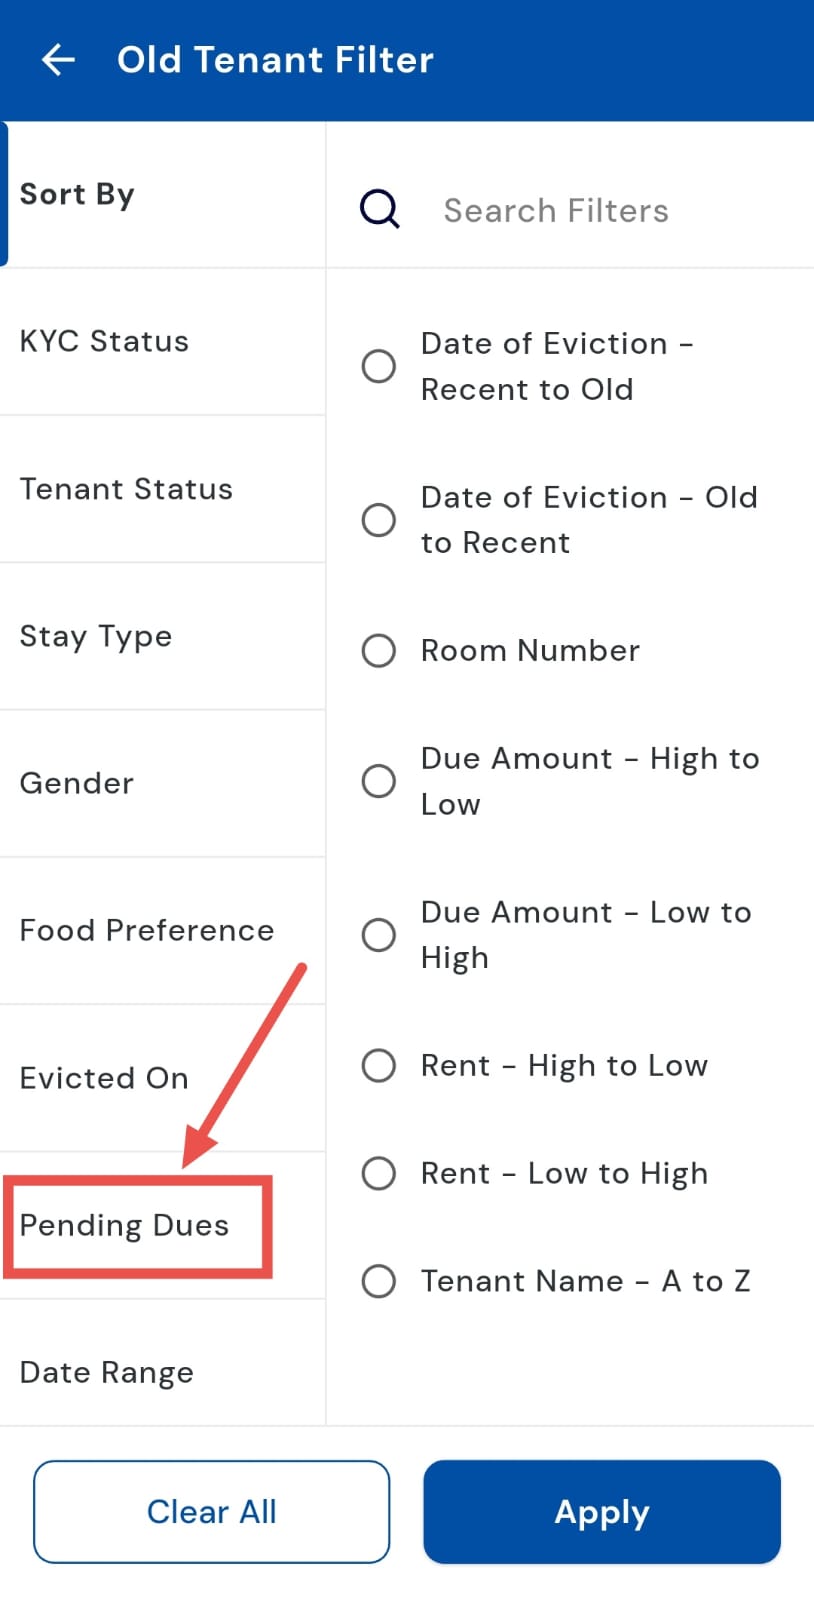
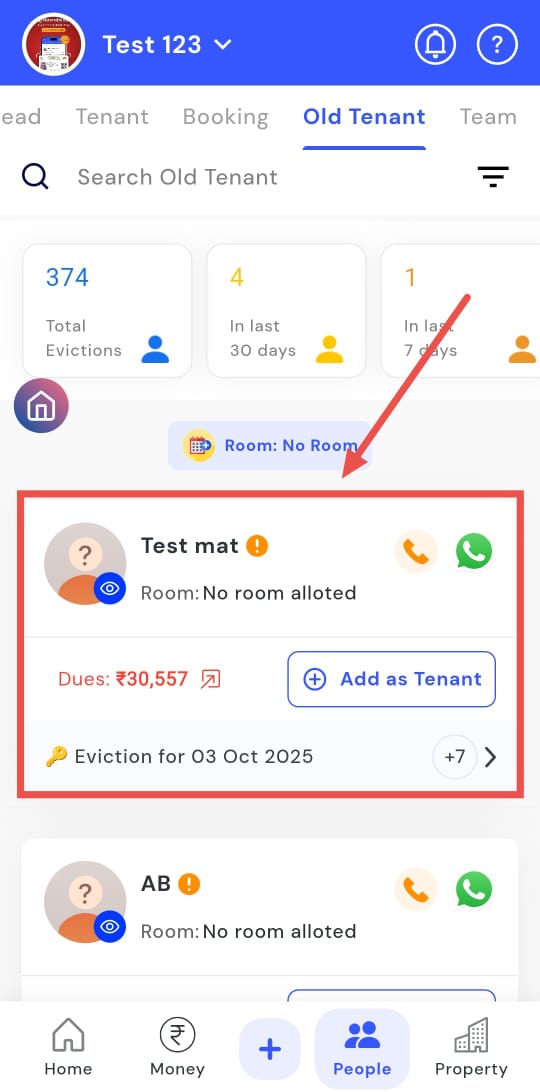
How can I check pending dues of evicted tenants?
Want to check pending dues of evicted tenants? The Pending Dues filter in the Old Tenants section makes it easy to review outstanding payments. You can see which tenants still owe dues and distinguish between those whose eviction caused a loss and those who have pending payments without a loss.
Here’s how you can use the Pending Dues filter to stay on top of evicted tenant balances efficiently:
- Step 1: Open Old Tenants Tap the People icon in the bottom navigation menu, then select Old.
- Step 2: Open the filter Click on the Filter option in the search box.
- Step 3: Select Pending Dues In the filter menu that appears, choose Pending Dues.
-
Step 4: Choose the type of pending dues Select either:
-
With Loss – tenants whose eviction caused a loss and still have pending dues
-
Without Loss – tenants who have pending dues but no loss incurred
-
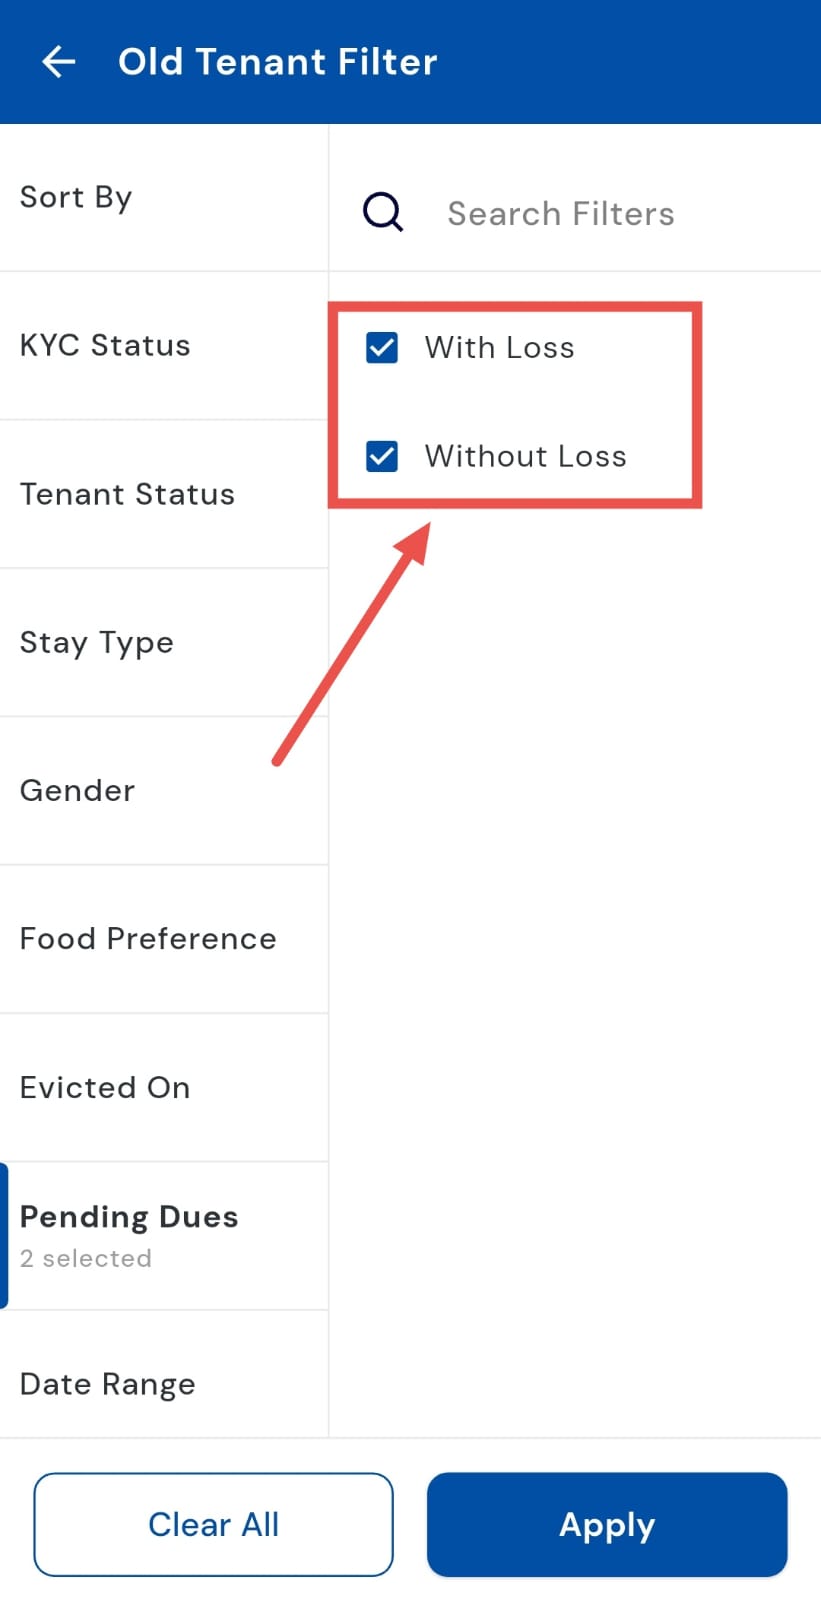
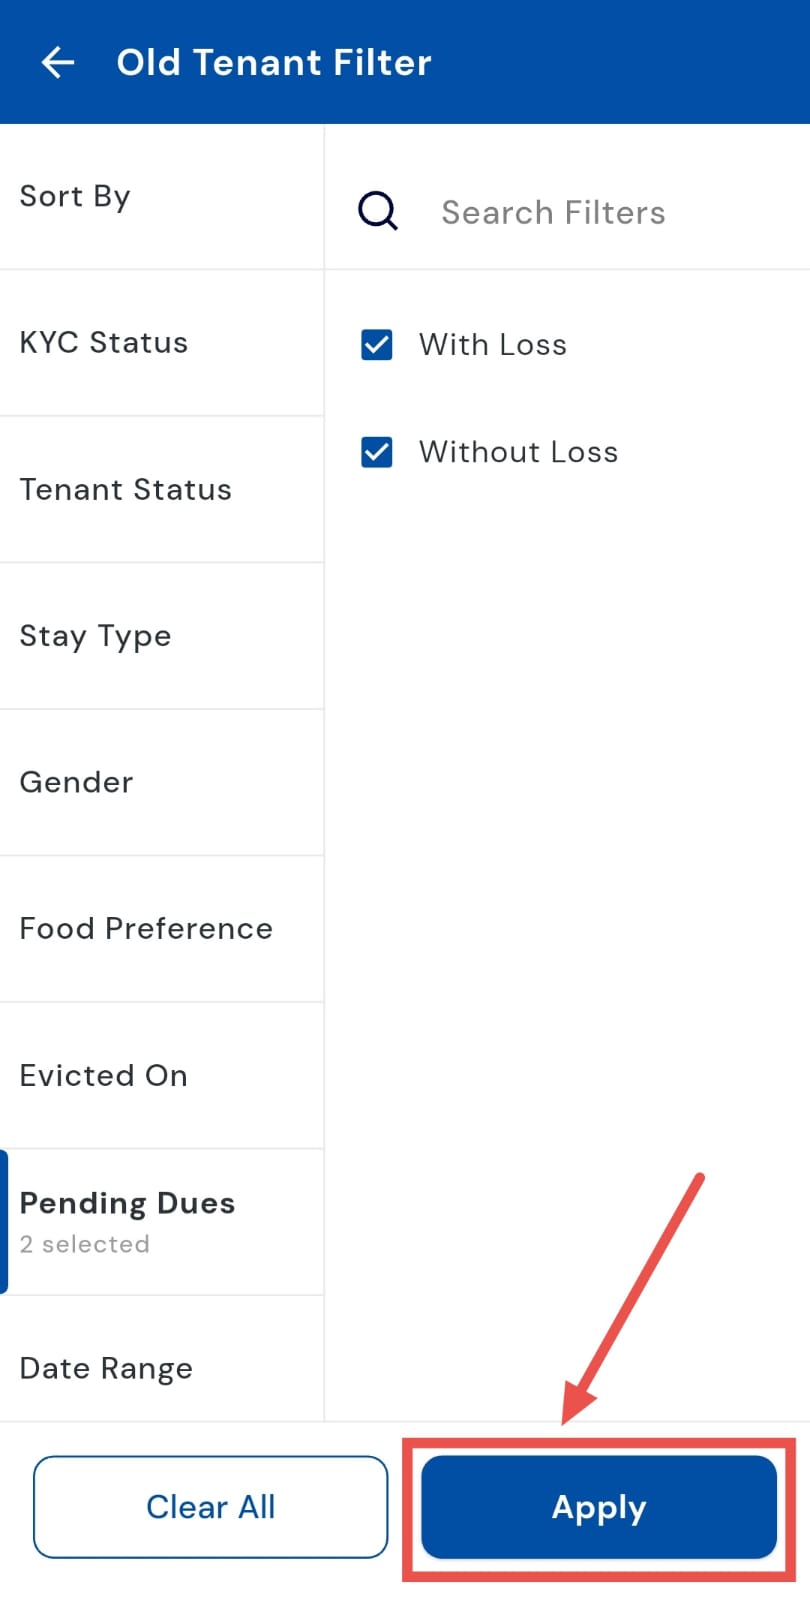
- Step 5: Apply filter Tap Apply to view the filtered list of tenants with pending dues.
How to permanently delete an old tenant?
Want to permanently remove an old tenant from your records? The Permanent Delete option in the Old Tenants section lets you safely erase their details. This helps keep your tenant database clean, accurate, and up to date.
Here’s how you can use the Permanent Delete option to remove old tenant records efficiently:
- Step 1: Open Old Tenants Tap the People icon in the bottom navigation menu, then select Old.
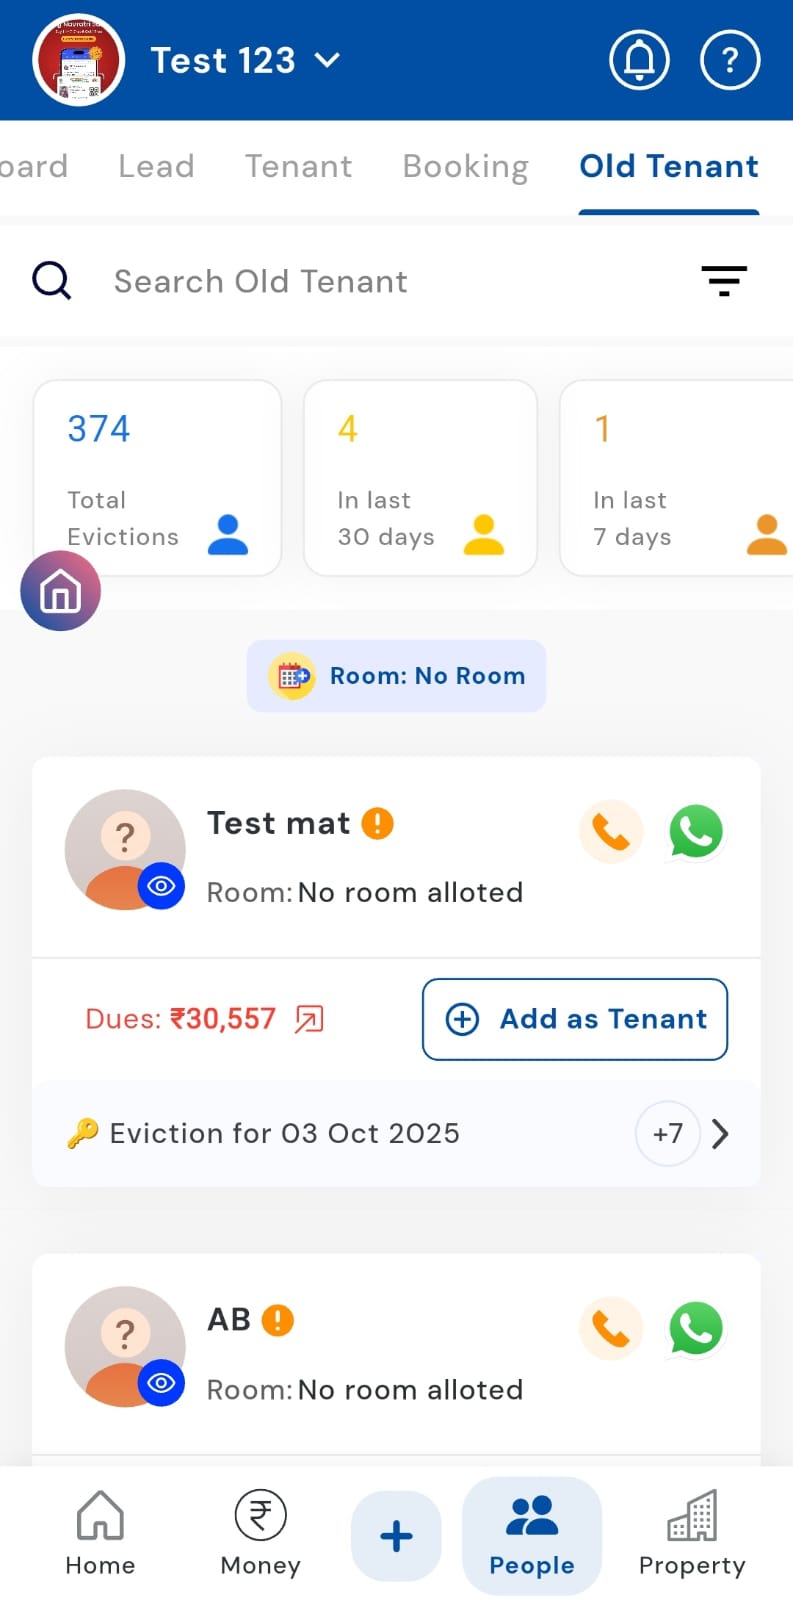
- Step 2: Find the tenant Scroll or search to locate the tenant you want to permanently delete.
- Step 3: Swipe to options Swipe left on the tenant’s card to reveal the Permanent Delete option.
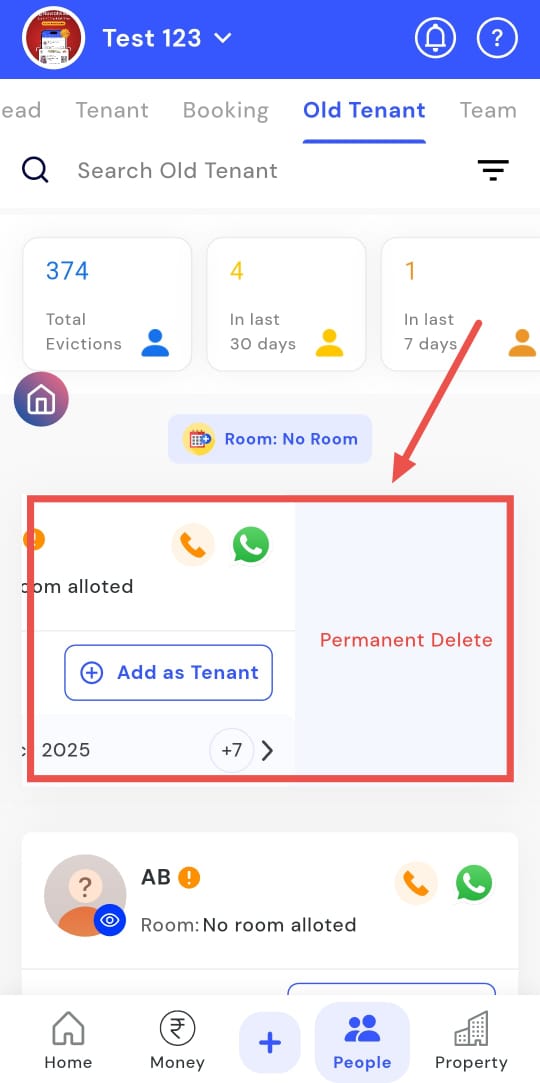
- Step 4: Delete the tenant Tap Permanent Delete.
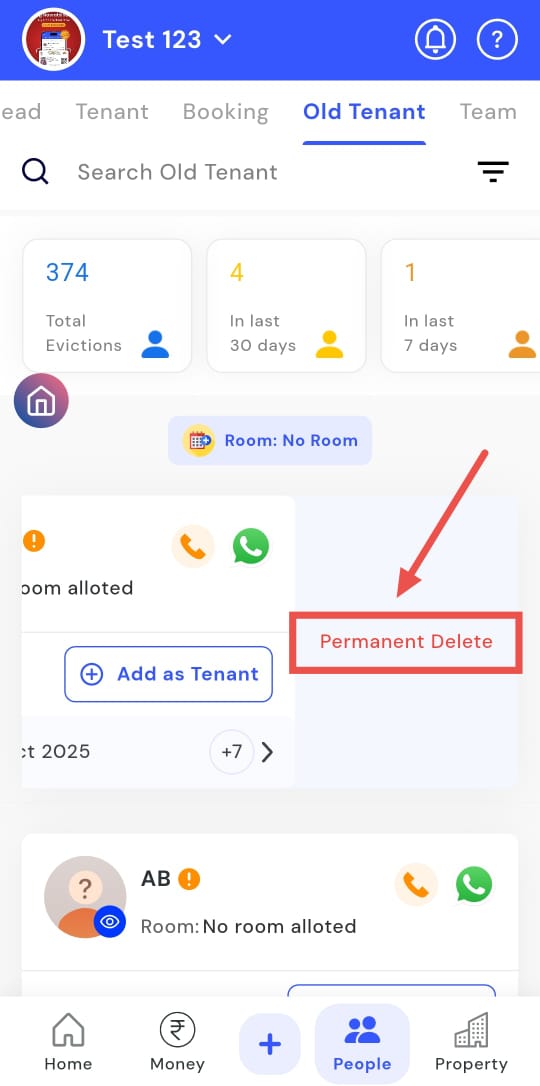
- Step 5: Confirm deletion A confirmation screen will appear. Tap Yes, Delete to permanently remove the tenant.

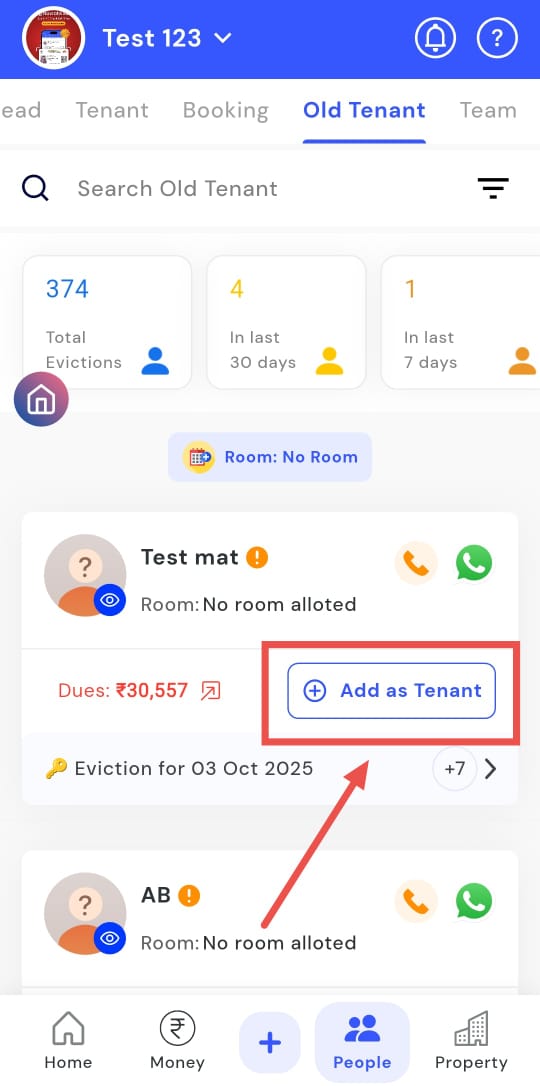
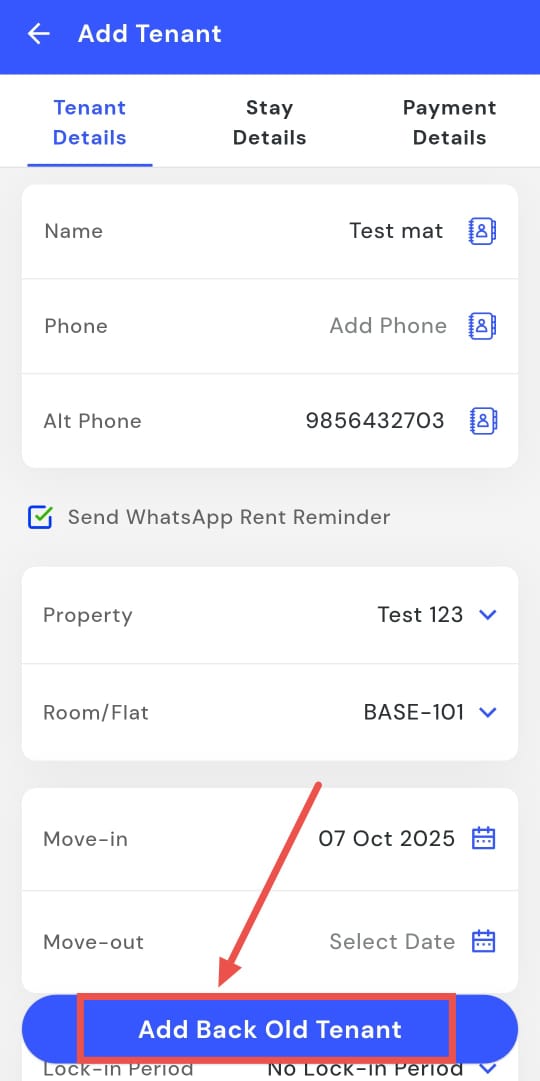
How do I add back a tenant?
If a tenant is returning, you can easily add them back from the Old Tenants list using the Add Back Tenant option. This allows you to restore past tenants into your active list quickly and efficiently. You can recover their profile, review all previous details, and optionally reinstate any unpaid dues.
Here’s how you can add back a returning tenant and manage their records seamlessly:
- Step 1: Open Old Tenants Tap the People icon in the bottom navigation menu, then select Old.
- Step 2: Find the tenant Scroll or search to locate the tenant you want to add back.
- Step 3: Open Add Back On the tenant’s card, tap Add as Tenant.
- Step 4: Review tenant details The Add Tenant screen will open. Review and edit all details as needed.
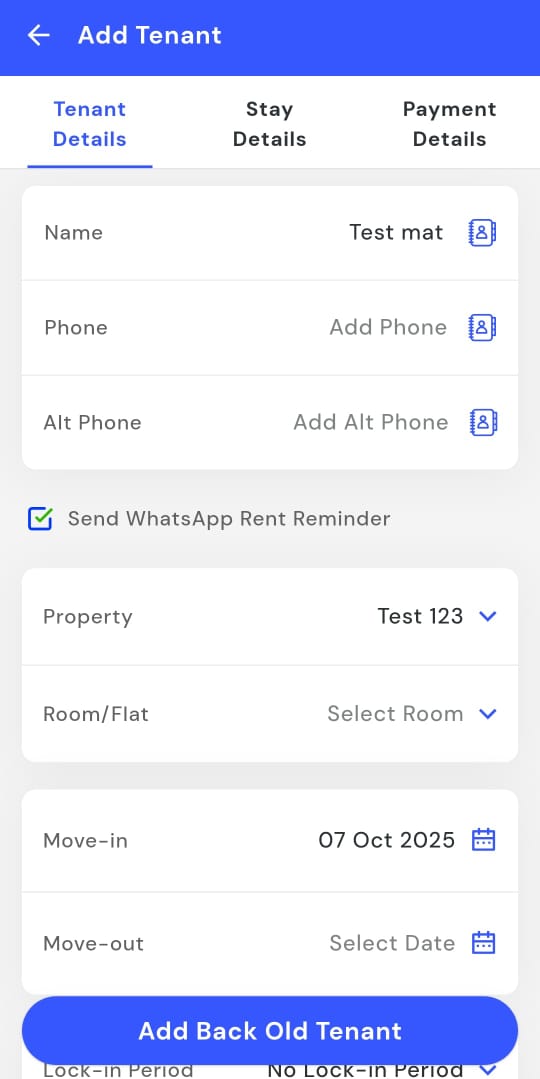
- Step 5: Add tenant Tap Add Back Old Tenant to restore the tenant to your active list.
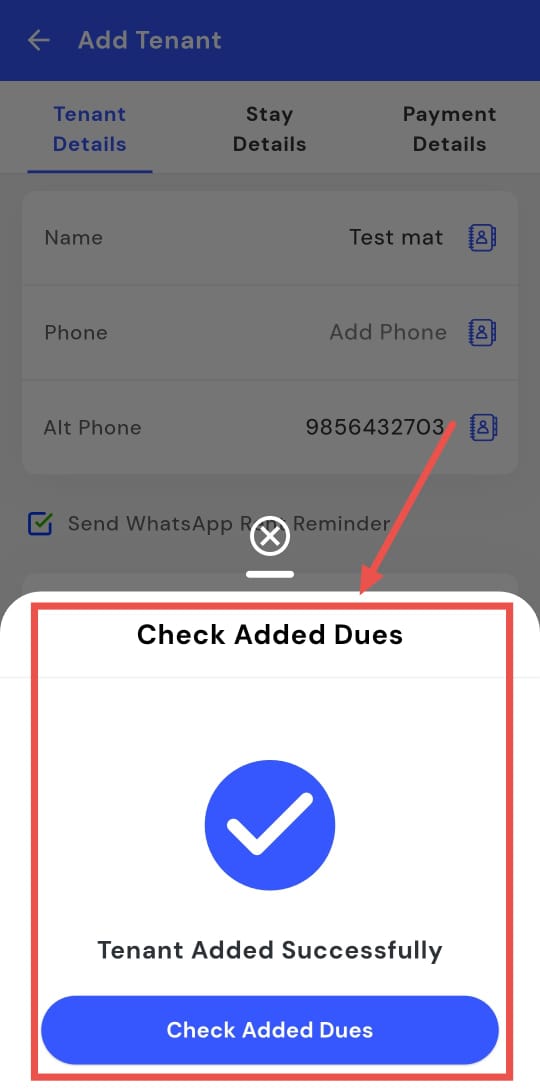
- Step 6: Handle previous loss Once the tenant is added successfully, tap Check Added Dues to view the tenant’s passbook and see any previous balances or losses.