Property Dashboard
PROPERTY>DASHBOARD
How to check individual property inventory in one place?
Do you need to check the inventory details of a specific property? The Property Dashboard lets you view everything in one place with just a few taps. You can easily track and manage items across properties without needing to open each one individually. This helps you maintain organized and up-to-date inventory records at all times. Here’s how you can view property-wise inventory quickly and efficiently:
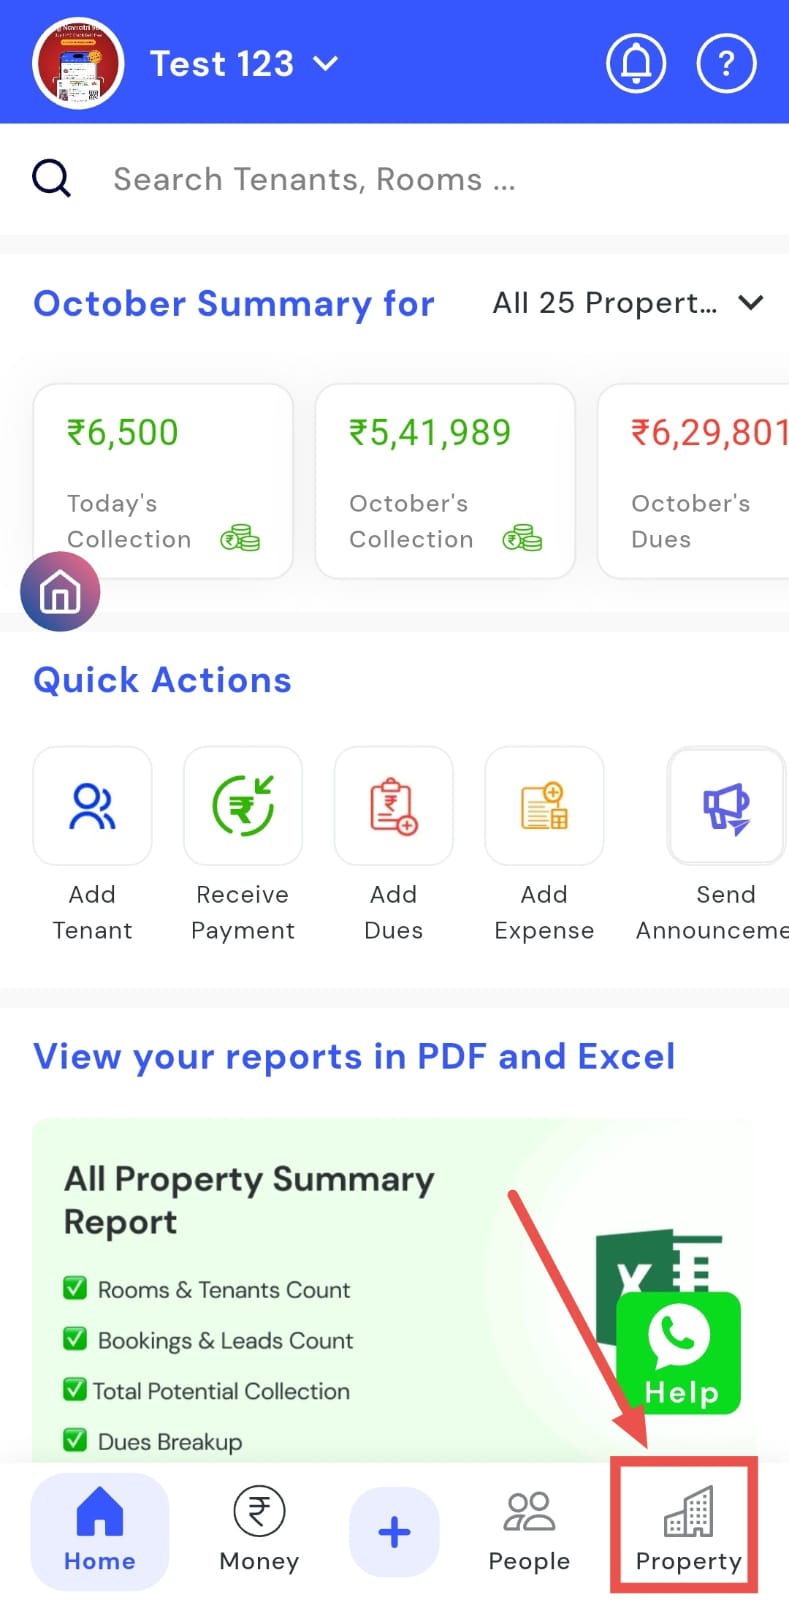
- Step 1: Open Properties Tap the Property icon in the bottom navigation menu.
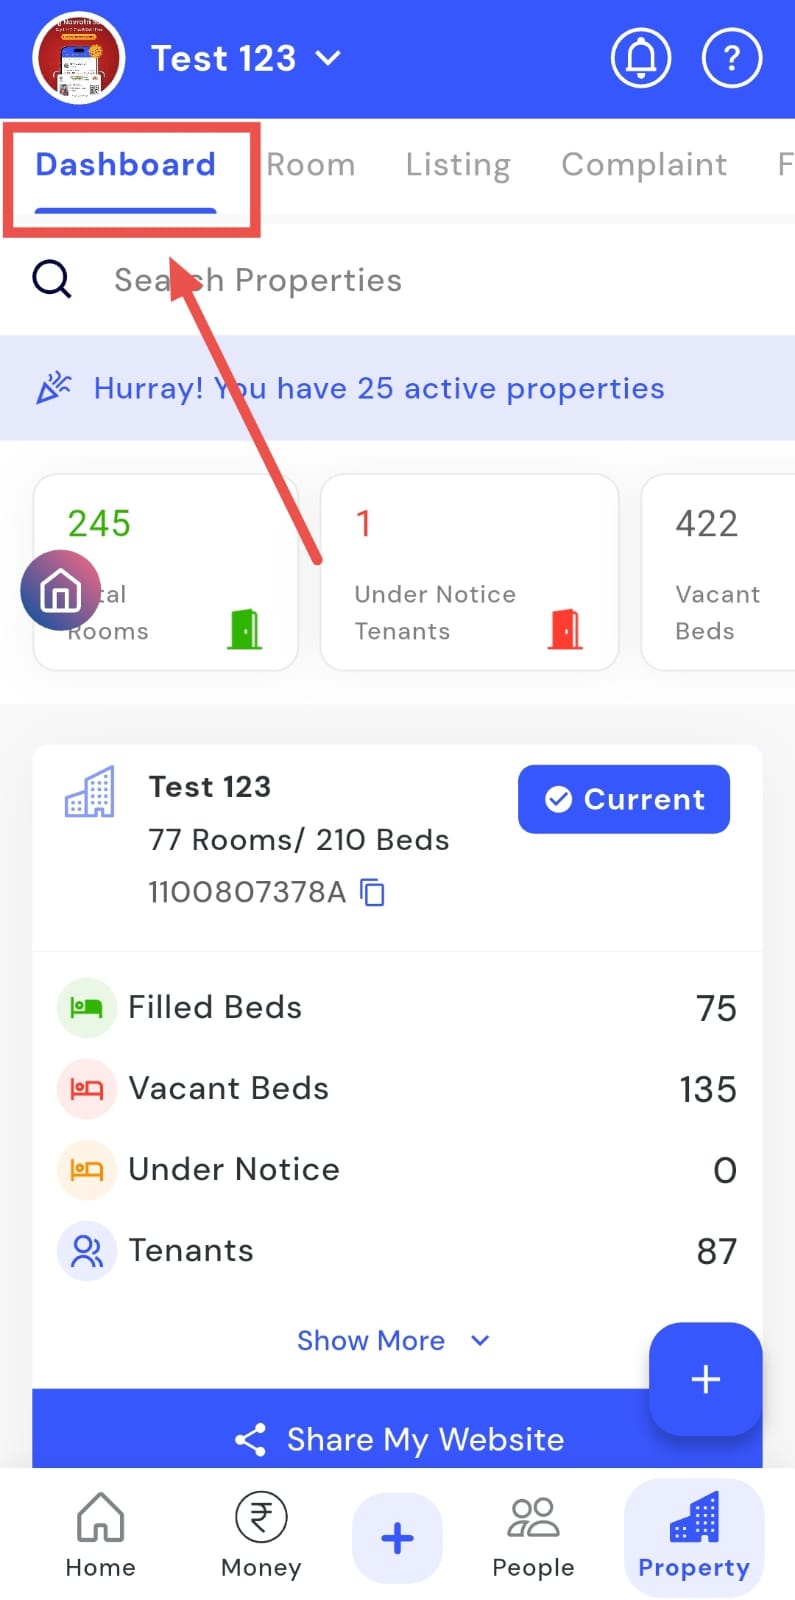
- Step 2: Access the Dashboard Tap Dashboard and scroll down to view the complete inventory details for each property individually.
How can I send the property website to individuals separately?
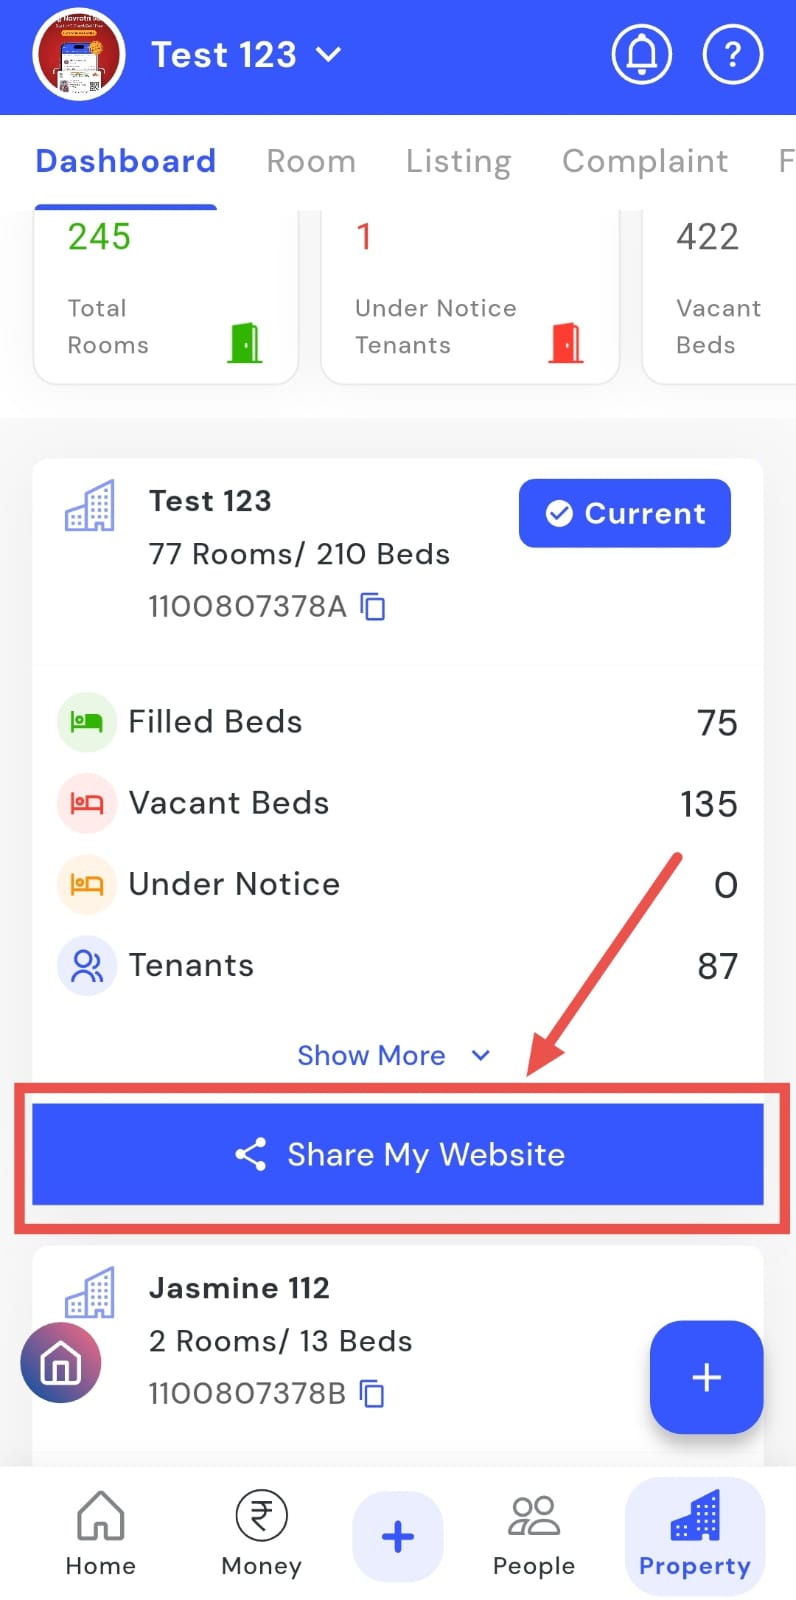
Easily share your property website link with anyone in just a few taps. From the Property Dashboard, you can send each property’s website directly through WhatsApp to prospects, tenants, or other interested individuals. This ensures all property details are shared quickly and professionally.
Here’s how you can share property websites efficiently:
- Step 1: Open Properties Tap the Property icon in the bottom navigation menu.
- Step 2: Find the property Tap Dashboard, scroll down, and search for the concerned property.
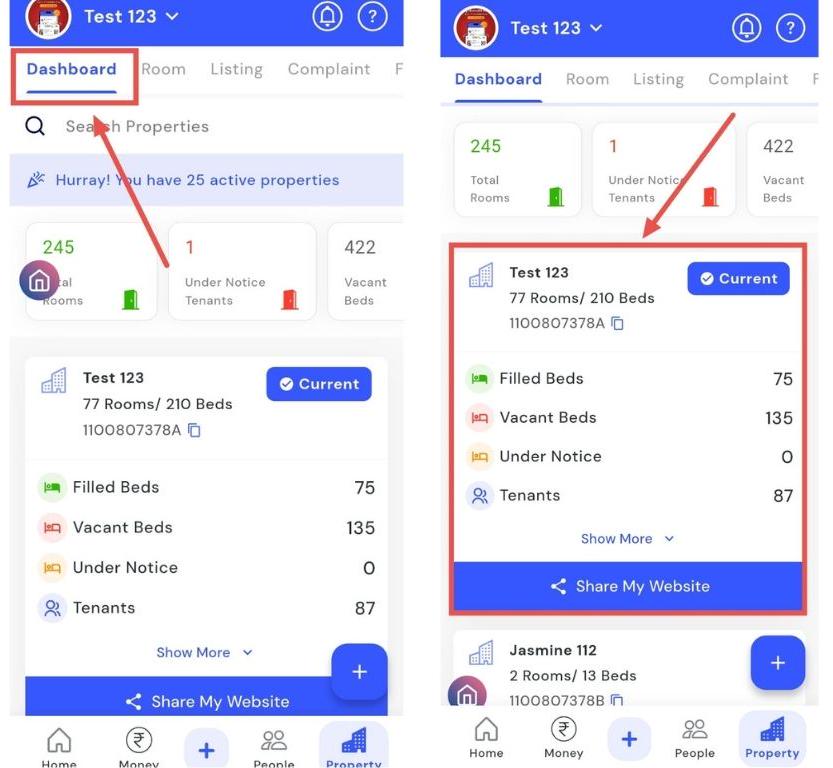
- Step 3: Share the website On the property card, tap Share My Website.
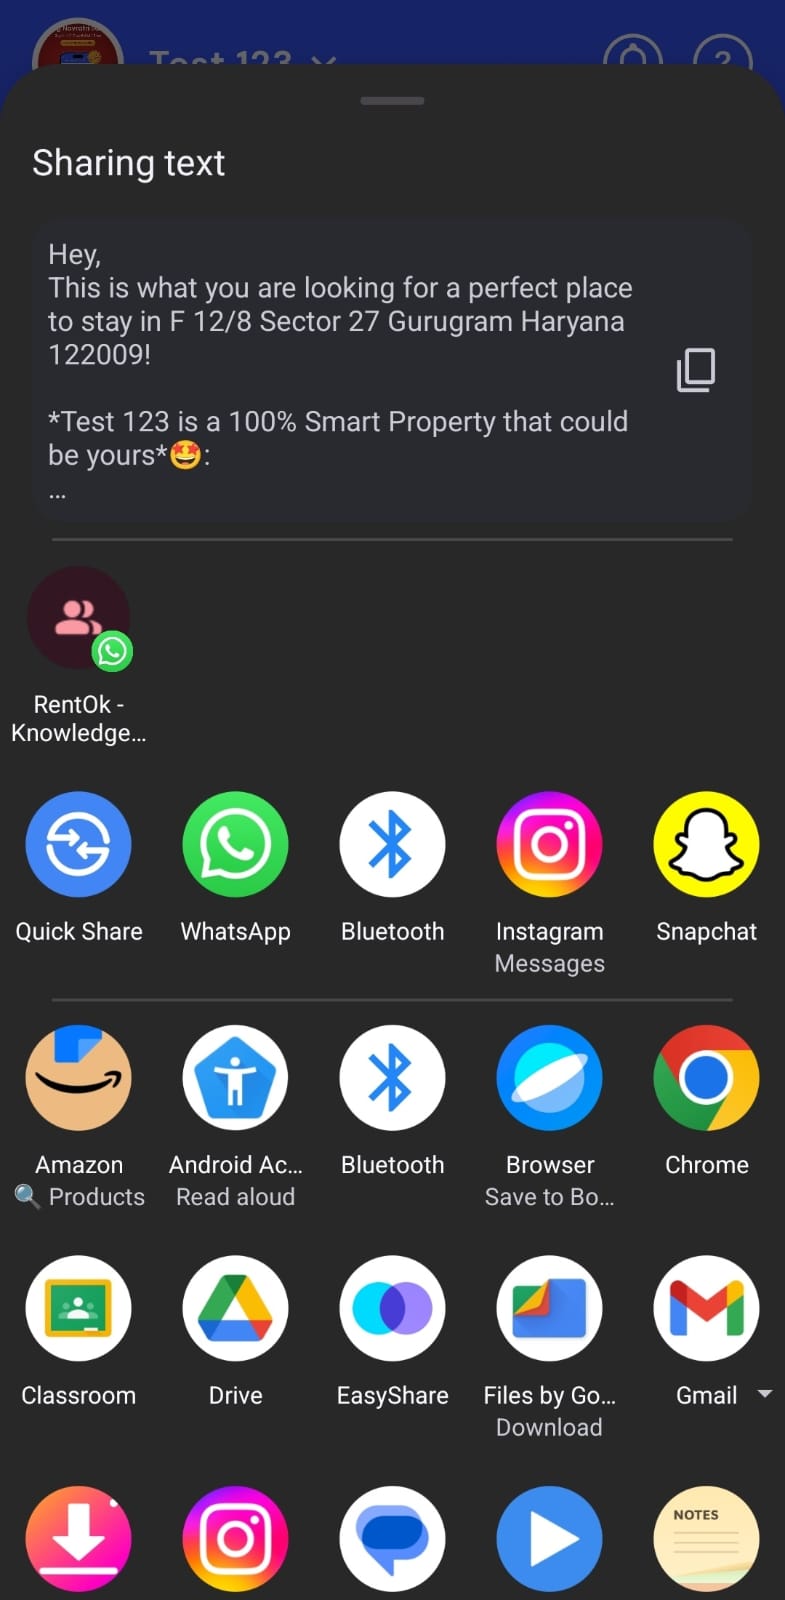
- Step 4: Send via WhatsApp Your WhatsApp contact list will appear. Select the contact, and the WhatsApp message screen will open. Tap Send to share the link.
How to add a new property?
Easily register a new property in the app using the Add New Property option. You can enter all details for the new listing and add it directly to your dashboard, managing it alongside your existing properties. This helps keep all property information organized, accessible, and up to date.
Here’s how you can add a new property quickly and efficiently:
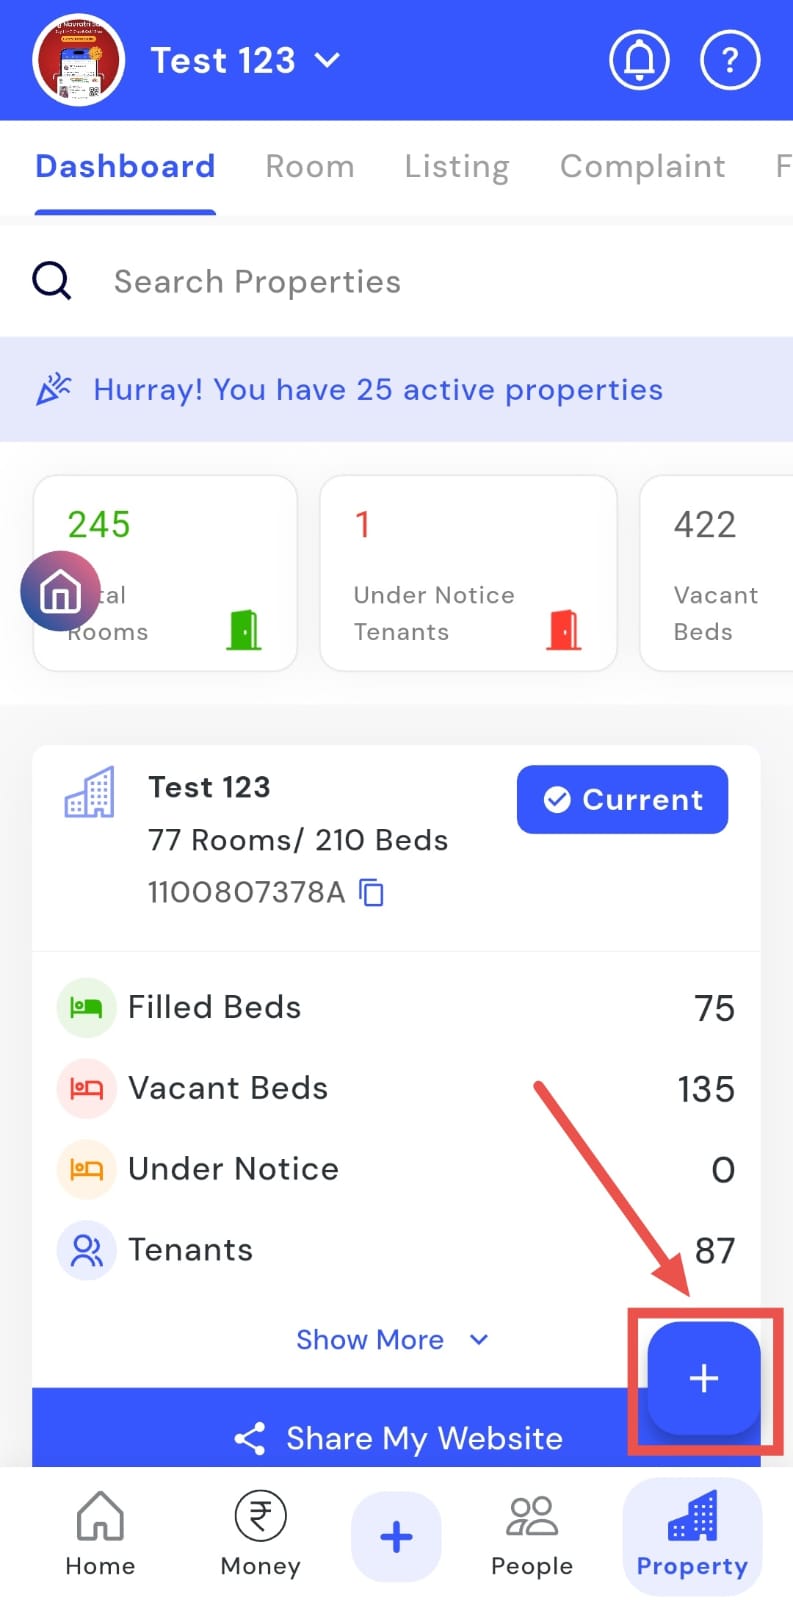
- Step 1: Open Properties Tap the Property icon in the bottom navigation menu.
- Step 2: Access the Dashboard Tap Dashboard to view existing properties.
- Step 3: Add New Property Tap the + sign to add the New Property.
- Step 4: Enter property details A screen will appear where you need to fill in all the required property information, such as the property name, address, and other relevant details. If you’ll be managing this new property yourself, tap Managed by Me before proceeding.
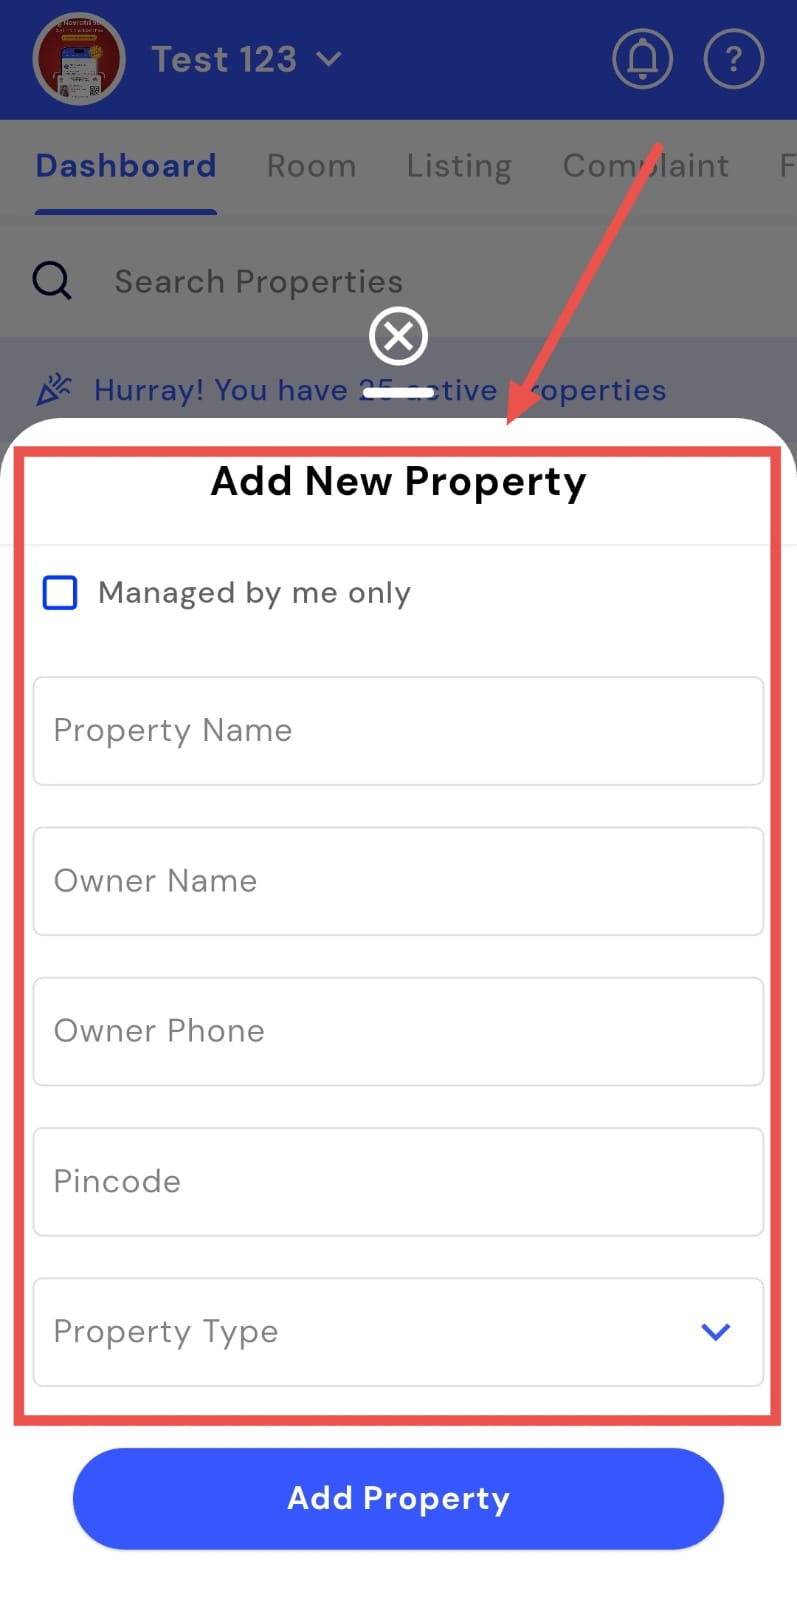
- Step 5: Save the property Tap Add New Property to create the new property in the system.

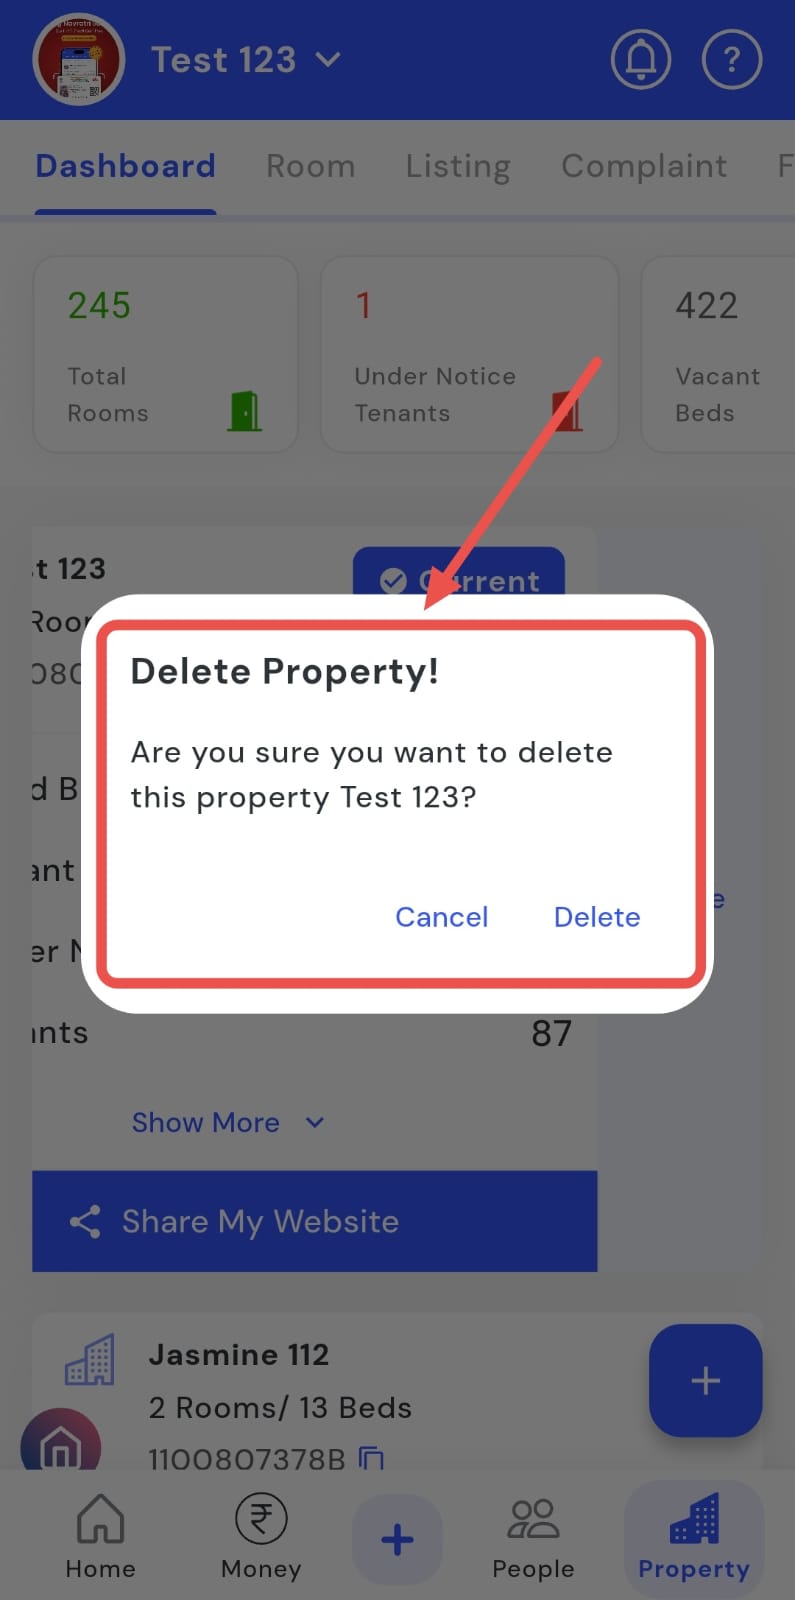
How to raise a deleted property request?
The Delete Property option lets you remove properties you no longer manage. You can raise a delete request directly from the dashboard to remove a property efficiently. This ensures that only active properties remain visible, keeping your dashboard organized and clutter-free.
Here’s how you can delete a property quickly and safely:
- Step 1: Open Properties Tap the Property icon in the bottom navigation menu.
- Step 2: Find the property Tap Dashboard, scroll down, and search for the concerned property.
- Step 3: Swipe to delete Swipe left on the property card to reveal the Delete option.
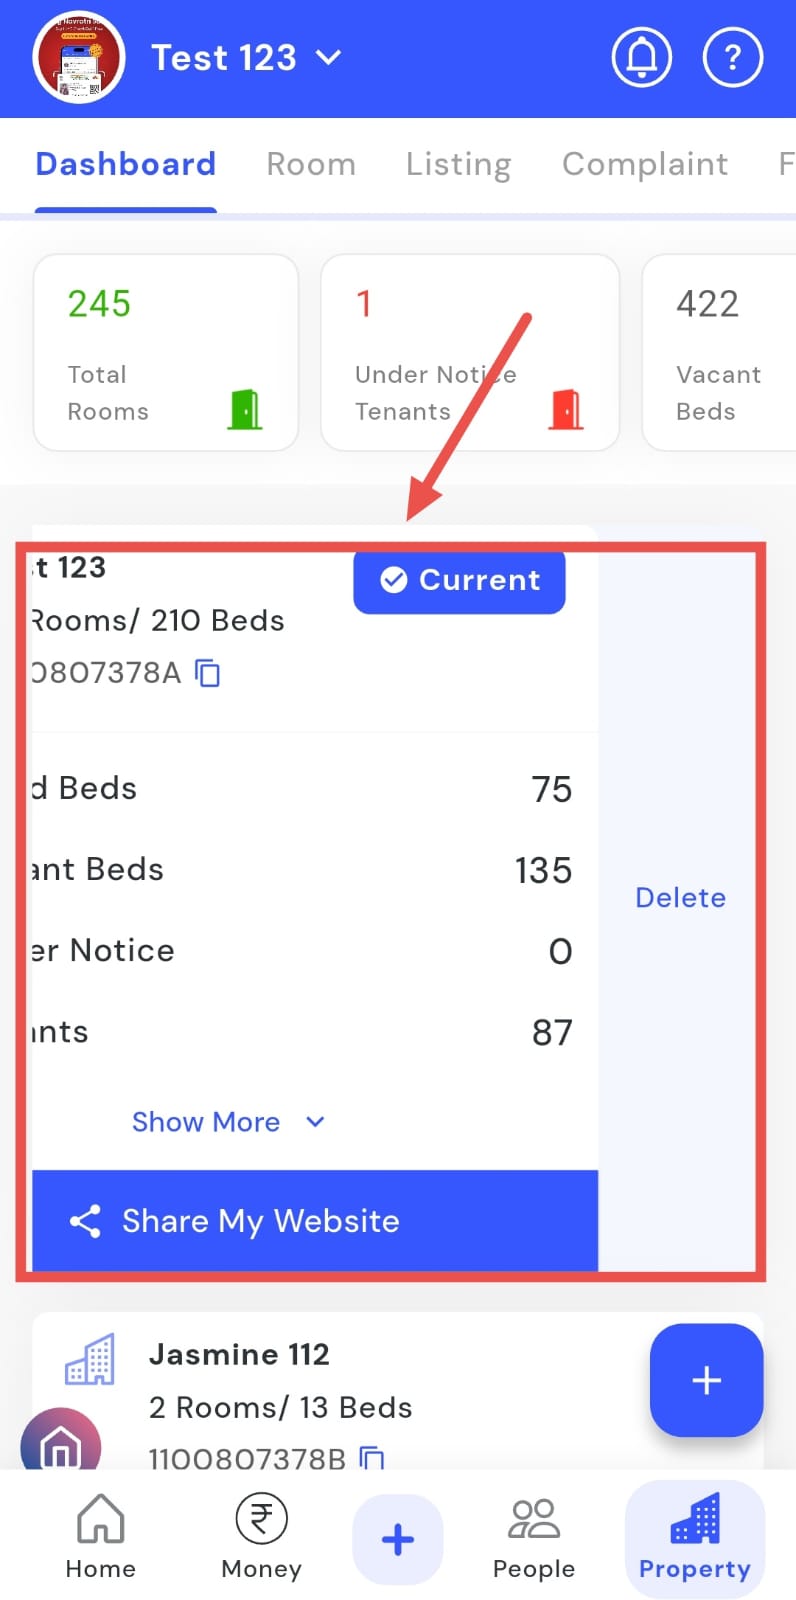
- Step 4: Delete property Tap Delete.
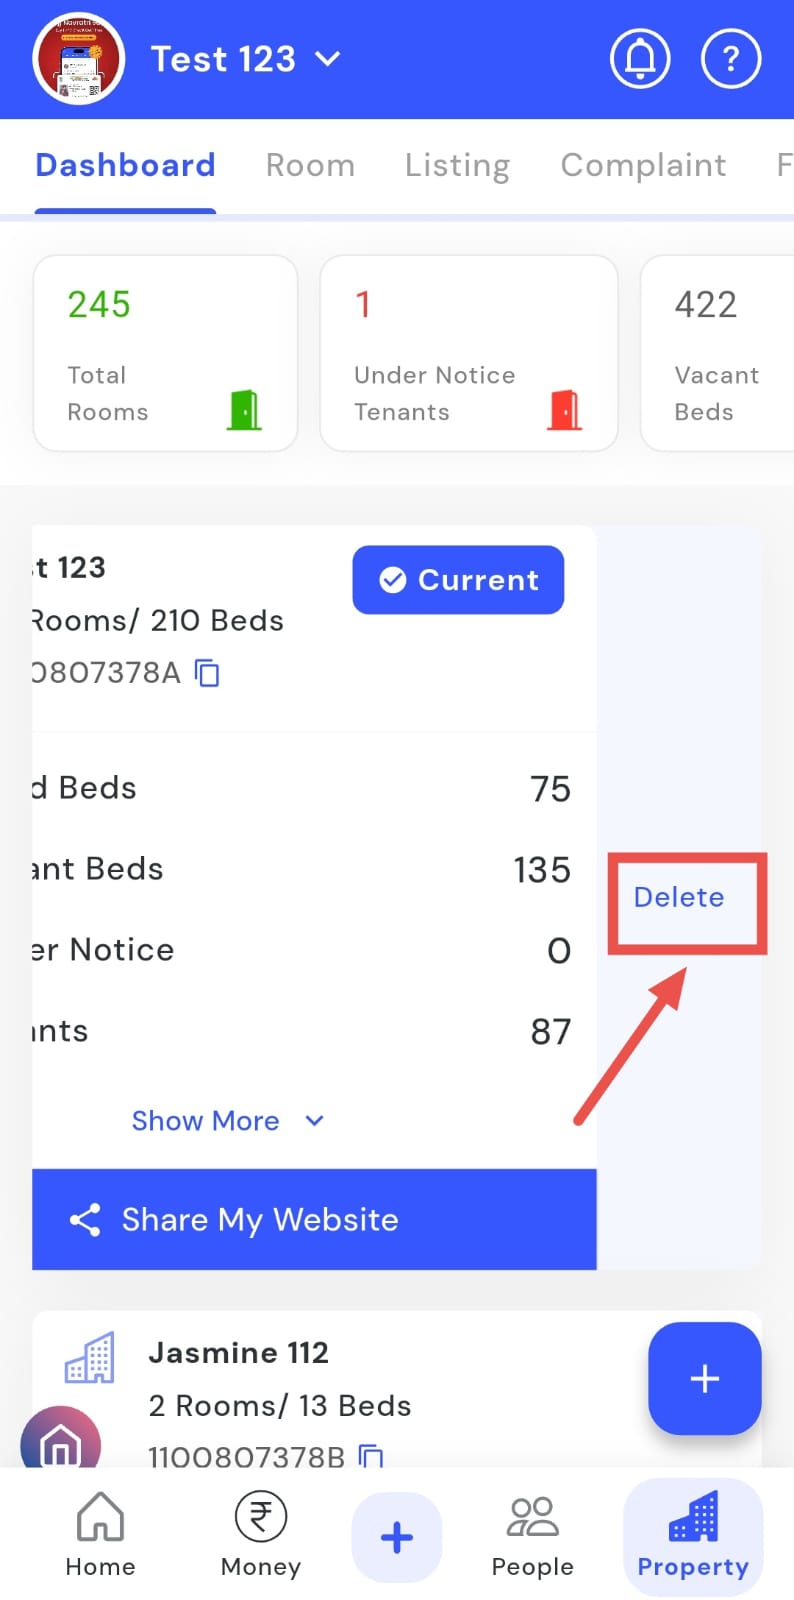
- Step 5: Confirm deletion A confirmation screen will appear. Tap Yes to submit the delete property request.
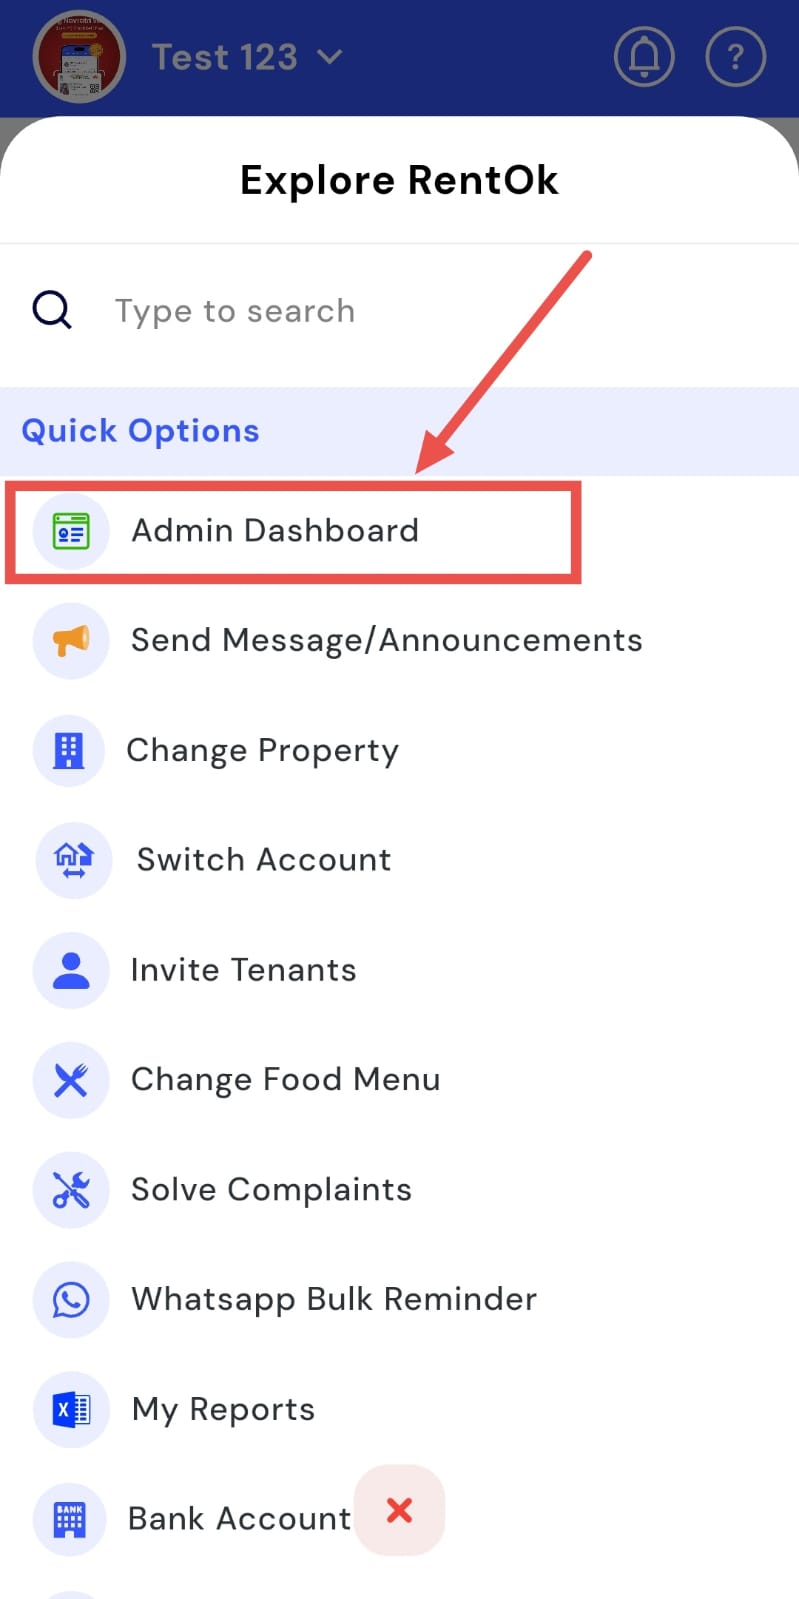
How can I check the Admin dashboard?
Want to access the Admin Dashboard? You can open it directly from the homepage to view key administrative insights and controls. The dashboard provides an overview of all important properties, team, and operational data, helping you monitor activity and manage settings efficiently.
Here’s how you can access the Admin Dashboard quickly and stay on top of operations:
- Step 1: Open Admin options Tap the + button on the homepage screen.
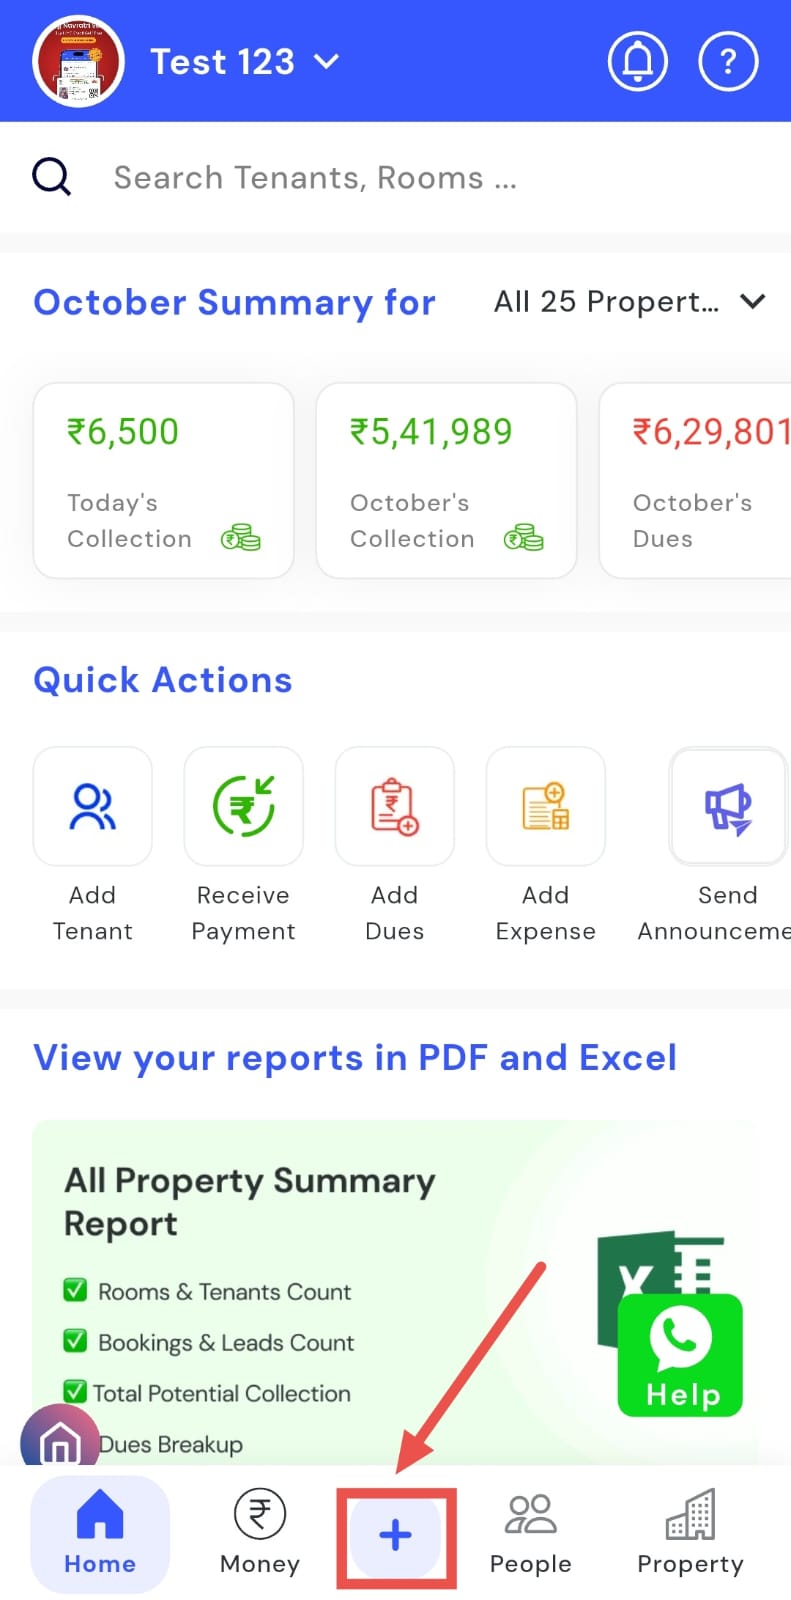
- Step 2: Access Admin Dashboard Tap Admin Dashboard to view all administrative insights and controls.