People > Tenant
How do I add a new Single Tenant?
Need to capture detailed tenant information quickly and efficiently? The People section allows you to easily add new tenants, entering all necessary details, including contact information, property information, rent, and payment information, in one place. This ensures smooth onboarding, organized records, and easy management of tenancy details without the need to switch between multiple screens.
Follow these steps:
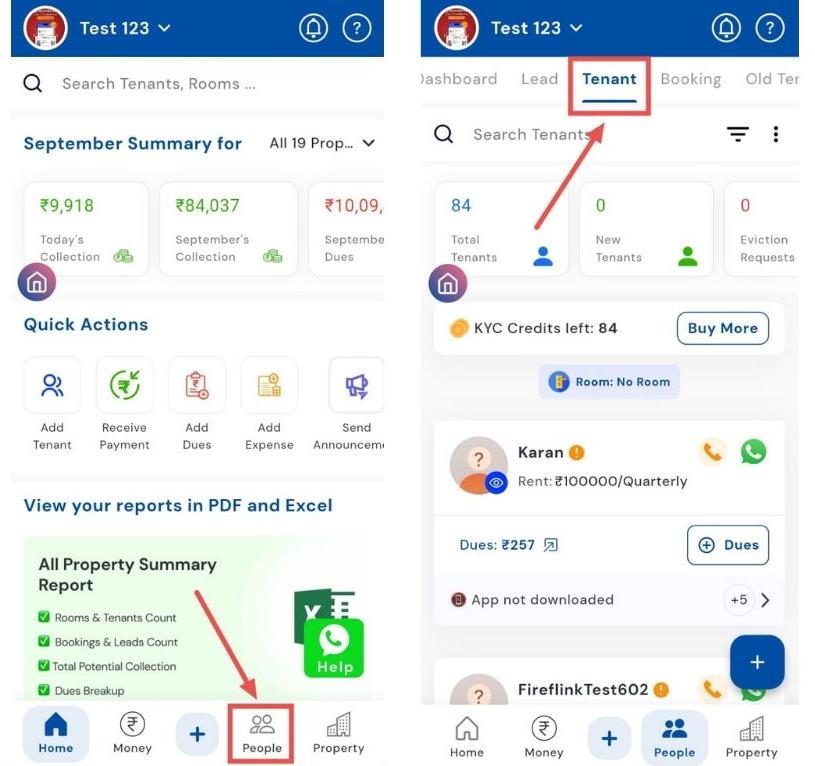
- Step 1: Open the People section Tap the People icon in the bottom navigation menu and select Tenant.
-
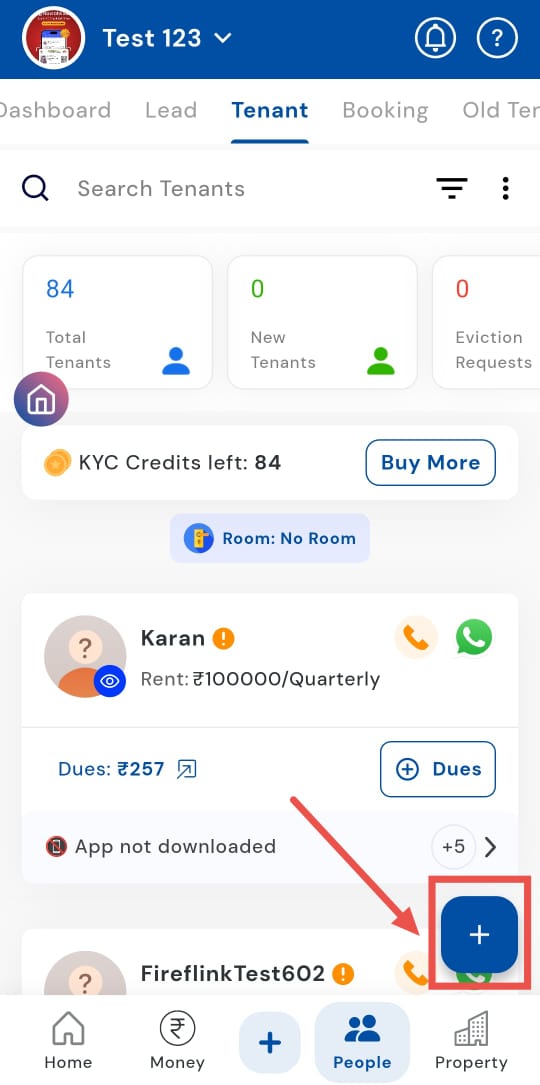
Step 2: Access add options There are two main ways to add a single tenant:
-
Using the Plus button (+)
-
Phonebook: Select a contact from your phonebook or add one manually. If you use the phonebook, the tenant’s name and phone number will be auto-filled, you would only be required to fill the other necesaary details, stated in Step 3.
-
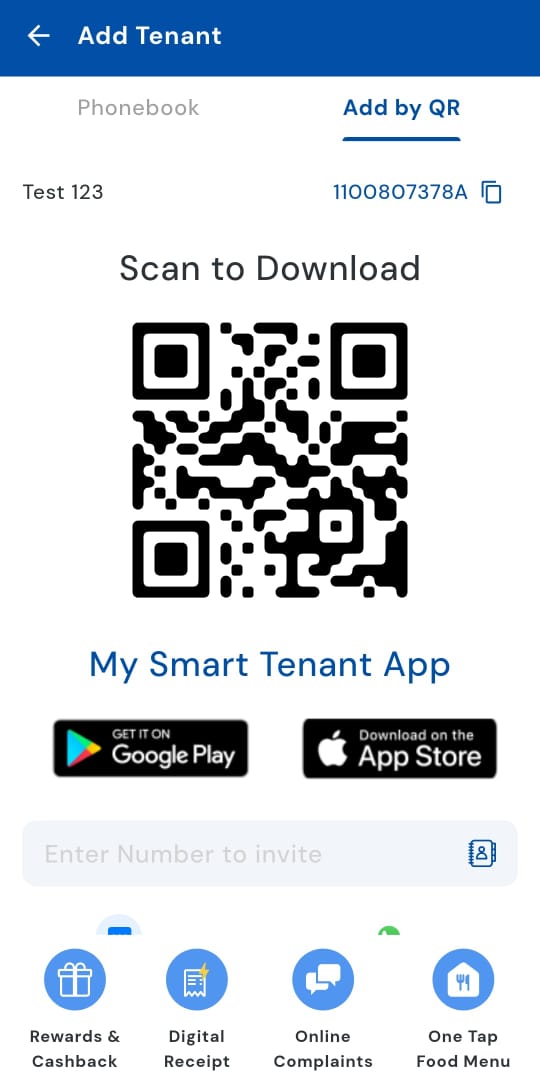
Add by QR: Share a QR code with the tenant to invite them to the property.
-
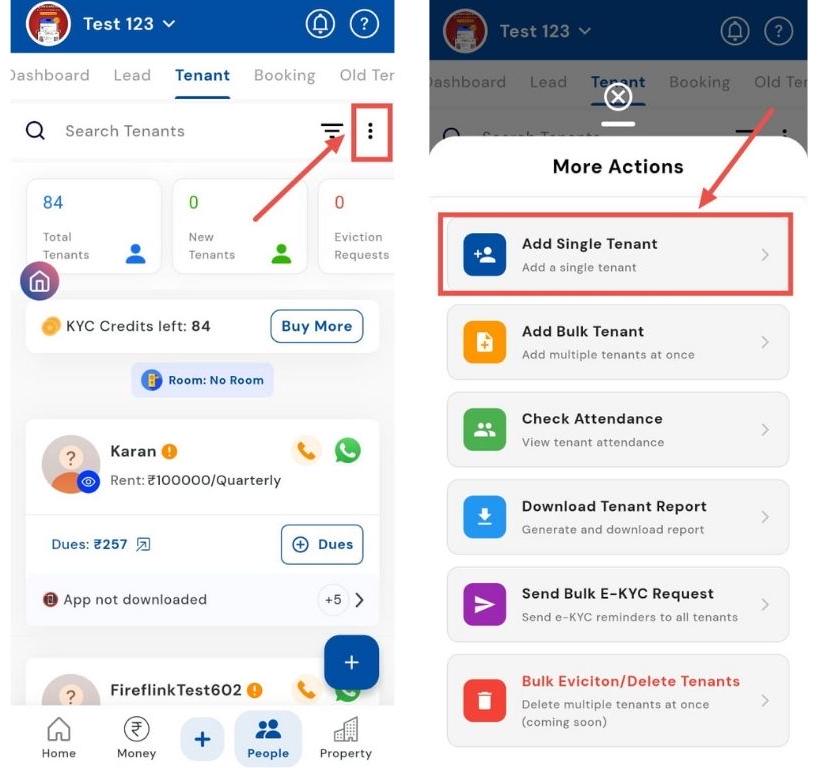
Using the Three dots (⋮)
- Tap the three dots and choose Add Single Tenant to manually fill in all tenant details.
-
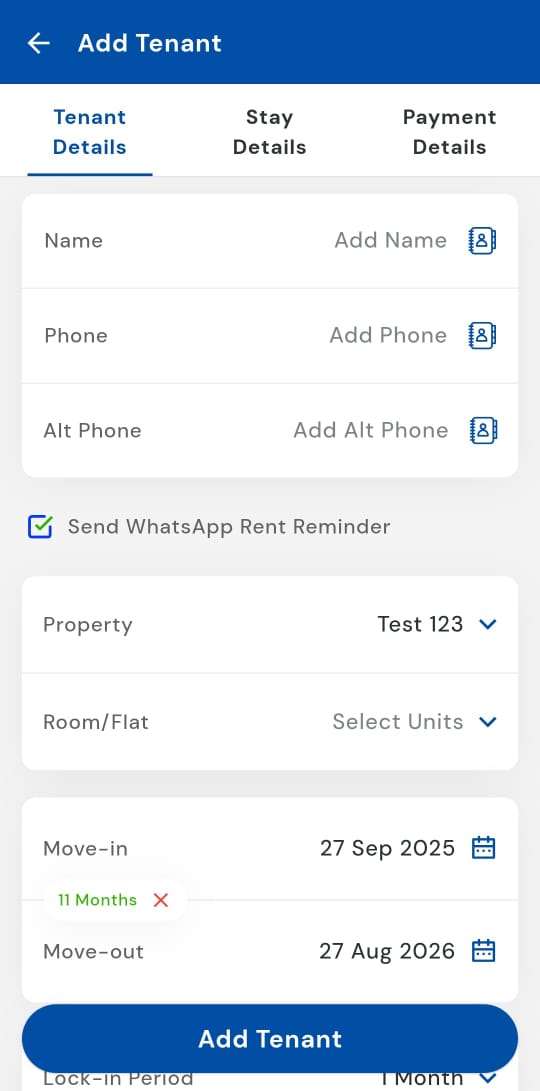
Step 3: Enter tenant details
-
Tenant Details:
-
Name
-
Phone number
-
Alternate phone number
-
Send WhatsApp / Rent reminders (optional)
-
Property / Room / Flat
-
Stay Details:
-
Move-in date
-
Move-out date (optional, can be added later)
-
Lock-in period / Notice period / Agreement period (use whichever applies)
-
Rental & Security Details:
-
Rental frequency
-
Add rent on (choose date of collection)
-
Fixed rent / Regular security deposit
-
Referred by / Remarks / Other important details
-
Payment Details:
-
Shows all dues and the opening balance for the tenant
-
To add additional dues, tap Add Other Dues
-
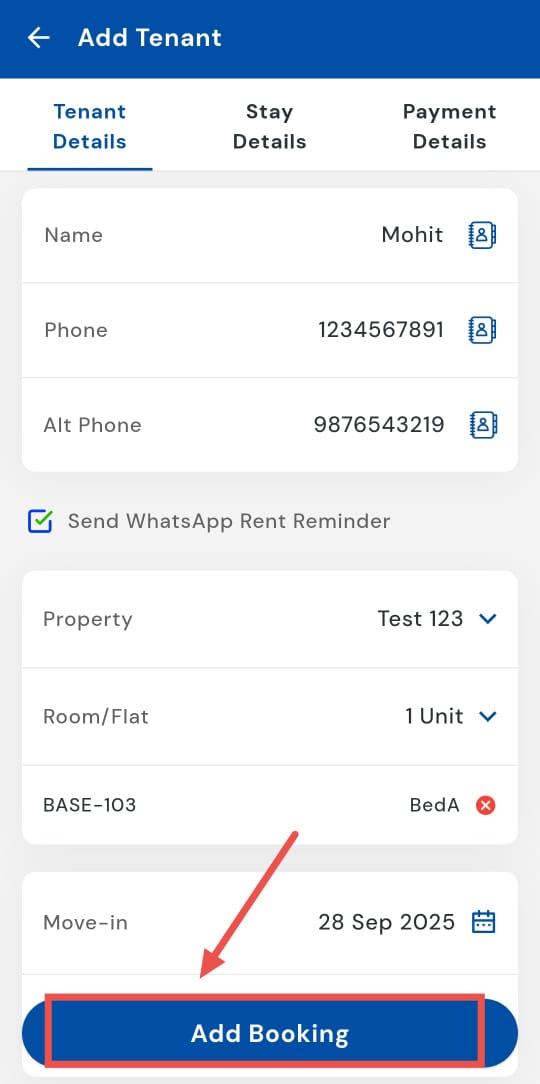
- Step 4: Save the tenant Click Add Booking to complete the process.
How do I add multiple tenants in bulk?
Onboard multiple tenants quickly with the Bulk Upload feature, adding several tenants in one go. This is ideal for large properties or multiple move-ins, saving time while keeping records accurate. All tenant details are captured correctly without manual effort.
Here’s how you can use the bulk upload feature to get started:
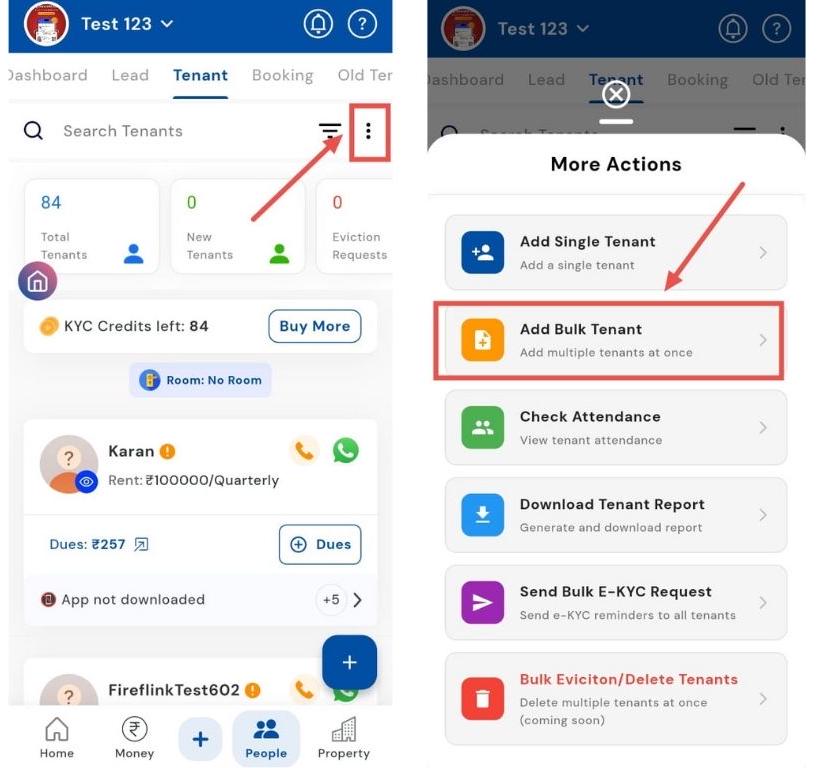
- Step 1: Open the People section Tap the People icon in the bottom navigation menu, then select Tenant to open your tenant list.
- Step 2: Access add options Tap the Three dots (⋮) and select Add Bulk Tenants.
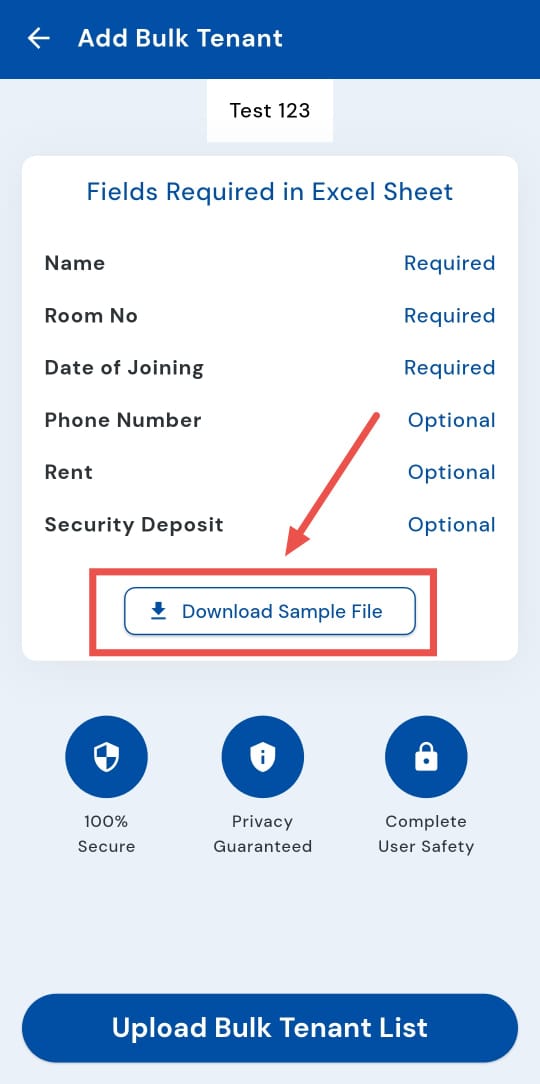
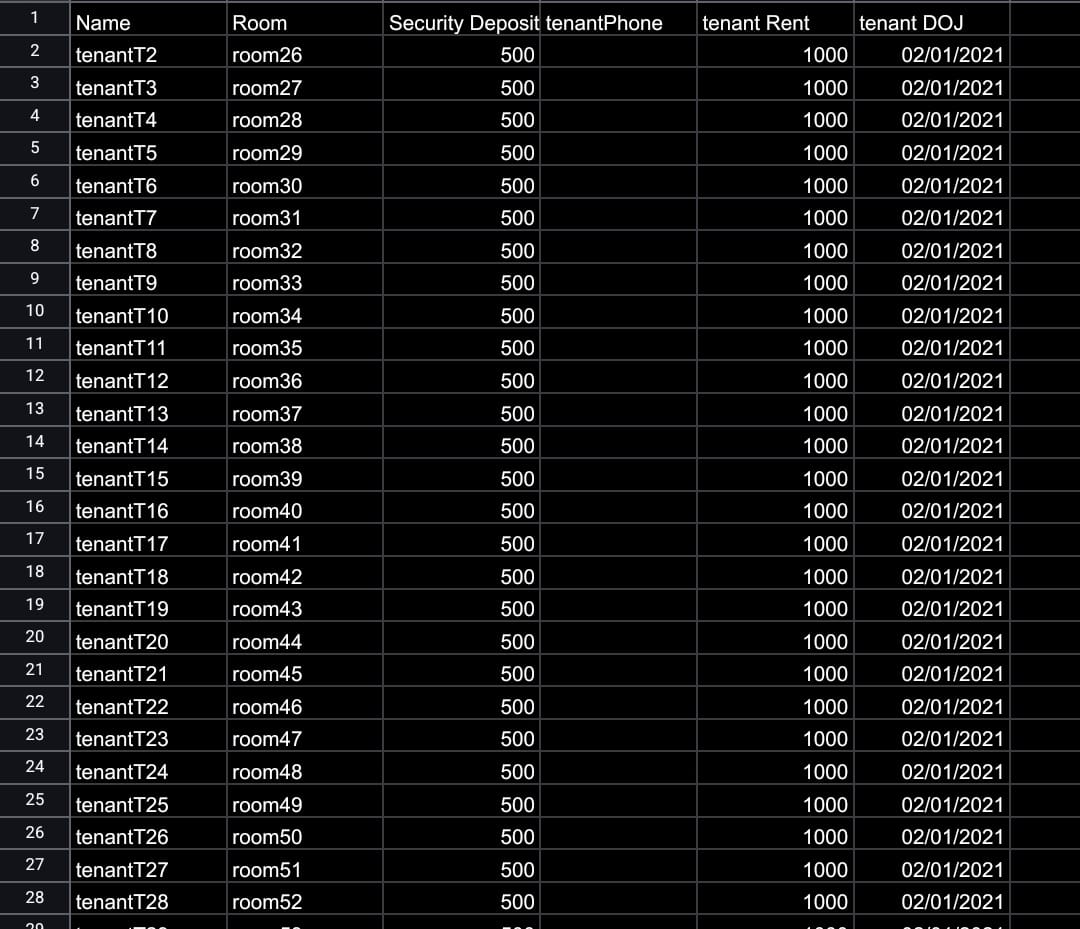
- Download the sample file Download the sample Excel file provided. This file shows the format required for uploading tenant data. You can use it as a reference or fill in your tenant details directly.
-
Prepare your Excel sheet Fill in all required details for each tenant:
-
Name
-
Room number
-
Date of joining
-
Phone number
-
Rent
-
Security deposit
-
- Step 6: Wait for processing Click on Upload Bulk Tenants, and all tenants will be added to the system within 2–3 hours.

| Tip: Make sure your Excel sheet follows the sample file format exactly. This ensures a smooth upload and avoids errors in tenant records. |
|---|