Dues & Payment Settings
How do I enable or disable AutoPay?
AutoPay takes the stress out of rent collection by ensuring payments are made on time, every time. With a quick one-time setup, you can automate rent payments, cut down on follow-ups, and make the process seamless for both you and your tenants.
Here’s how you can get AutoPay up and running in just a few easy steps:
- Step 1: Open Profile Settings Click on your profile picture in the top-right corner of the screen. This will open your profile settings.

- Step 2: Go to Dues & Payment Settings Once your profile screen appears, select Dues & Payment Settings to access all payment-related configurations.
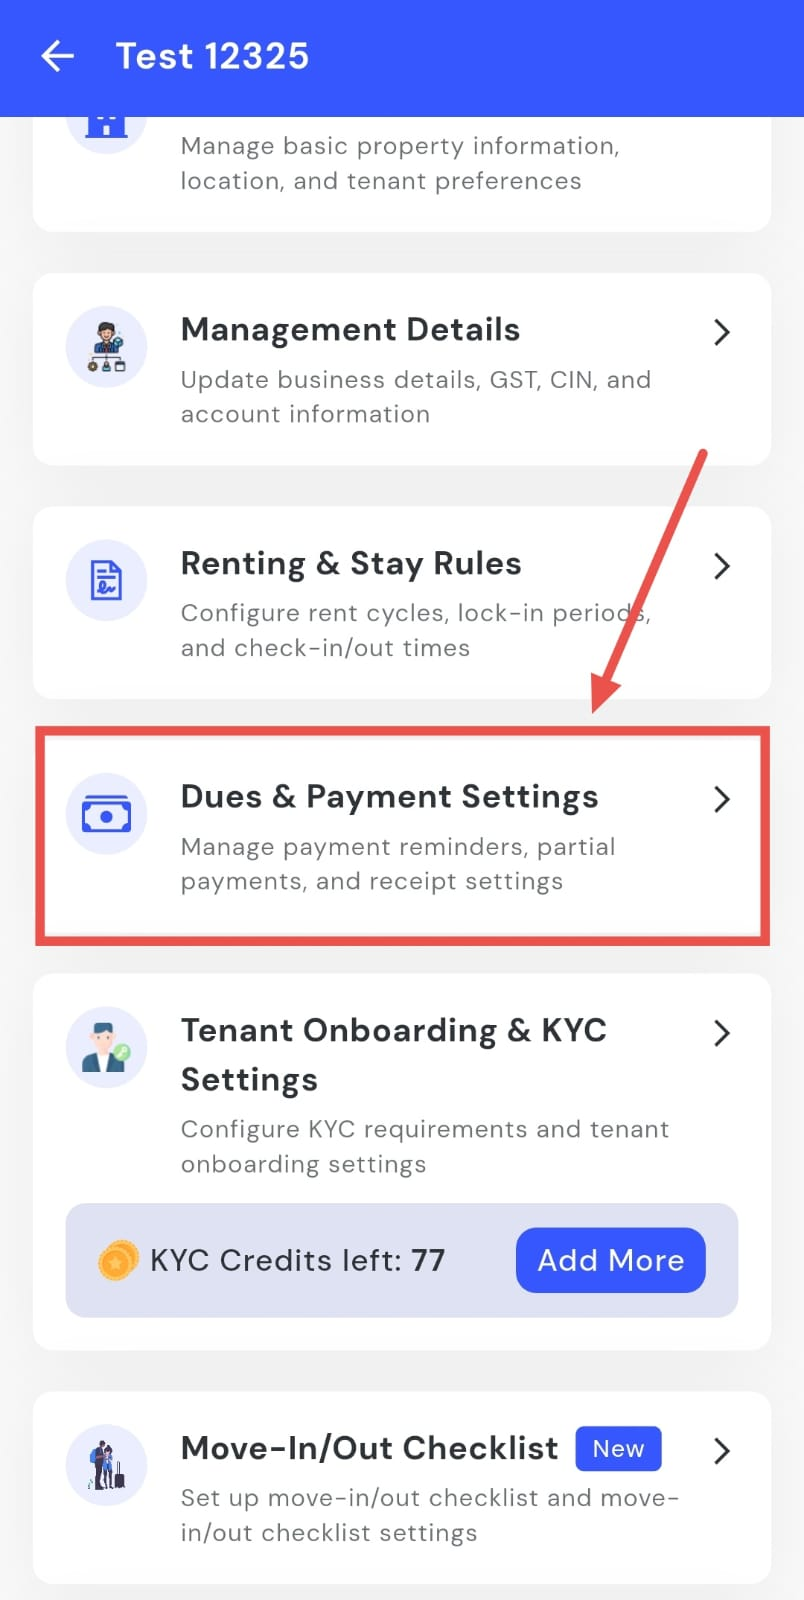
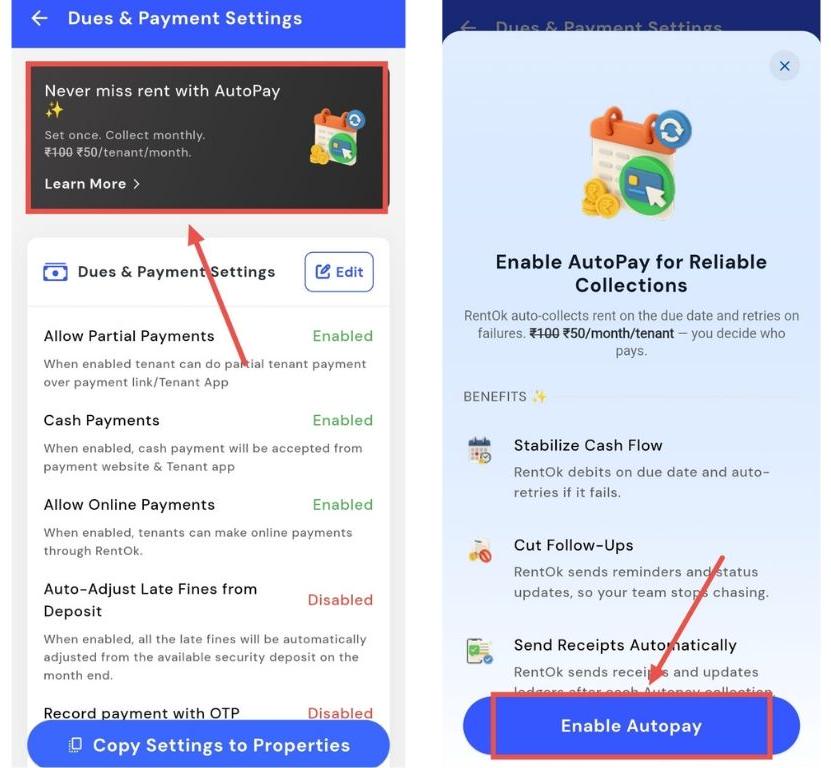
- Step 3: Enable AutoPay You’ll see a black box labelled “Never miss rent with AutoPay.” Click on it, then choose Enable AutoPay to begin the setup process.
- Step 4: Set Rules & Eligibility Decide whether AutoPay should apply to all tenants or only to those joining after a specific date. Adjust the rules as required.
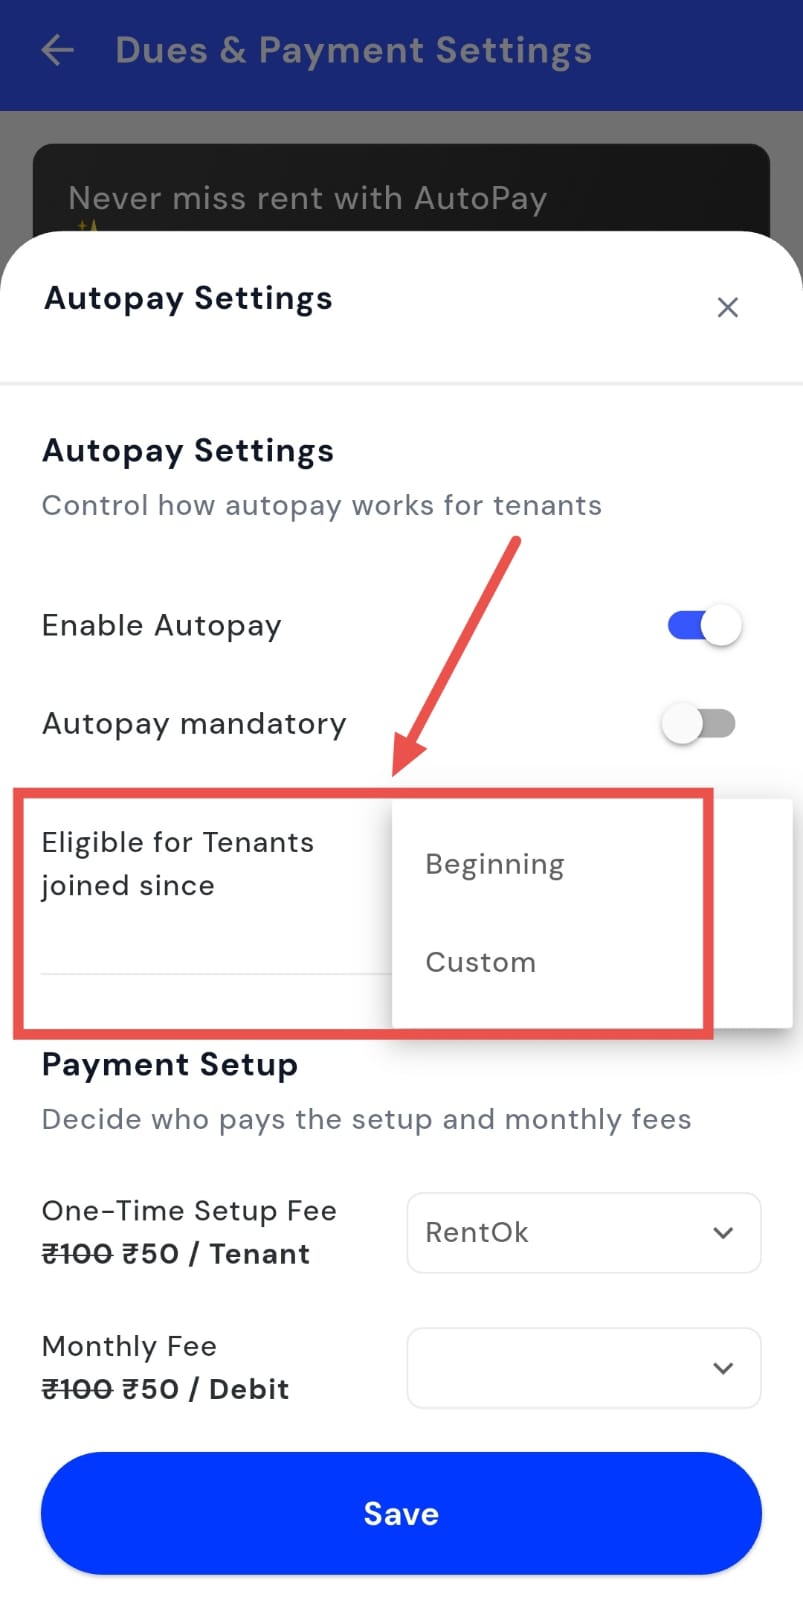
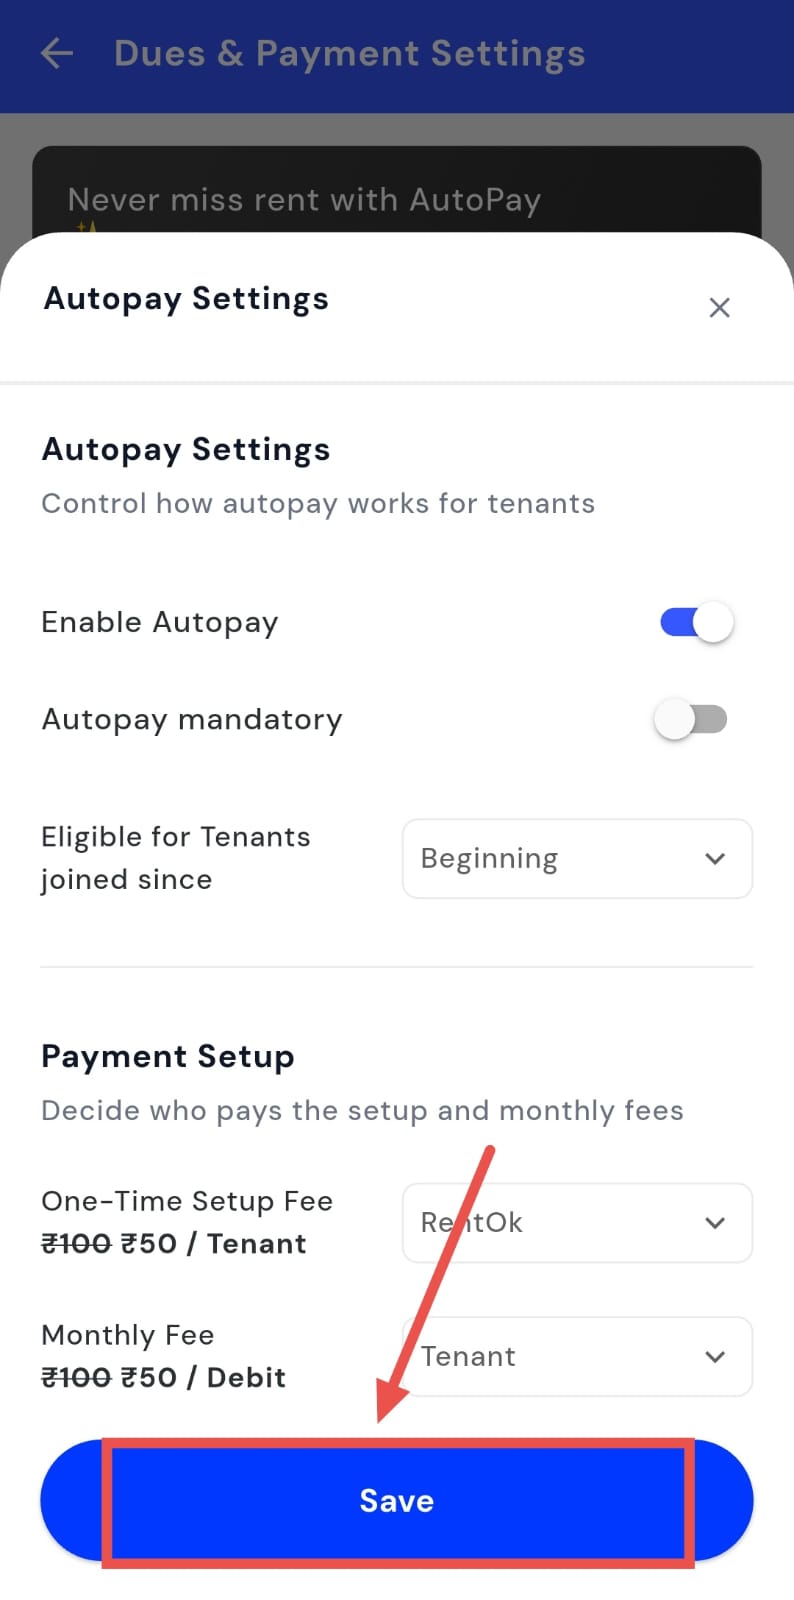
- Step 5: Choose Who Pays the Fees For the one-time setup fee, select Paid by RentOK. Then, decide whether the monthly AutoPay fee will be covered by the Owner or the Tenant.
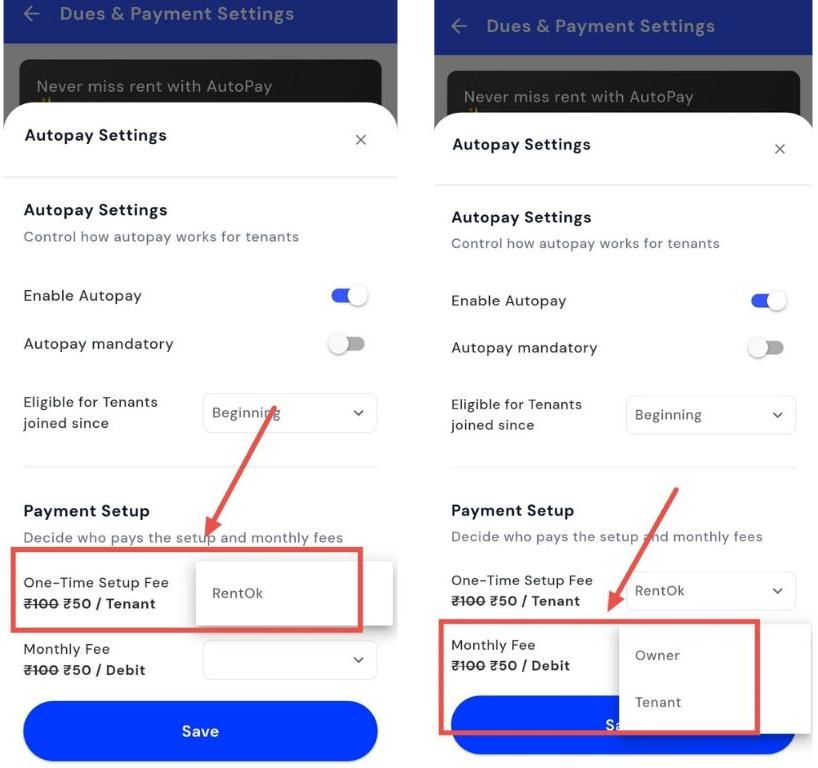
- Step 6: Save Settings After confirming all preferences, click Save to enable AutoPay for your property. The setup will take effect immediately.
| 💡 Why it matters: AutoPay stabilizes your property’s cash flow and eliminates rent delays. RentOK handles debit retries, reminders, and receipts, ensuring every payment is collected on time, every time. |
|---|
How do I enable or disable partial payments?
Partial payments allow tenants to pay their dues in parts instead of paying the full amount at once. If you want to give tenants more flexibility, you can enable this option, or turn it off if you prefer full payments only. This setting can be updated anytime from the payment settings.
To enable or disable partial payments, follow these steps:
- Step 1: Open your profile Tap on your profile picture in the top-left corner of the screen to open the settings.
- Step 2: Open Dues and Payment Settings Scroll down until you see Dues and Payment Settings, then tap on it to continue.
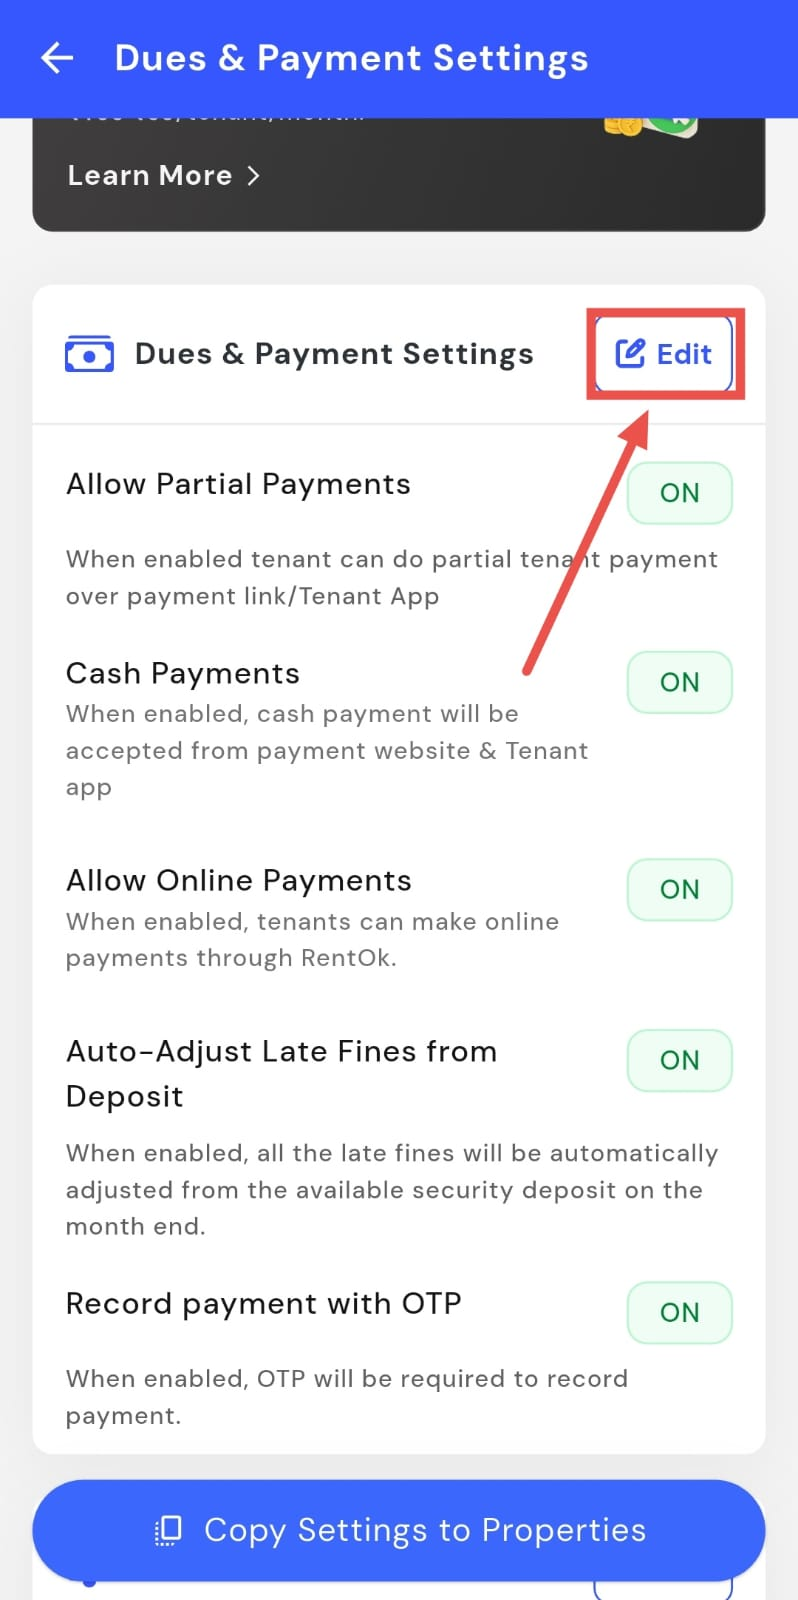
- Step 3: Edit dues and payment settings On this screen, you will see a section for Dues and Payment Settings. Tap on Edit to make changes.
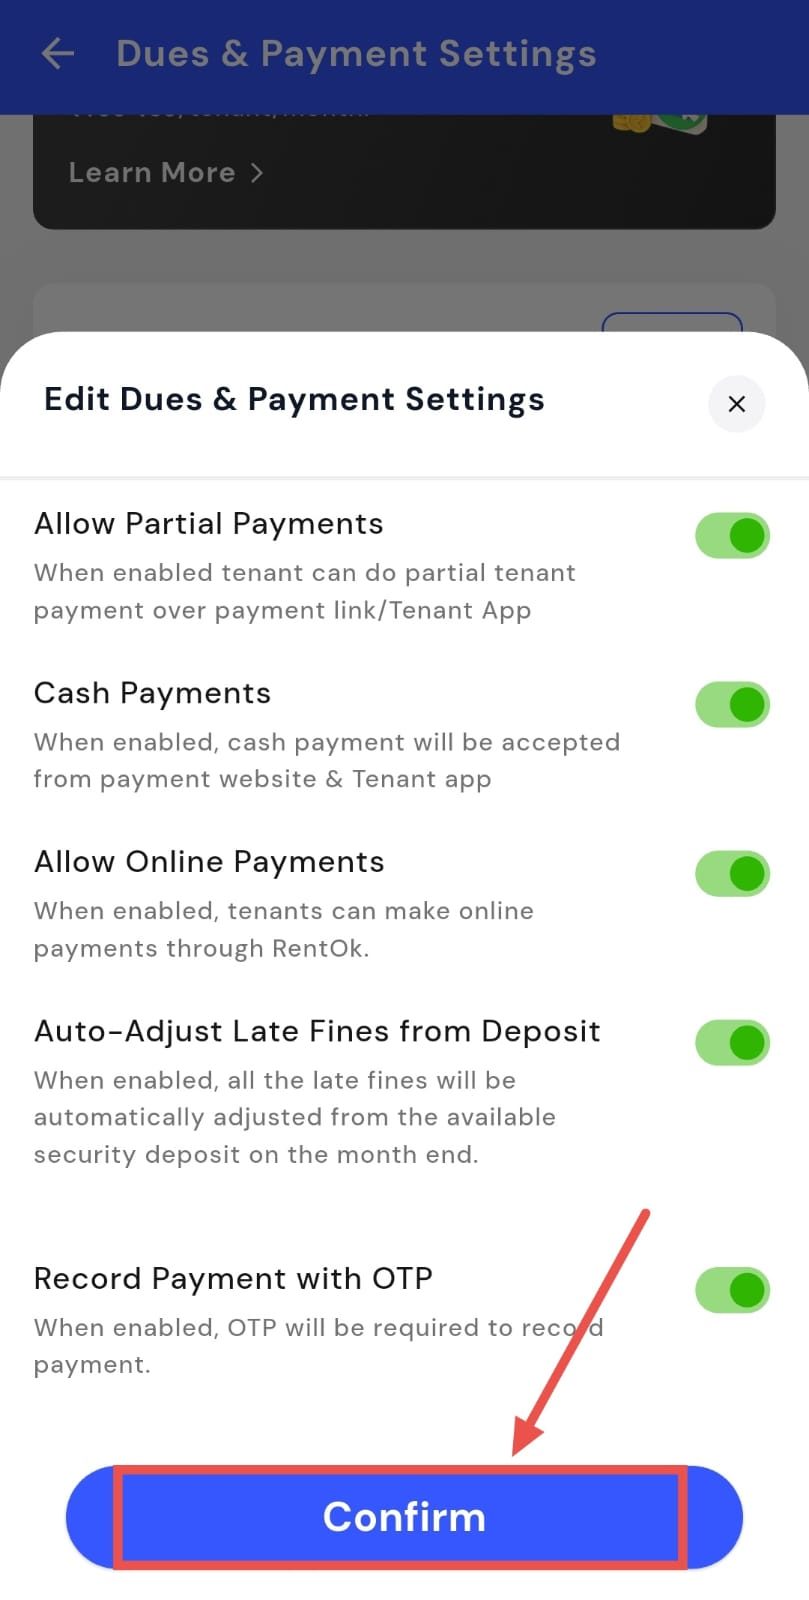
- Step 4: Enable or disable partial payments Use the Partial Payments toggle to turn the option on or off based on your preference.
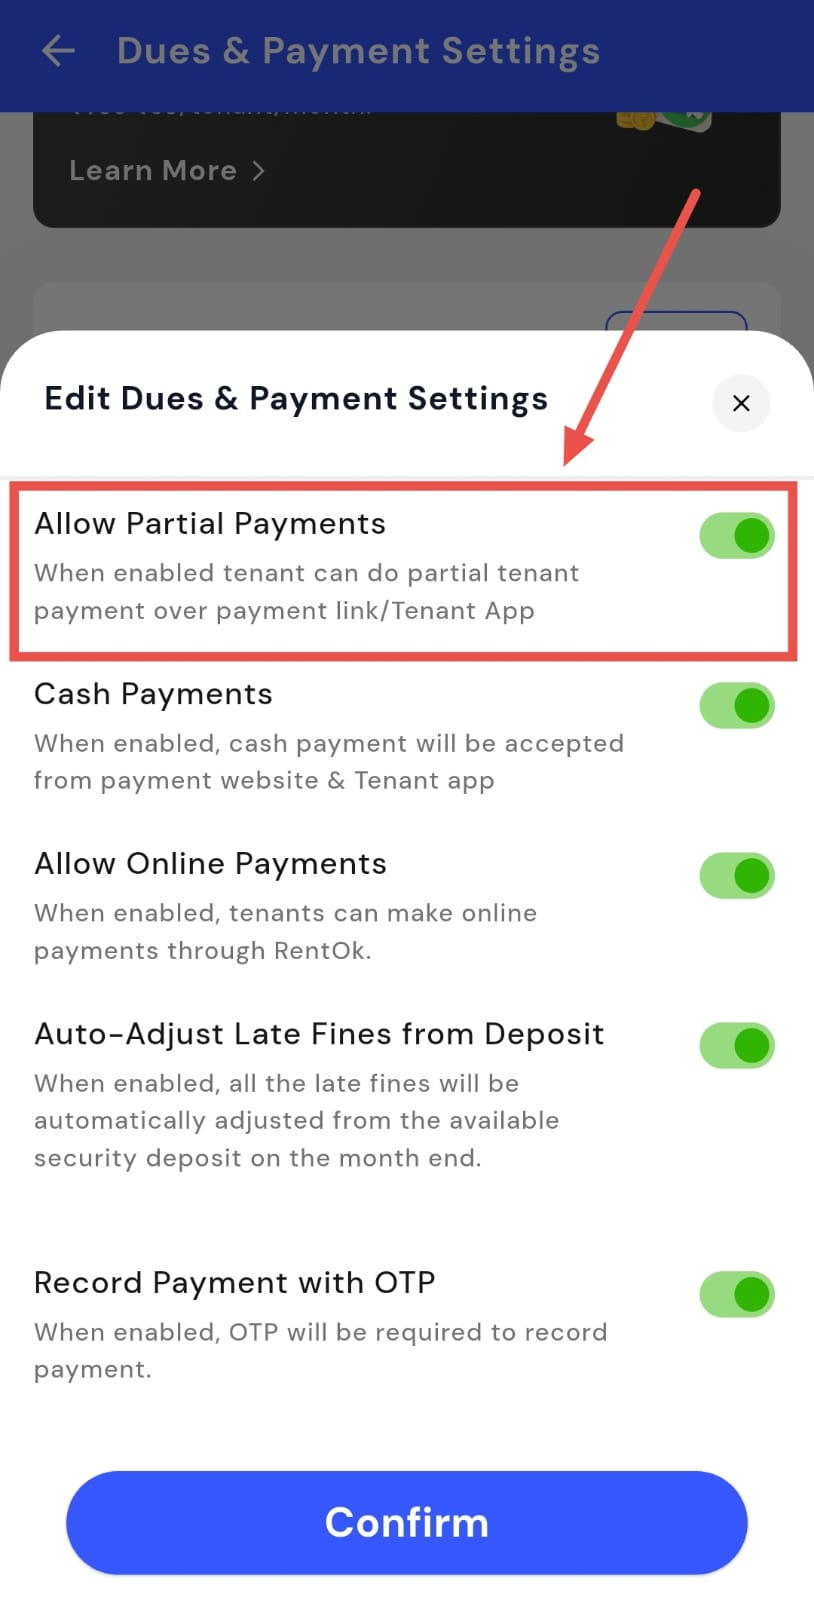
- Step 5: Confirm and save Once you’ve updated the setting, tap on Confirm to save and apply the changes.
How do I allow or block cash and online payments?
You get to decide how your tenants pay their dues, whether that’s online, in cash, or both. This gives you better control over payments and helps keep everything smooth and hassle-free. You can update these settings anytime from the Dues & Payment Settings.
Here’s how you can do it:
- Step 1: Open your profile Tap on your profile picture in the top-left corner of the screen to open the settings.
- Step 2: Open Dues & Payment Settings Scroll down and tap on Dues & Payment Settings to access payment-related options.
- Step 3: Edit dues and payment settings On this screen, you will see the Dues & Payment Settings section. Tap on Edit to make changes.
-
Step 4: Enable or disable payment modes
-
Allow Online Payments: When enabled, tenants can make online payments through RentOK.
-
Cash Payments: When enabled, cash payments will be accepted via the Payment website and the tenant app.
-
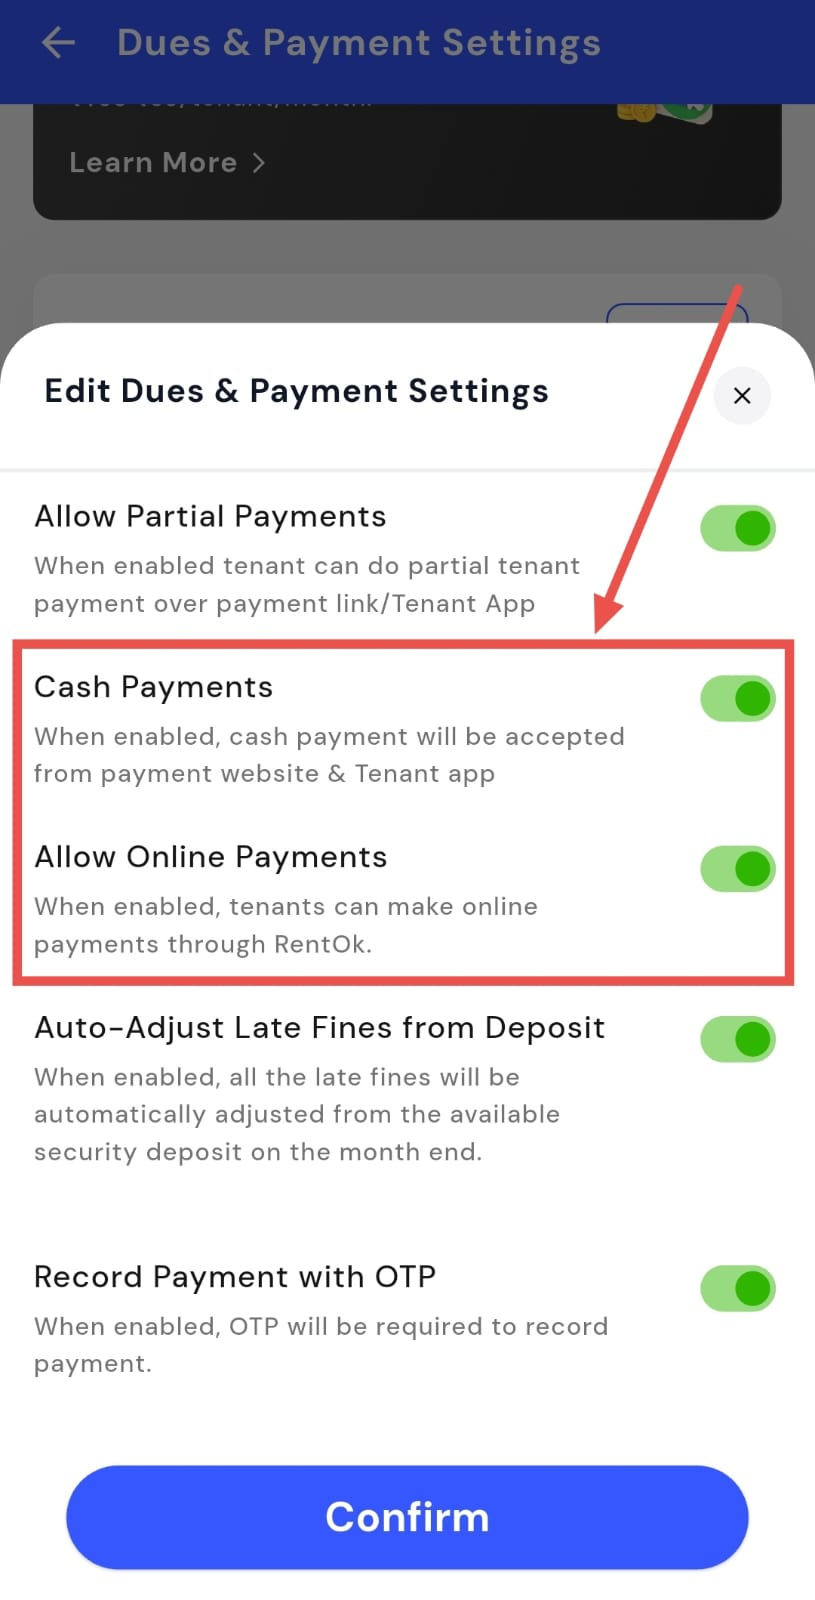
- Step 5: Confirm and save After updating the settings, tap on Confirm to save and apply the changes.
How do I enable or disable auto adjust?
Auto adjust helps you manage late fines by automatically adjusting them from the tenant’s available security deposit at the end of the month. If you prefer to handle fines manually, you can turn this option off. This setting can be updated anytime from the dues and payment settings.
To enable or disable auto adjust, follow these steps:
- Step 1: Open your profile Tap on your profile picture in the top-left corner of the screen to open the settings.
- Step 2: Open Dues and Payment Settings Scroll down until you see Dues and Payment Settings, then tap on it to continue.
- Step 3: Edit dues and payment settings On this screen, you will see a section for Dues and Payment Settings. Tap on Edit to make changes.
- Step 4: Update auto adjust option Find the option to auto-adjust late fines from the security deposit. Turn this option on or off based on how you want late fines to be handled.
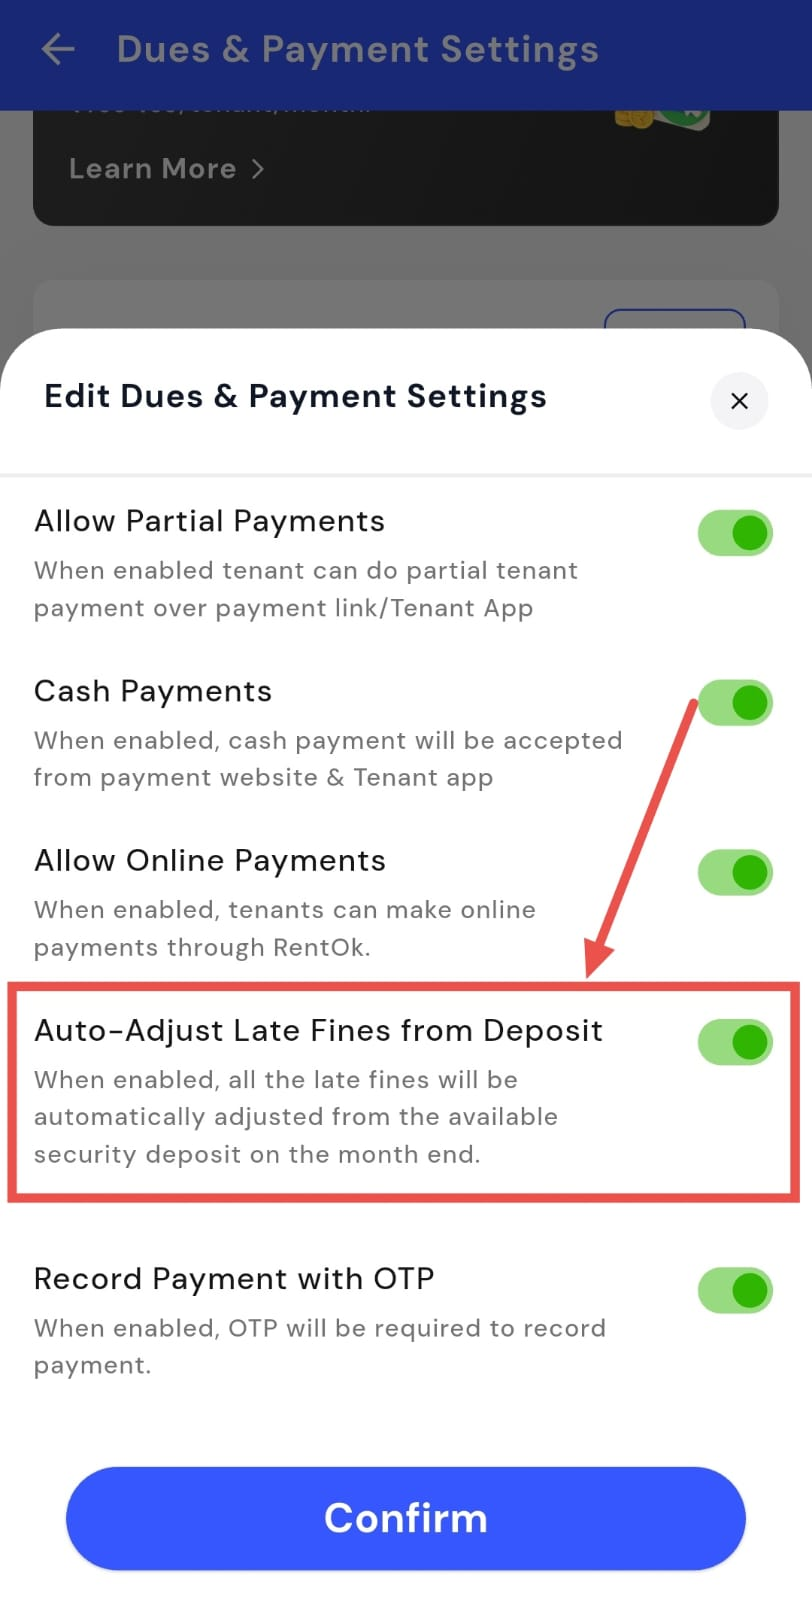
- Step 5: Confirm and save After updating the setting, tap on Confirm to save and apply the changes.
How do I record a manual payment?
If you receive rent or any other payment offline, you can still record it in the app. To keep things secure, manual payments can be verified using an OTP sent to the tenant. This helps ensure that the payment is recorded only after the tenant confirms it.
Follow the steps below to enable and use this option:
- Step 1: Open your profile Tap on your profile picture in the top-left corner of the screen to open the settings.
- Step 2: Open Dues & Payment Settings Scroll down and tap on Dues & Payment Settings to access payment-related options.
- Step 3: Edit dues and payment settings On this screen, you will see the Dues & Payment Settings section. Tap on Edit to make changes.
- Step 4: Enable “Record payment with OTP” Turn on the Record payment with OTP option. An OTP will be sent to the tenant when you record a manual payment, and the payment will be accepted only after verification.

- Step 5: Save the settings You can turn this option on or off whenever needed. Tap Confirm to save your changes.
How do I enable or disable payment reminders?
Payment reminders help you stay on top of pending dues by automatically notifying tenants. You can decide whether these reminders are sent, based on how you prefer to manage payments. This setting can be changed anytime from your payment settings.
Here’s how you can manage it:
- Step 1: Open your profile Tap your profile picture in the top-left corner of the screen to open the Settings page.
- Step 2: Go to Dues & Payment Settings Scroll down on the Settings page and tap Dues & Payment Settings to view payment-related options.
- Step 3: Edit dues and payment settings In this section, you’ll find the Reminders option. Tap Edit to update how reminders work.
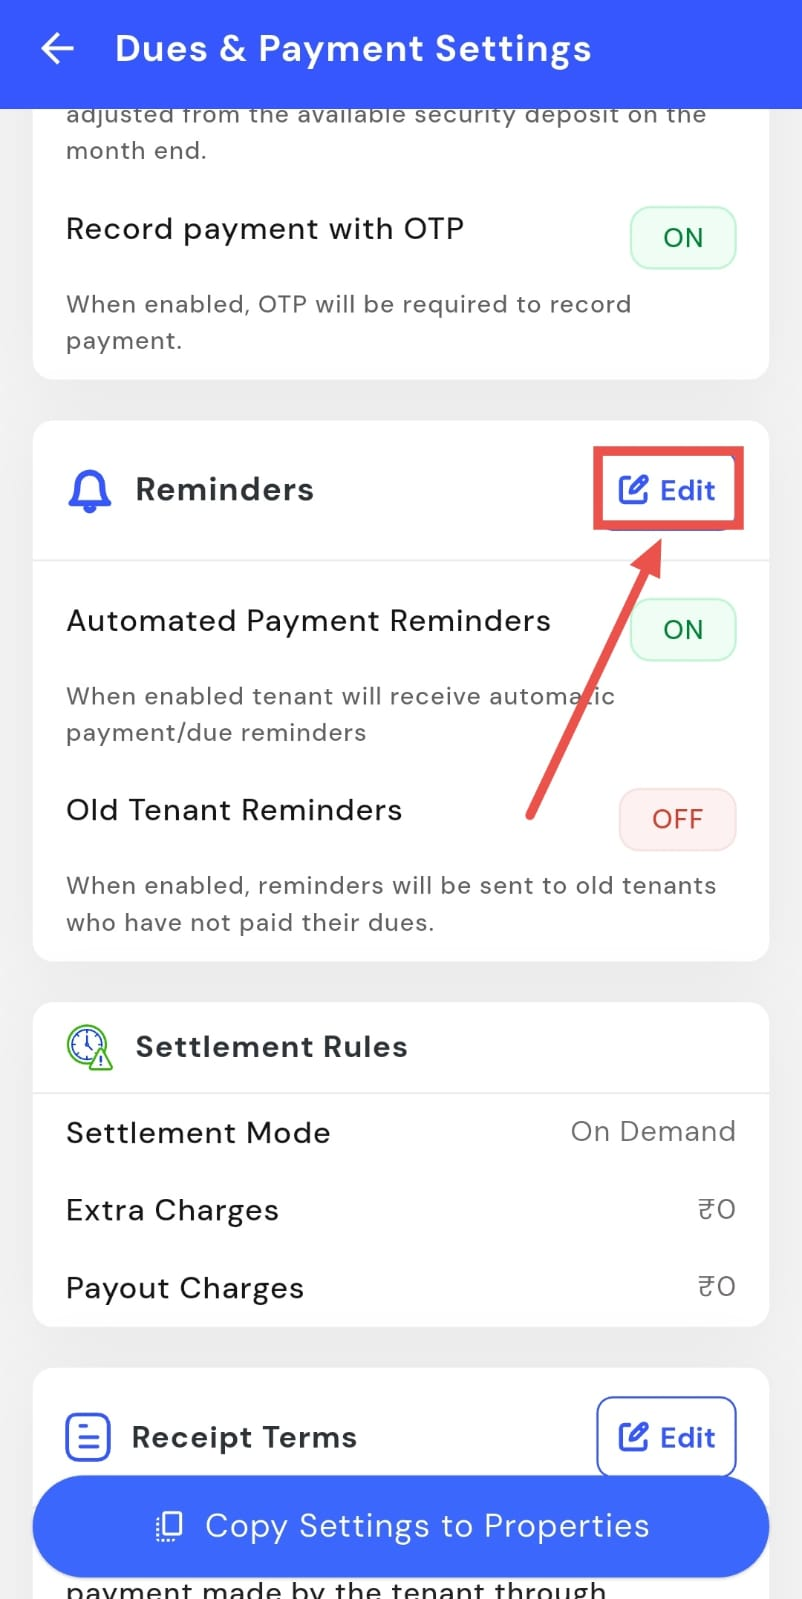
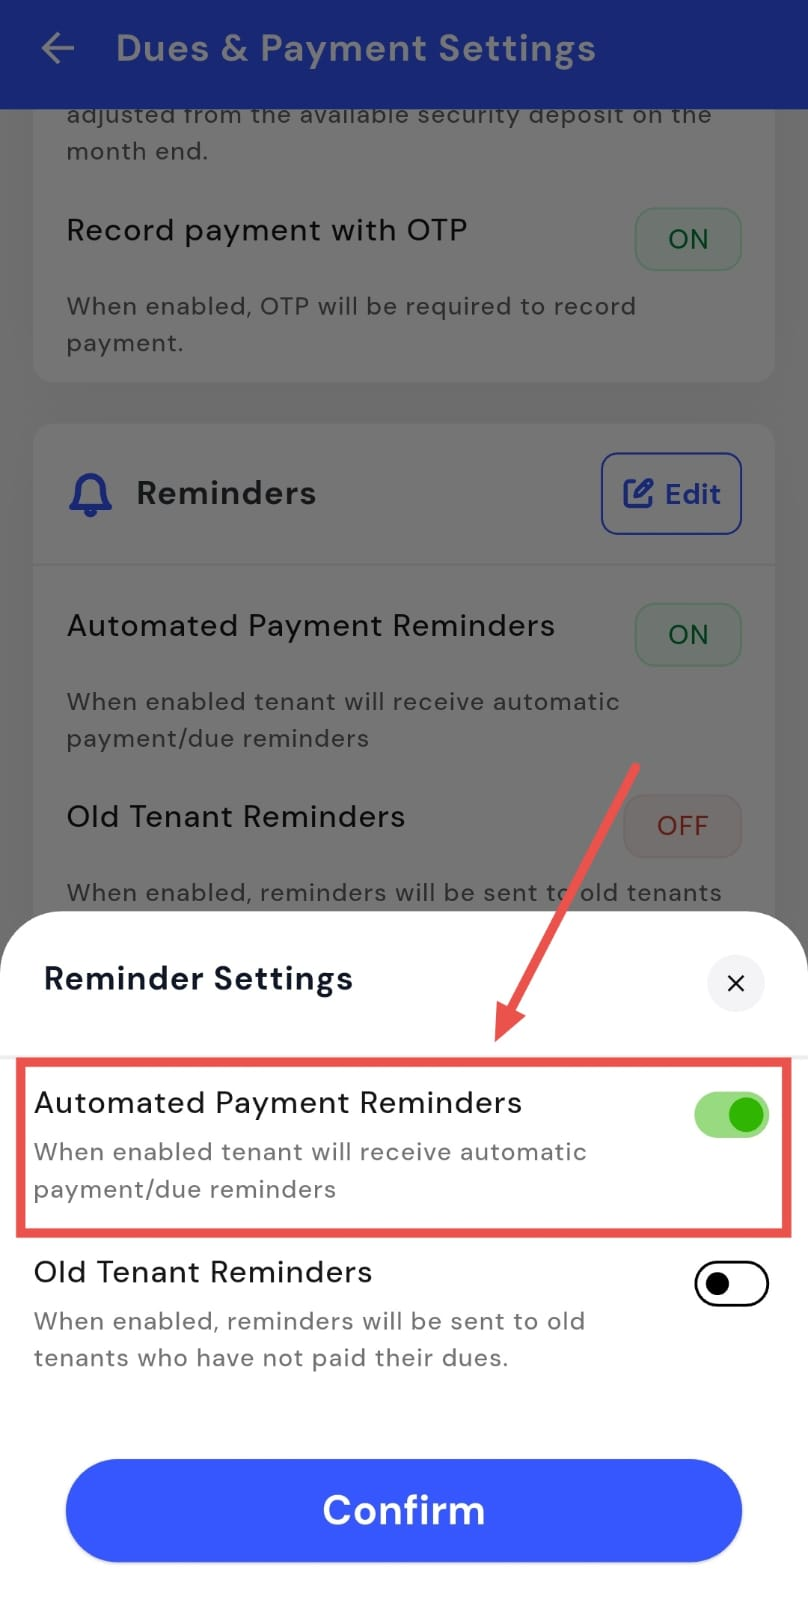
- Step 4: Turn automated payment reminders on or off You will see the Automated Payment Reminders option here. Switch it on to send reminders to tenants, or turn it off if you don’t want reminders to be sent.
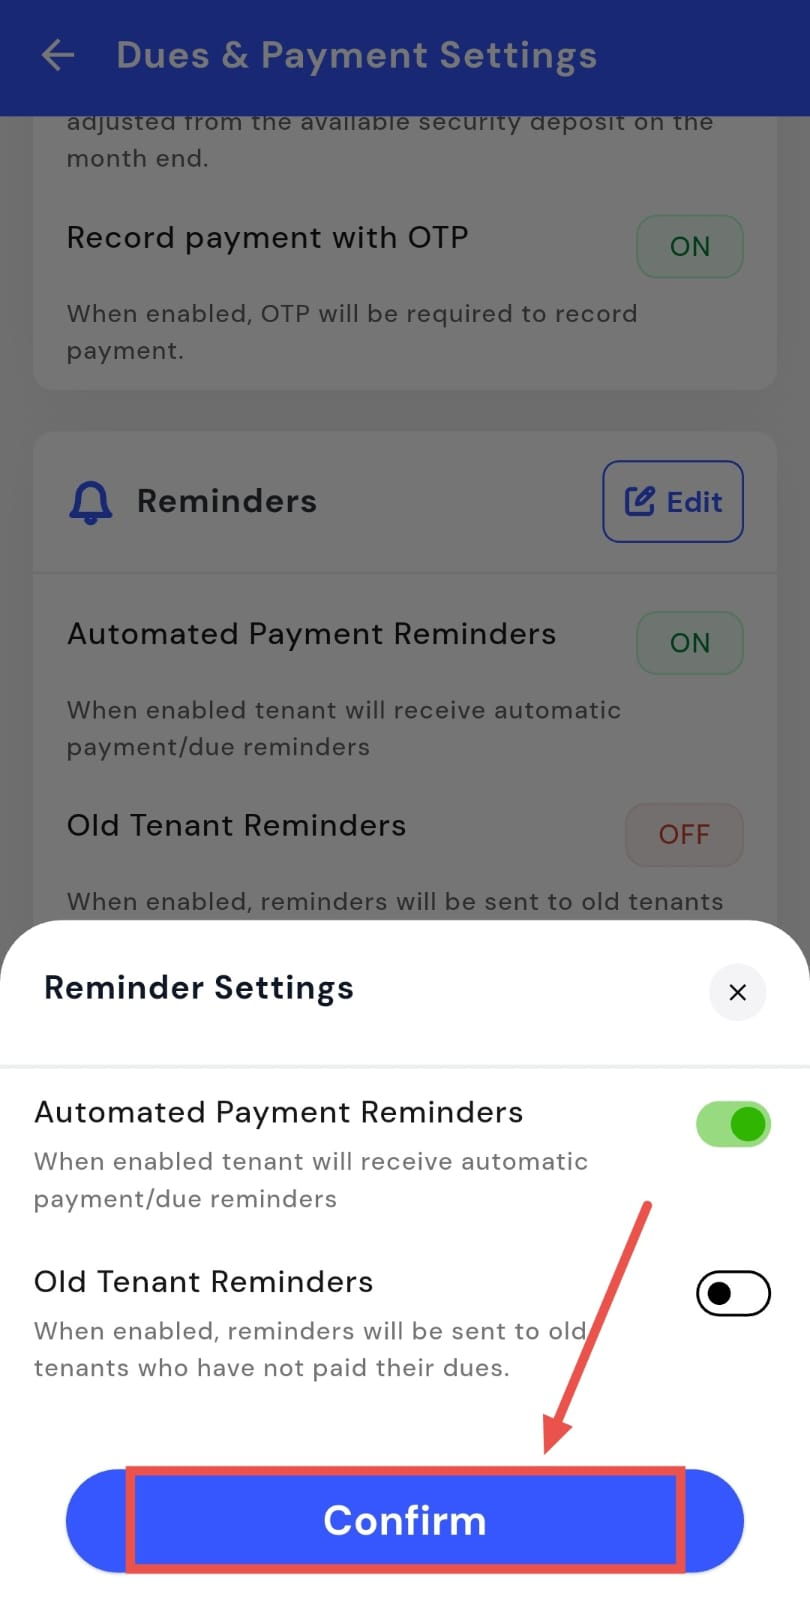
- Step 5: Confirm and save After updating the setting, tap Confirm to save and apply the changes.
How do I set settlement rules and settlement mode?
Settlement rules and the settlement mode are managed from the backend.
How do I add or change extra charges and payout charges?
Extra charges and payout charges are managed from the backend.
How do I set receipt terms?
Receipt terms let you add important notes or conditions that appear on payment receipts. This helps keep communication clear and avoids confusion around payments. You can update these terms whenever needed from your payment settings.
Here’s how you can do it:
- Step 1: Open your profile Tap on your profile picture in the top-left corner of the screen to open Settings.
- Step 2: Open Dues & Payment Settings Scroll down on the screen and tap Dues & Payment Settings to view payment-related options.
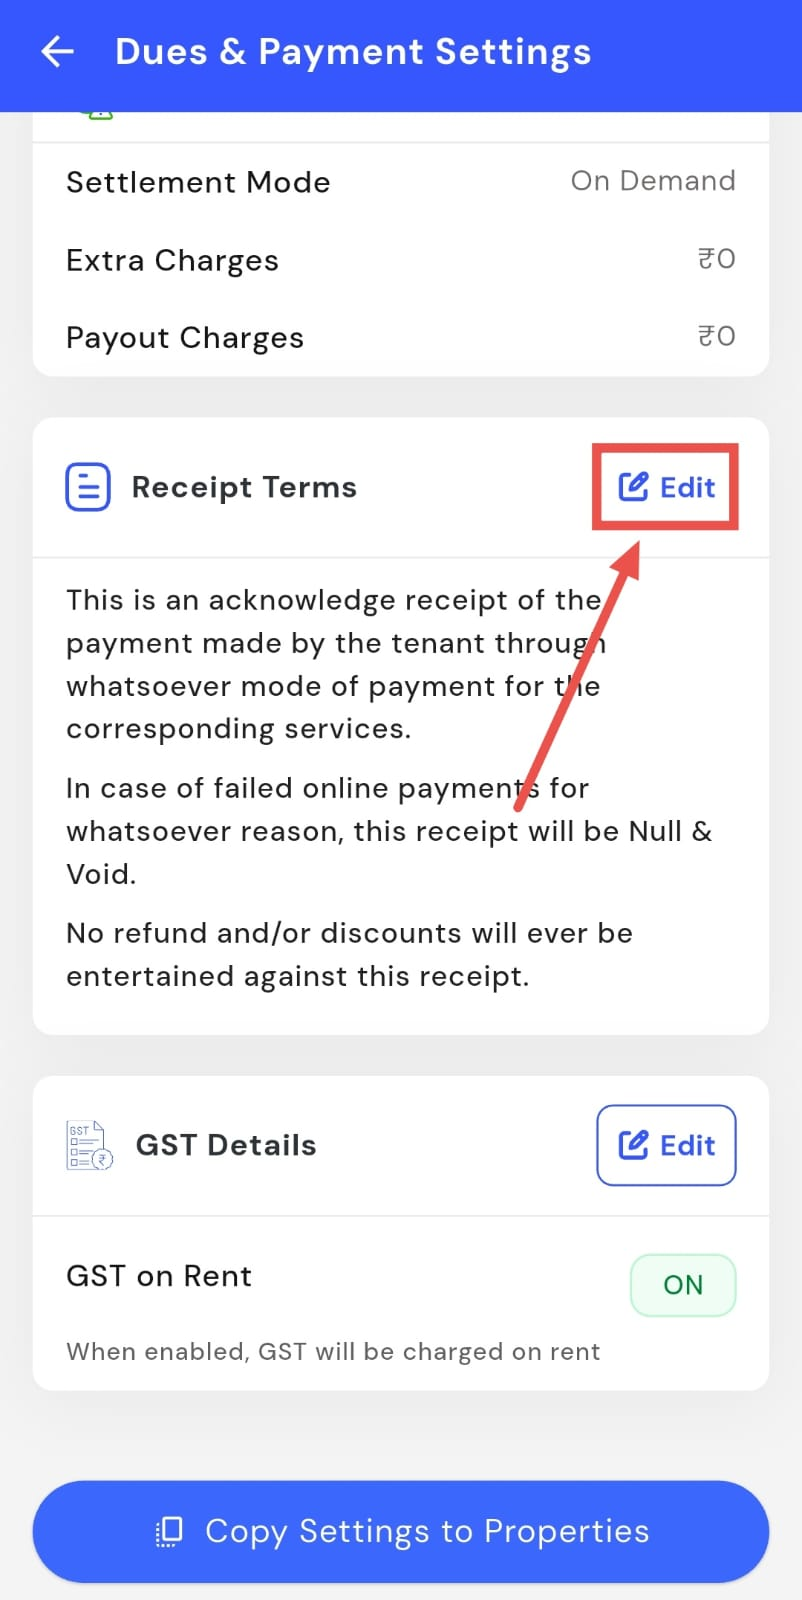
- Step 3: Edit receipt terms In this section, go to Receipt Terms and tap Edit to make changes.
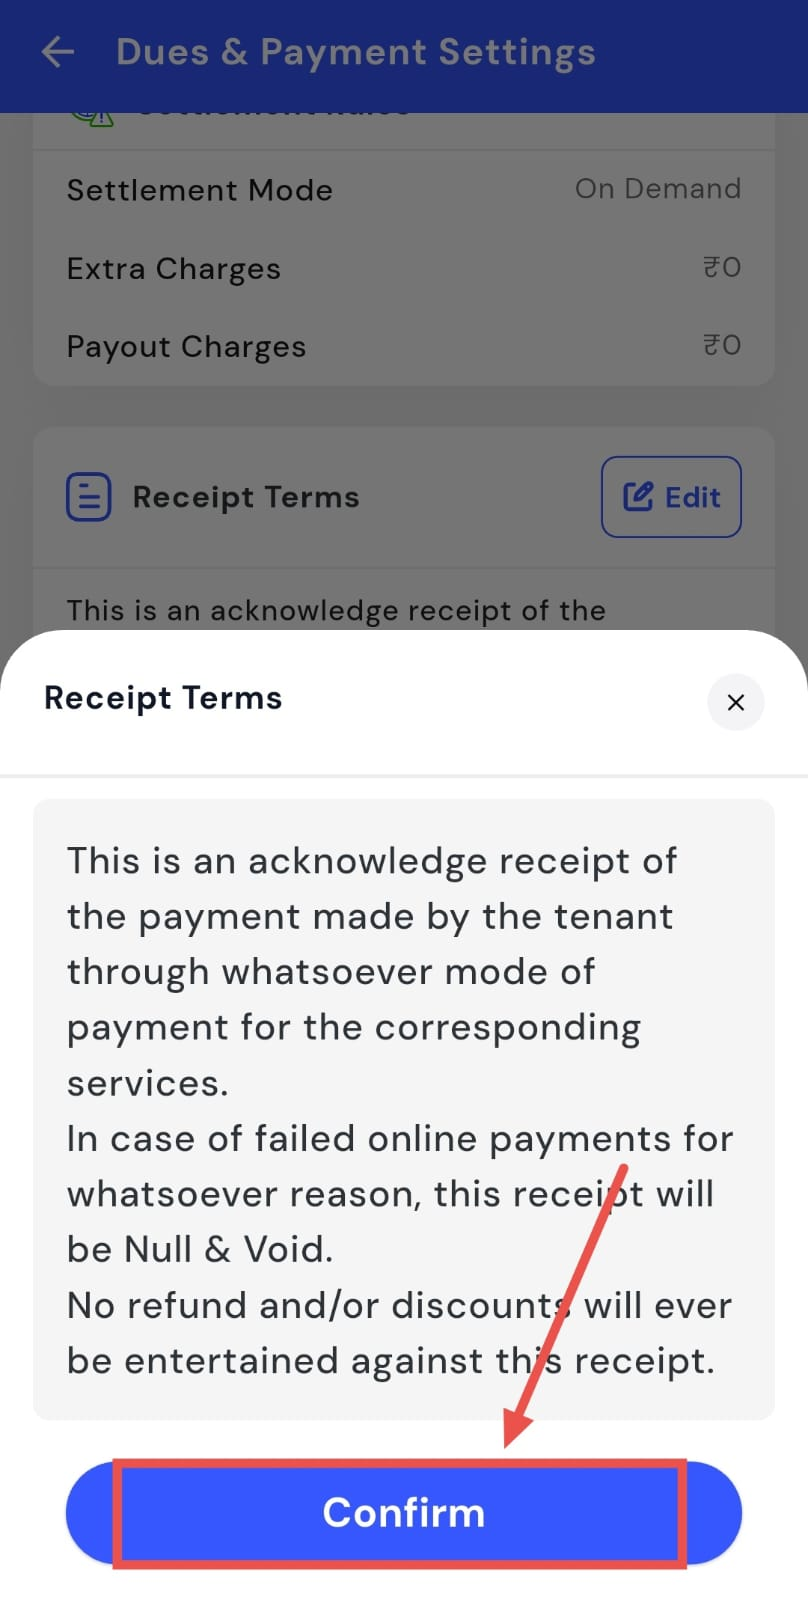
- Step 4: Add your receipt terms Enter the terms or notes you want to show on payment receipts, making sure they clearly explain any conditions.
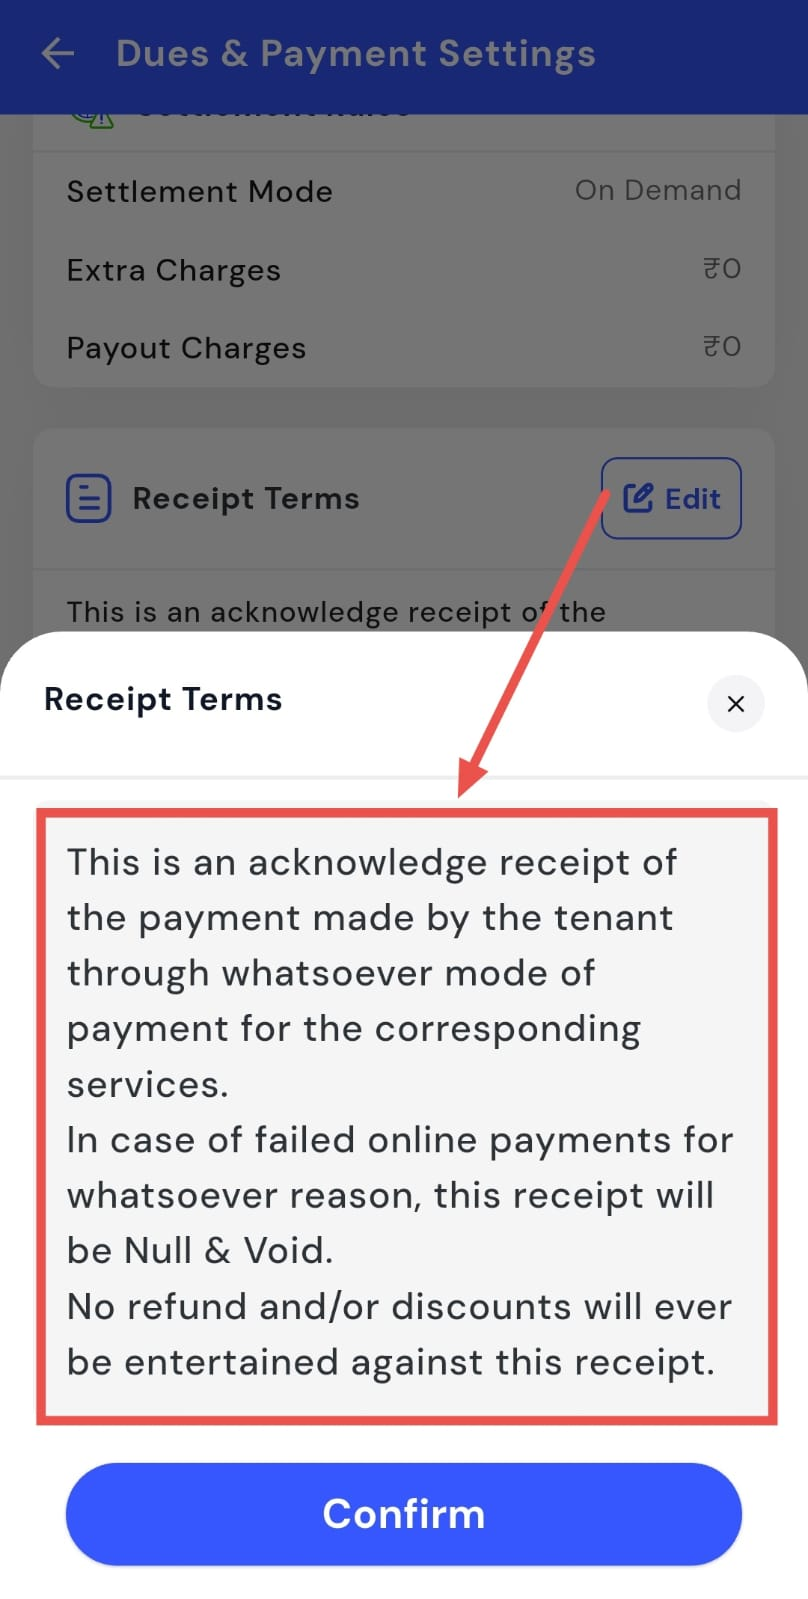
- Step 5: Confirm and save After updating the setting, tap Confirm to save and apply the receipt terms.
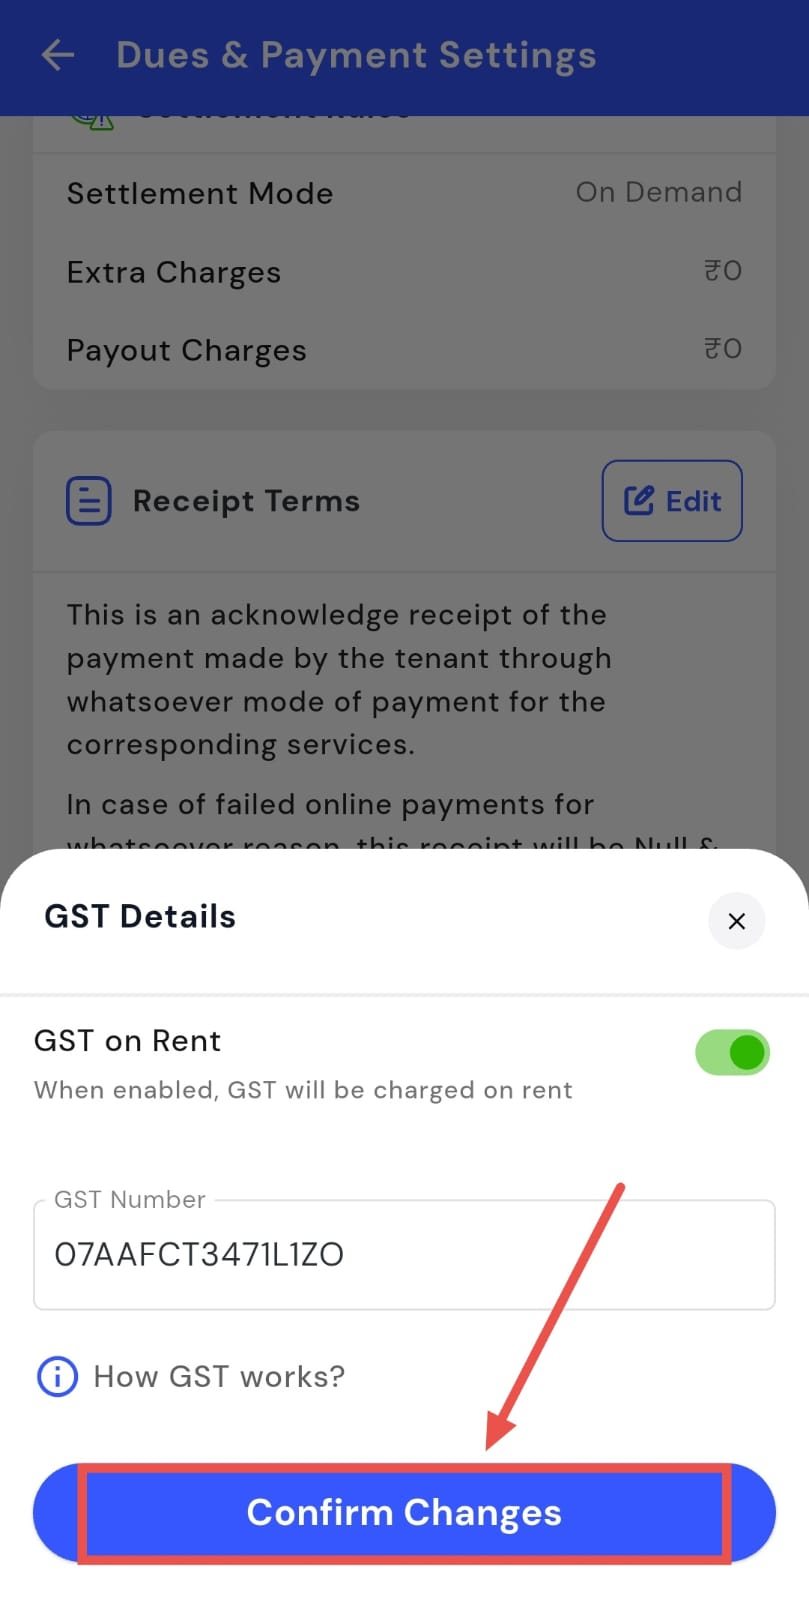
How do I add or update GST details?
If you charge GST on rent, you can add or update your GST details directly from your payment settings. This helps ensure that GST is applied correctly and reflected in your records. You can also choose whether GST should be charged at all.
Here’s how you can do it:
- Step 1: Open your profile Tap on your profile picture in the top-left corner of the screen to open Settings.
- Step 2: Open Dues & Payment Settings Scroll down on the screen and tap Dues & Payment Settings to view payment-related options.
- Step 3: Edit GST details In this section, you will see the GST Details option. Tap Edit to make changes.

- Step 4: Update GST information From here, you can choose whether GST should be charged on rent and enter your GST number if applicable.
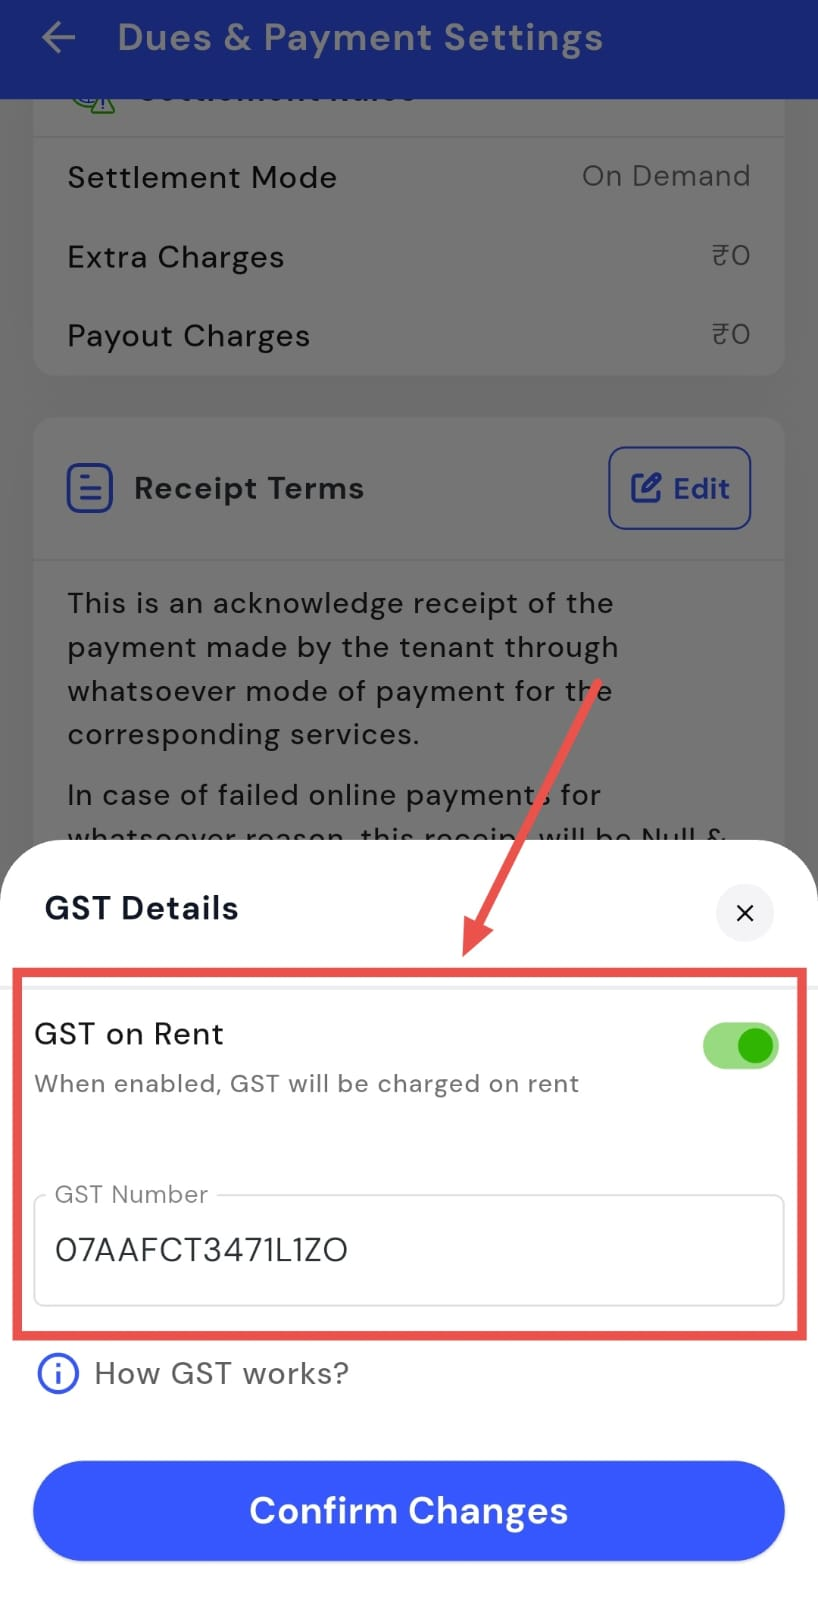
- Step 5: Confirm and save After updating the details, tap Confirm changes to save and apply the settings.