Move-In Out Settings
How do I enable or disable move-in and move-out checklists?
Move-in and move-out checklists help make sure important steps are completed during tenant entry and exit. You can control whether these checklists are enabled, who they apply to, and when they must be completed, all from one place in the app.
To enable or disable move-in and move-out checklists, follow these steps:
- Step 1: Open your profile Tap on your profile picture in the top-left corner of the screen to open the setting.

- Step 2: Open Move-in/Move-out Checklist Settings Scroll down until you find Move-in/Move-out Checklist Settings, then tap on it to continue.
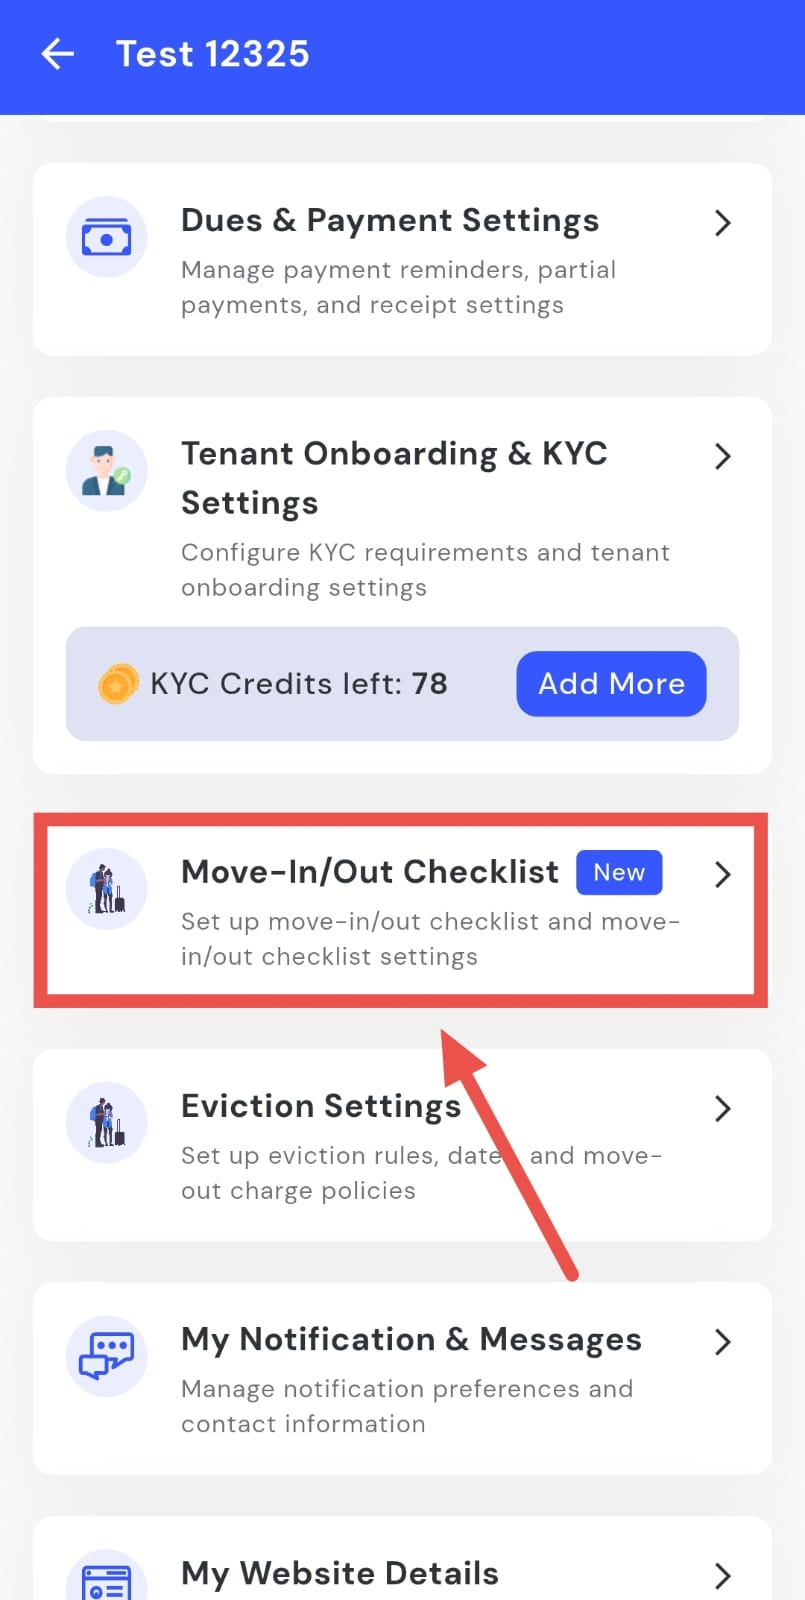
- Step 3: Edit move-in and move-out rules On this screen, you will see the Move-in and Move-out Rules section. Tap on Edit to update it.
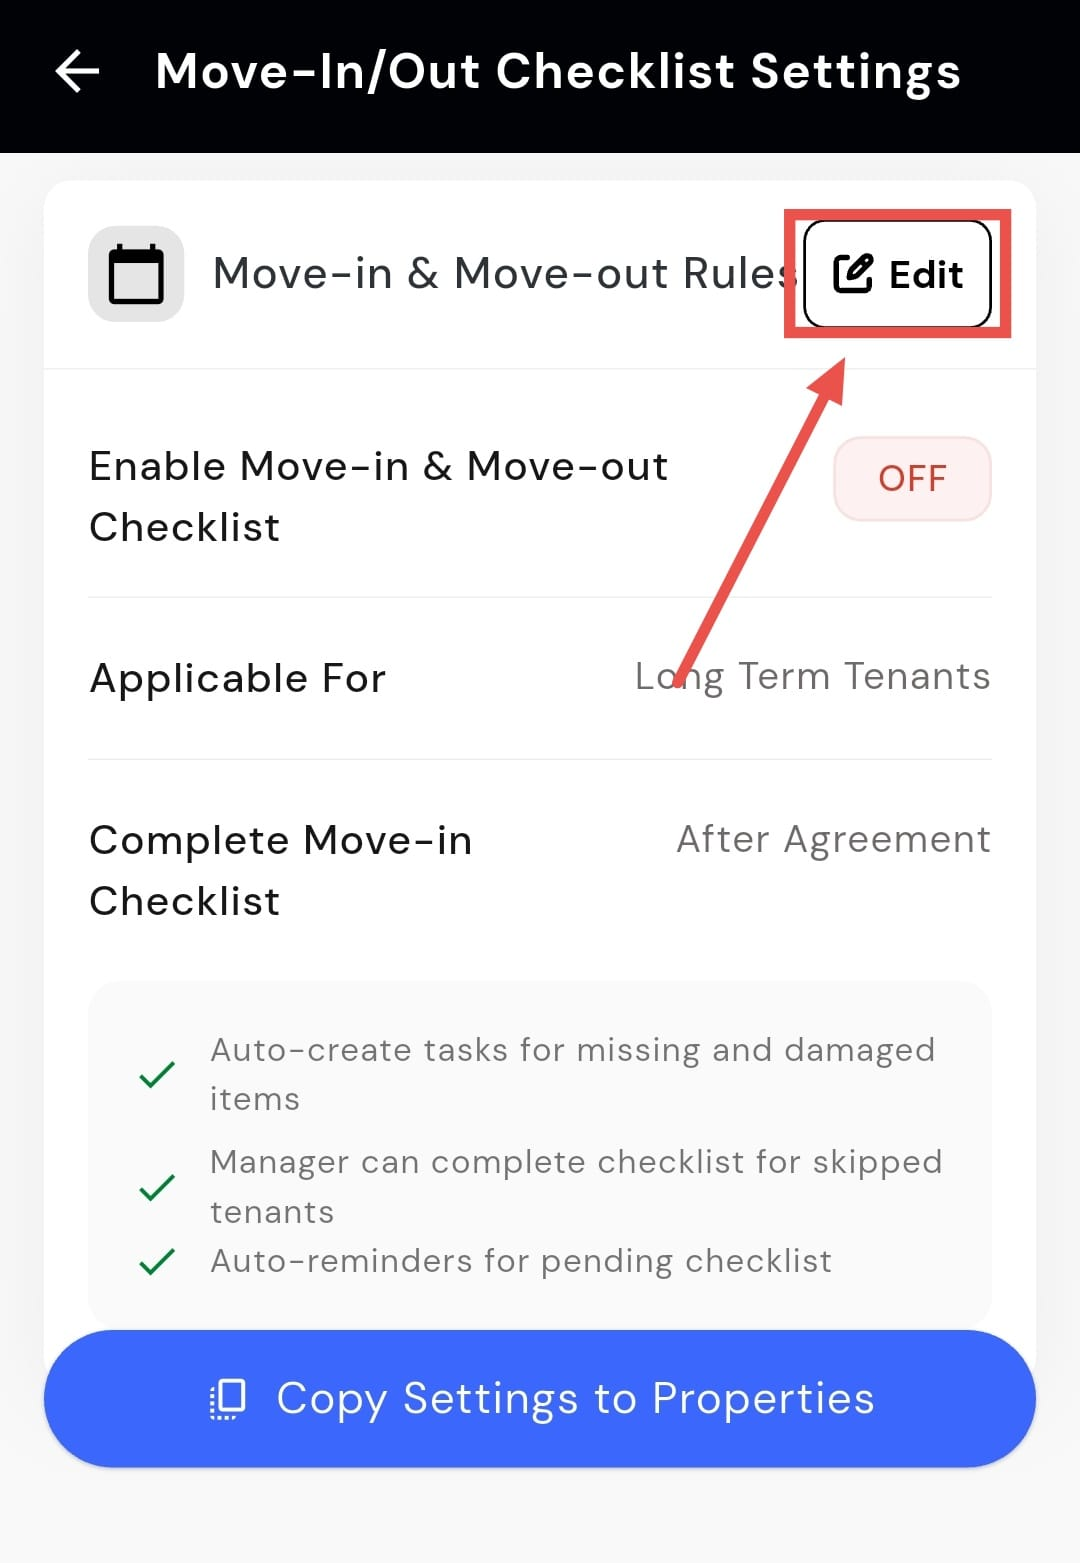
- Step 4: Enable or disable the checklists From here, you can turn the Move-in Checklist and Move-out Checklist on or off as required.

-
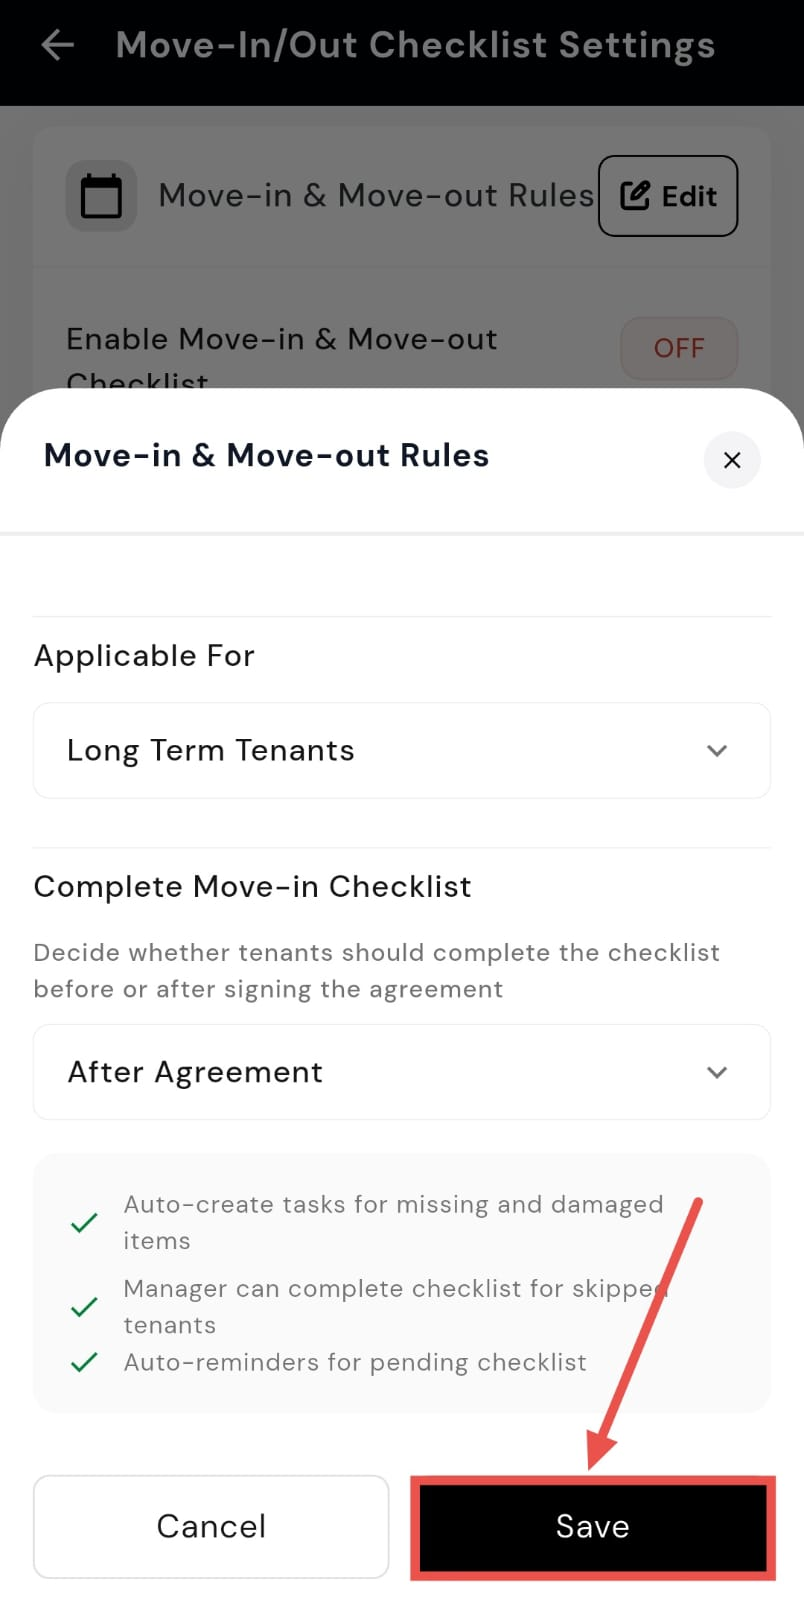
Step 5: Set who the checklist applies to Use the Applicable For option to choose whether the checklist applies to all tenants, long-term tenants, or short-term tenants.
-
Step 6: Set checklist completion timing Use the Complete Move-in Checklist option to decide whether the checklist must be completed before or after signing the agreement.
-
Step 7: Save your changes After making all the required updates, tap on Save to apply the changes.
How do I enable or disable auto-approve for move-in checklists?
Auto-approve for move-in checklists helps speed up the entry process by automatically approving checklist details in specific cases. If you want to reduce manual approvals or adjust how move-in checklists are handled, you can enable or disable this option from the checklist settings.
To enable or disable auto-approve for move-in checklists, follow these steps:
- Step 1: Open your profile Tap on your profile picture in the top-left corner of the screen to open the settings.
- Step 2: Open Move-in/out Checklist Settings Scroll down until you find Move-in/out Checklist Settings, then tap on it to continue.
- Step 3: Edit checklist configuration On this screen, you will see the Checklist Configuration section. Tap on Edit to update the settings.

- Step 4: Enable or disable auto-approve Find the Auto-approve Move-in Checklist option and turn it on or off as needed. When enabled, checklist details added outside the move-in window will be approved automatically.
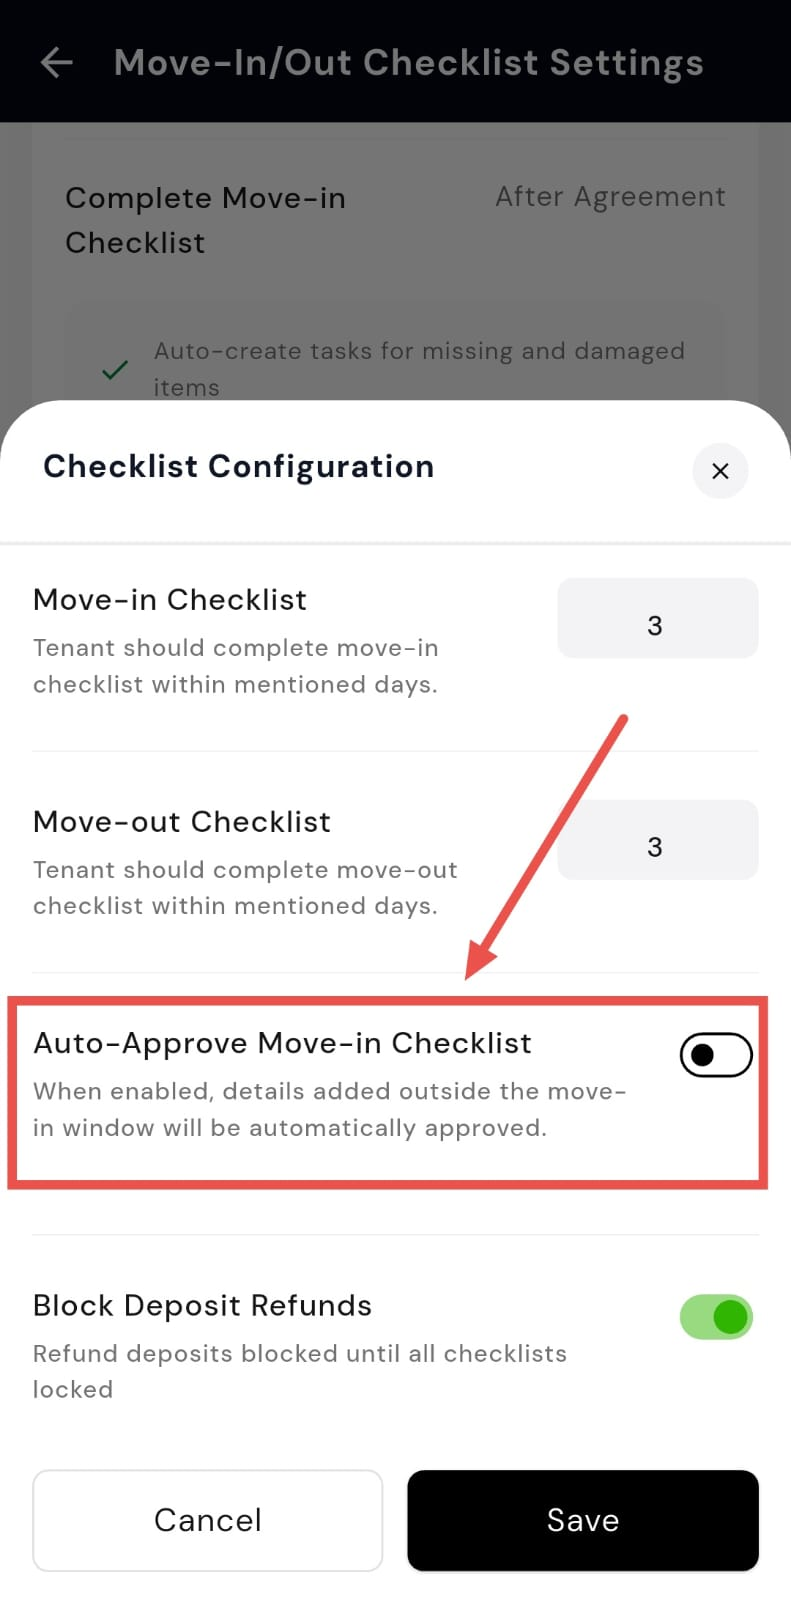
- Step 5: Save your changes After making the update, tap on Save to apply the changes.
How do I enable or disable deposit refunds during move-out?
Deposit refunds during move-out can be controlled based on whether all required checklists are completed. This helps ensure that no refunds are processed before the move-out formalities are properly closed. You can enable or disable this setting depending on how you want the process to work for your property.
To enable or disable deposit refunds during move-out, follow these steps:
- Step 1: Open your profile Tap on your profile picture in the top-left corner of the screen to open the settings.
- Step 2: Open Move-in/Move-out Checklist Settings Scroll down until you find Move-in/Move-out Checklist Settings, then tap on it to continue.
- Step 3: Edit checklist configuration On this screen, you will see the Checklist Configuration section. Tap on Edit to update the settings.
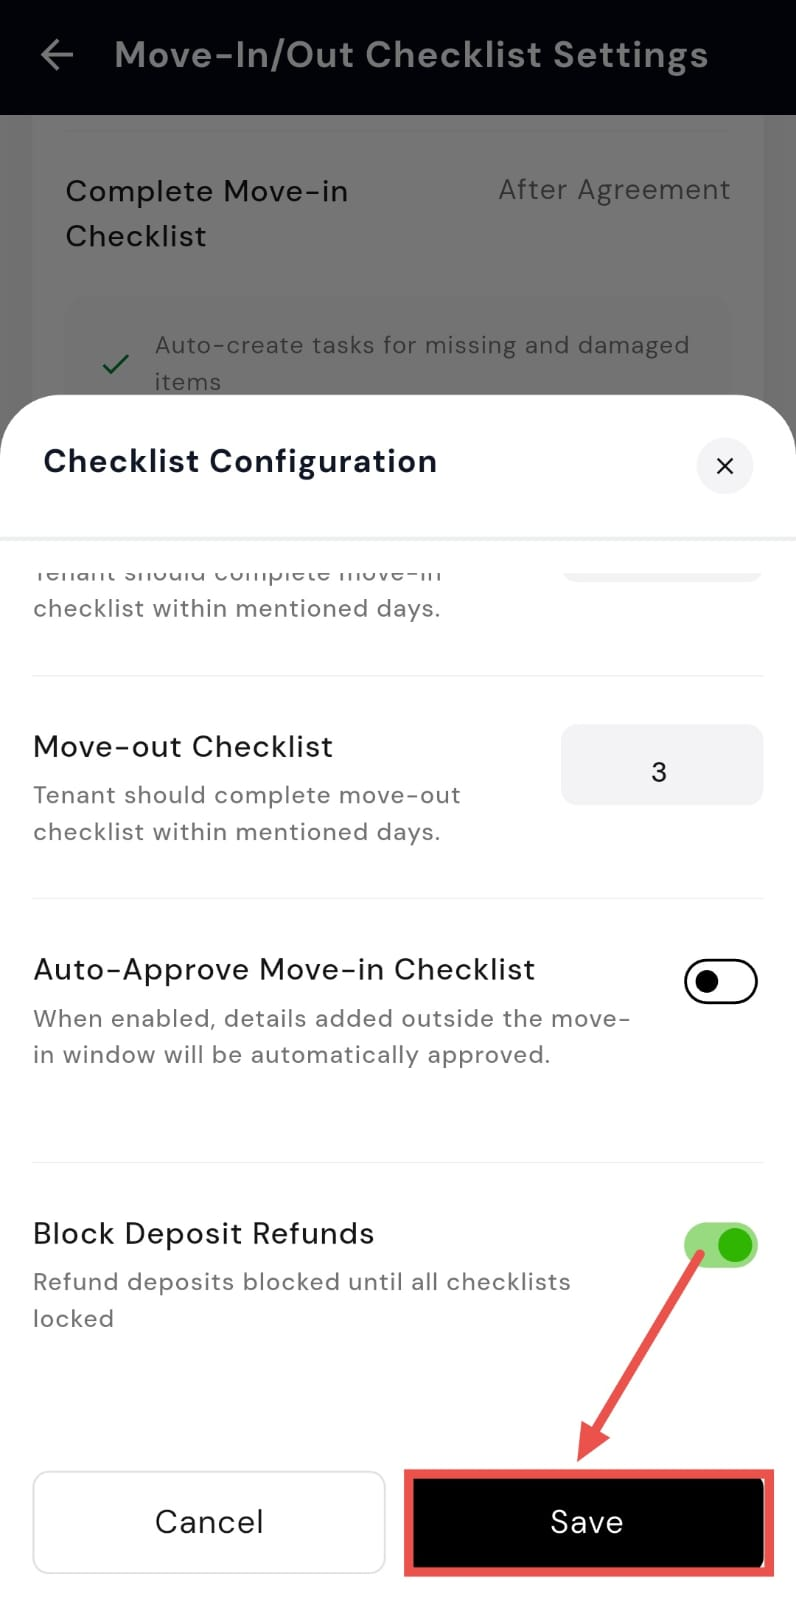
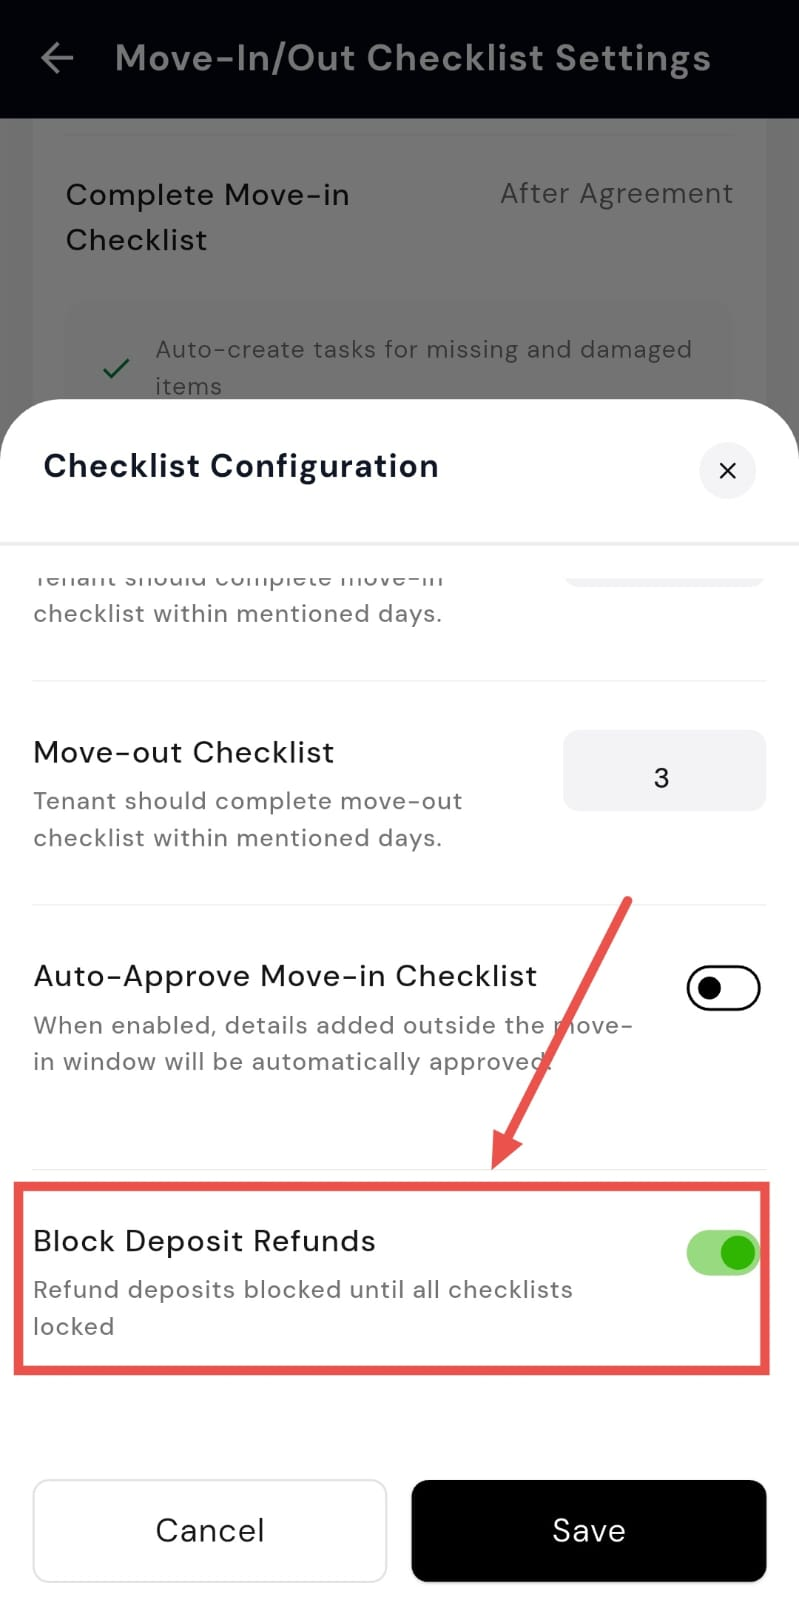
- Step 4: Manage deposit refund setting Scroll down to find Blocked Deposit Refunds. Use this option to decide whether deposit refunds should remain blocked until all move-out checklists are locked and completed.
- Step 5: Save your changes After making the required update, tap on Save to apply the changes.
How do I set the number of days for completing the move-in checklist?
Setting a time limit for completing the move-in checklist helps ensure that tenants finish all required steps within a defined period after moving in. This keeps the process structured and avoids delays. You can update this time limit easily from the checklist settings.
To set the number of days for completing the move-in checklist, follow these steps:
- Step 1: Open your profile Tap on your profile picture in the top-left corner of the screen to open the settings.
- Step 2: Open Move-in/out Checklist Settings Scroll down until you find Move-in/out Checklist Settings, then tap on it to continue.
- Step 3: Edit checklist configuration On this screen, you will see the Checklist Configuration section. Tap on Edit to update the settings.
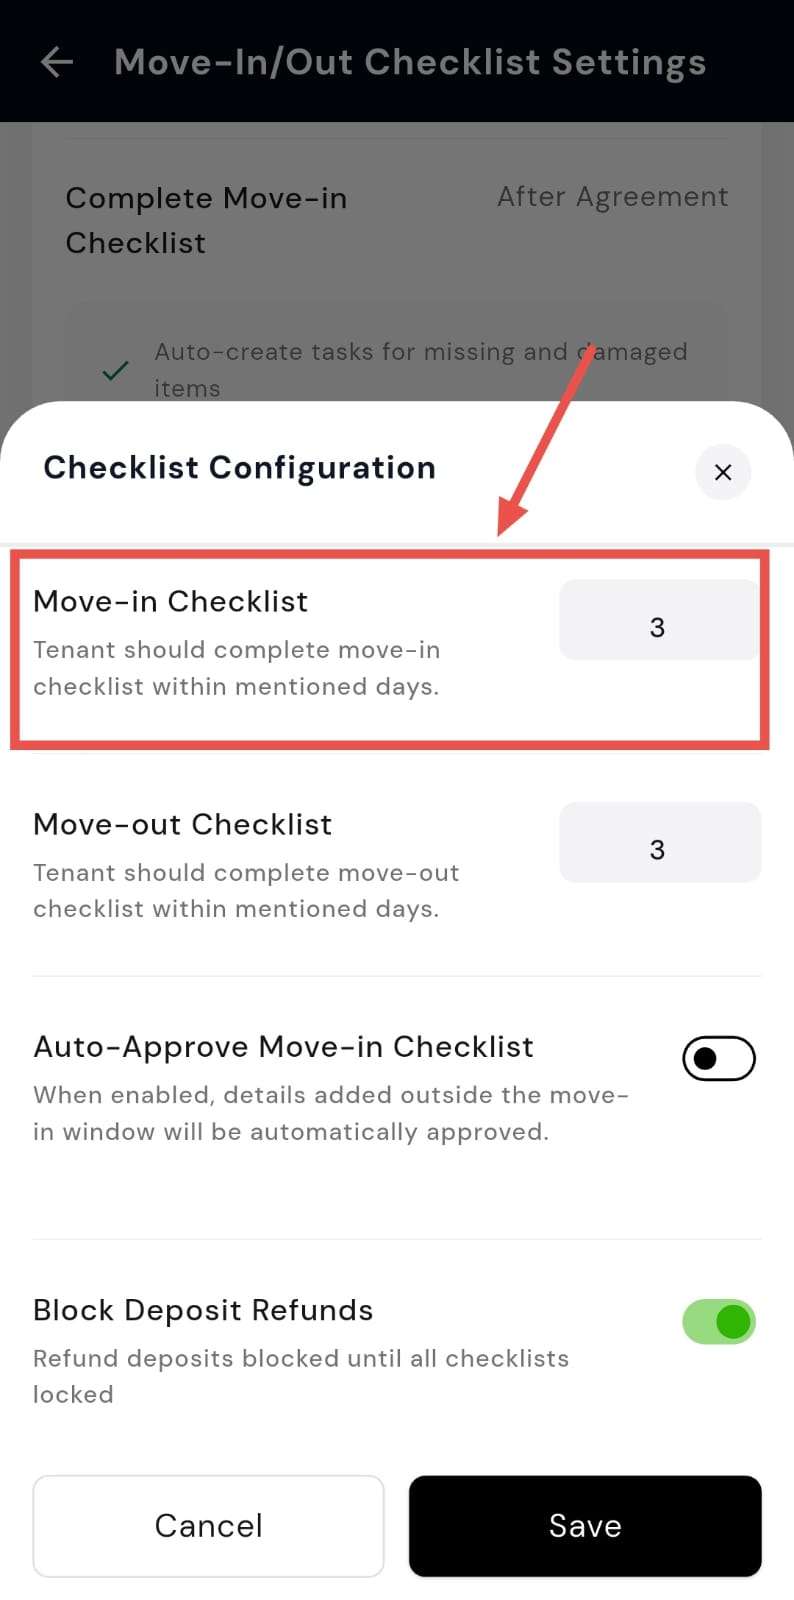
- Step 4: Set the move-in checklist duration You will see the Move-in Checklist option, where you can enter the number of days within which tenants must complete the checklist.
- Step 5: Save your changes After entering the required number of days, tap on Save to apply the changes.
How do I set the number of days for completing the move-out checklist?
Setting a time limit for the move-out checklist helps ensure that tenants complete all required exit steps within a defined period. This keeps the move-out process organised and avoids delays in closing the tenancy. You can set or update this duration from the checklist settings.
To set the number of days for completing the move-out checklist, follow these steps:
- Step 1: Open your profile Tap on your profile picture in the top-left corner of the screen to open the settings.
- Step 2: Open Move-in/Move-out Checklist Settings Scroll down until you find Move-in/Move-out Checklist Settings, then tap on it to continue.
- Step 3: Edit checklist configuration On this screen, you will see the Checklist Configuration section. Tap on Edit to update the settings.
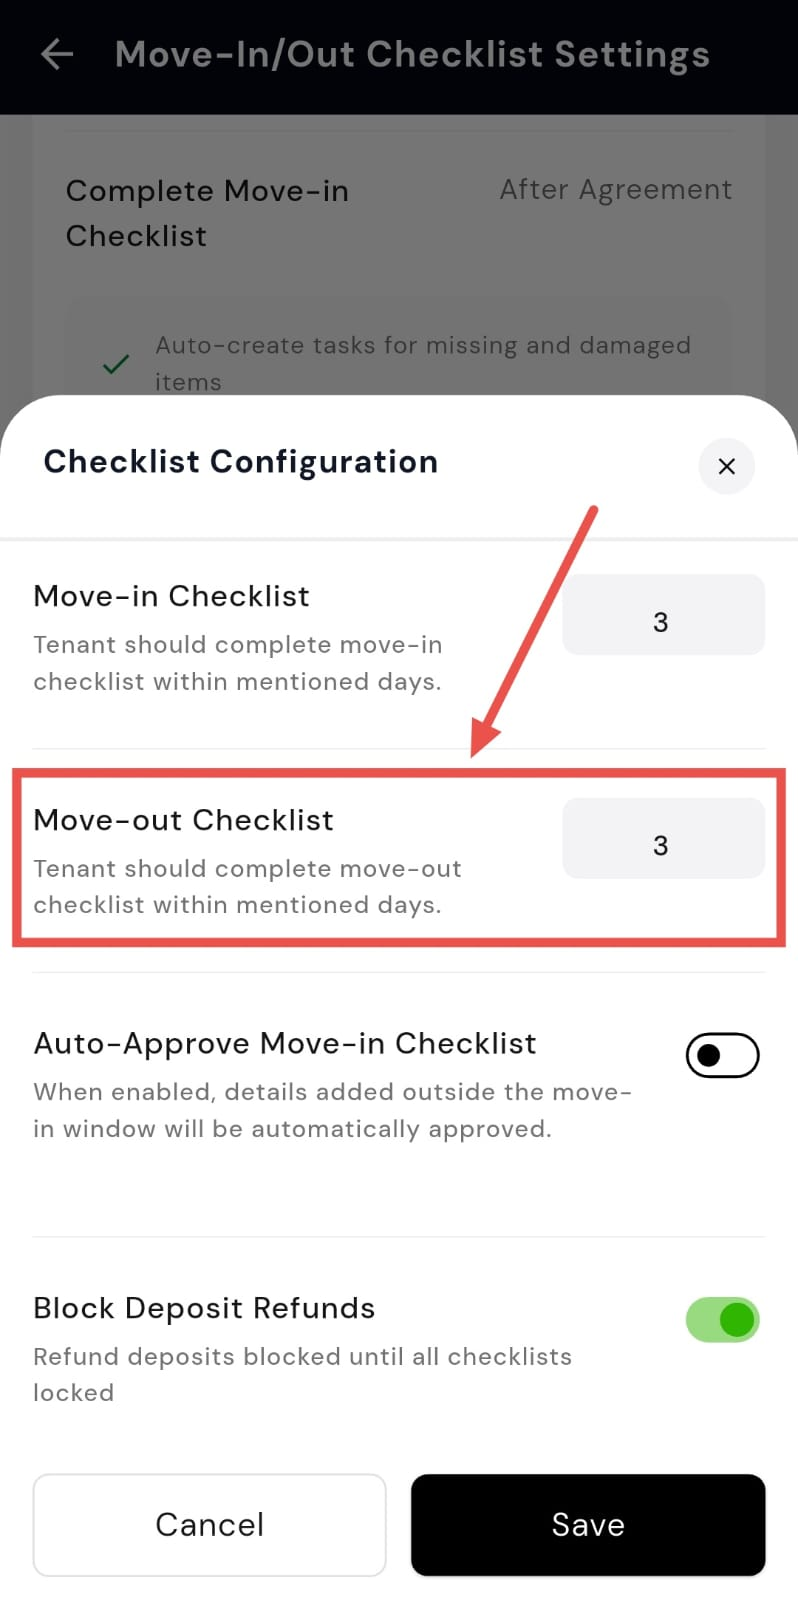
- Step 4: Set the move-out checklist duration You will see the Move-out Checklist option, where you can enter the number of days within which tenants must complete the checklist.
- Step 5: Save your changes After entering the required number of days, tap on Save to apply the changes.