Eviction Settings
How do I set accepted eviction dates?
Accepted eviction dates help you control when tenants are allowed to raise a notice and by when they are expected to vacate the property. Setting this clearly avoids confusion and keeps the eviction process structured for both you and your tenants.
To set accepted eviction dates, follow these steps:
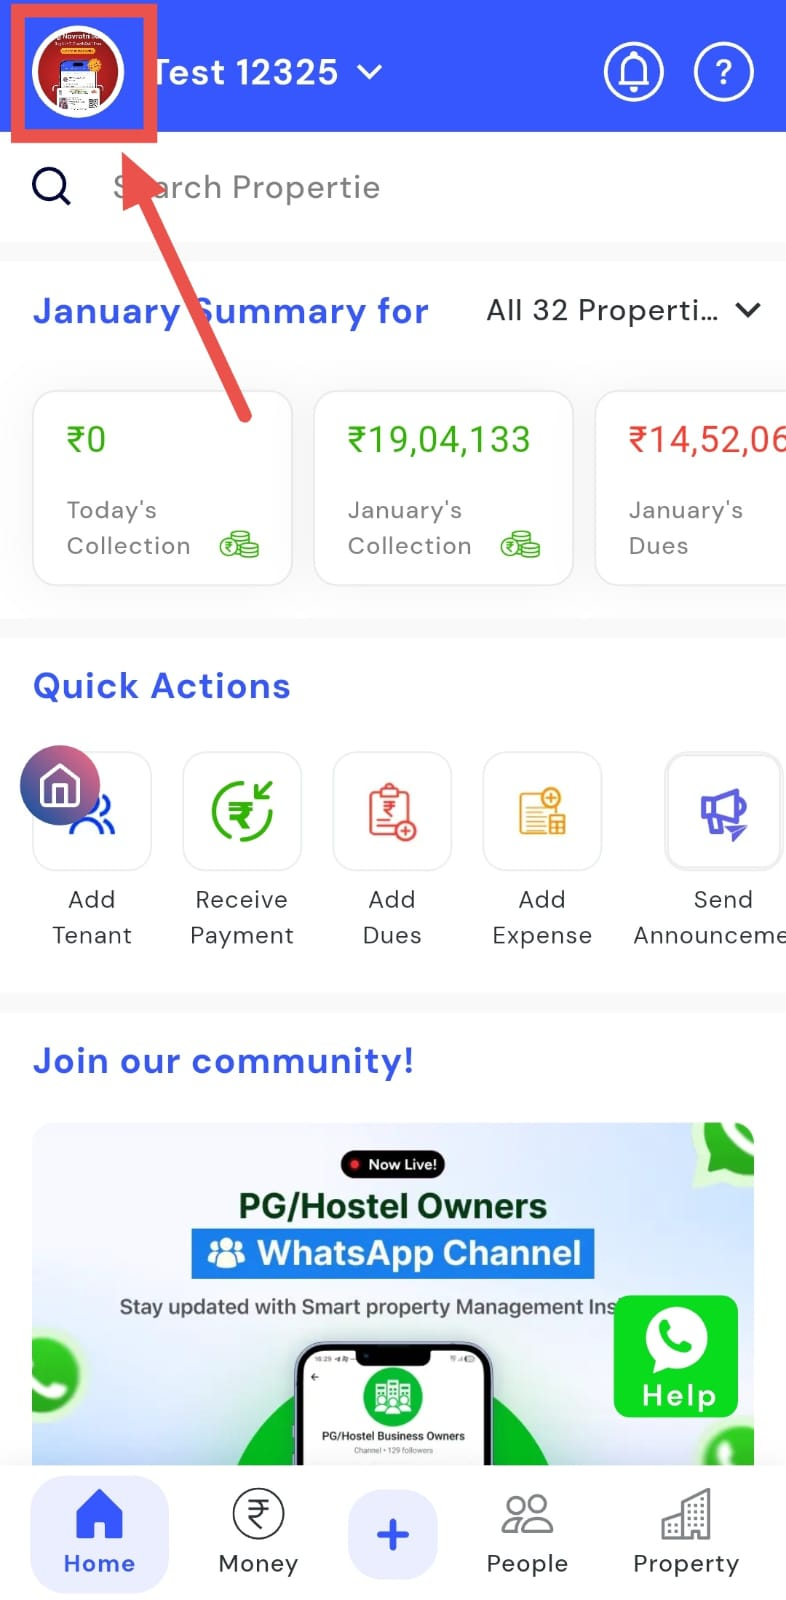
- Step 1: Open your profile Tap on your profile picture in the top-left corner of the screen to open the settings.
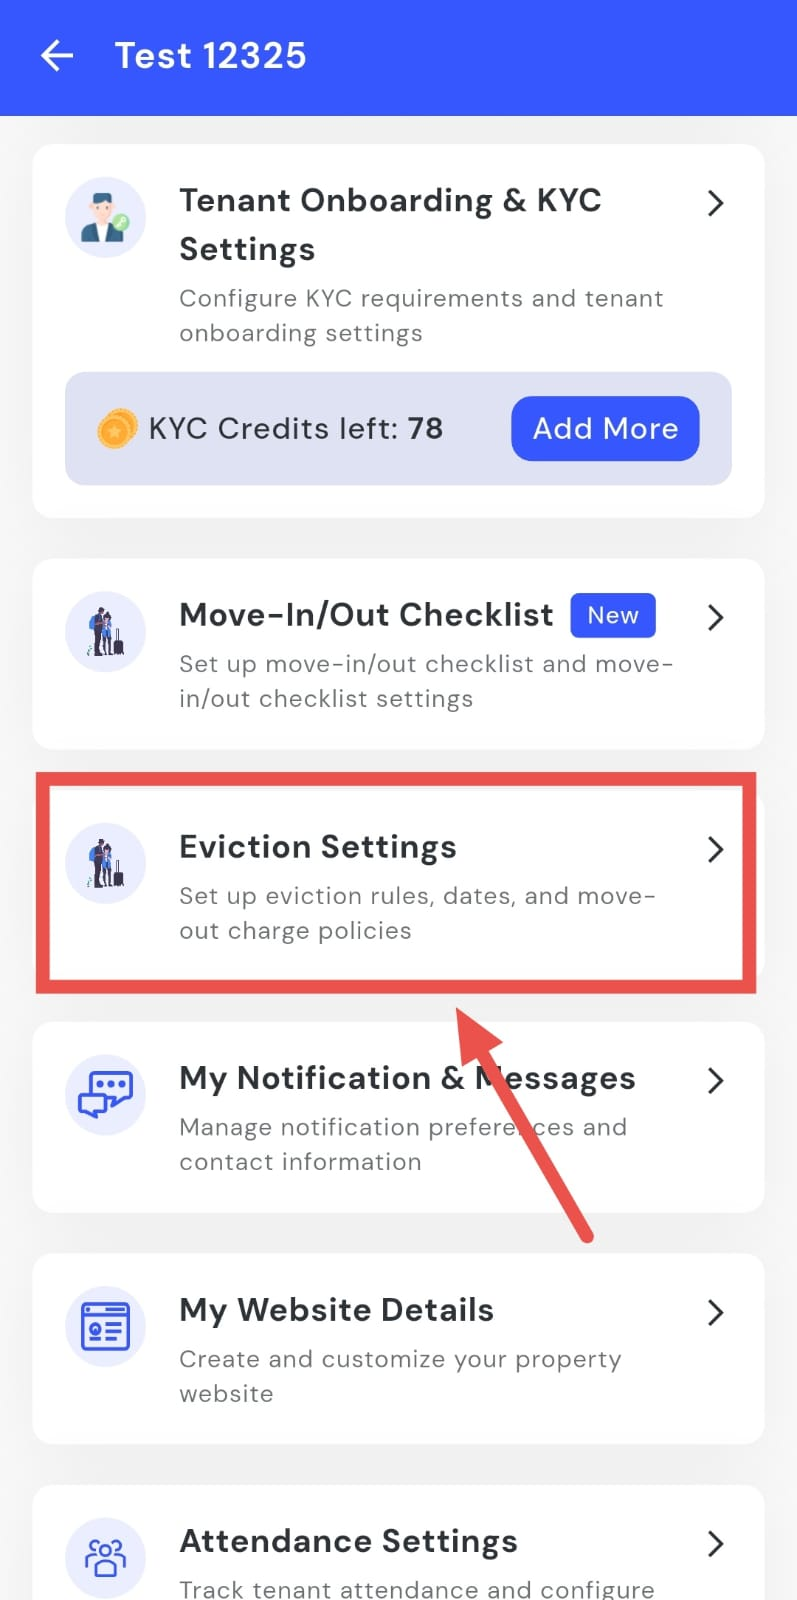
- Step 2: Open Eviction Settings Scroll down until you see the Eviction Settings option, then tap on it to continue.
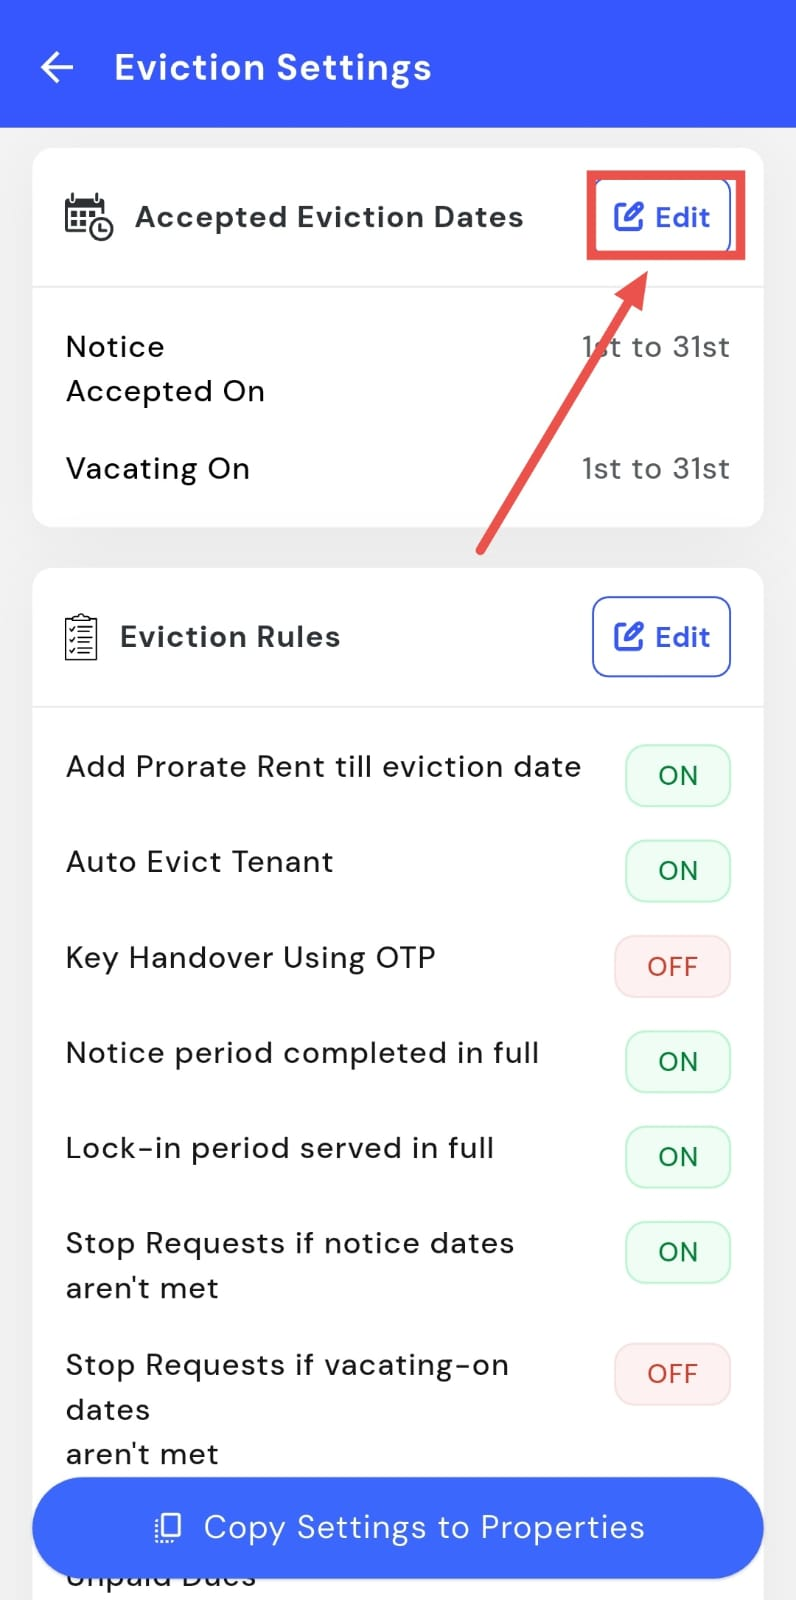
- Step 3: Edit accepted eviction dates On this screen, you will see Accepted Eviction Dates. Tap on Edit to update the dates.
-
Step 4: Set notice and vacate dates Choose the dates for when tenants can raise a notice and the dates by which they need to vacate the property.
-
Step 5: Submit and save After making the required changes, tap on Submit to save and apply the updated eviction dates.

How do I set eviction rules?
Eviction rules help you decide how tenant exit requests are handled in different situations. These rules make sure the process stays fair, structured, and aligned with your property policies. You can control what conditions must be met before an eviction request is approved or rejected.
To set eviction rules, follow these steps:
- Step 1: Open your profile Tap on your profile picture in the top-left corner of the screen to open the app settings.
- Step 2: Open Eviction Settings Scroll down until you see Eviction Settings, then tap on it to continue.
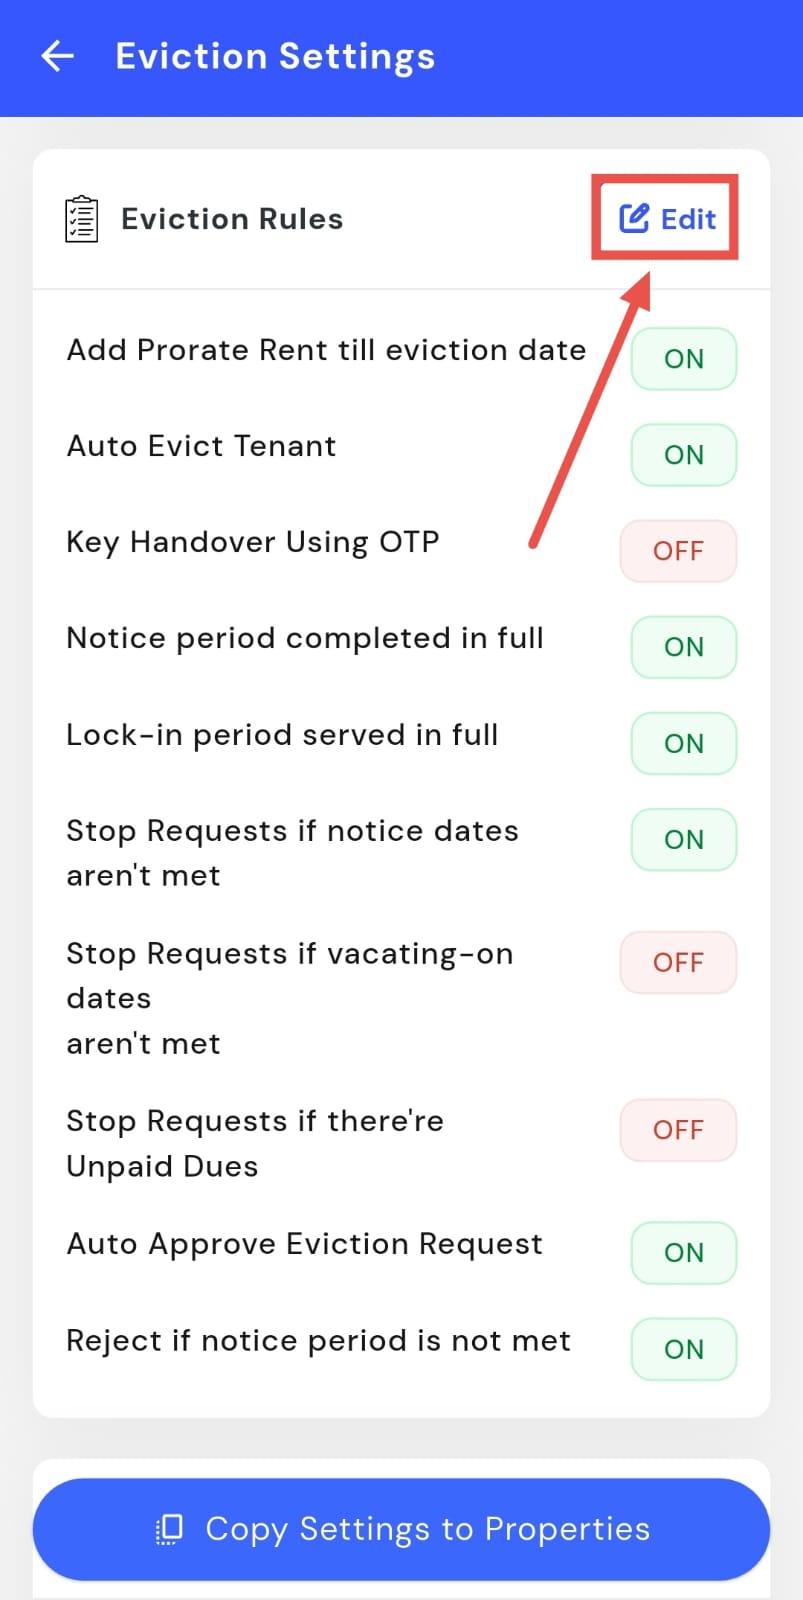
- Step 3: Open Eviction Rules On this screen, you will see the Eviction Rules option. Tap on Edit to view and update the rules.
-
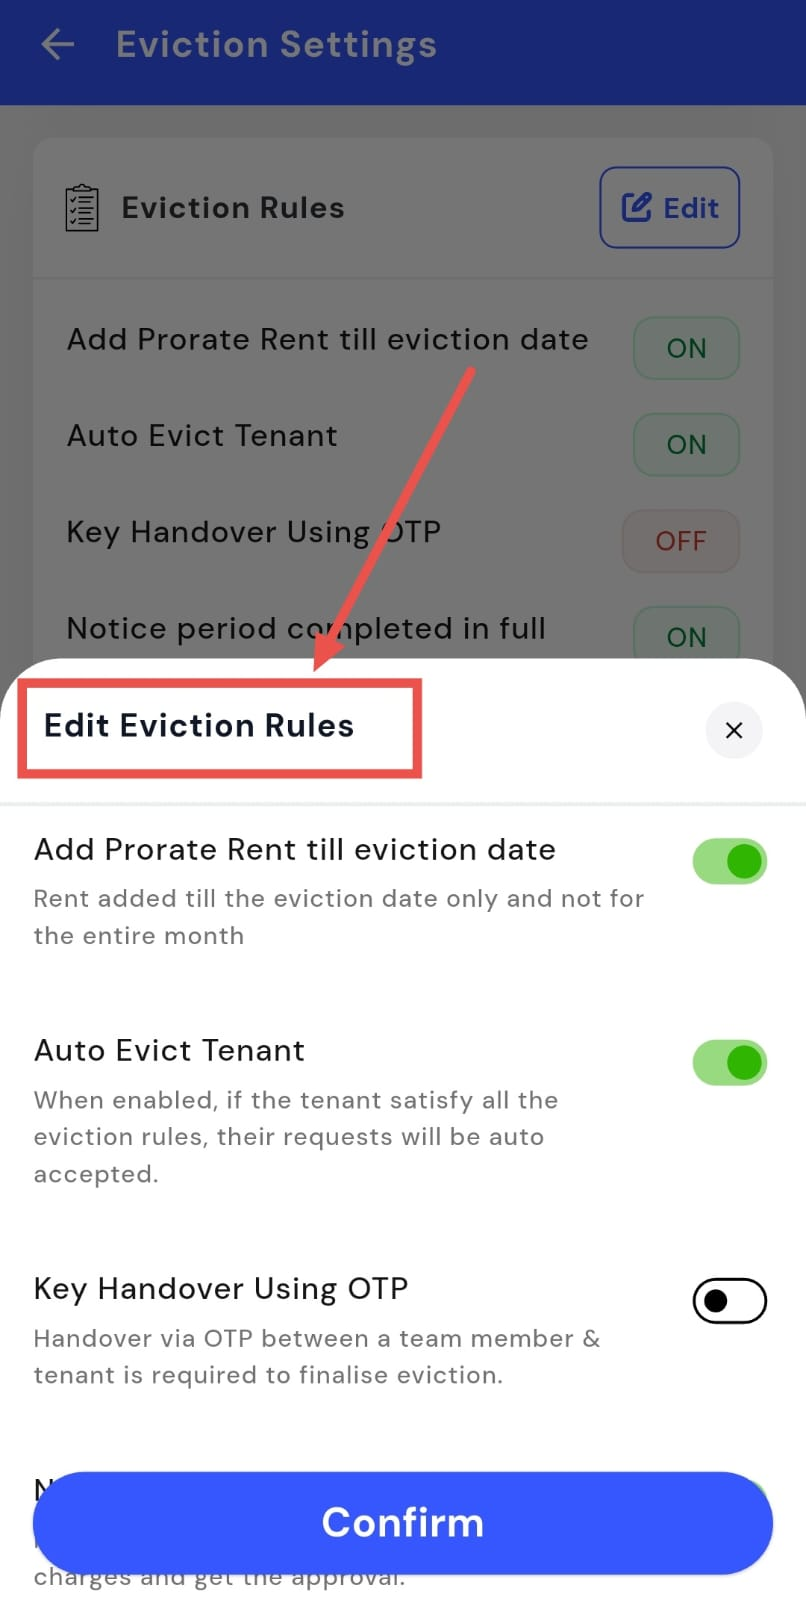
Step 4: Update the eviction rules From here, you can configure rules such as:
-
Stop eviction requests if the notice period or vacating dates are not met
-
Require key handover using OTP for secure exits
-
Add pro-rata rent till the eviction date
-
Allow or restrict auto-eviction of tenants
-
Stop requests if there are unpaid dues
-
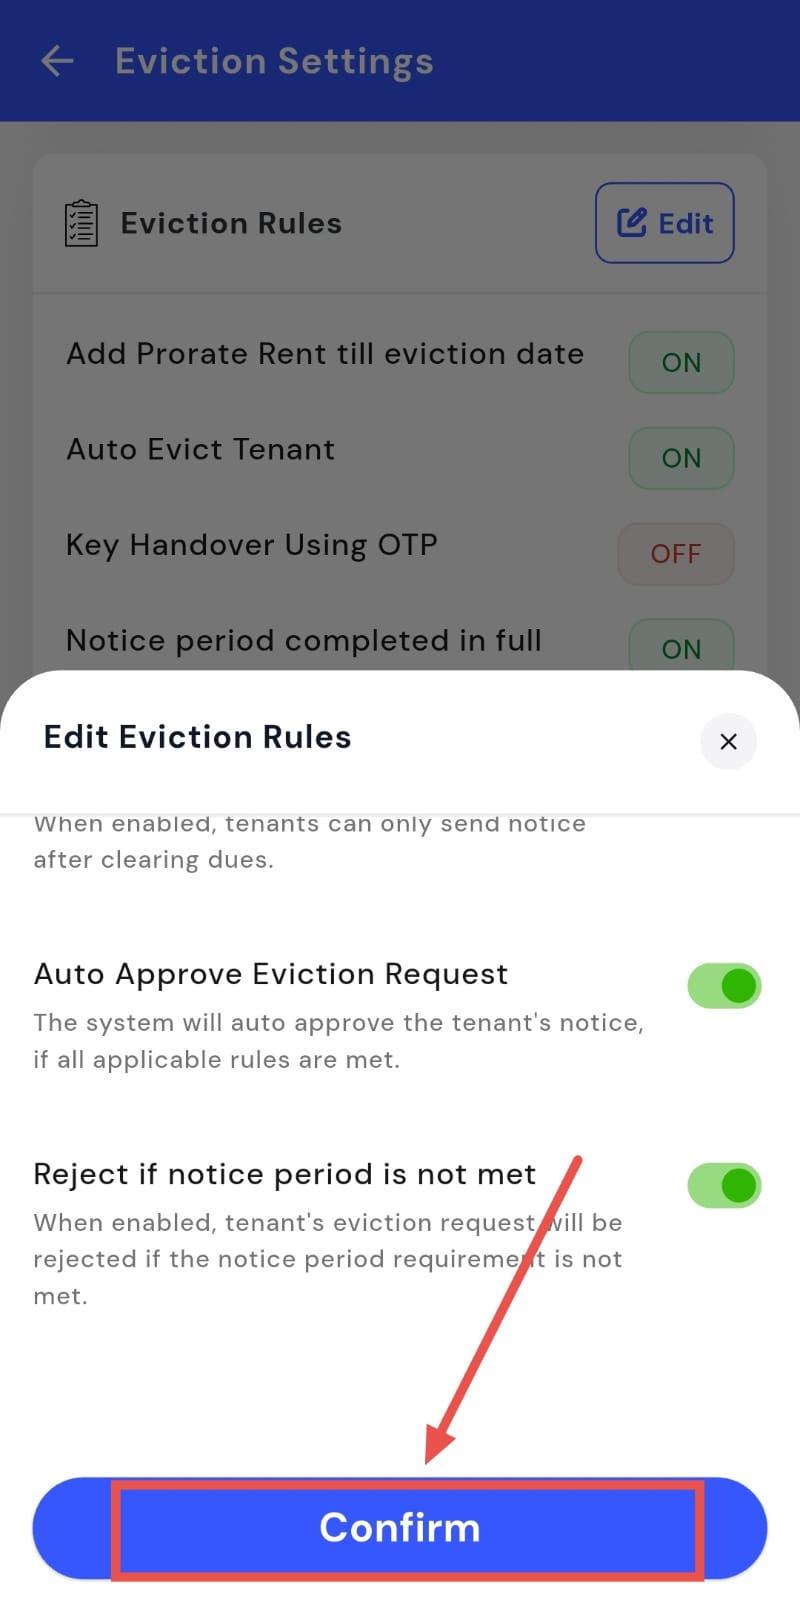
Auto-approve or reject eviction requests based on rule compliance
-
Check whether lock-in period and notice period are fully served
-
- Step 5: Confirm and save After updating the rules as needed, tap on Confirm to save and apply the eviction rules.
How do I set eviction charges?
Eviction charges help you define the penalties that apply when eviction rules are not followed. This makes the move-out process clearer for tenants and ensures that deductions are handled consistently. You can set these charges in advance so they are applied automatically when required.
To set eviction charges, follow these steps:
- Step 1: Open your profile Tap on your profile picture in the top-left corner of the screen to open the app settings.
- Step 2: Open Eviction Settings Scroll down until you see Eviction Settings, then tap on it to continue.
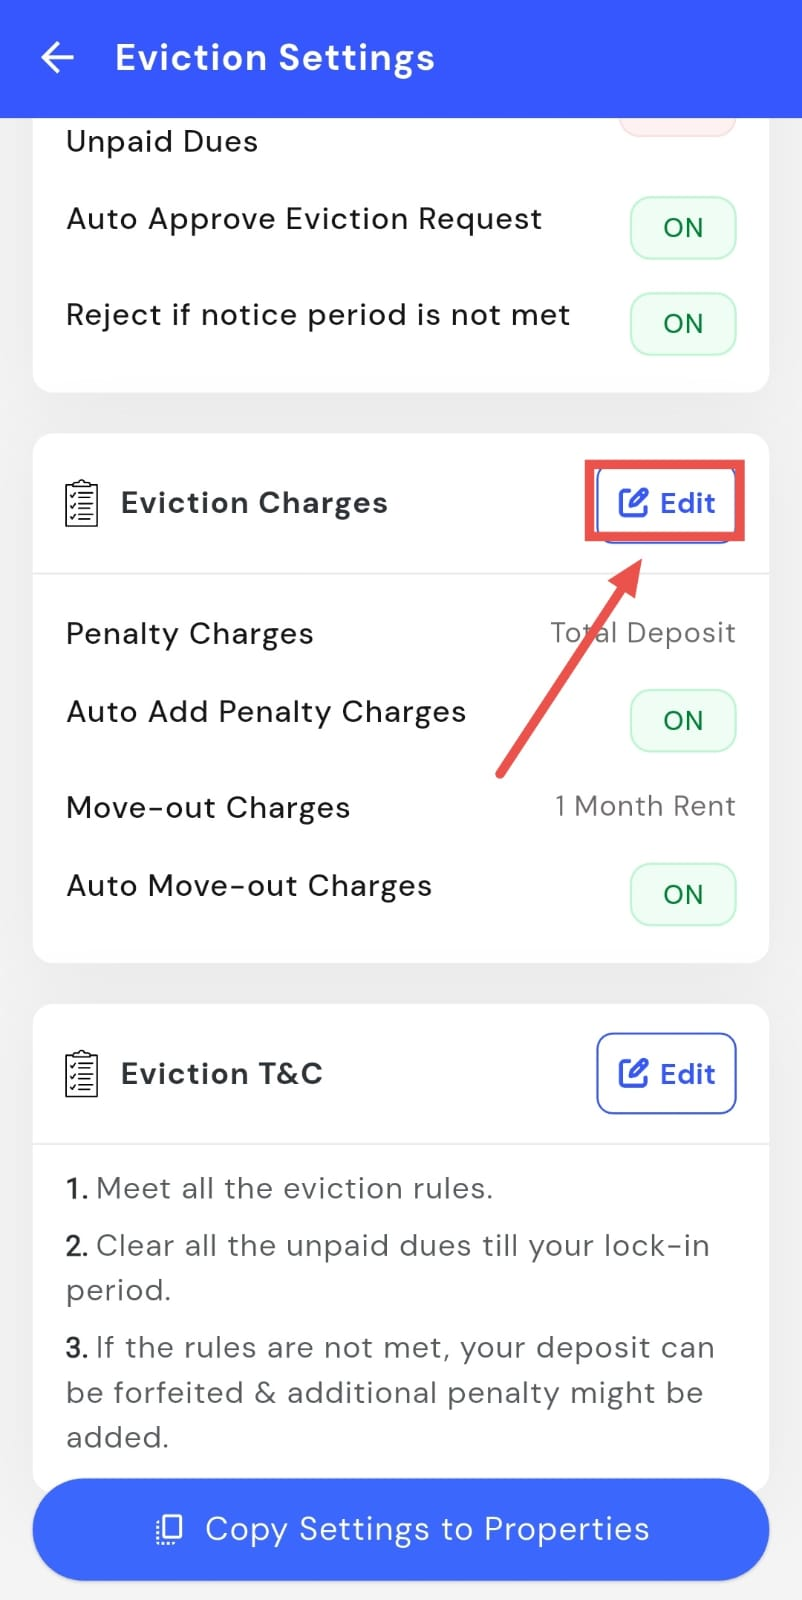
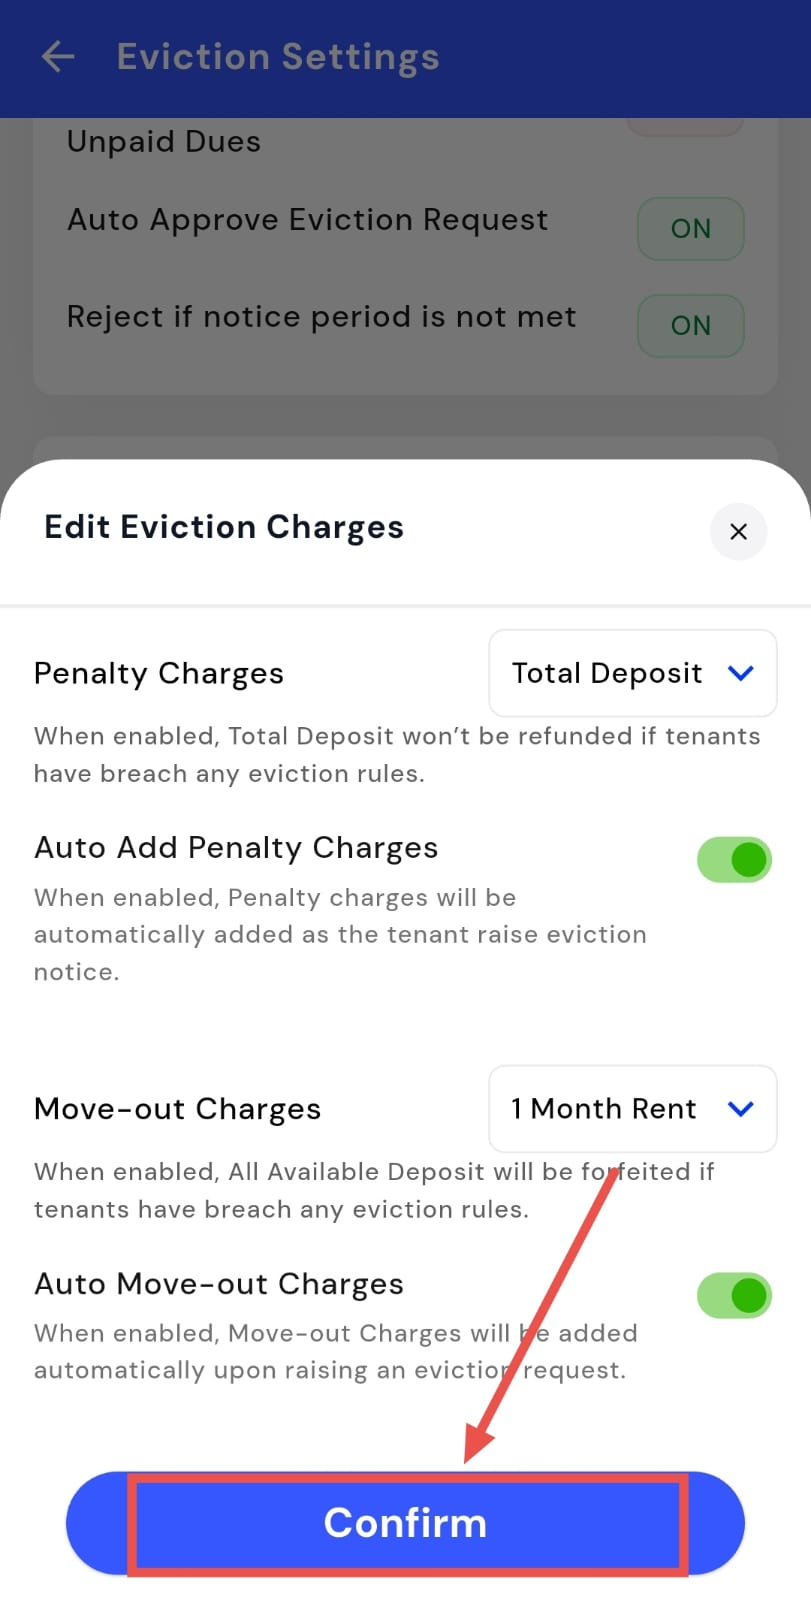
- Step 3: Open Eviction Charges Scroll down on this screen until you find Eviction Charges, then tap on Edit to update the settings.
-
Step 4: Configure the charges From here, you can manage the following options:
-
Penalty charges – set penalties when eviction rules are breached
-
Auto-add penalty charges – automatically apply penalties when applicable
-
Move-out charges – add charges related to the move-out process
-
Auto move-out charges – automatically apply move-out charges when an eviction request is raised
-
Deposit forfeiture – apply rules where the available deposit may be forfeited if eviction rules are not met
-

- Step 5: Confirm and save After updating the charges as needed, tap on Confirm to save and apply the eviction charge settings.
How do I update eviction terms and conditions?
Eviction terms and conditions help set clear expectations around the move-out process for tenants. If your property rules change or you want to add more clarity, you can update these terms anytime from the eviction settings.
To update eviction terms and conditions, follow these steps:
- Step 1: Open your profile Tap on your profile picture in the top-left corner of the screen to open the app settings.
- Step 2: Open Eviction Settings Scroll down until you see Eviction Settings, then tap on it to continue.
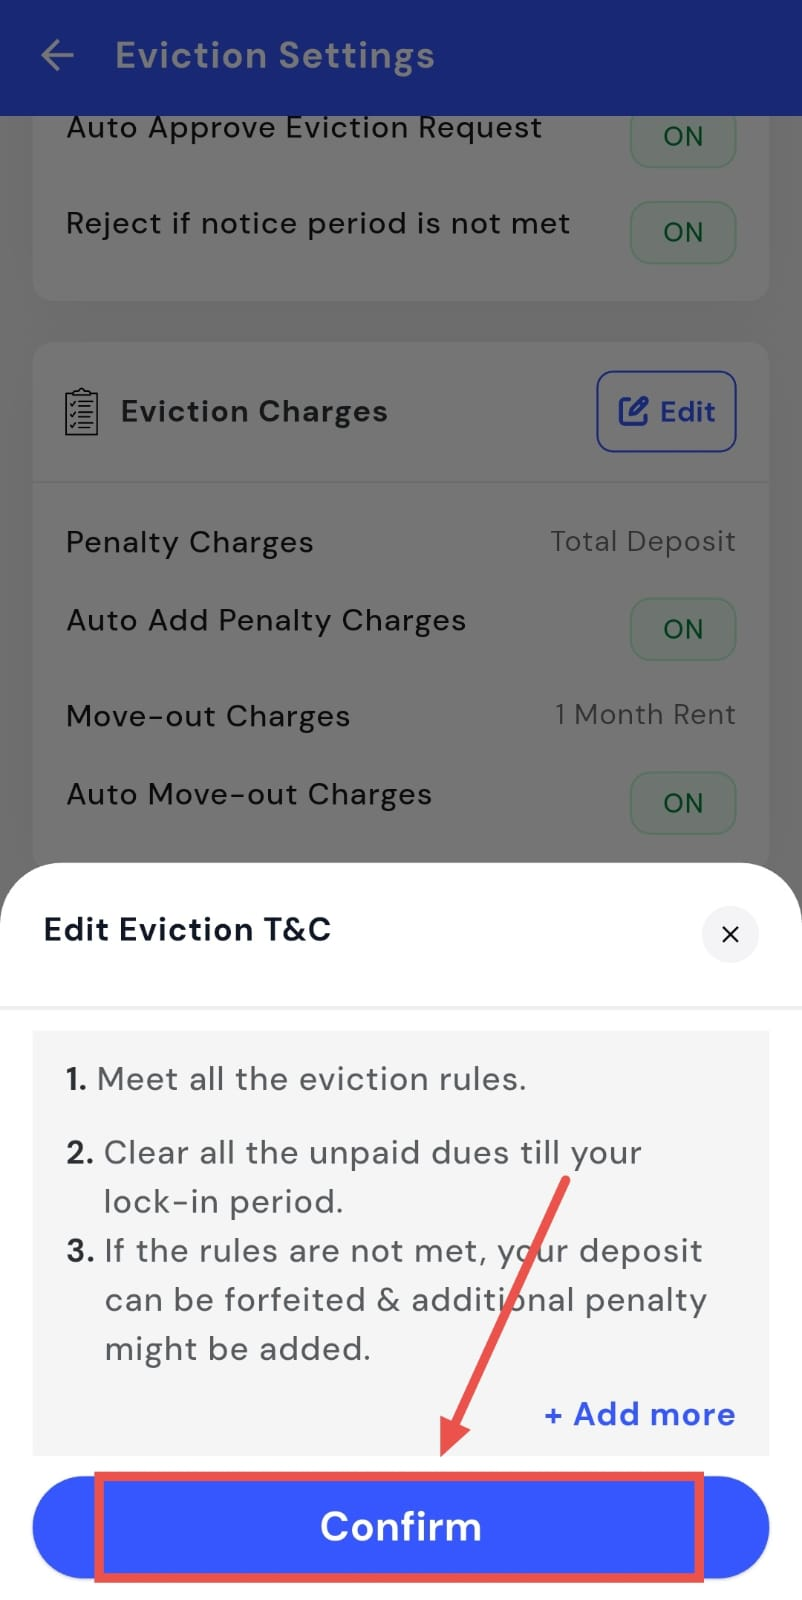
- Step 3: Open Eviction T&C Scroll down on this screen until you find the Eviction Terms & Conditions section, then tap on Edit.
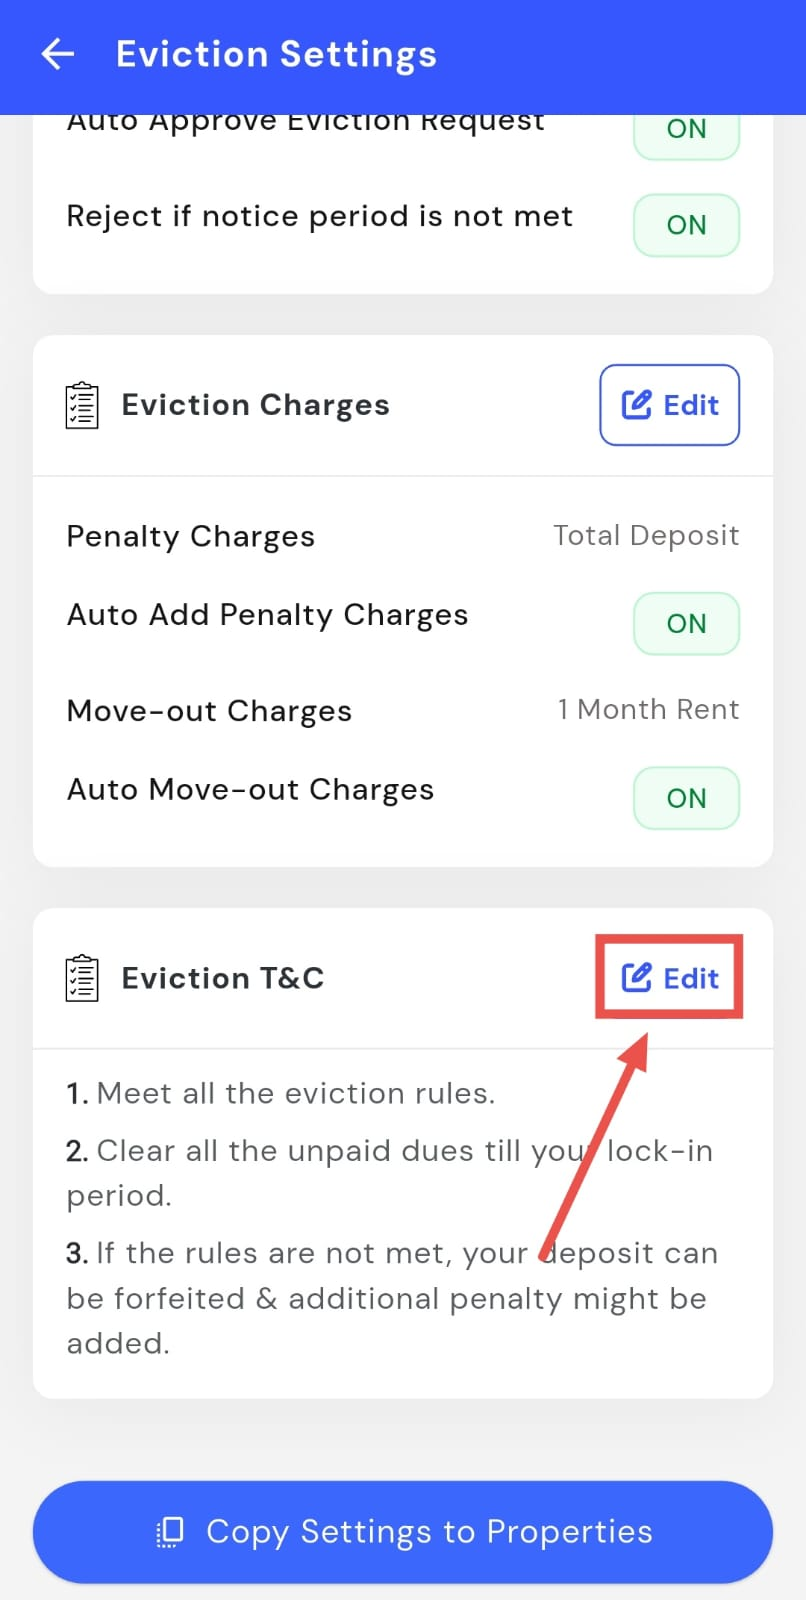
- Step 4: Update the terms Here, you can review the existing rules, edit them if needed, or tap Add More to include your own additional eviction rules.
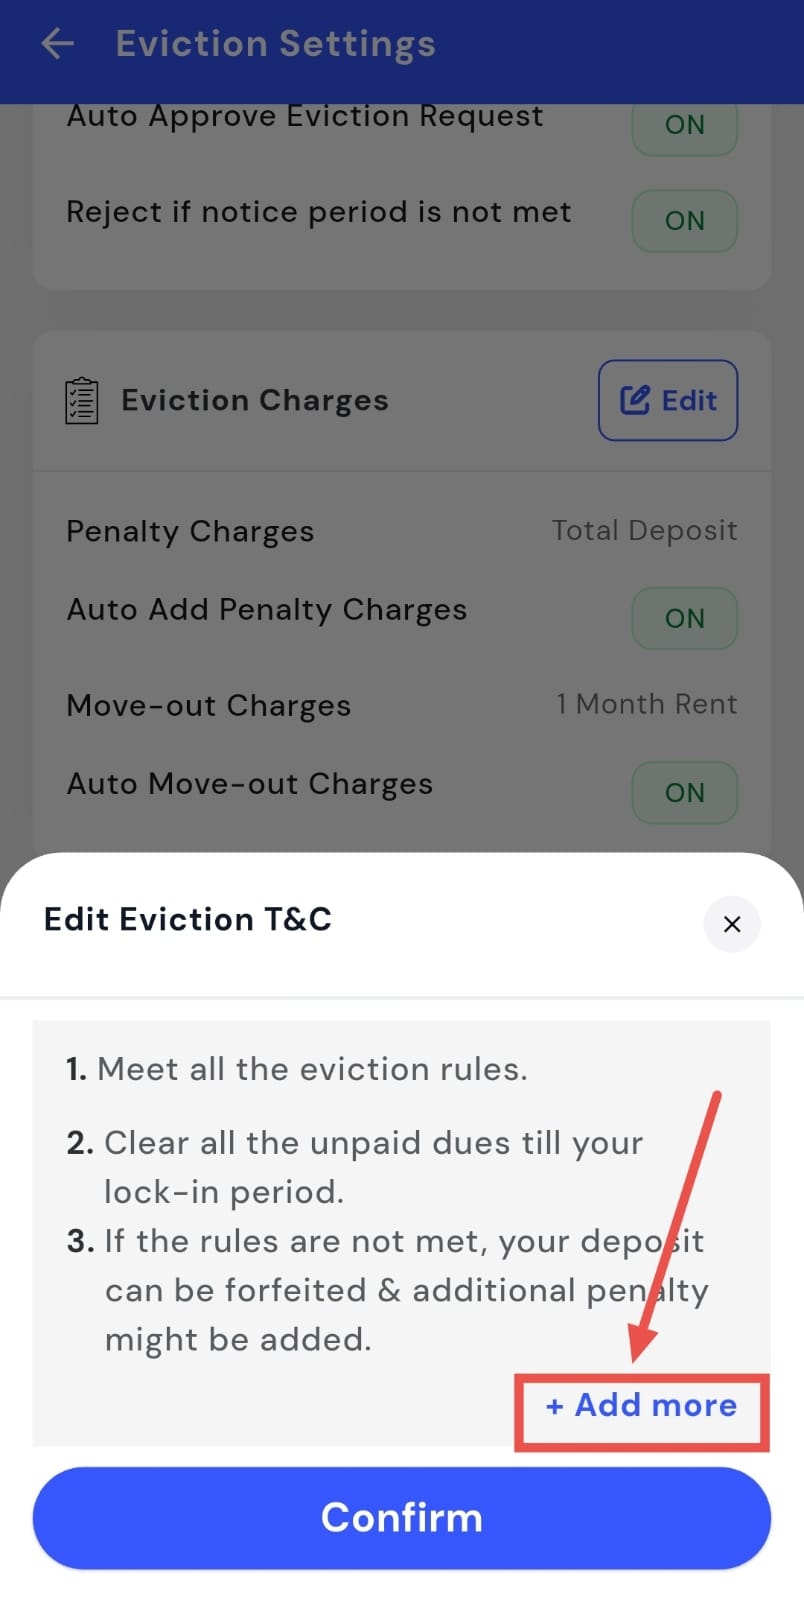
- Step 5: Confirm and save After making the changes, tap on Confirm to save and apply the updated eviction terms and conditions.