Tenant Onboarding & Kyc
How do I update onboarding settings for my property?
Onboarding settings help you control how tenants are added to your property and how KYC is managed. You can review and update these settings to match your property rules and onboarding process. Any changes you make will apply to new tenant onboarding going forward.
Here’s how you can update them:
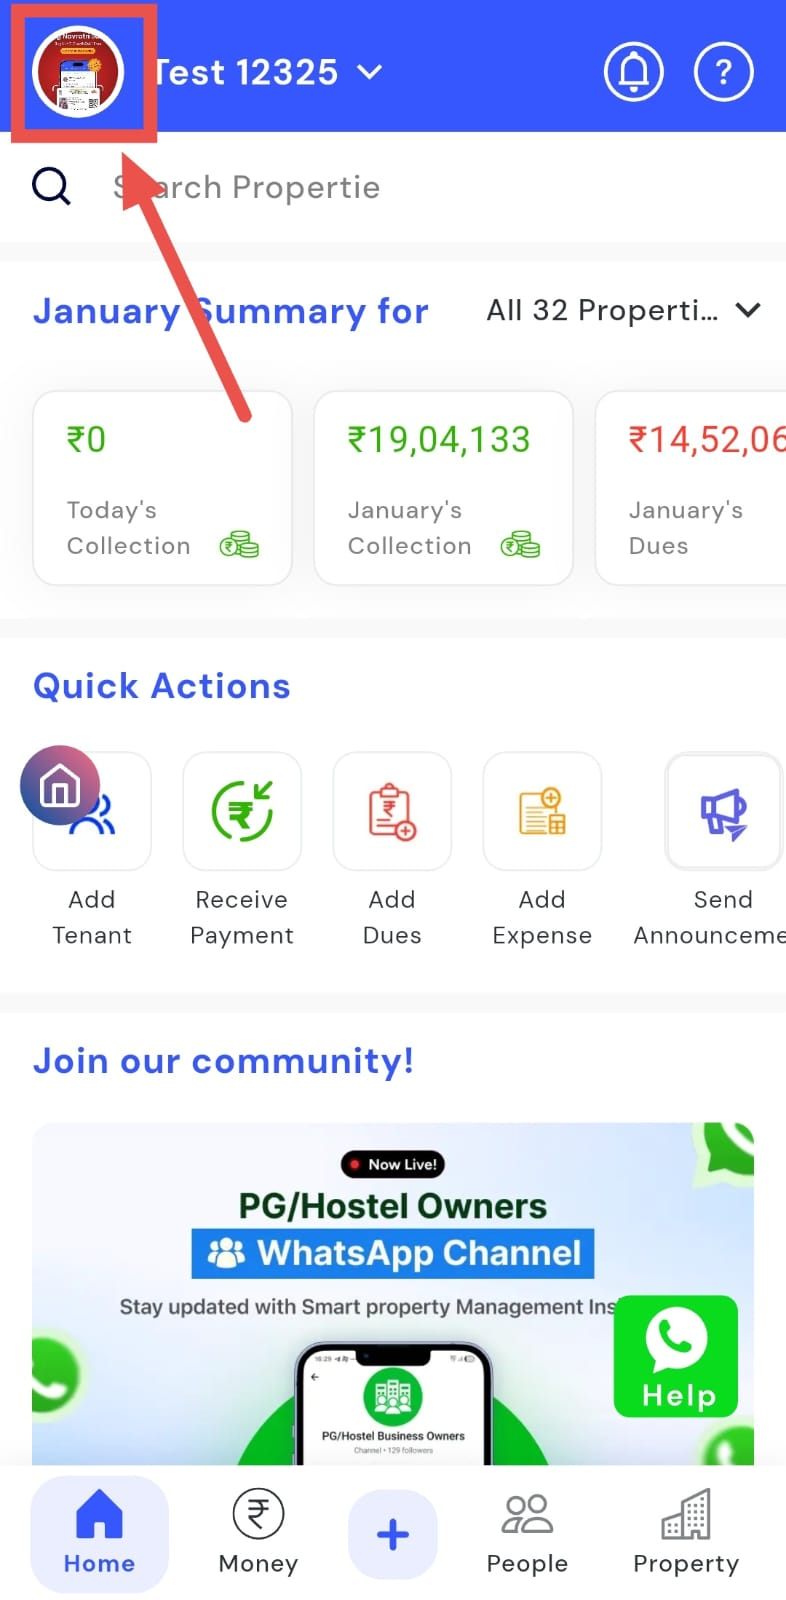
- Step 1: Open your profile Tap on your profile picture in the top-left corner of the screen to open Settings.
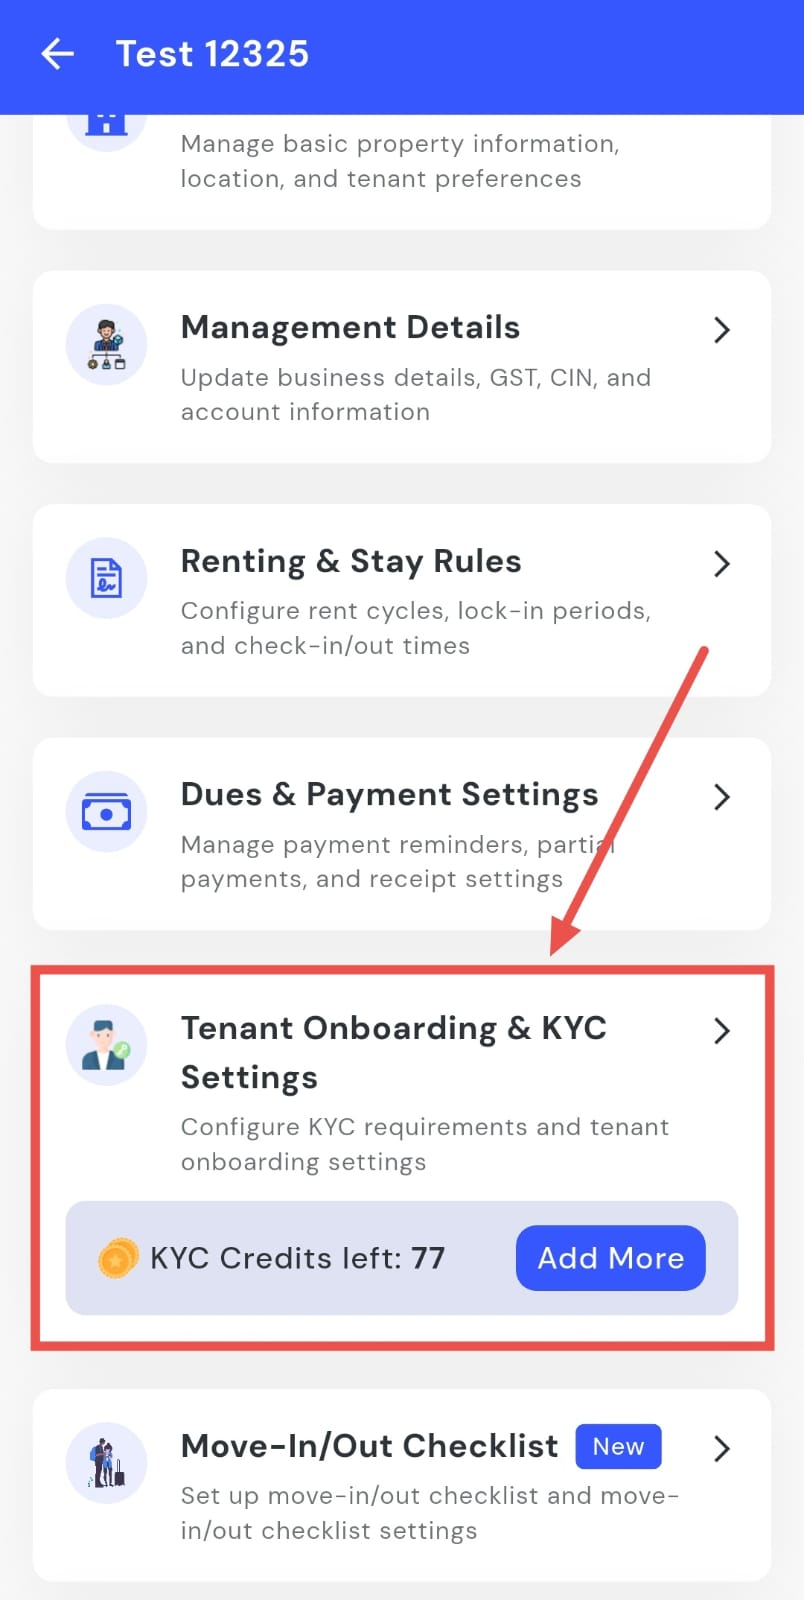
- Step 2: Go to Tenant Onboarding and KYC settings Scroll down on the screen and tap Tenant Onboarding and KYC settings to continue.
-
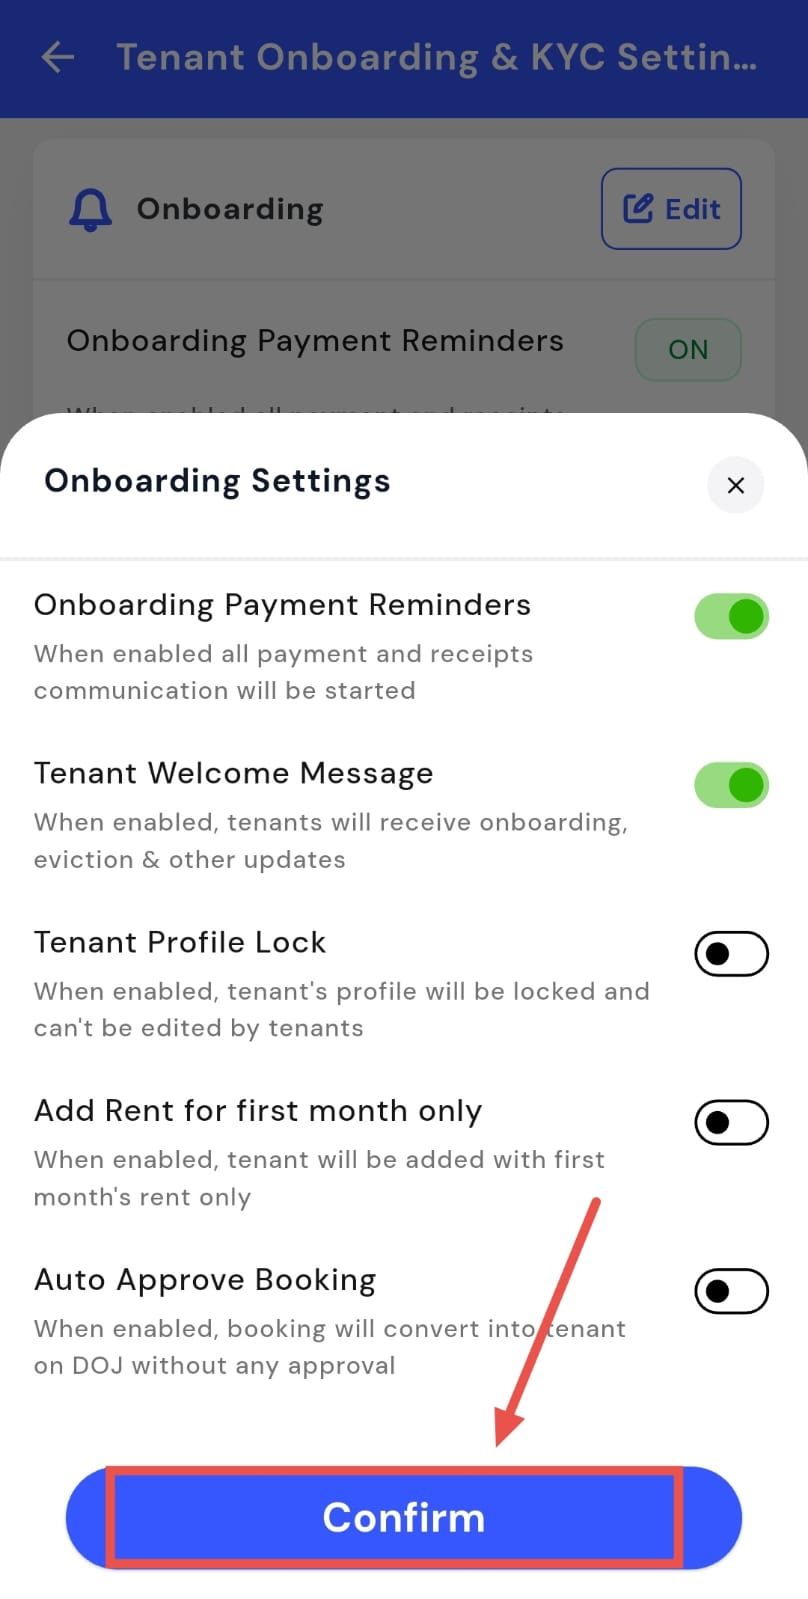
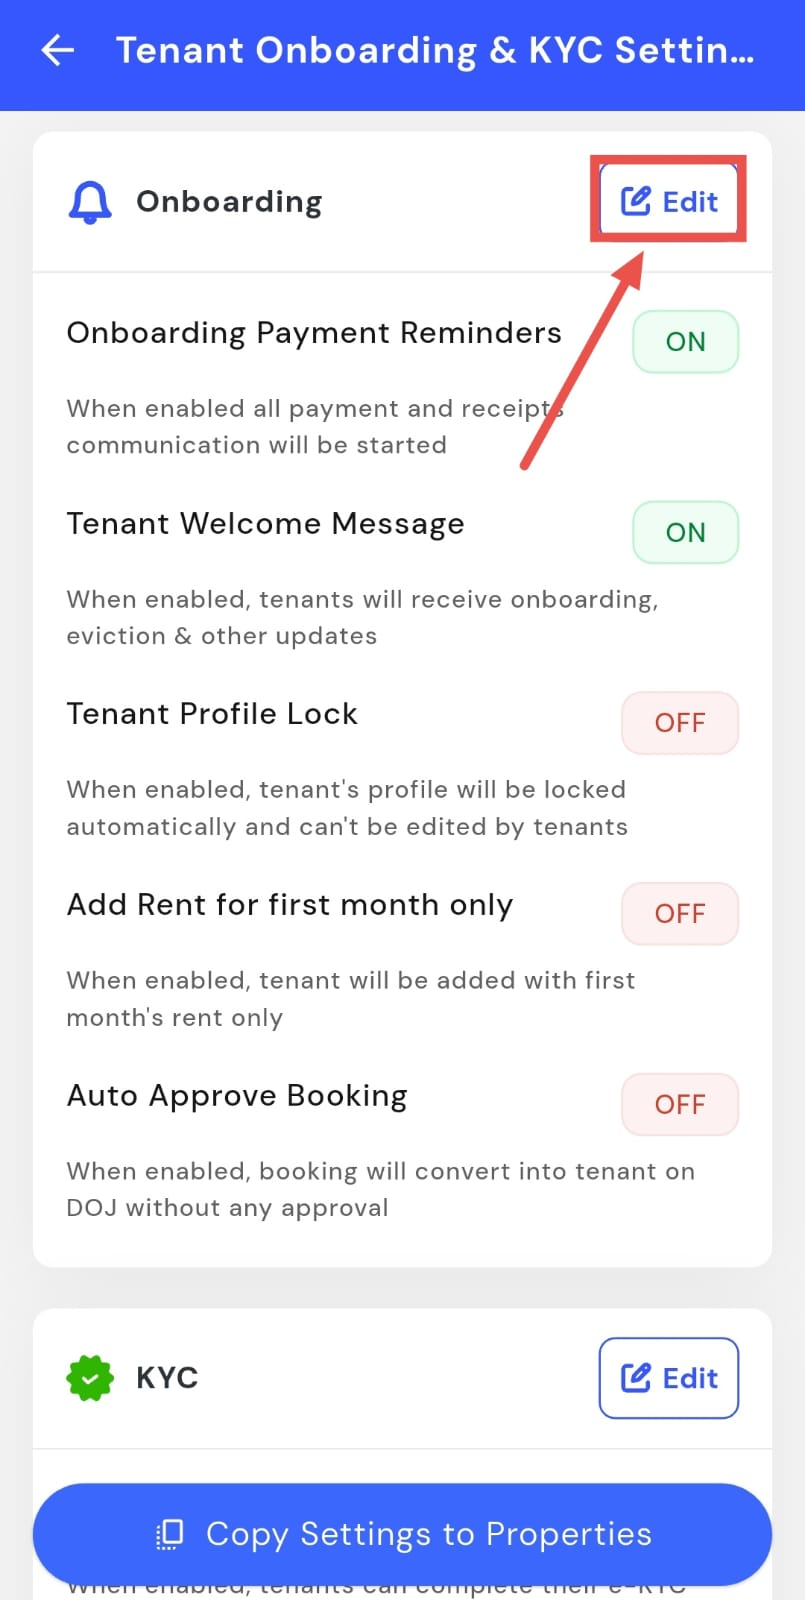
Step 3: Review and update onboarding options On this screen, you will see multiple onboarding and KYC options. Edit and update the settings as needed for your property.
-
Step 4: Save your changes After making the required updates, tap Confirm to save and apply the changes.
How do I enable or disable onboarding payment reminders?
Onboarding payment reminders help ensure tenants are informed about any payments due during the onboarding process. You can choose whether these reminders are sent, based on how you want to manage payment communication. Any changes you make will apply to future onboarding flows.
Here’s how you can manage this setting:
- Step 1: Open your profile Tap on your profile picture in the top-left corner of the screen to open Settings.
- Step 2: Go to Tenant Onboarding and KYC settings Scroll down on the screen and tap Tenant Onboarding and KYC settings to continue.
- Step 3: Edit onboarding settings In the onboarding section, tap Edit to view and update onboarding-related options.
- Step 4: Enable or disable onboarding payment reminders You will see the Onboarding Payment Reminders option here. Turn it on to start payment and receipt communication, or turn it off if you do not want reminders to be sent.
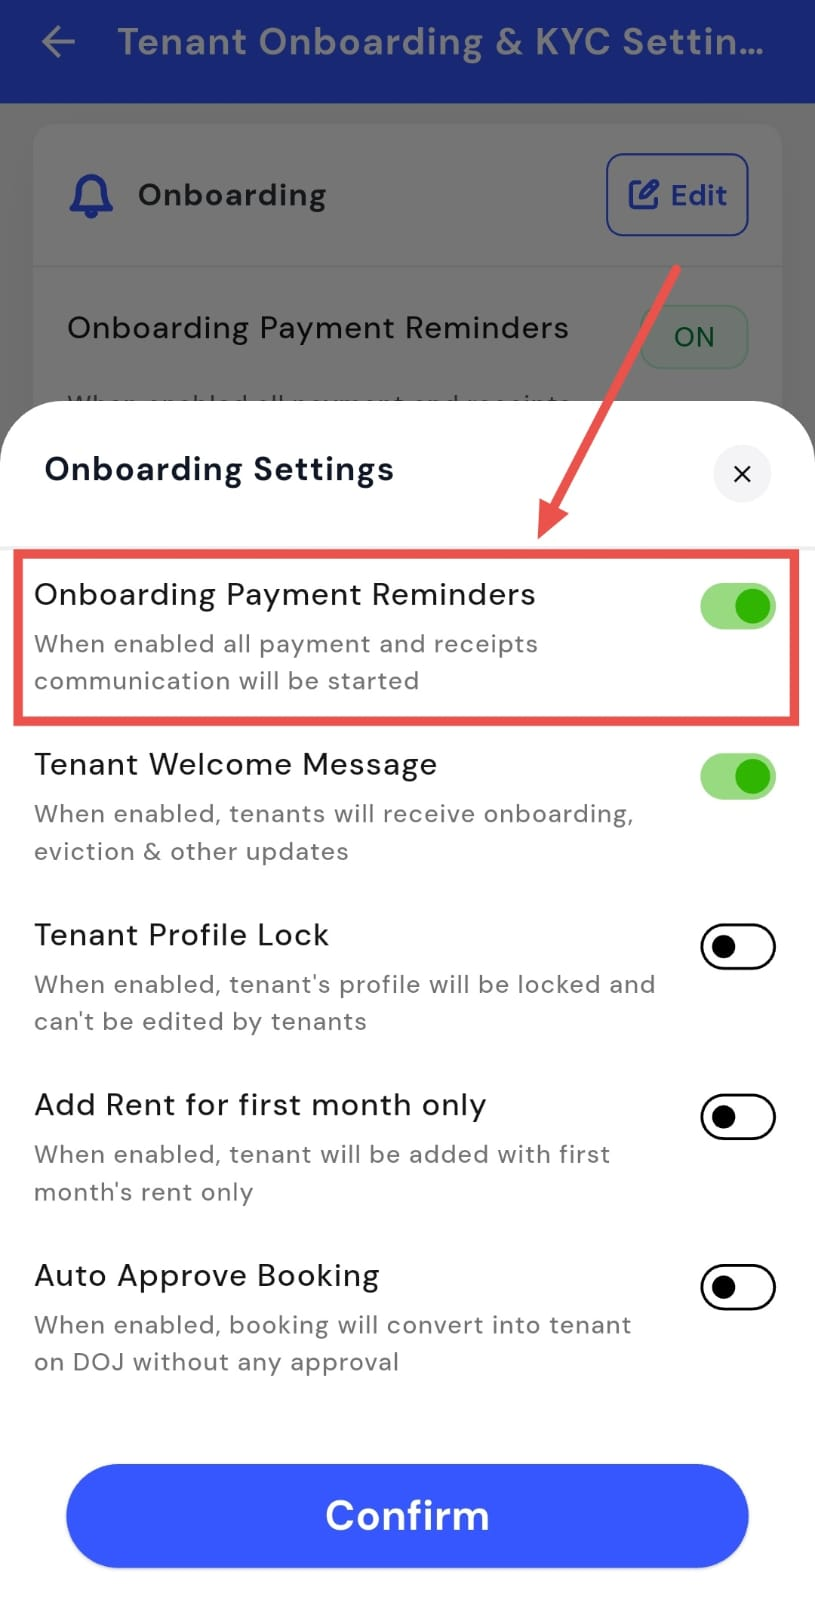
- Step 5: Confirm and save After making the change, tap Confirm to save and apply the updated setting.
How do I enable or disable the tenant welcome message?
The tenant welcome message helps keep tenants informed by sharing onboarding updates, eviction notices, and other important communication. You can decide whether these messages should be sent automatically. Any change you make will apply to future tenant communication.
Here’s how you can manage this setting:
- Step 1: Open your profile Tap on your profile picture in the top-left corner of the screen to open Settings.
- Step 2: Go to Tenant Onboarding and KYC settings Scroll down on the screen and select Tenant Onboarding and KYC settings to move to onboarding preferences.
- Step 3: Edit onboarding settings Once you’re on this screen, locate the onboarding section and tap Edit to make changes.
- Step 4: Enable or disable the tenant welcome message You will now see the Tenant Welcome Message option. Turn it on to send automatic updates to tenants, or turn it off if you prefer not to send them.
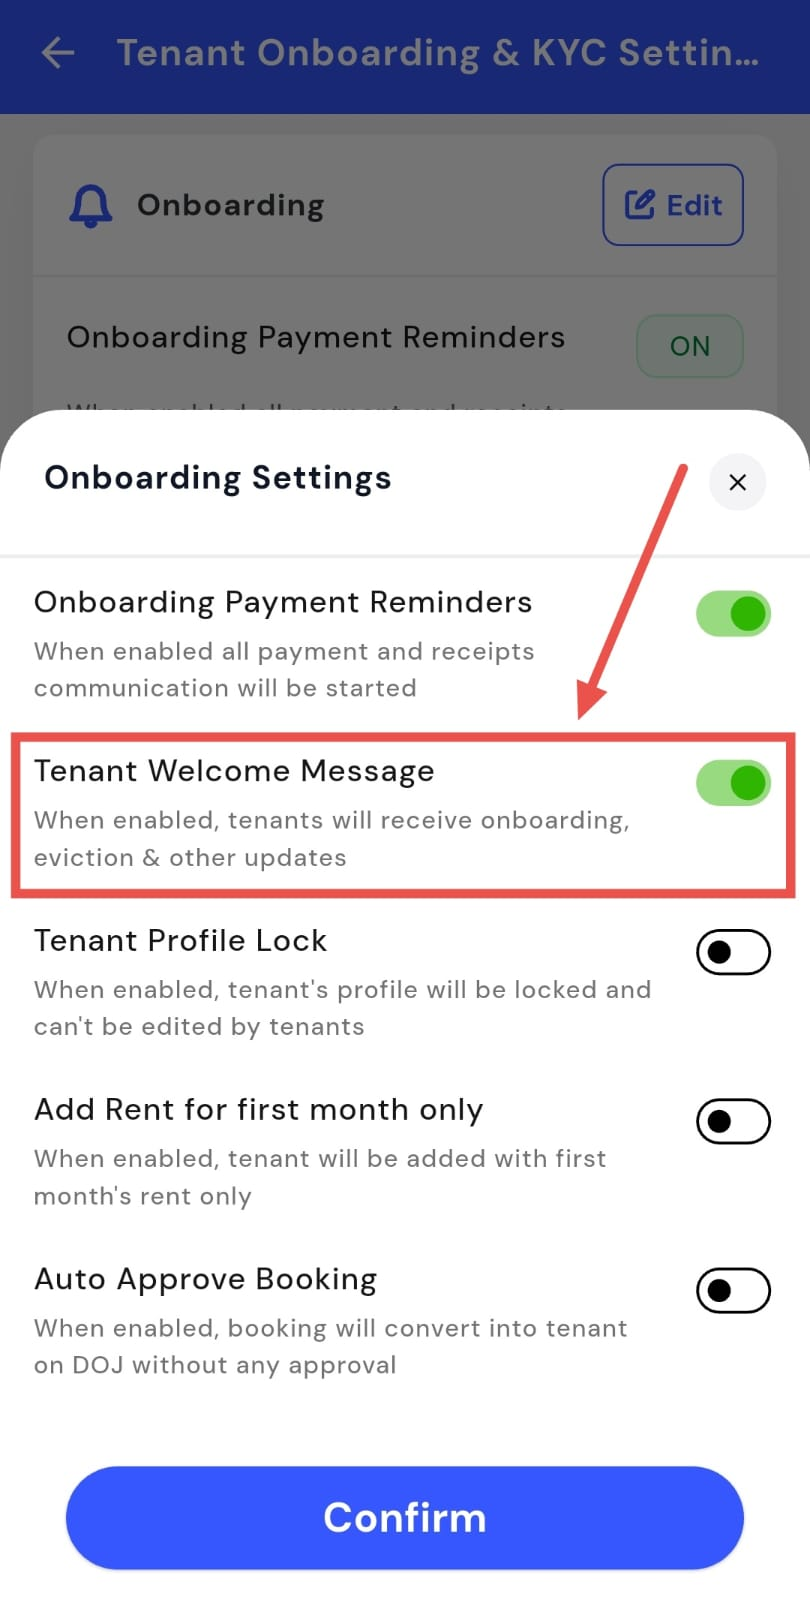
- Step 5: Confirm and save After updating the setting, tap Confirm to save and apply the change.
How do I enable or disable tenant profile lock?
Tenant profile lock helps maintain accurate tenant information by preventing tenants from editing their profile details. This is useful when you want to keep records consistent. You can turn this setting on or off anytime.
Here’s how you can manage this setting:
- Step 1: Open your profile Tap on your profile picture in the top-left corner of the screen to open Settings.
- Step 2: Go to Tenant Onboarding and KYC settings Scroll down and tap Tenant Onboarding and KYC settings to continue.
- Step 3: Edit onboarding settings On this screen, find the onboarding section and tap Edit to access the available options.
- Step 4: Enable or disable tenant profile lock You will see the Tenant Profile Lock option here. Turn it on to restrict profile edits, or turn it off to allow tenants to update their details.
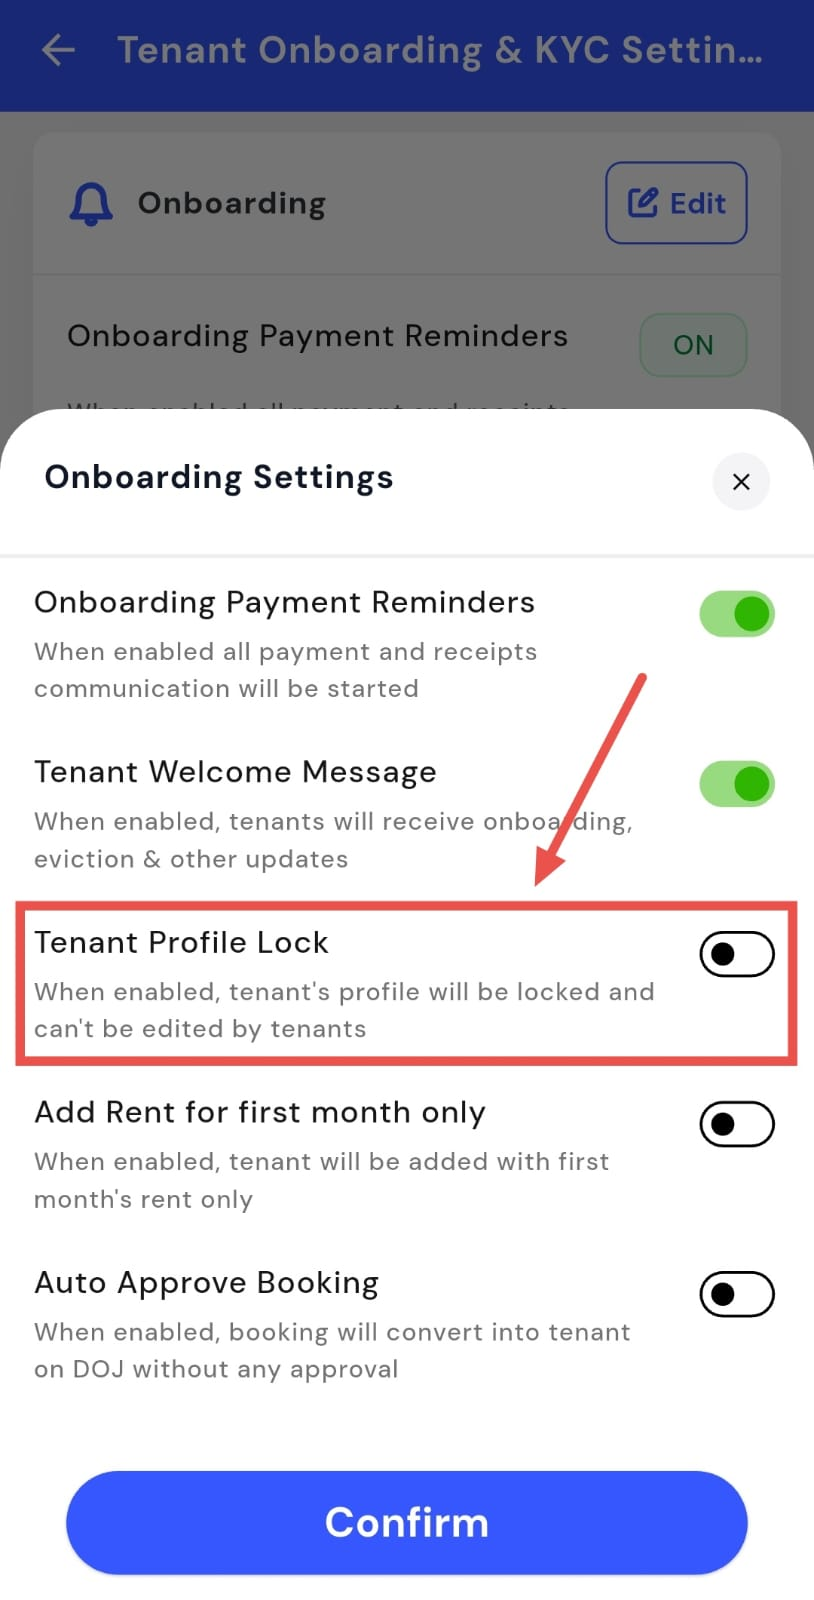
- Step 5: Confirm and save Once you’ve made the change, tap Confirm to save and apply the updated setting.
How do I enable or disable “add rent for first month only”?
This option ensures that tenants are added with only the first month’s rent during onboarding. It helps simplify rent setup, especially when full rent details are added later. You can enable or disable this based on your onboarding process.
Here’s how you can manage this setting:
- Step 1: Open your profile Tap on your profile picture in the top-left corner of the screen to open Settings.
- Step 2: Go to Tenant Onboarding and KYC settings Scroll down and tap Tenant Onboarding and KYC settings to move forward.
- Step 3: Edit onboarding settings In the onboarding section, tap Edit to view and update onboarding-related options.
- Step 4: Enable or disable “Add rent for first month only” On this screen, you will see the Add Rent for First Month Only option. Turn it on if you want tenants to be added with only the first month’s rent applied.
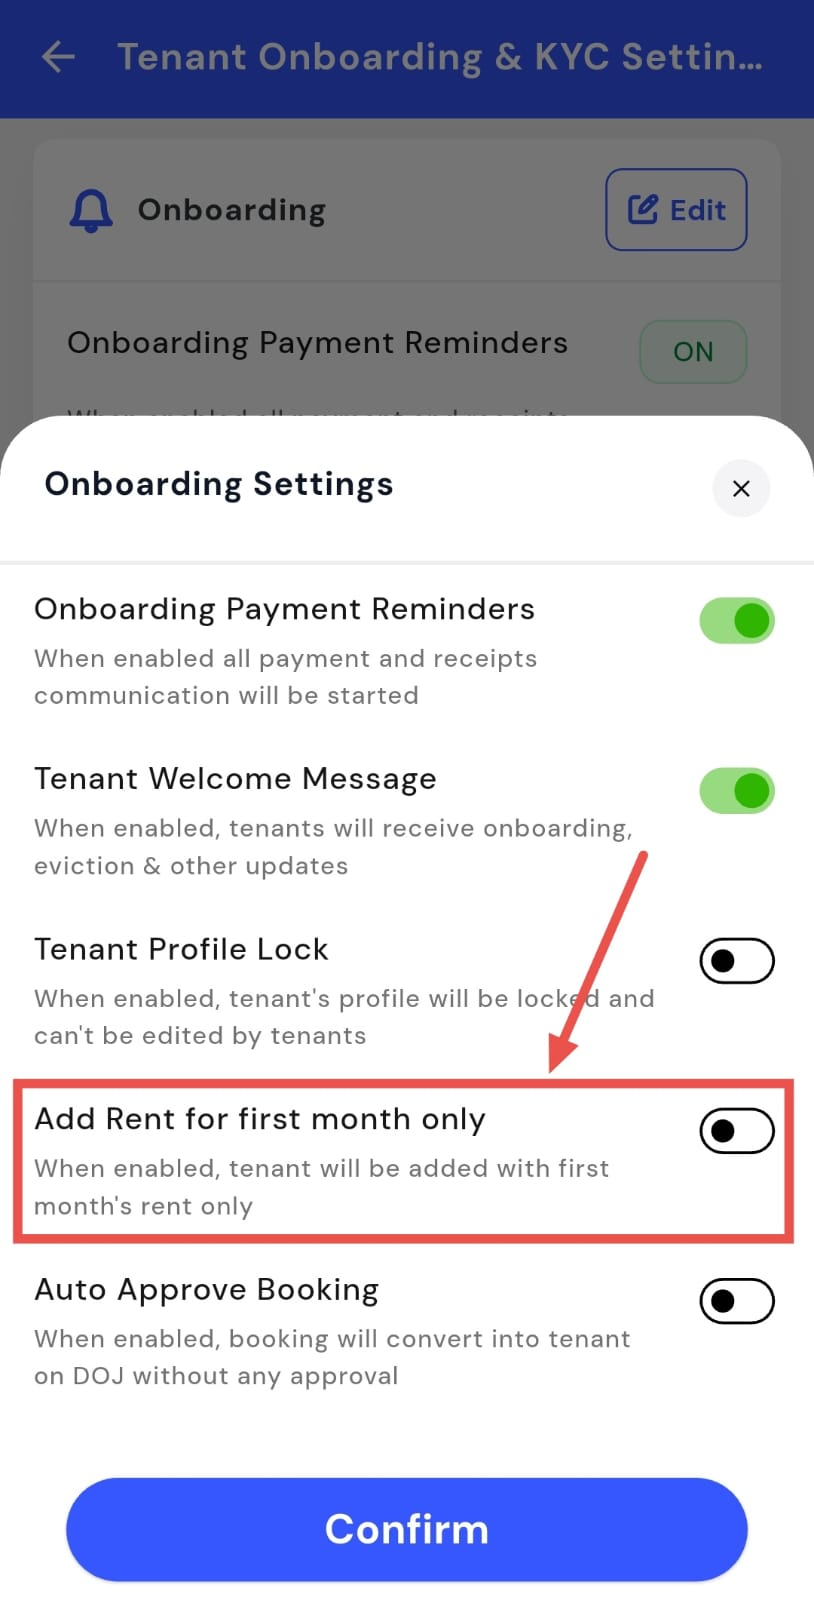
- Step 5: Confirm and save After making the update, tap Confirm to save and apply the change.
How do I enable or disable auto-approve bookings?
Auto-approve bookings allow bookings to be automatically converted into tenants on the joining date. This reduces manual work and helps speed up onboarding. You can control this setting based on your property workflow.
Here’s how you can manage this setting:
- Step 1: Open your profile Tap on your profile picture in the top-left corner of the screen to open Settings.
- Step 2: Go to Tenant Onboarding and KYC settings Scroll down and tap Tenant Onboarding and KYC settings to continue.
- Step 3: Edit onboarding settings On this screen, tap Edit in the onboarding section to access the options.
- Step 4: Enable or disable auto-approve bookings You will now see the Auto-Approve Bookings option. Turn it on to automatically convert bookings into tenants, or turn it off to require manual approval.
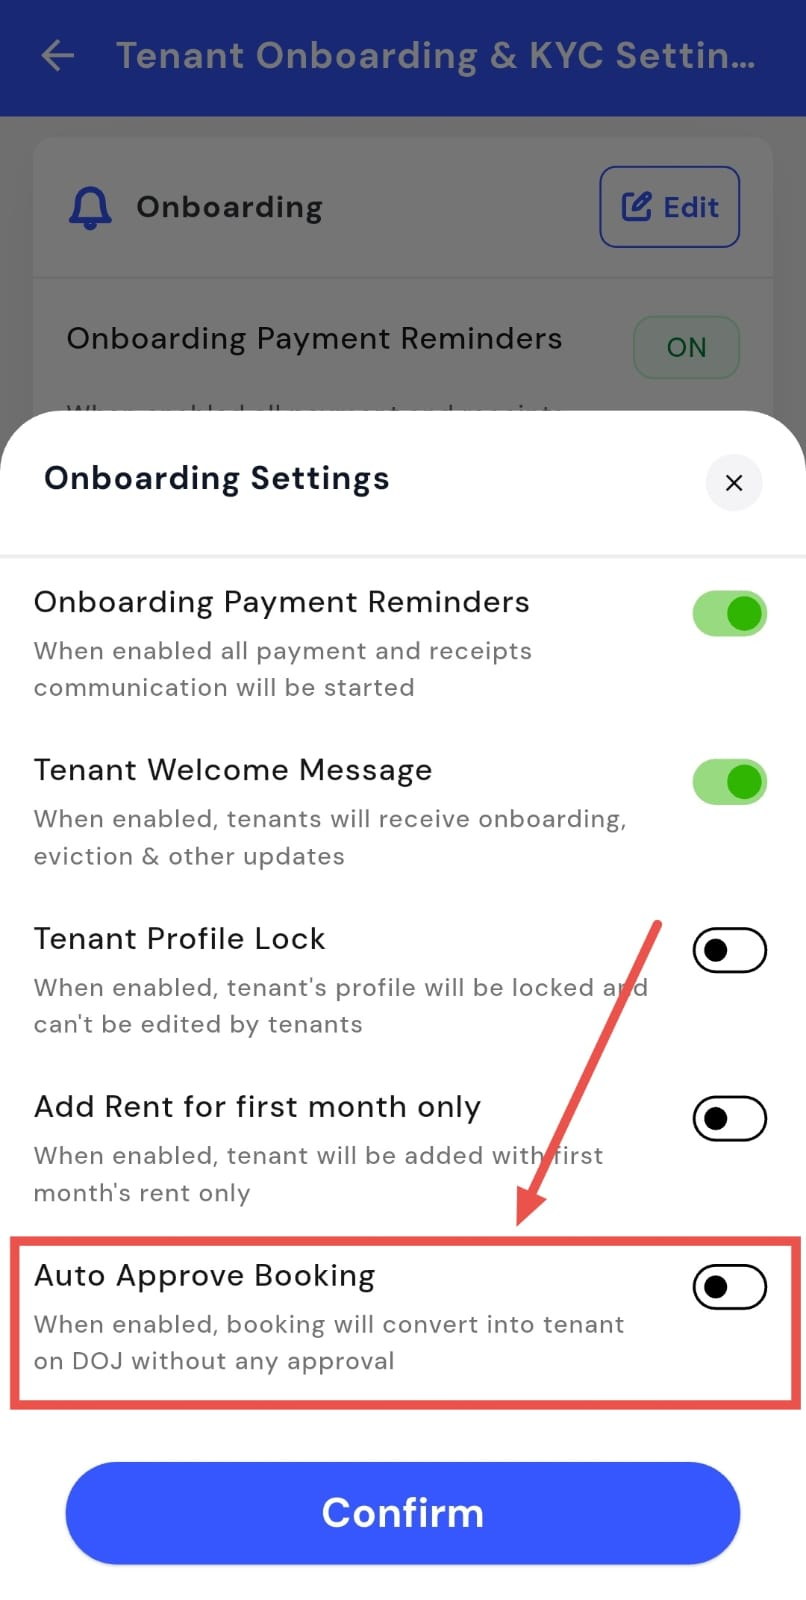
- Step 5: Confirm and save Once you’re done, tap Confirm to save and apply the updated setting.
How do I enable or disable KYC for tenants?
KYC settings let you control whether tenants are required to complete eKYC during onboarding. You can choose if KYC is needed and decide which tenants it applies to, based on your property rules. Any changes you make will apply to future tenant check-ins.
Here’s how you can manage this setting:
- Step 1: Open your profile Tap on your profile picture in the top-left corner of the screen to open Settings.
- Step 2: Go to Tenant Onboarding and KYC settings Scroll down on the screen and tap Tenant Onboarding and KYC Settings to continue.
- Step 3: Edit KYC settings On this screen, go to the KYC section and tap Edit to make changes.

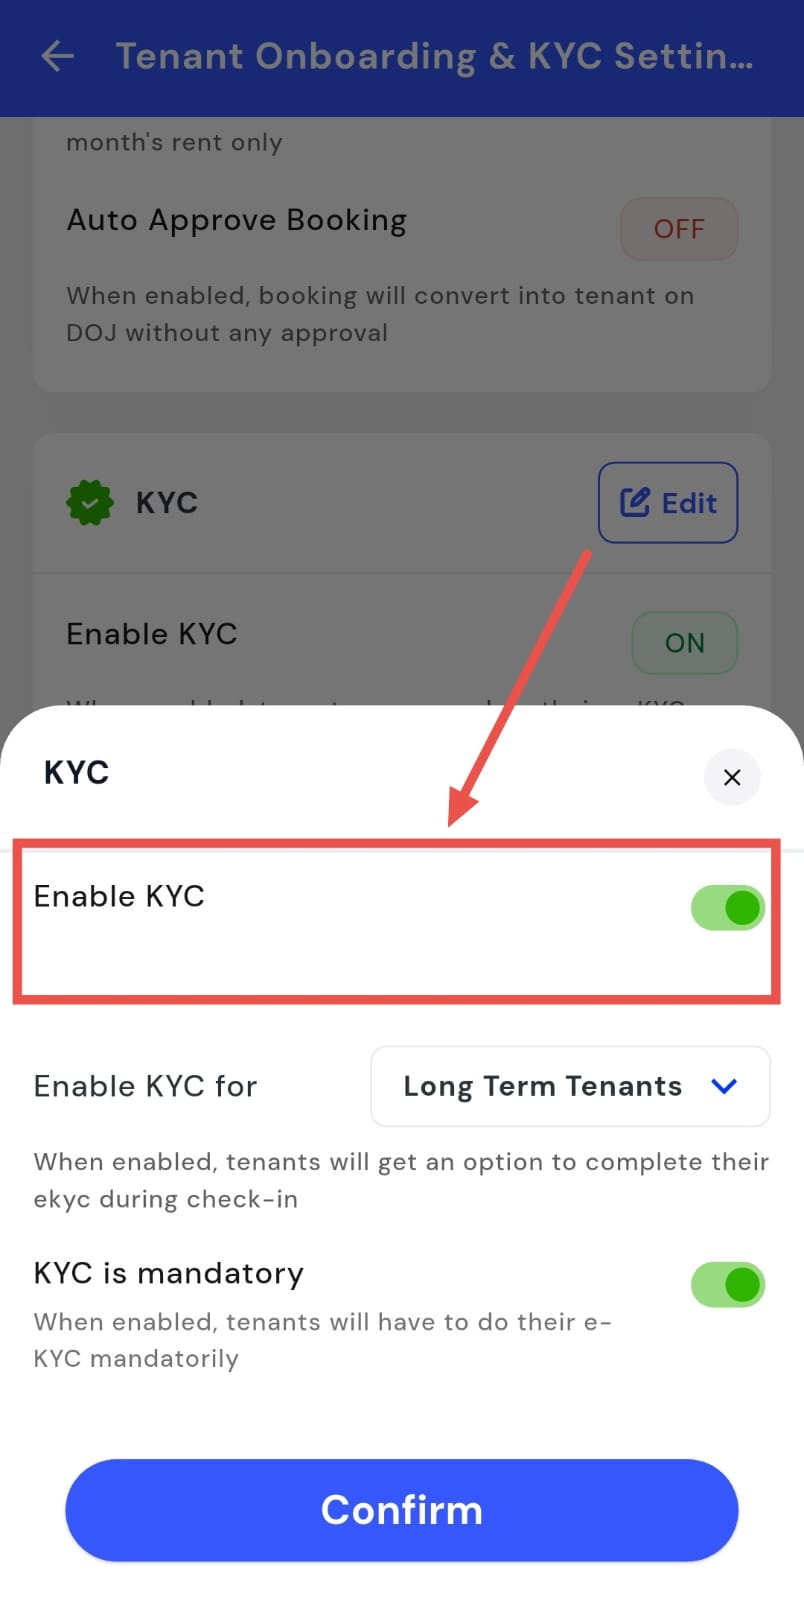
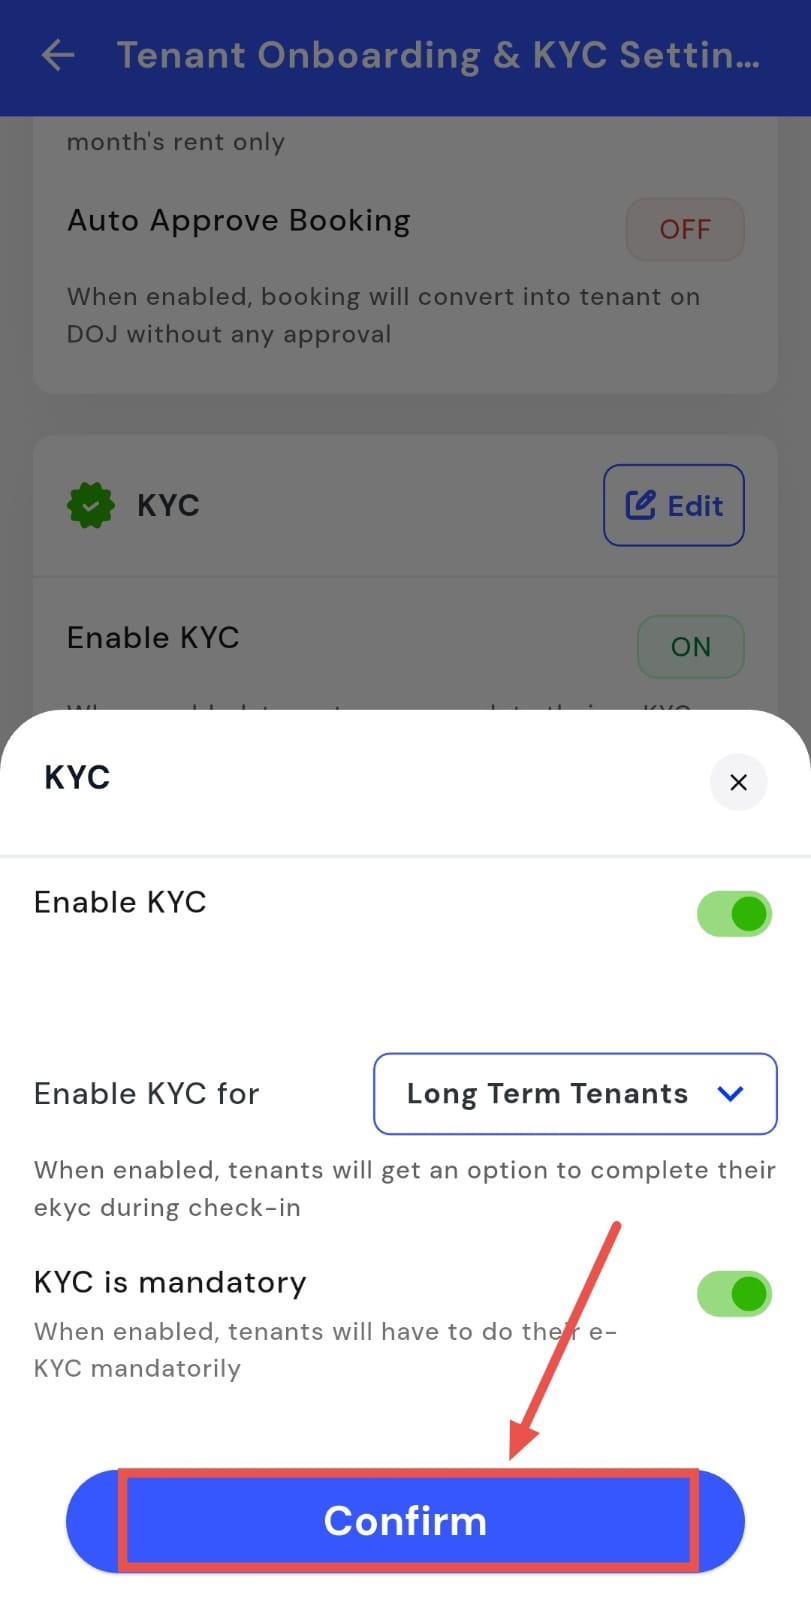
- Step 4: Enable or disable KYC You will first see an option to enable KYC. You can switch it on or off depending on your requirement.
- Step 5: Choose which tenants KYC applies to Once KYC is enabled, select whether it should apply to all tenants, short-term tenants, long-term tenants, or specific tenant types.
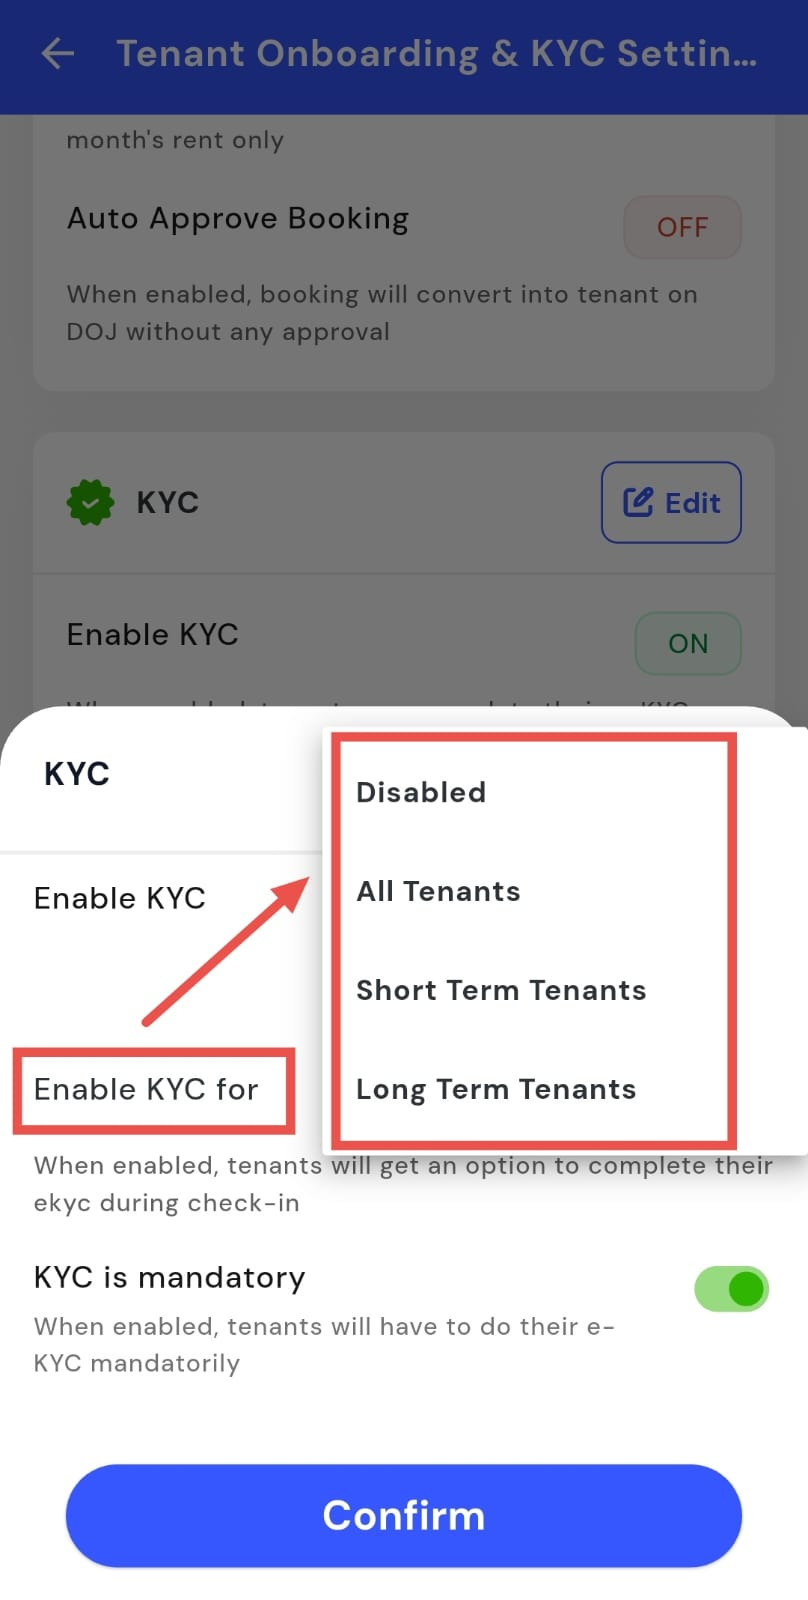
- Step 6: Confirm and save After making the required changes, tap Confirm to save and apply the updated settings.
How do I make KYC mandatory for tenants?
Making KYC mandatory ensures that tenants complete their eKYC before or during onboarding. This helps verify tenant details and keeps your records compliant and accurate. Once enabled, tenants will not be able to skip the KYC step.
Here’s how you can update this setting:
- Step 1: Open your profile Tap on your profile picture in the top-left corner of the screen to open Settings.
- Step 2: Go to Tenant Onboarding and KYC settings Scroll down on the screen and tap Tenant Onboarding and KYC Settings to continue.
- Step 3: Edit KYC settings On this screen, go to the KYC section and tap Edit to make changes.
- Step 4: Enable mandatory KYC You will see an option to make KYC mandatory. Turn this on so tenants are required to complete their eKYC during onboarding.
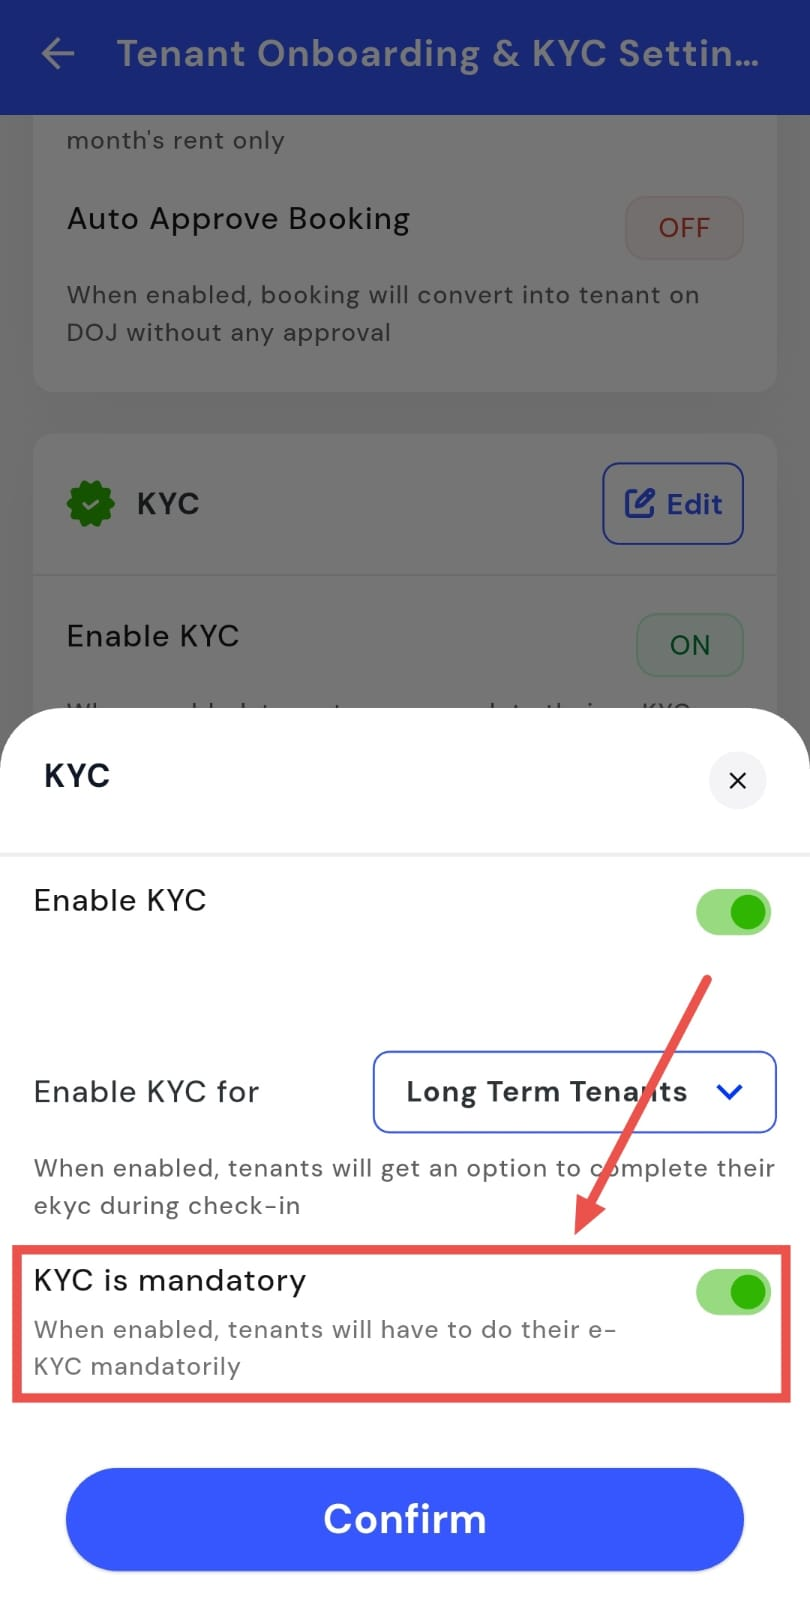
- Step 5: Confirm and save After making the required change, tap Confirm to save and apply the updated setting.
How do I enable or disable mandatory stamp for tenant agreement signing?
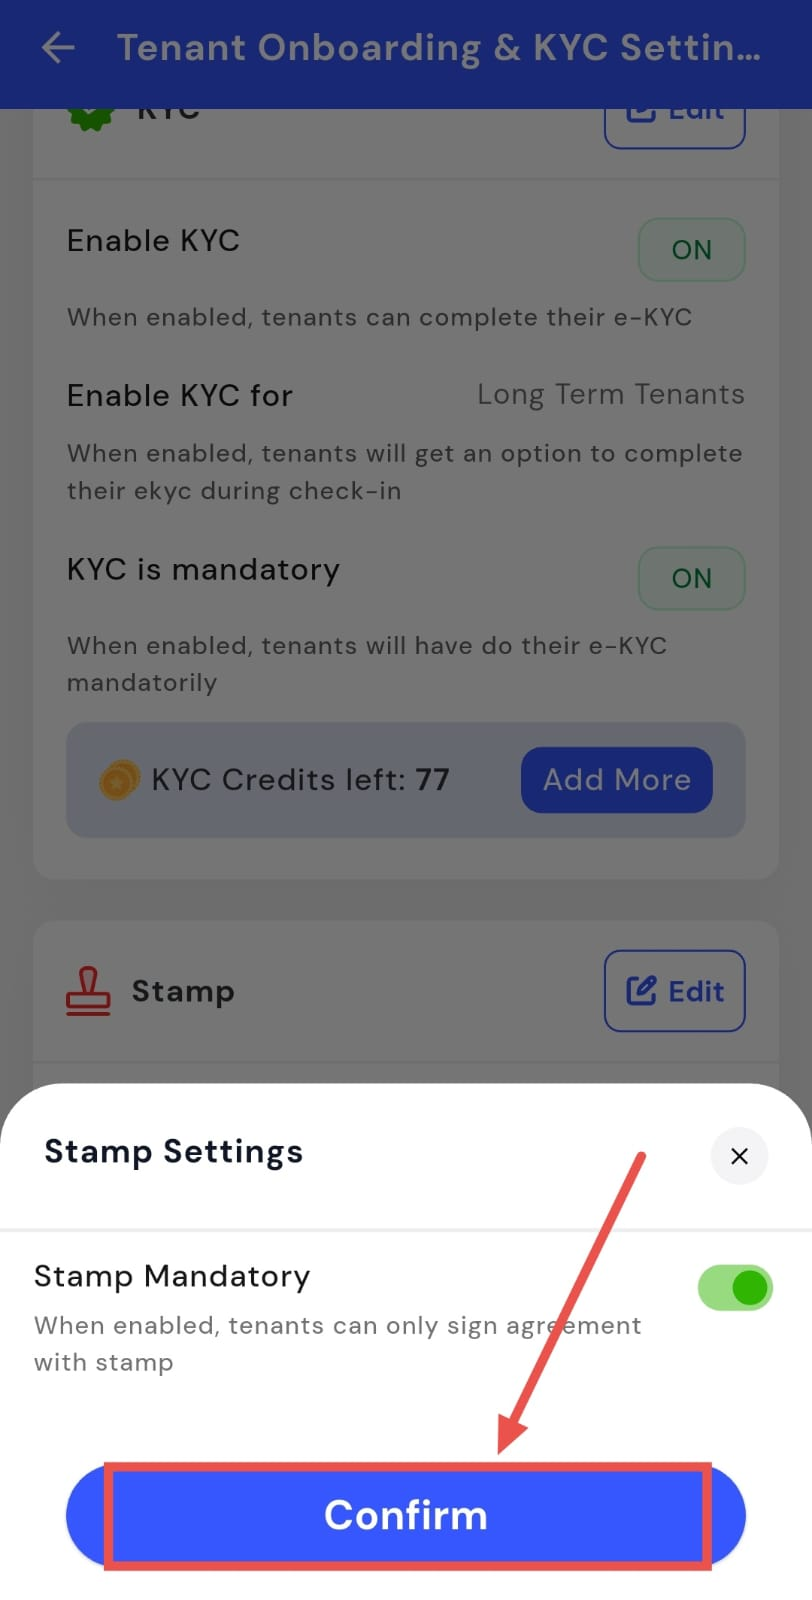
Mandatory stamp settings help you control how tenant agreements are signed. When this option is enabled, tenants can sign agreements only using the required stamp. You can turn this setting on or off based on your agreement and compliance needs.
Here’s how you can manage this setting:
- Step 1: Open your profile Tap on your profile picture in the top-left corner of the screen to open Settings.
- Step 2: Go to Tenant Onboarding and KYC settings Scroll down on the screen and tap Tenant Onboarding and KYC settings to continue.
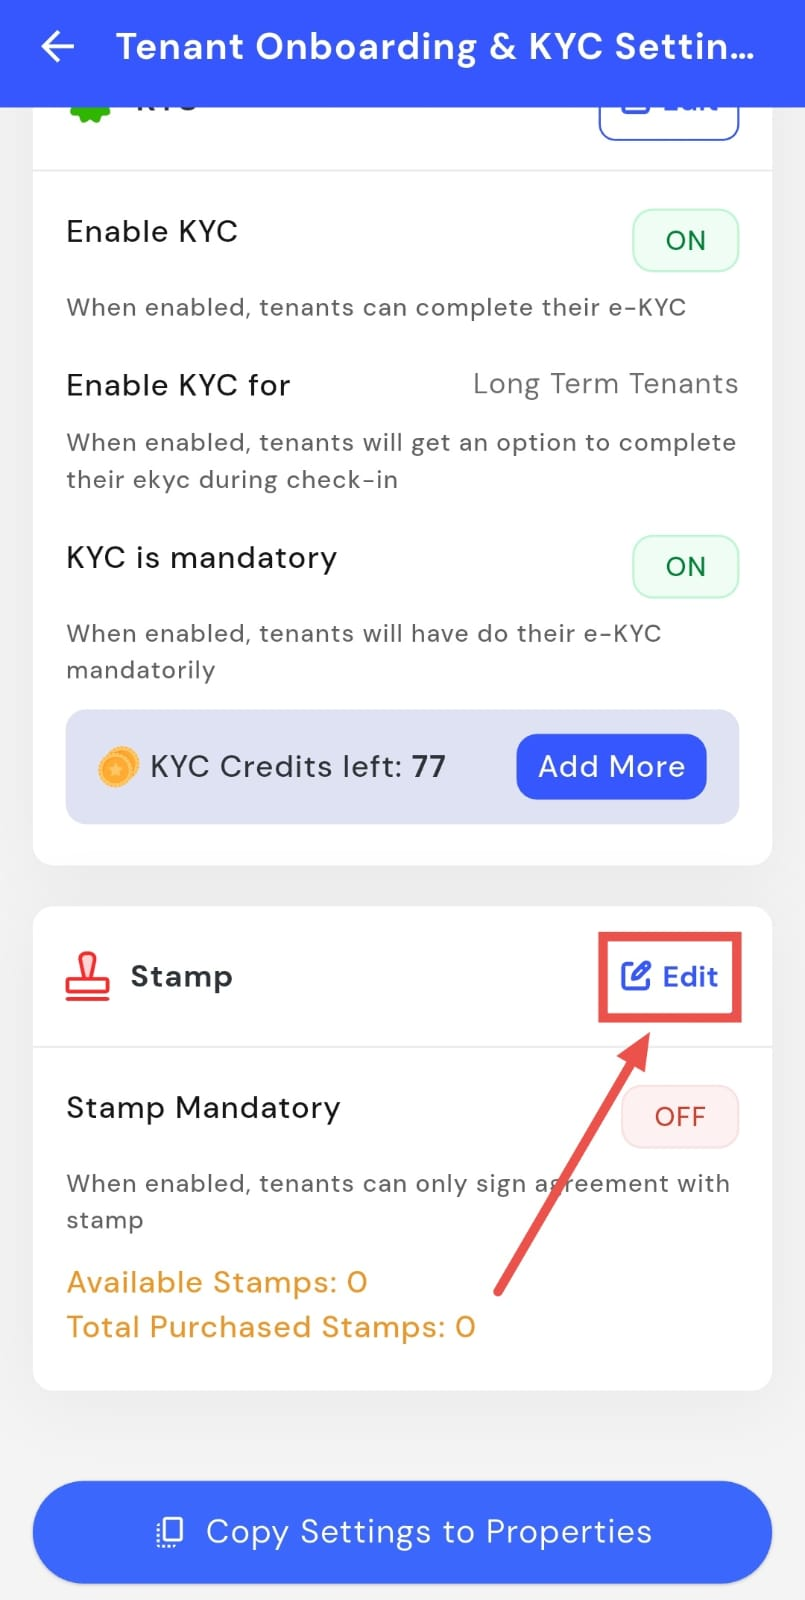
- Step 3: Edit stamp settings On this screen, go to the KYC section, then move to the Stamp section and tap Edit.
- Step 4: Enable or disable mandatory stamp You will see an option to make the stamp mandatory. Turn it on to require the stamp for agreement signing, or turn it off if the stamp is not mandatory.
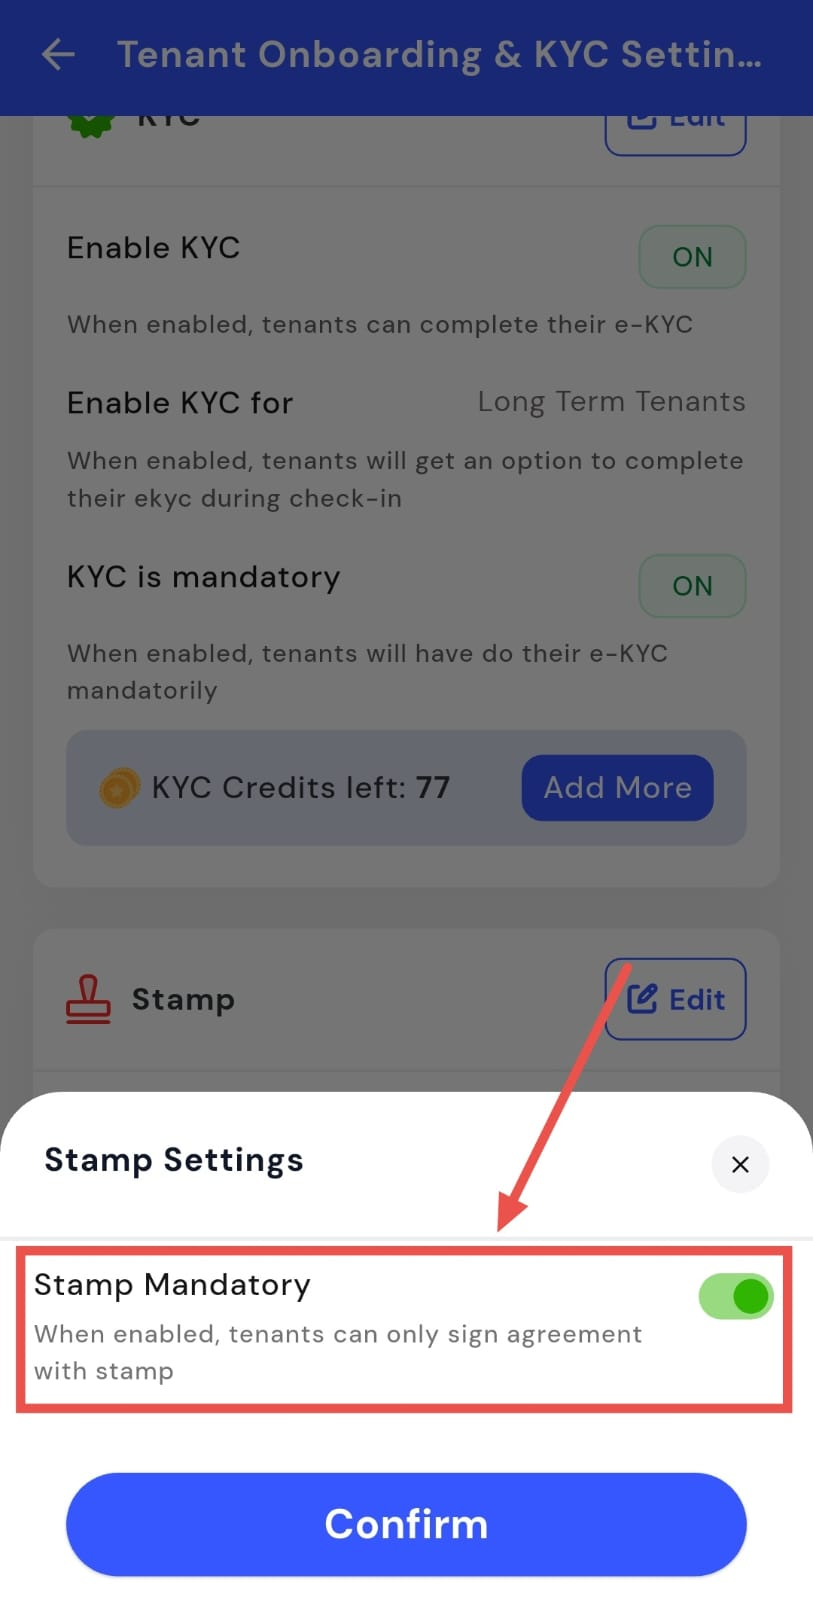
- Step 5: Confirm and save After making the change, tap Confirm to save and apply the updated settings.