RentOk Release Notes - 20th Nov, 2025
Hello! This update introduces a powerful new way to track property items during tenant onboarding, giving both you and your tenants complete transparency. We're also rolling out the much-awaited Smart Attendance feature for the Manager App.
Move-in Checklist with Inventory - Track every item, prevent disputes later
We're launching a brand new Move-in Checklist feature, fully integrated with inventory management. When a new tenant moves in, they can now verify the condition of every item provided in their room, right from the check-in link.
Highlights
-
Track Room Inventory: List all items in a room, from ACs and TVs to chairs and almirahs.
-
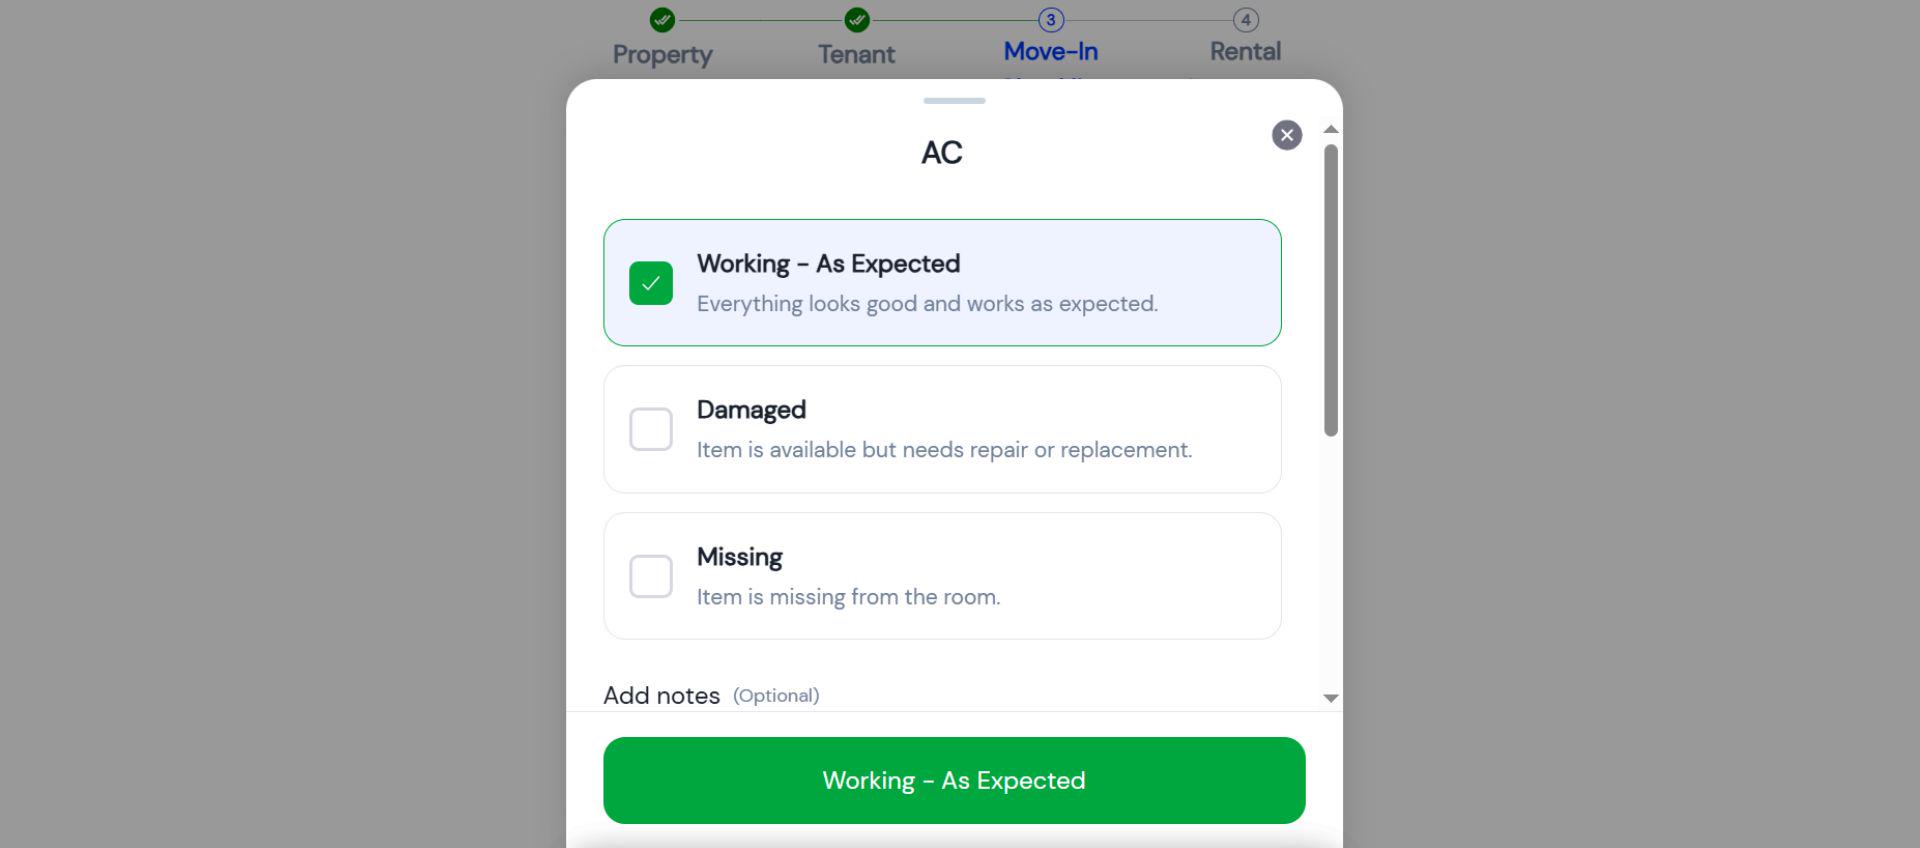
Tenant Verification: Tenants can mark each item as "Working," "Damaged," or "Missing" during move-in.
-
Add Photo Proof: Tenants can upload photos of damaged items, creating a clear visual record from day one.
-
Auto-Create Complaints: If an item is marked as "Damaged" or "Missing," a complaint ticket is automatically generated for your team to resolve.
How to try
- Step 1: Log in to the web version Open the web version of the app and enter your credentials to log in.
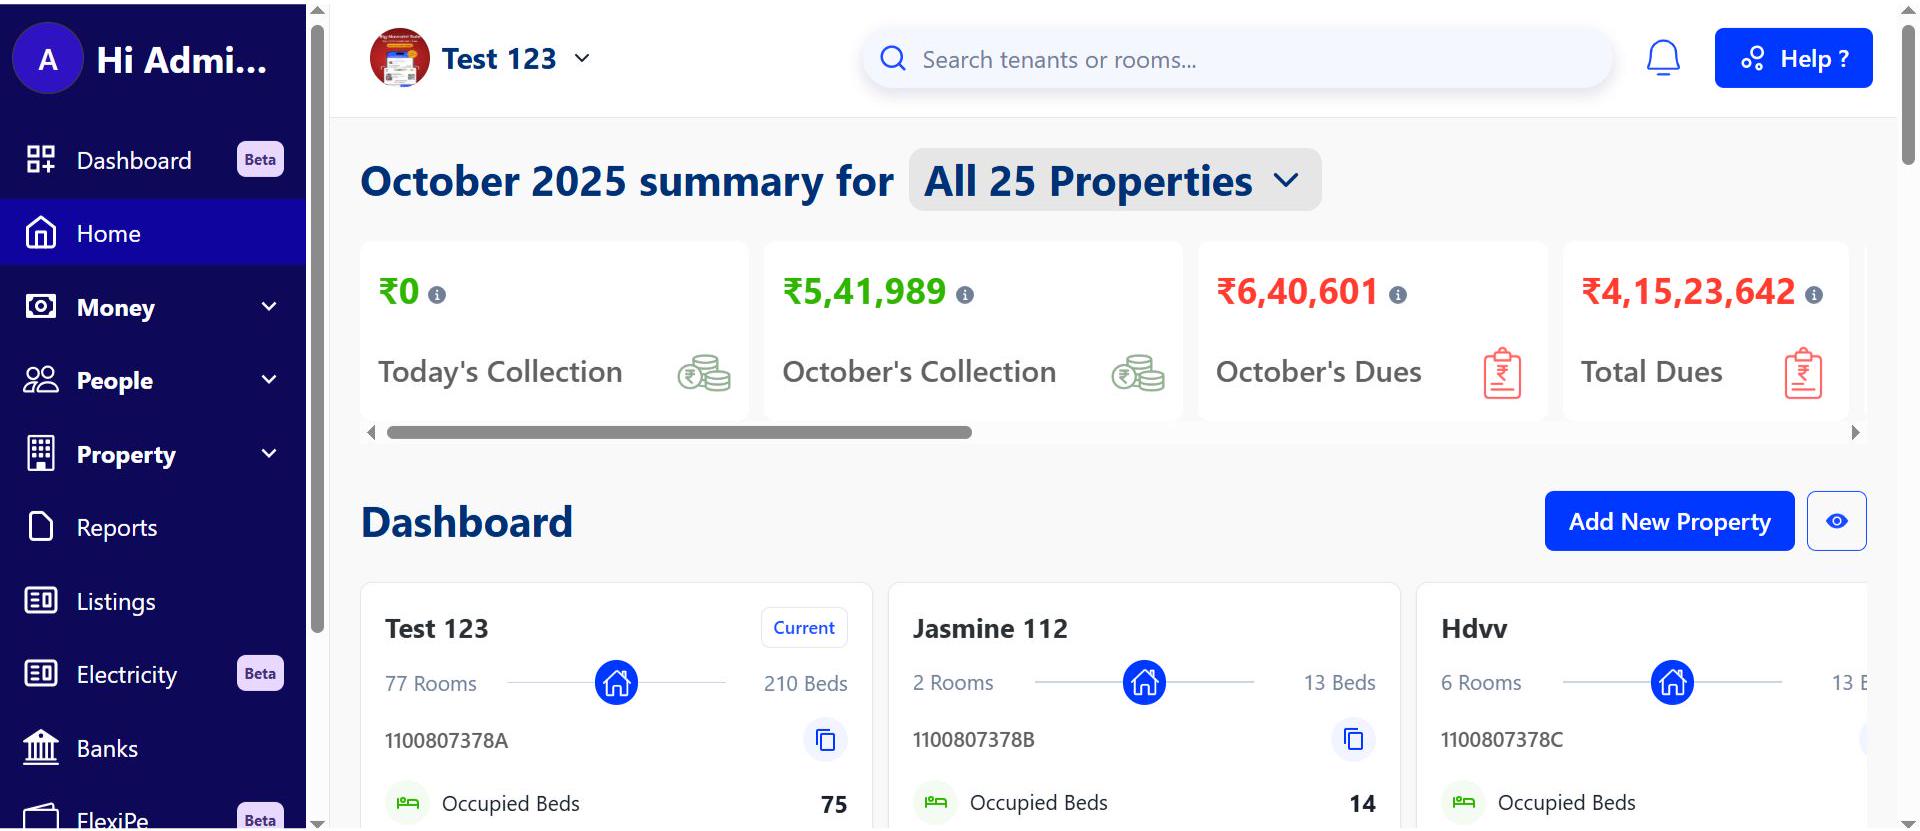
- Step 2: Go to the Home page After logging in, the home page gives you an overview of your account.
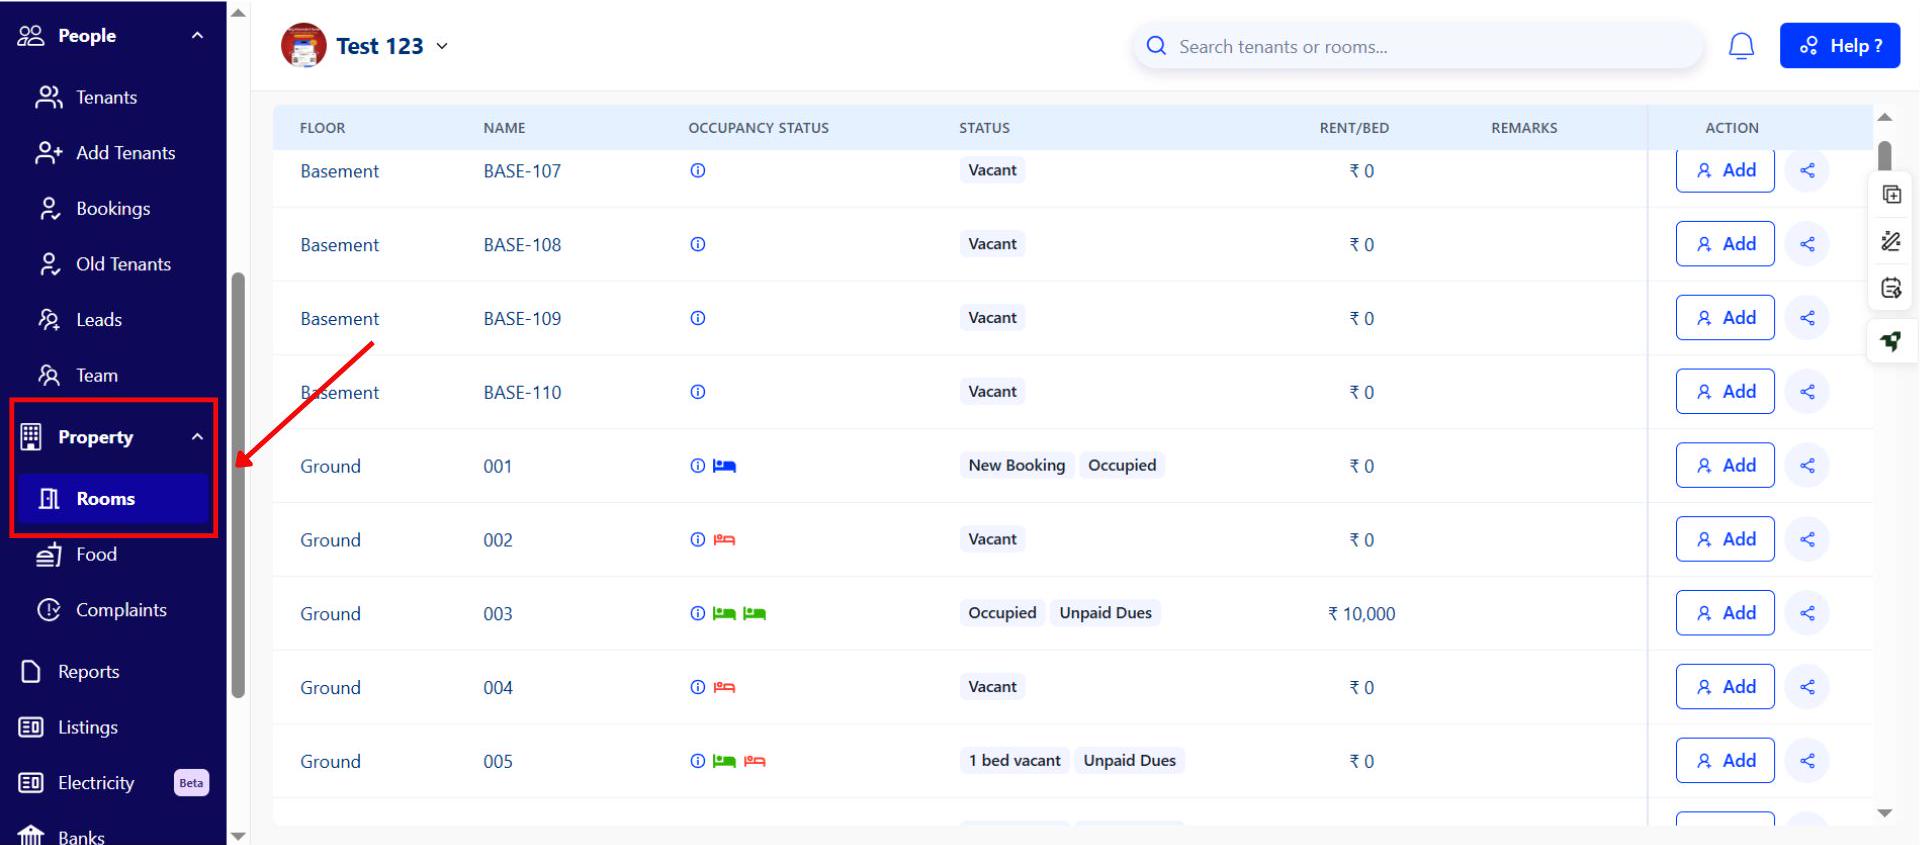
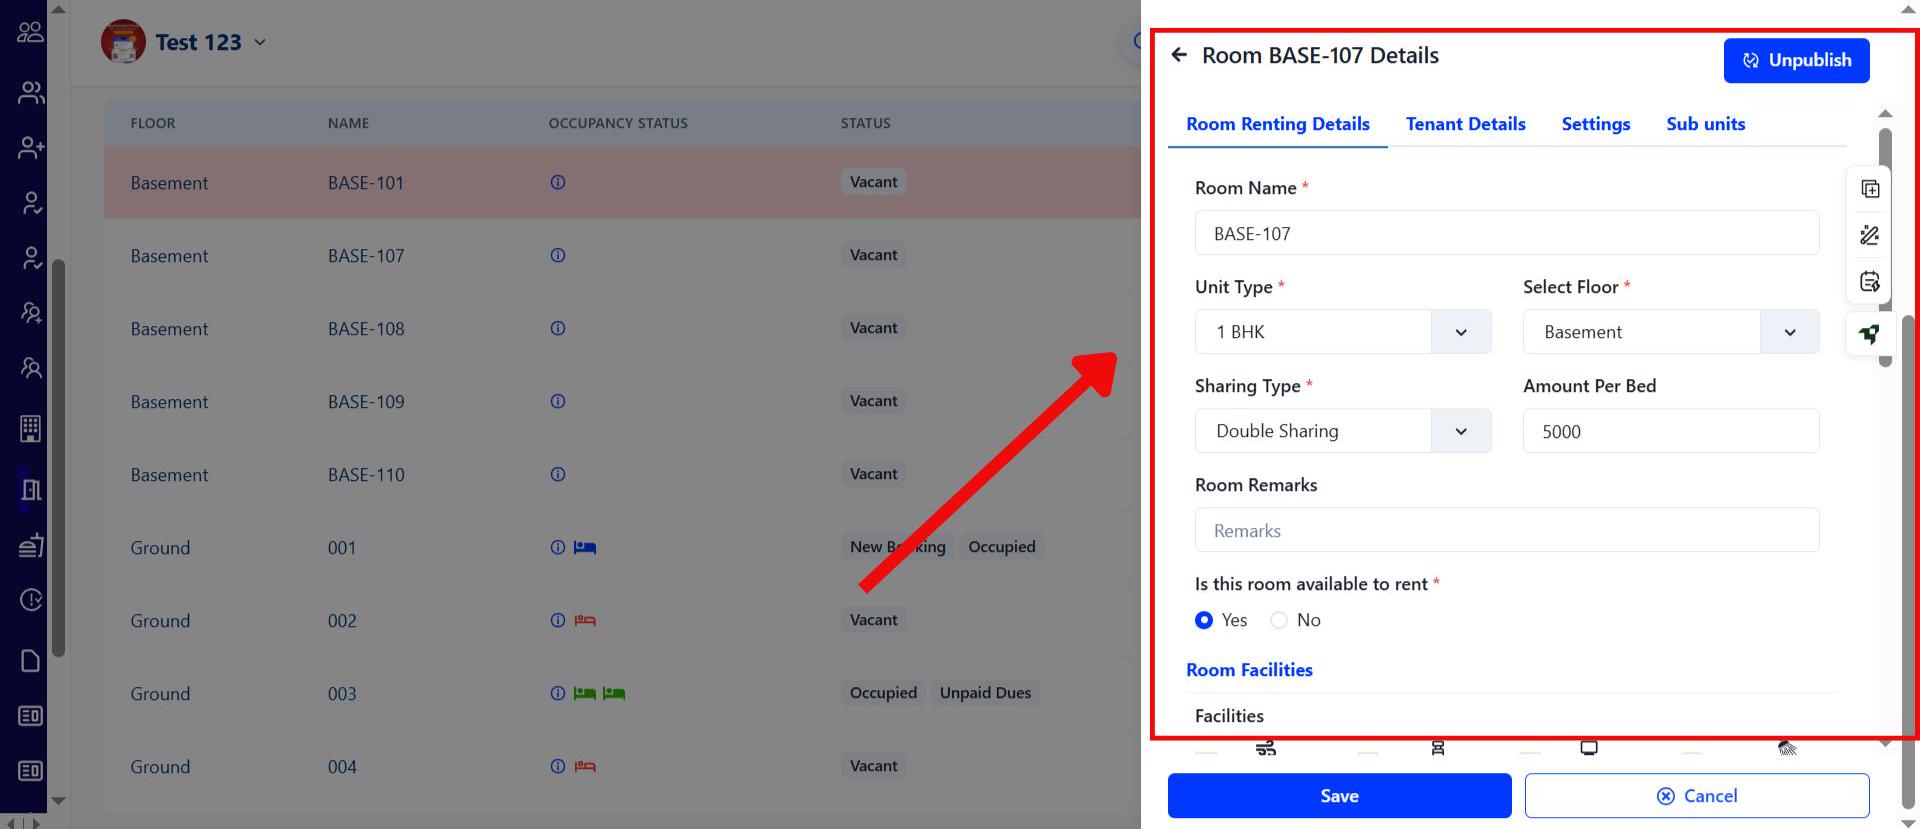
- Step 3: Go to the Property section, open Rooms, and click Add New Room. Enter all required room details, including facilities and other necessary information. Click Save.
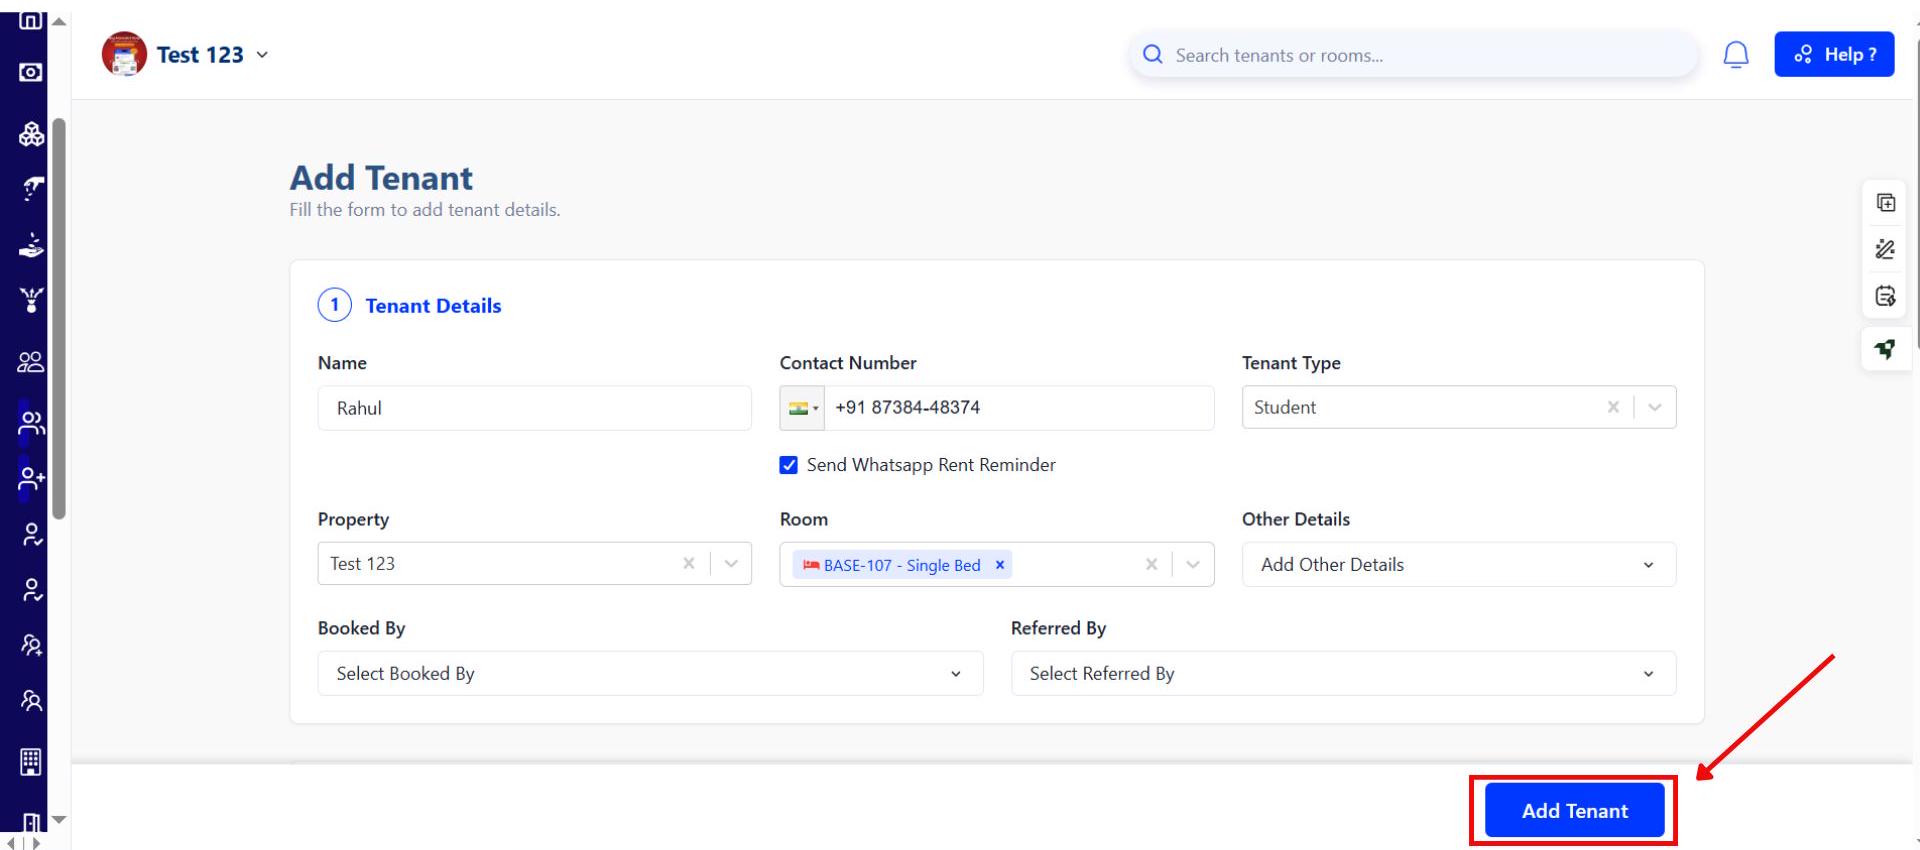
- Step 4: Now go to the People section and click Add Tenant. Fill in all tenant details and click Add Tenant to save.
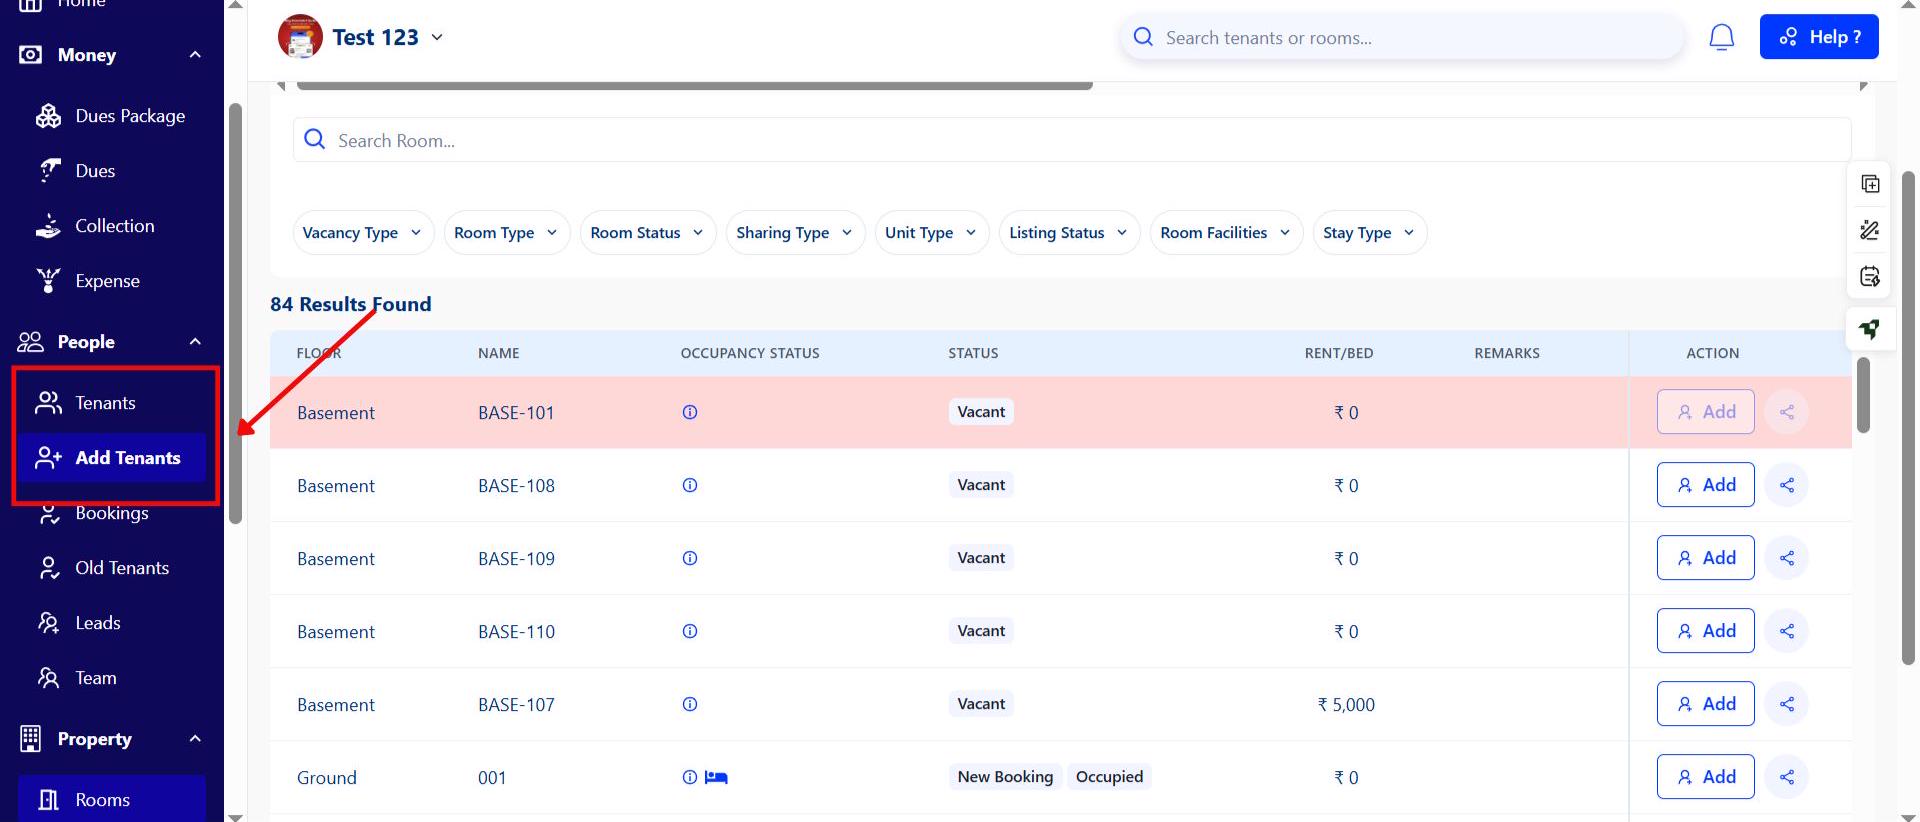
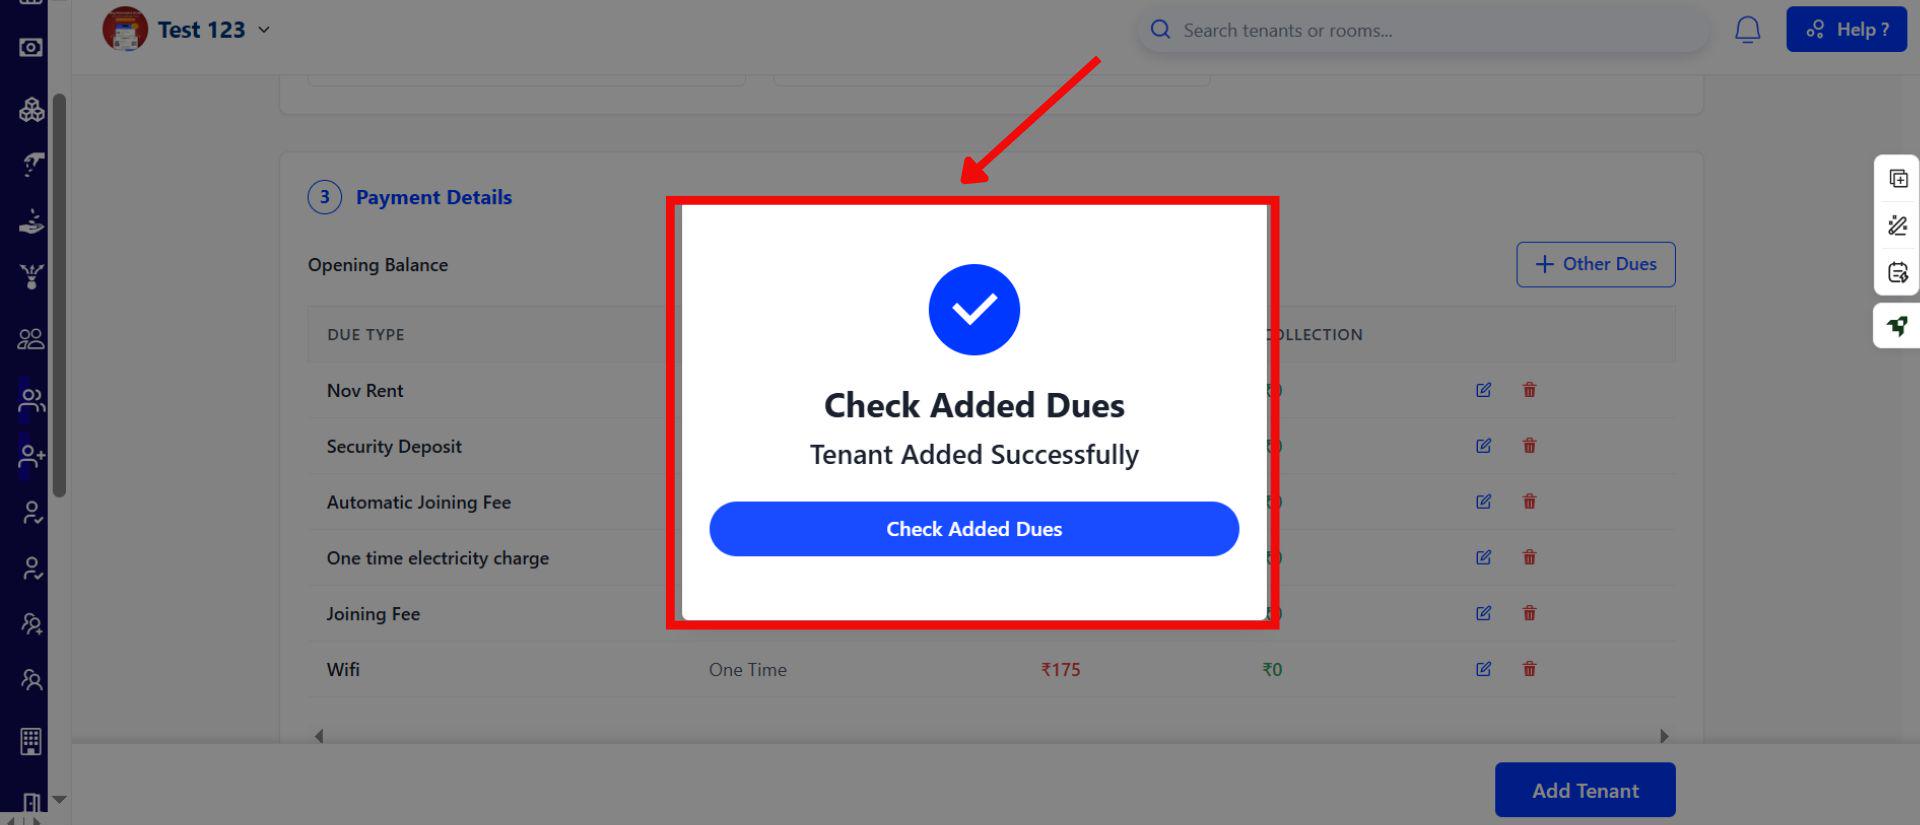
- Step 5: After saving, you will see an option to Check Added Dues. Click on it and you’ll be taken to the tenant’s profile. Scroll down and look for the Web Check-in Link.
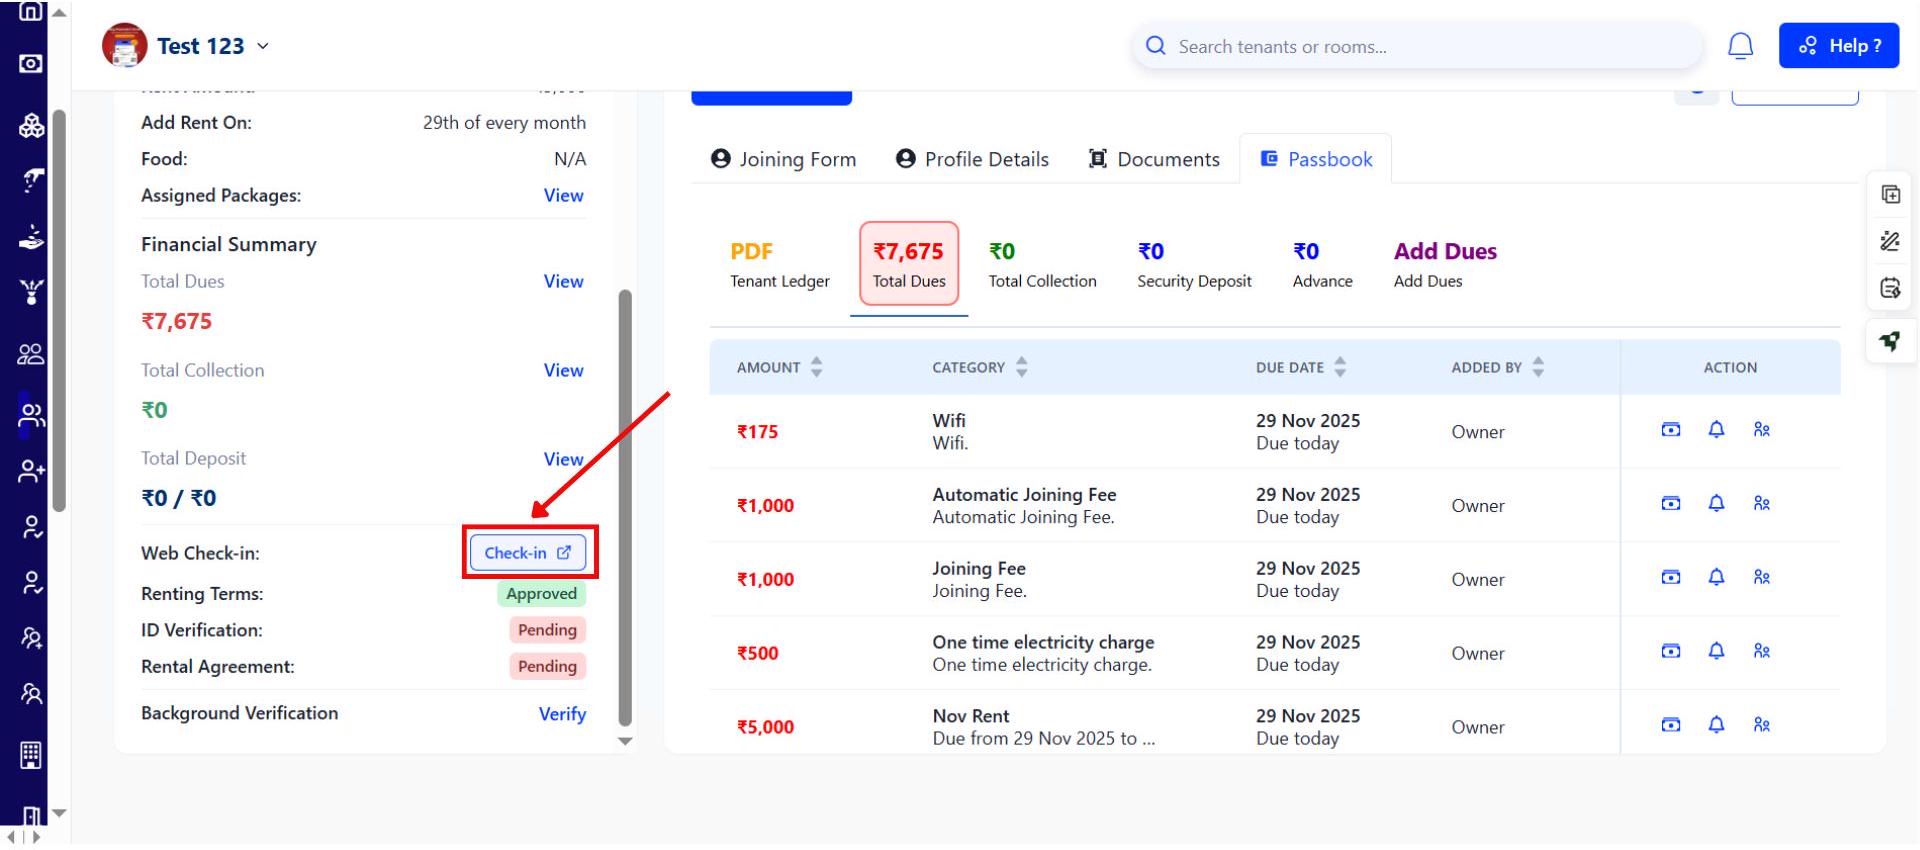
- Step 6: Click on the link, choose to either open the KYC form or send it via WhatsApp, and begin the KYC process.
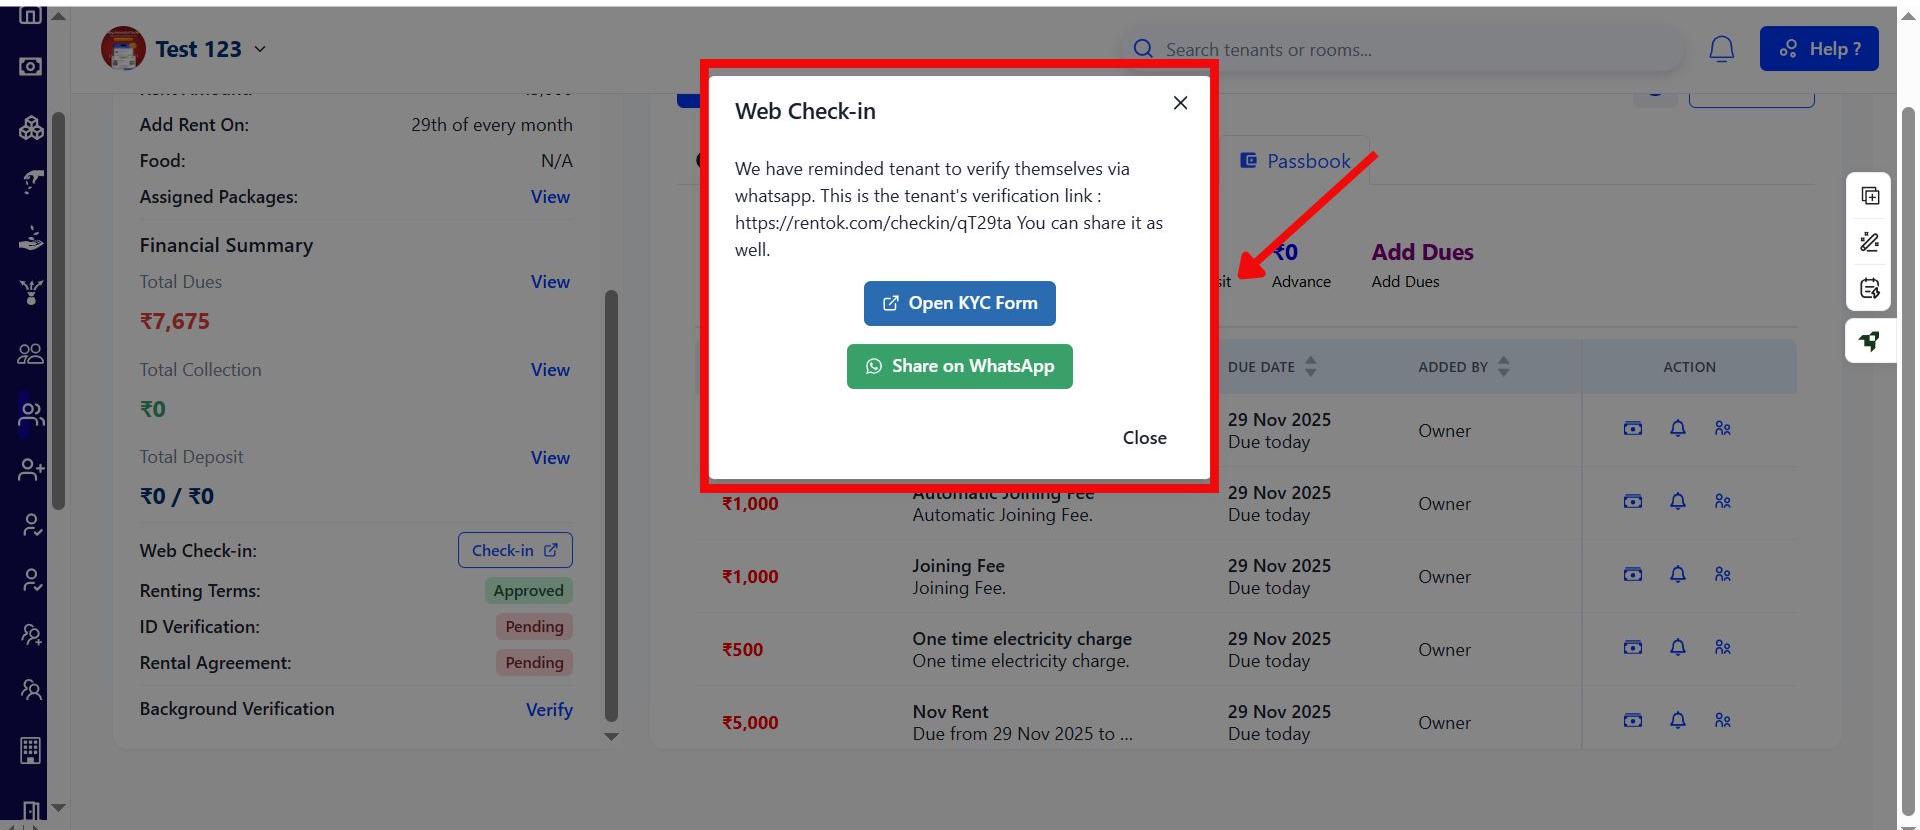
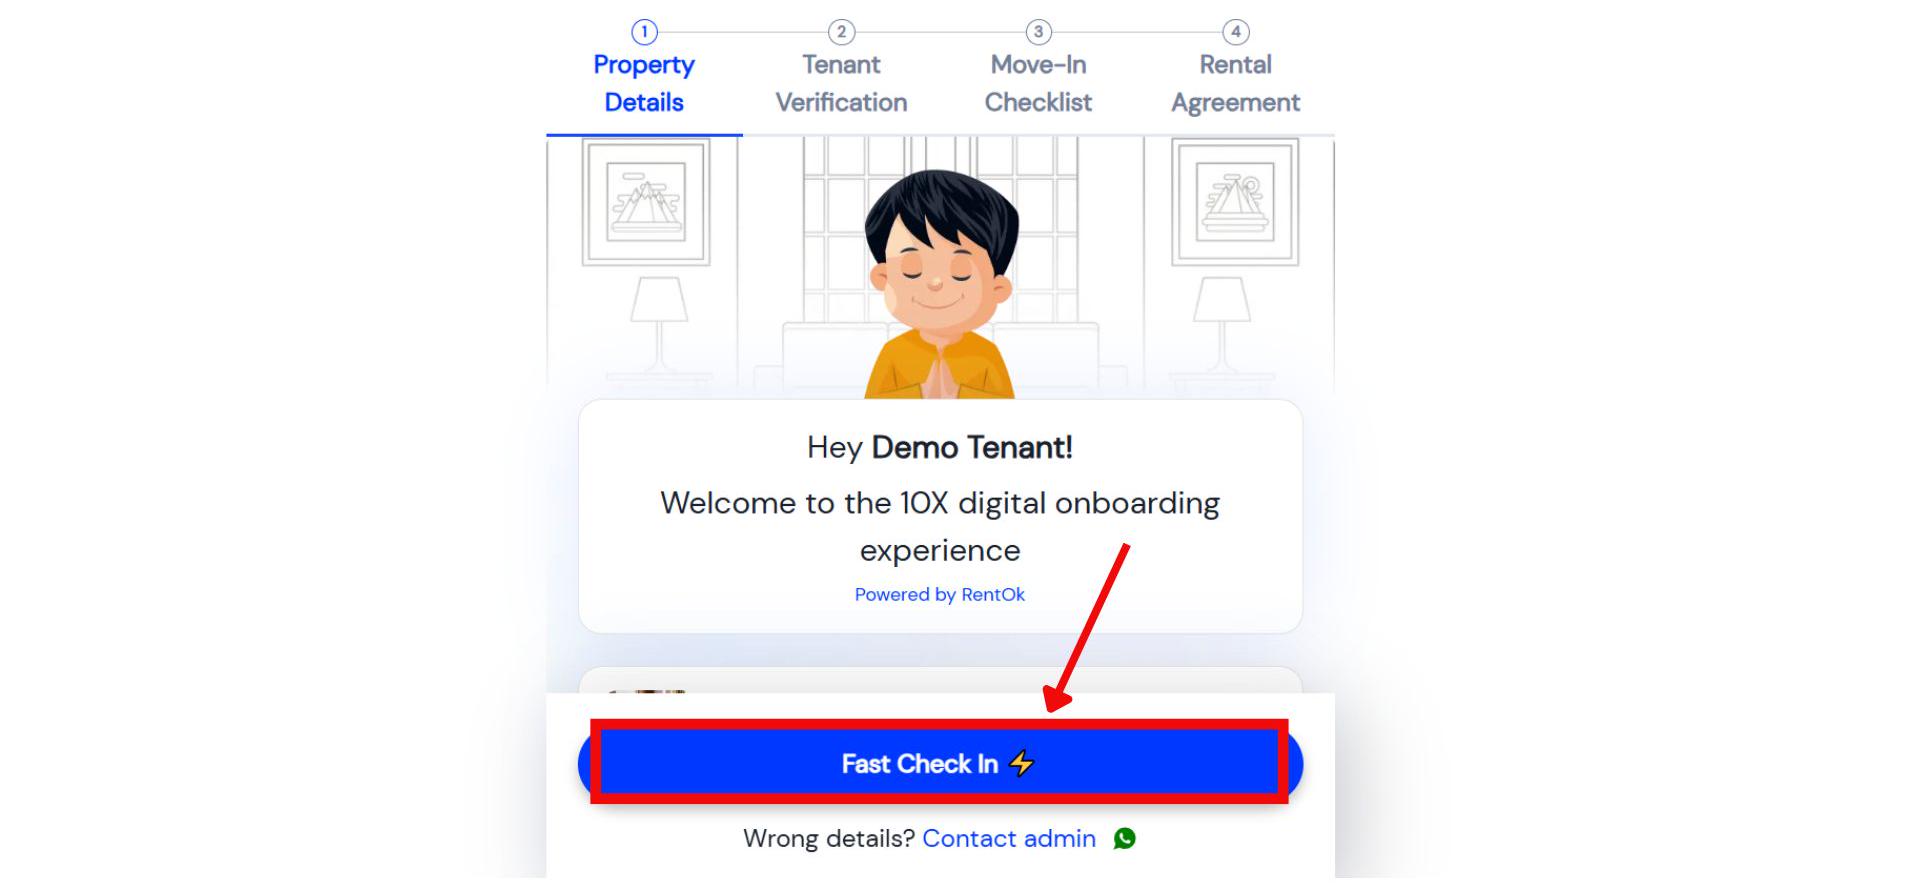
- Step 7: If you click on Open KYC Form, it will take you to a screen showing the tenant’s information. Click on Fast Check-in to proceed.
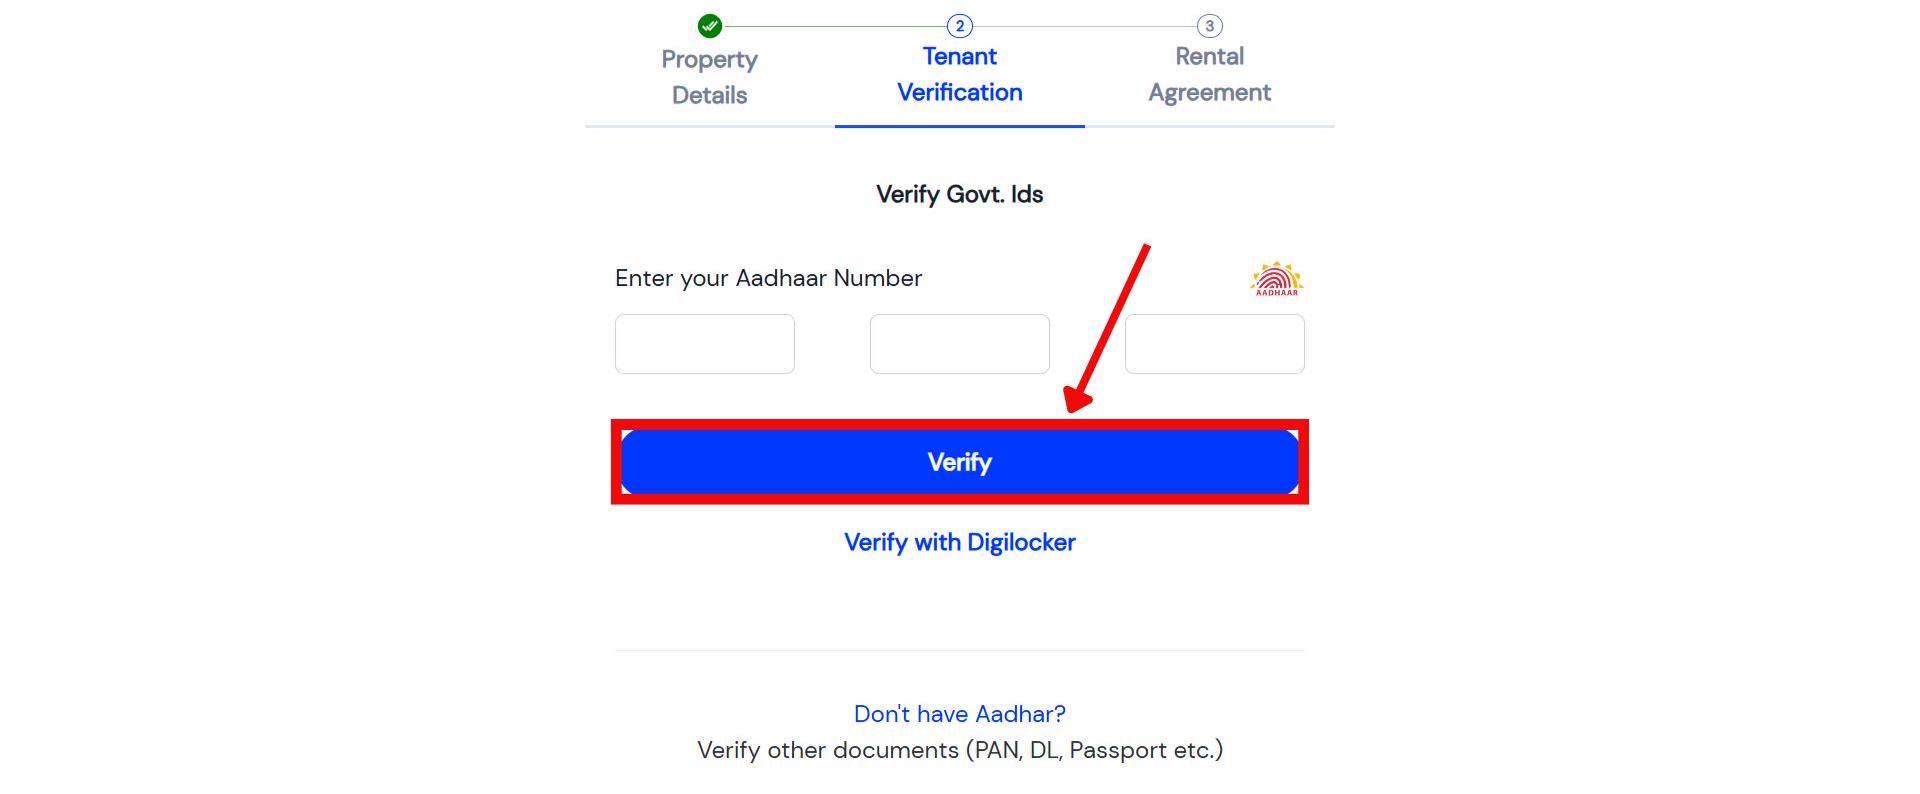
- Step 8: Complete Aadhaar Verification The system will redirect you to the Aadhaar/KYC screen. Complete the verification and tap Continue Now.
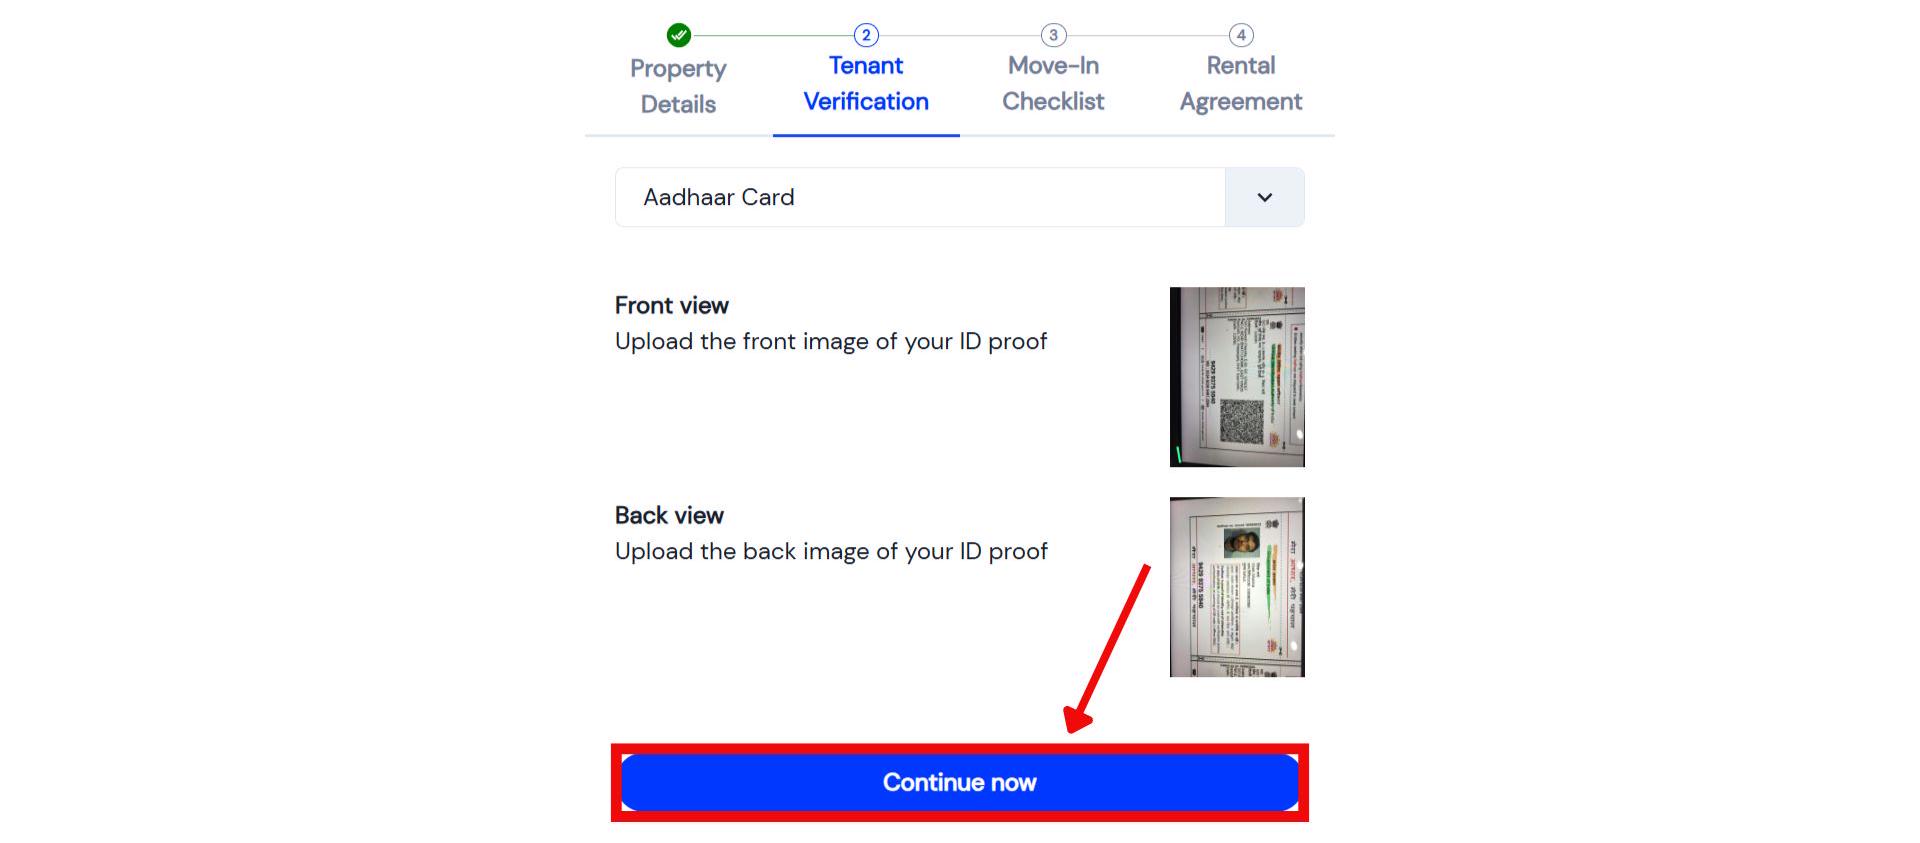
- Step 9: Next, upload the tenant’s selfie and fill out the remaining personal details required for the check-in. Click Continue Now.

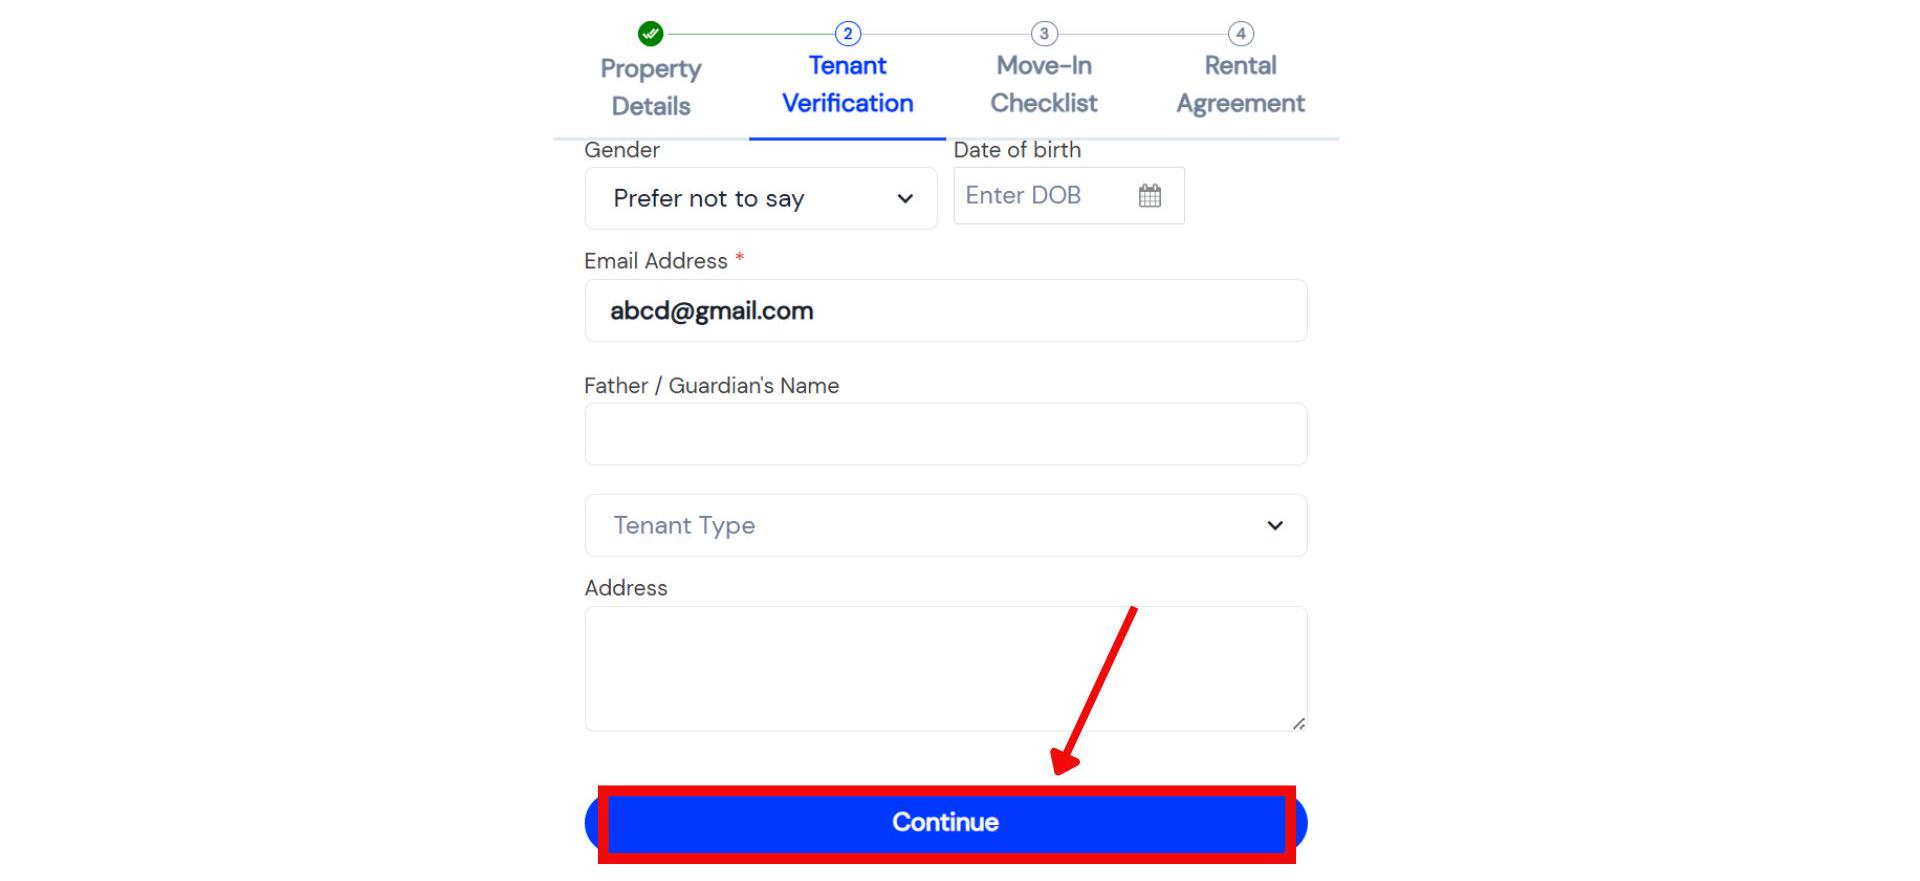
- Step 10: You will now land on the Inventory Review screen.
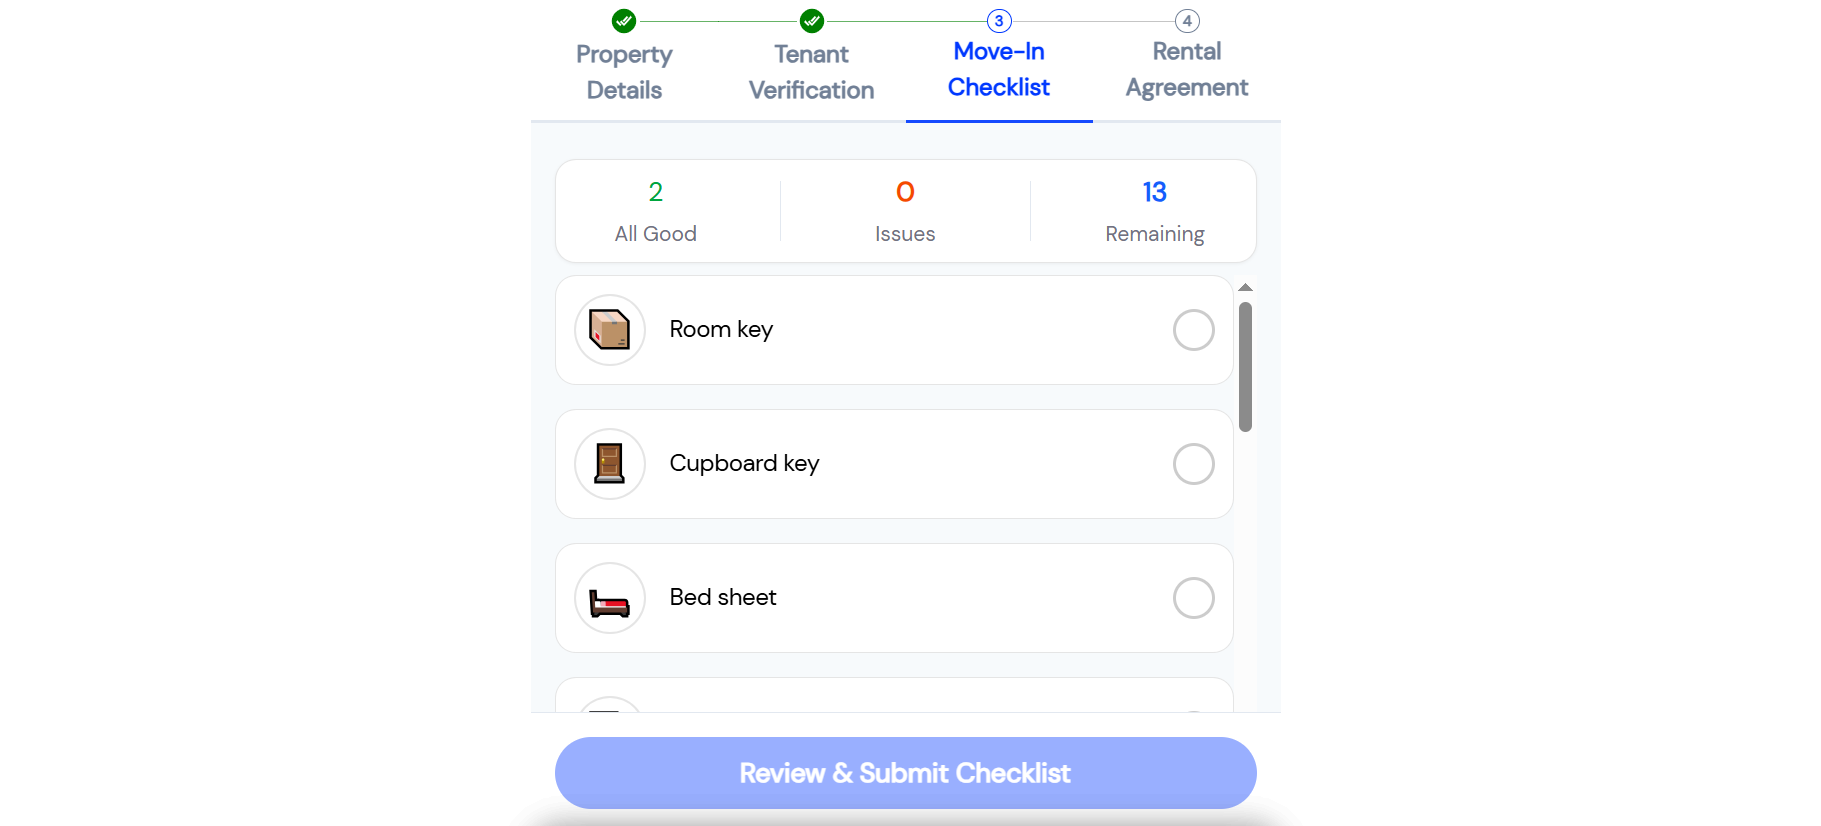
Check each inventory item and mark it as:
-
Working
-
Damaged
-
Missing
After reviewing all items, click Review & Submit Checklist.
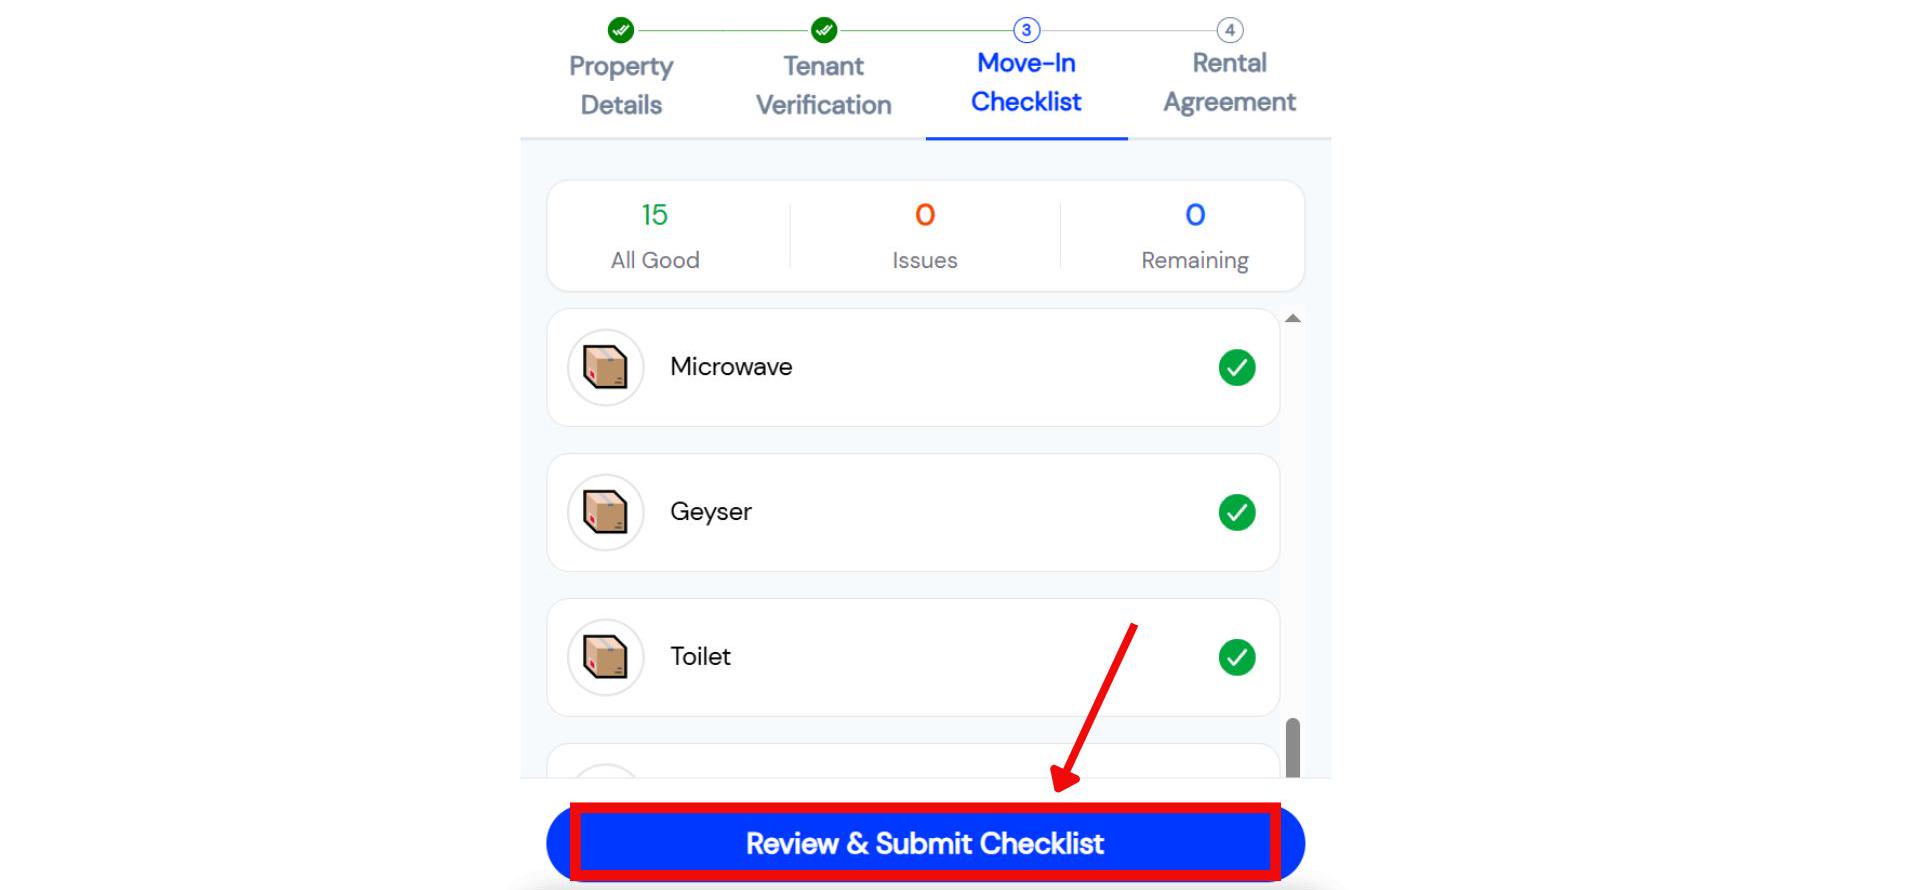
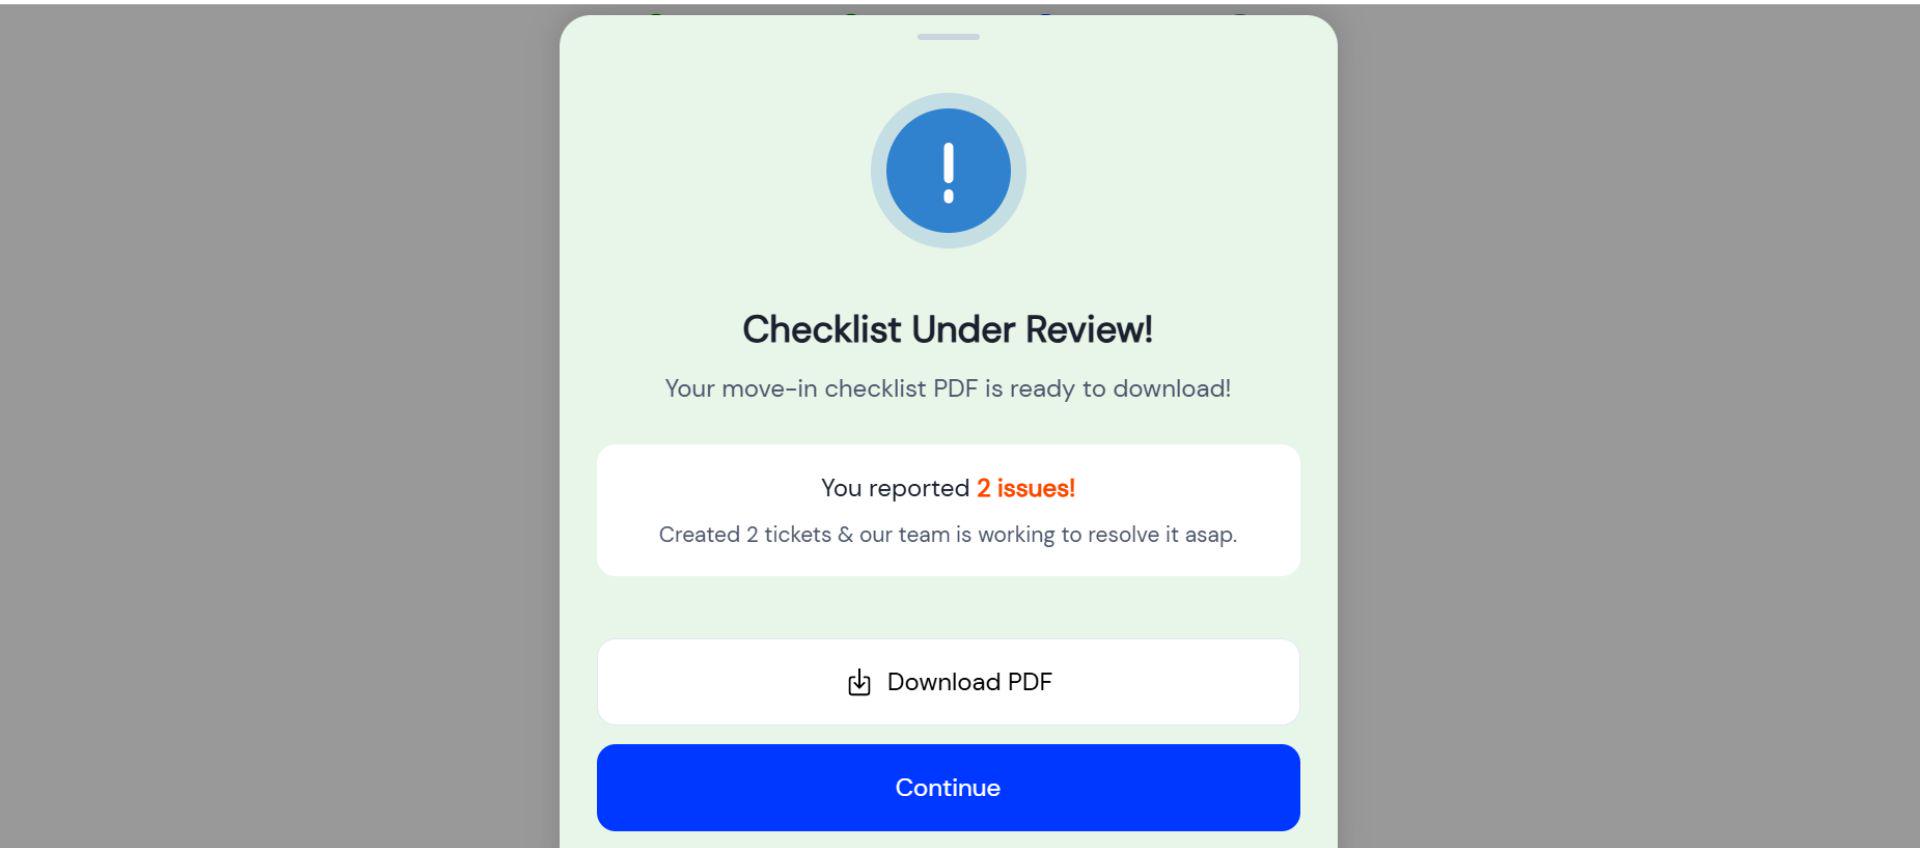
- Step 11: A screen will appear showing the Inventory PDF. You can download it. The screen will also show the number of issues you marked. Click Continue.
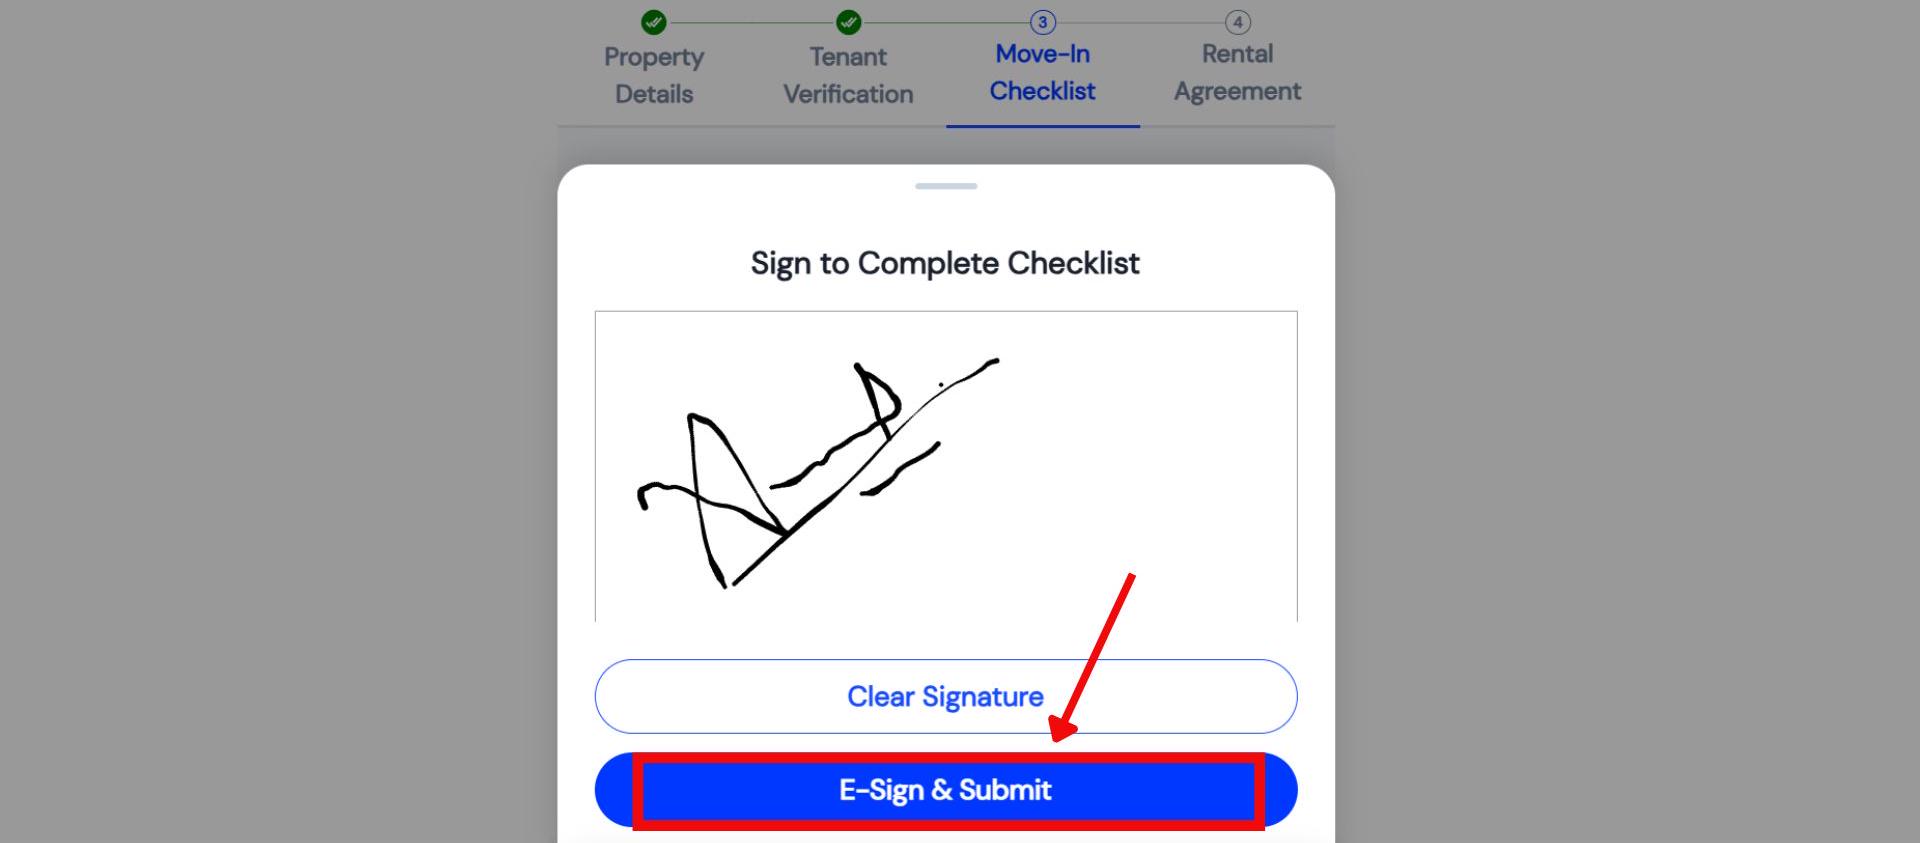
- Step 12: Upload your signature by either uploading an image or using e-sign. Submit it.
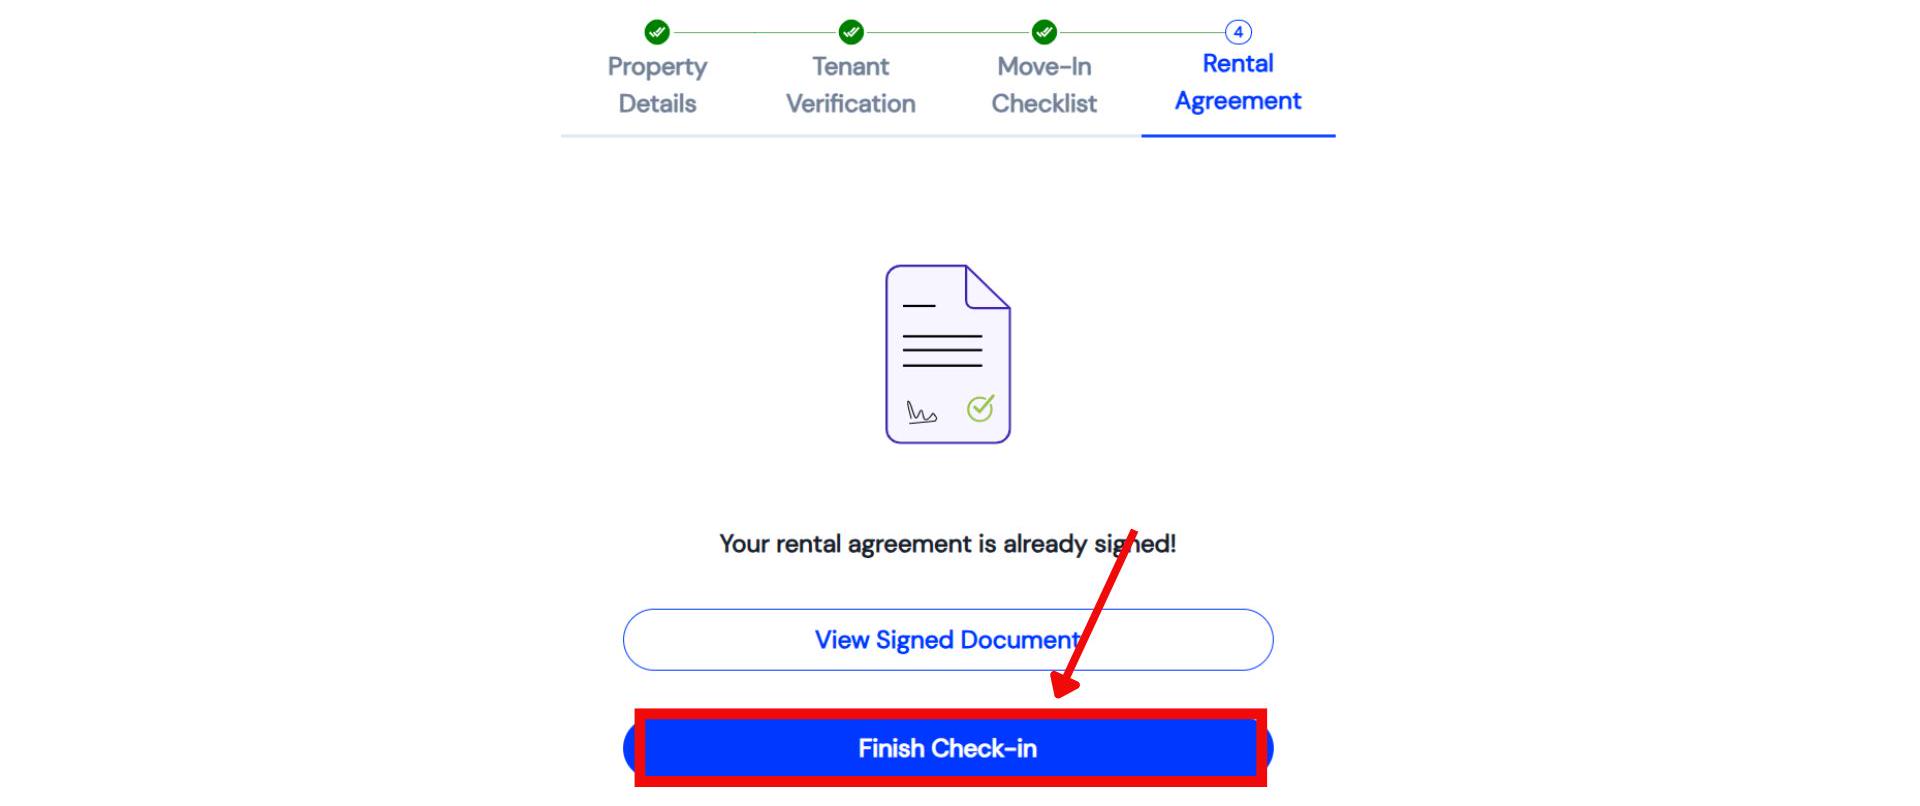
- Step 13: You will now see a confirmation screen with your signed document preview. Click Finish Check-in to complete the process.
| This feature can be enabled for your property via a backend setting. It will then appear as a step in the tenant's check-in link. |
|---|
One example
- “A new tenant finds the AC is damaged. They mark it as 'Damaged,' upload a photo of the issue, and a ticket is instantly created for your maintenance staff to fix it.”
| 💡 Why it matters: This creates a transparent and digitally signed record of the room's condition at the time of joining. It helps prevent future disputes over damages and ensures tenants get what they were promised. |
|---|
Smart Attendance for Managers - Mark attendance with selfie, location, and Wi-Fi
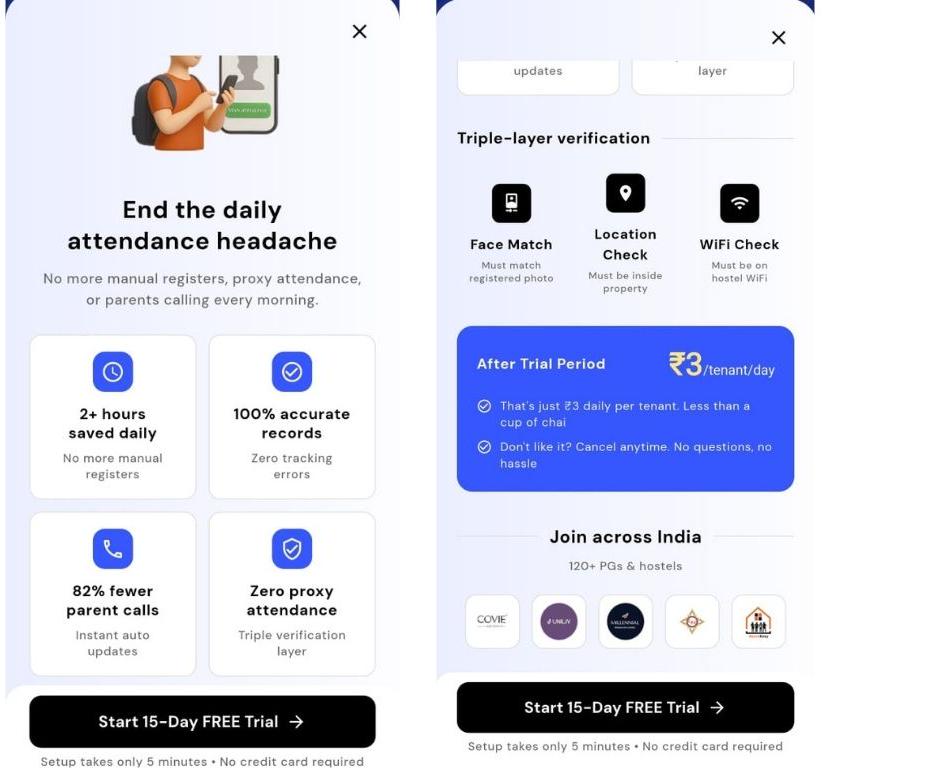
The Smart Attendance feature is now available on the Manager App! Staff can now mark attendance for tenants using the same secure, multi-factor verification, which is perfect for properties where tenants may not have smartphones.
Highlights
-
Three-Factor Verification: Uses a combination of Selfie Match, Geofencing (location boundary), and Wi-Fi network check for accurate marking.
-
Multiple Shifts: Set up and mark attendance for multiple rounds in a day, such as 'Day' and 'Night' shifts.
-
Live Face Detection: The system requires a live photo, preventing the use of static pictures to cheat the system.
-
Full History View: A new, clean calendar view shows the complete attendance history for any tenant, with clear color codes for Present, Absent, and Leave.
How to try
- Step 1: Open Attendance Settings From your dashboard, click the plus (+) button at the bottom and select Attendance Settings from the menu.
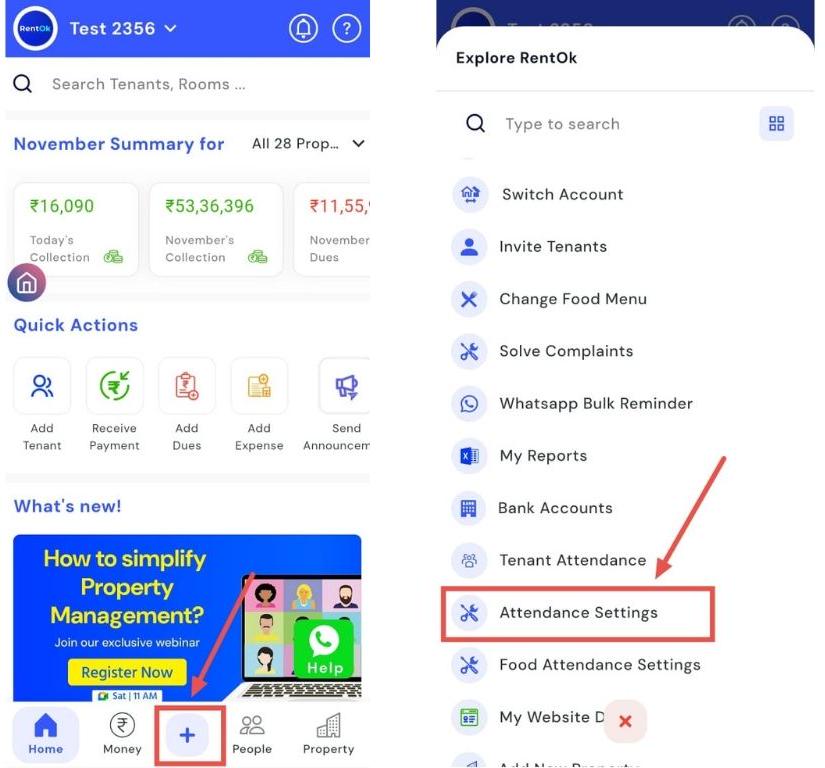
- Step 2: View Benefits and Features A screen will appear explaining the benefits and features of Smart Attendance. Read through the information and click the cross (×) button at the top to continue.
-
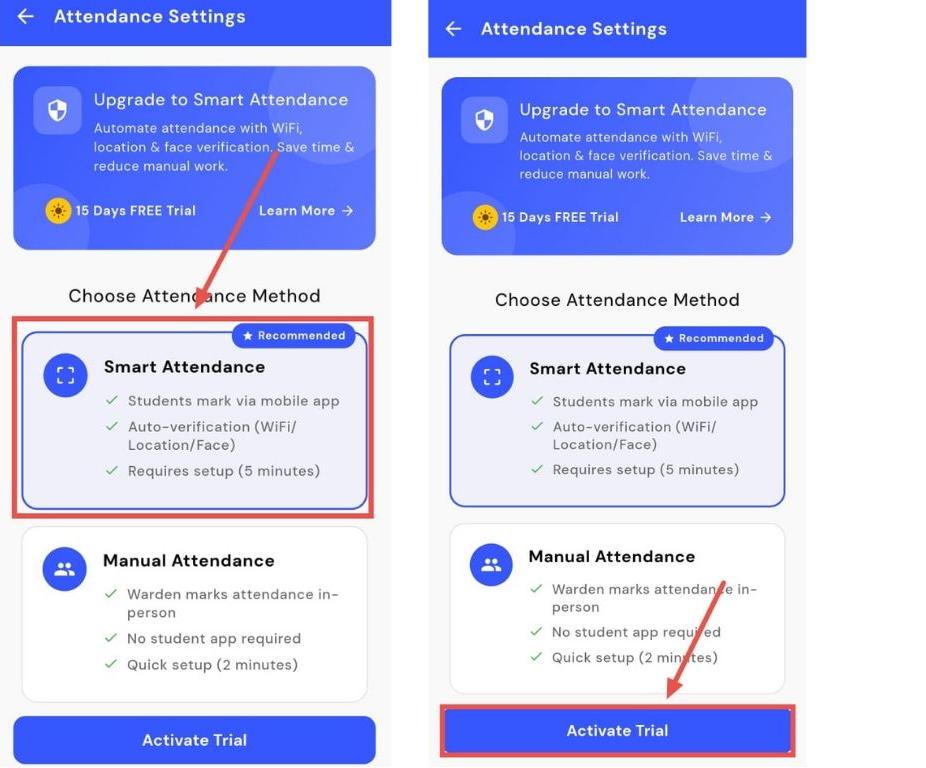
Step 3: Choose the Attendance Method Select the attendance method you want to use:
-
Manual Attendance: Traditional method used previously.
-
Smart Attendance: New, automated method.
-
Click Smart Attendance and then select Activate Trial.
-
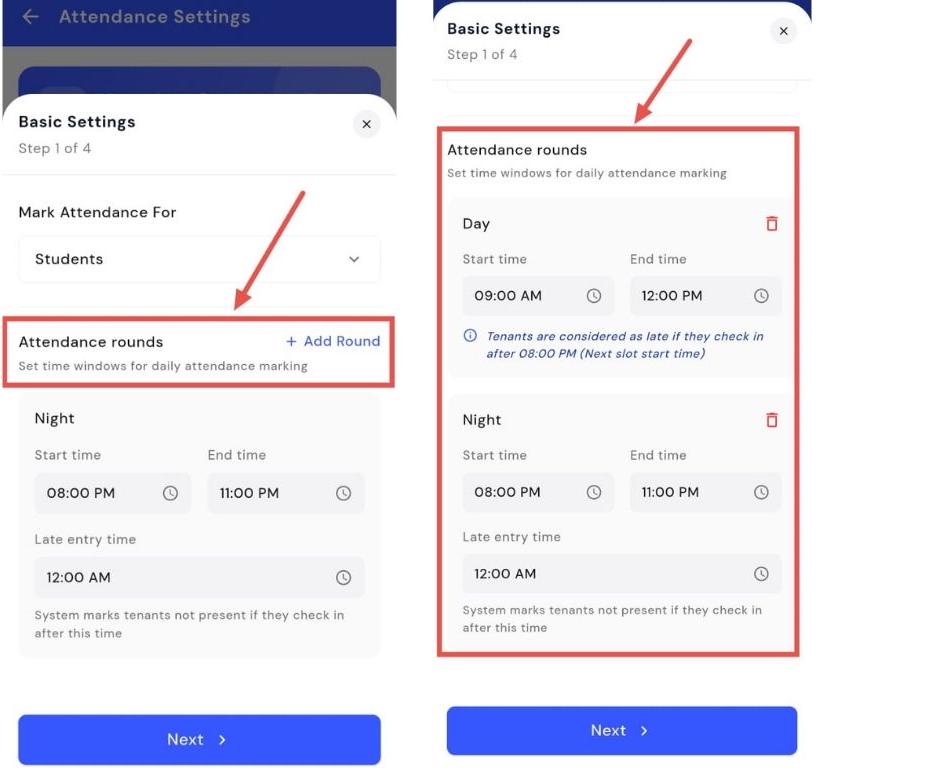
Step 4: Configure Basic Attendance Settings
- Mark Attendance For: Choose whether to mark attendance for students, working professionals, or all tenants.
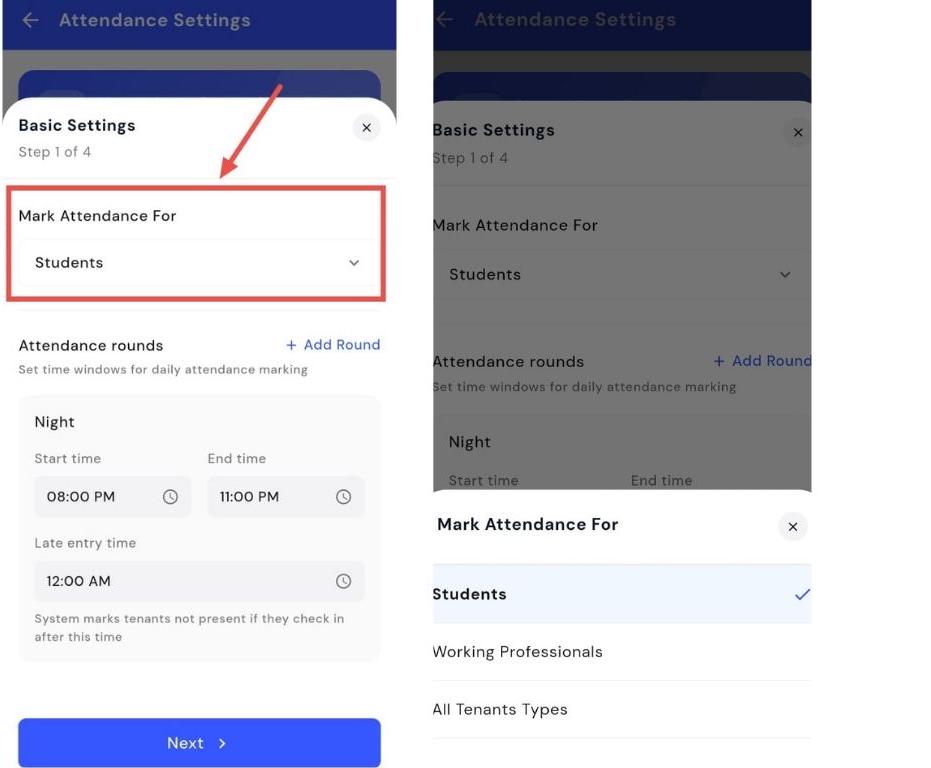
- Attendance Round: Set the round(s) for marking attendance, such as morning, night, or both, and specify the time.
-
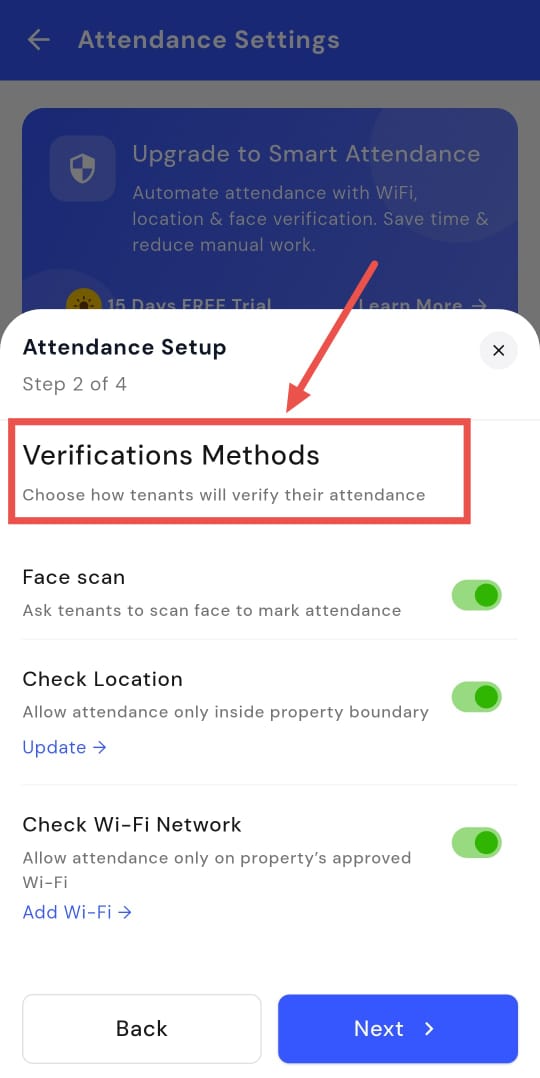
Step 5: Set Verification Methods There are three verification methods:
-
Face Scan (mandatory)
-
Check Location (mandatory)
-
Check Wi-Fi Network (optional; can be enabled or disabled) Select your preferred settings and save.
-
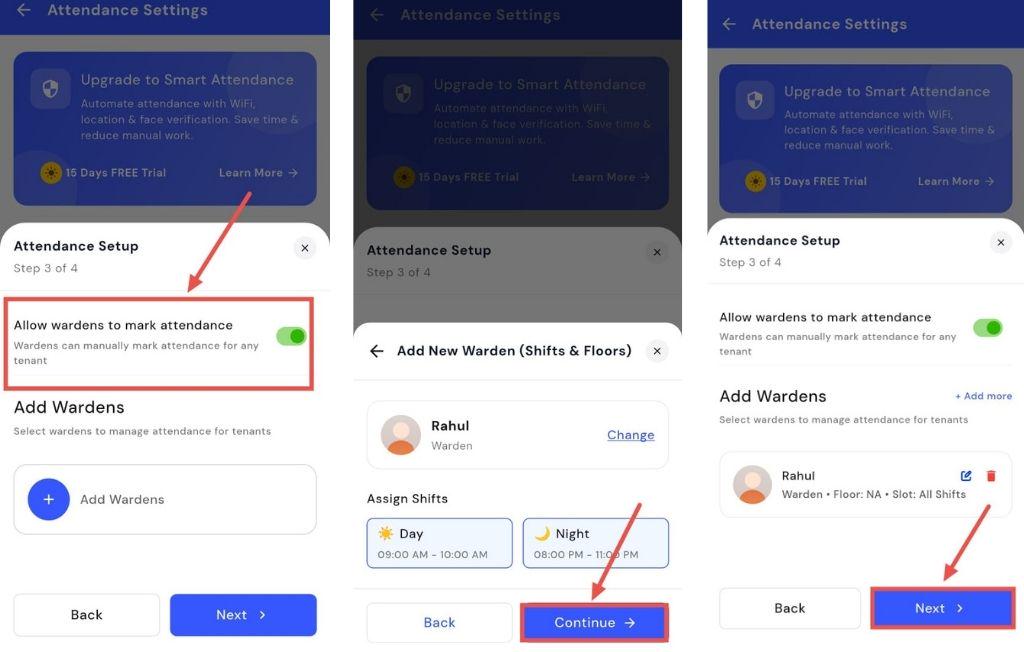
- Step 6: Allow Wardens to Mark Attendance Enable this option if wardens should mark attendance instead of the owner, and add the wardens.
-
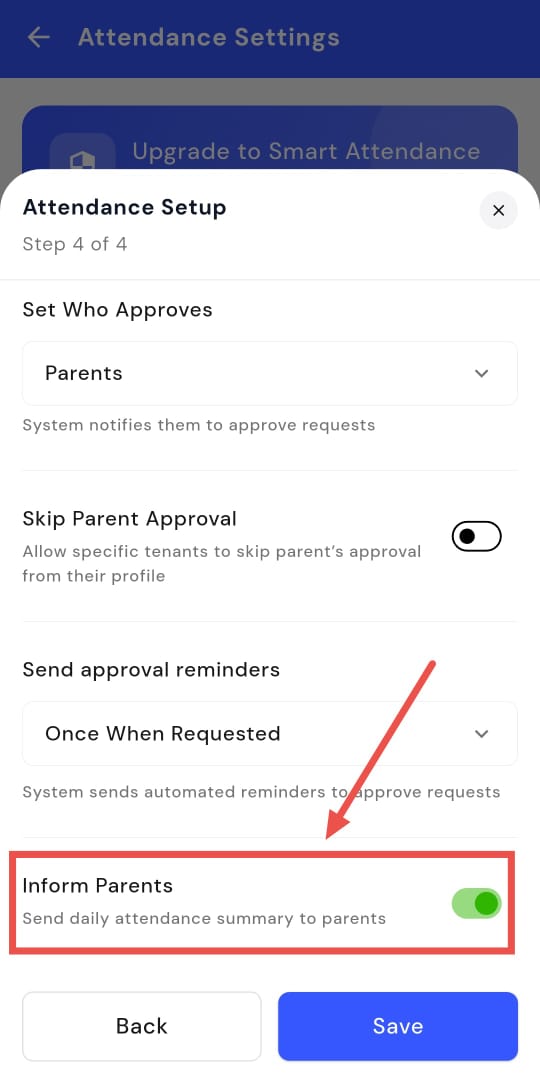
Step 7: Configure Approval Settings
- Decide who approves the settings: Parents, Wardens, or both.
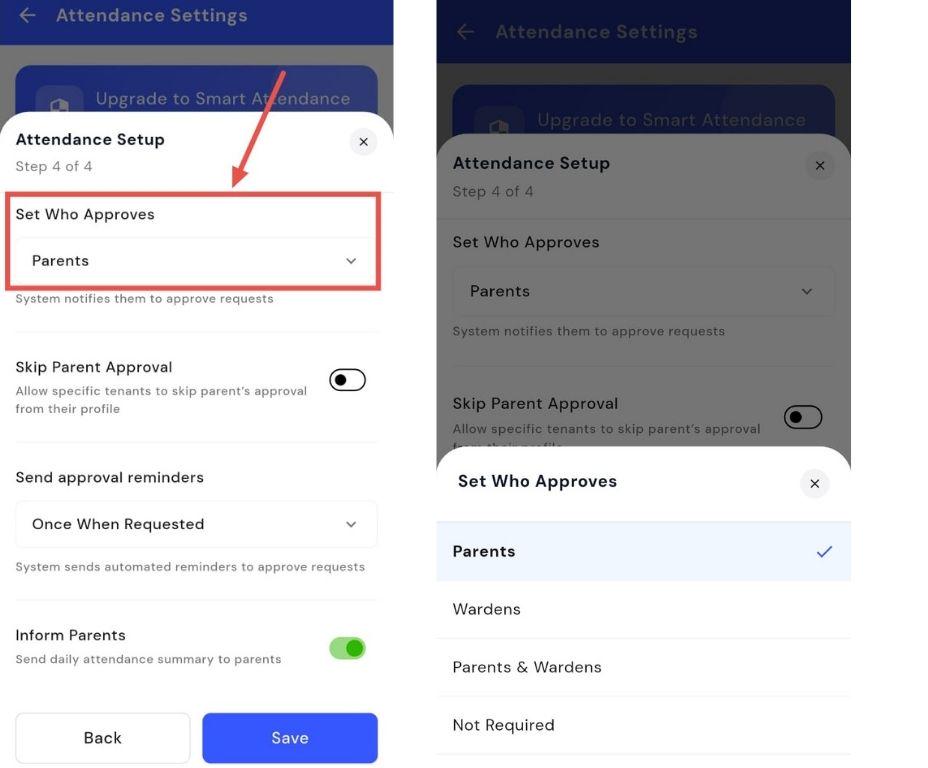
- Allow specific tenants to skip parent approval from their profile if needed.
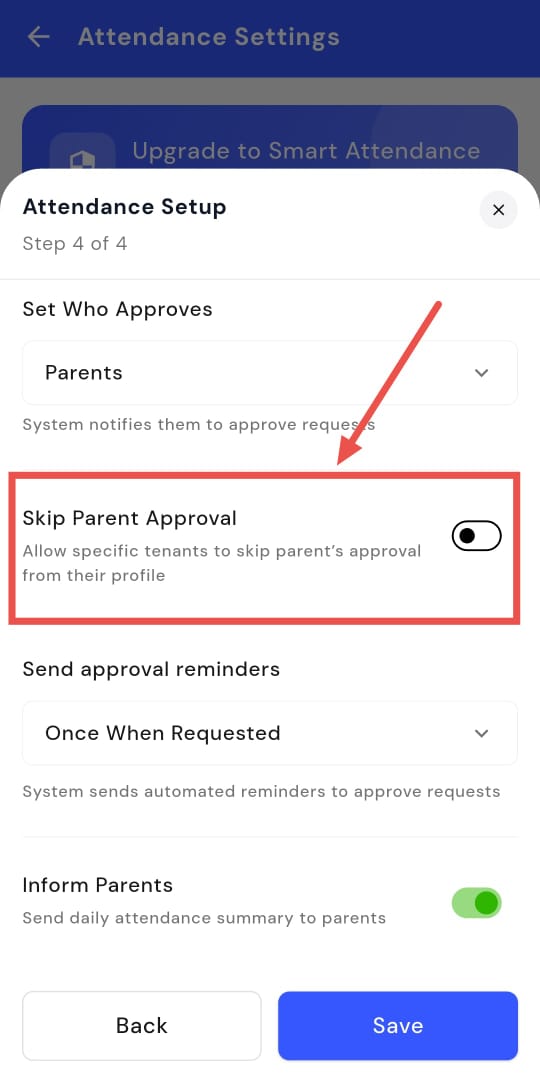
- Enable Send Approval Reminders to notify approvers automatically once when requested.
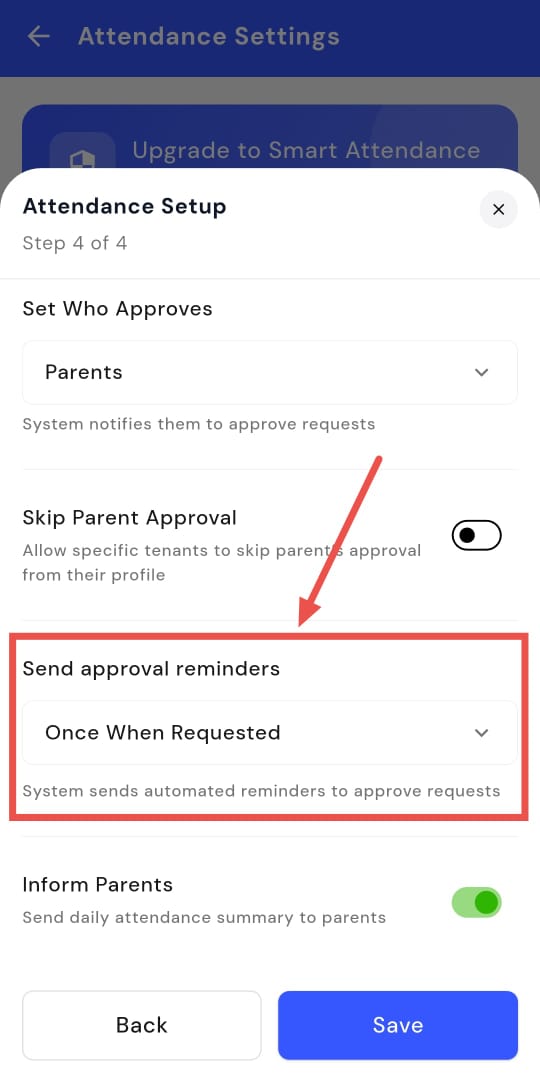
- Optionally, toggle Inform Parents and Send Daily Attendance Summary on or off.
- Step 8: Save and Review Click Save to complete the setup. You’ll see a summary screen showing all features and settings, which can be edited as needed.
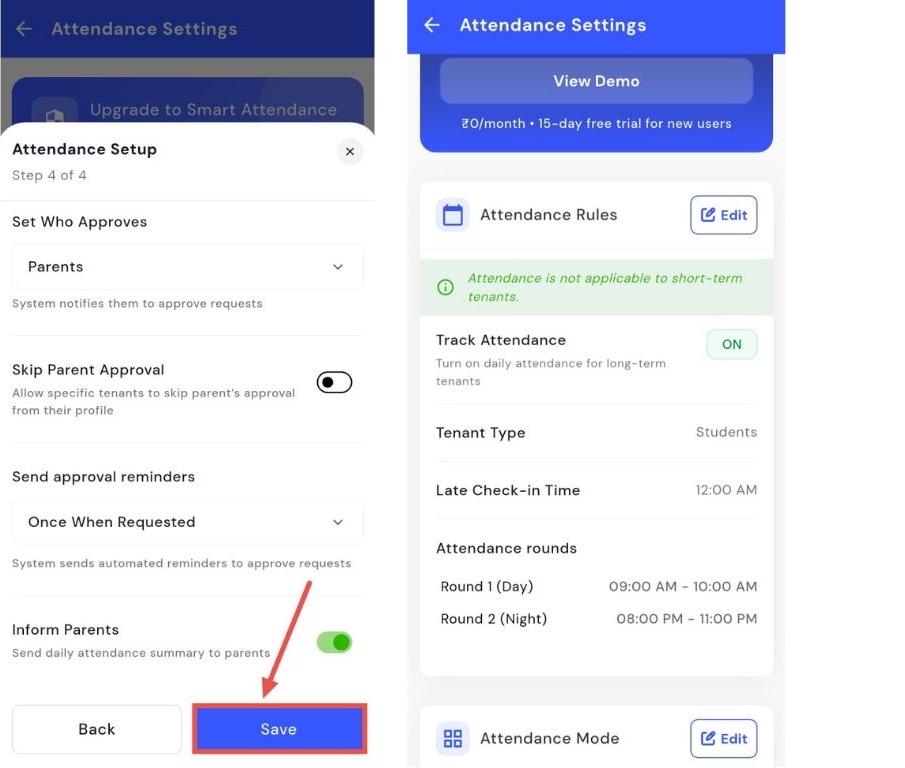
| 💡 Why it matters: This brings a higher level of security and accuracy to attendance tracking, reducing proxy entries. It provides a crucial tool for wardens and helps maintain a reliable record for all tenants. |
|---|
Fixes & Polish
-
Improved Collection Details (Web): The "Edit Collection" screen on the web has been redesigned to match the mobile app, showing full details like UTR numbers, descriptions, and attachments.
-
Revamped Blog Page: Our public blog (rentok.com/blog) has a new, modern design with better navigation and related articles.
-
Aliste Payments Integration: For properties with Aliste smart meters, electricity recharge payments are now handled directly by Aliste for a smoother process.
-
New OTP System: We are rolling out our own proprietary OTP system to improve the reliability and speed of login and transaction codes.
Coming Up Next
- Move-out Checklist: The second phase of our checklist feature, which will track the condition of inventory when a tenant is leaving, will be released next.
Thank You
Have doubts or any feedback? Chat with us in-app (Help → send us message). We’re building for you, and every suggestion counts!