RentOk Release Note - 22nd Jan, 2026
RentOk Release Note - 22nd Jan, 2026
Hello!
This update focuses on bringing more discipline and transparency to your daily operations. We're launching the complete Move-out checklist to make deposit settlements smoother, and a new tool to help you track daily room cleaning across your property.
Complete Move-in & Move-out Checklist - Track every item, prevent deposit disputes
The full checklist workflow is now live! Building on our Move-in feature, you can now conduct a detailed inspection during a tenant's move-out, creating a transparent record to handle security deposit settlements fairly.
Highlights
- Side-by-Side Comparison: During move-out, compare the condition of each item (e.g., AC, TV) against its status from move-in.
- Add Damage Charges: If an item is marked as "Damaged," managers can add a repair cost, which is automatically raised as a due for the tenant.
- Photo & Video Proof: Both tenants and managers can upload live photos and videos to document the condition of items, creating a clear record.
- Manager Override: Managers can complete the checklist on behalf of tenants who may have left or don't have a smartphone.
How to try
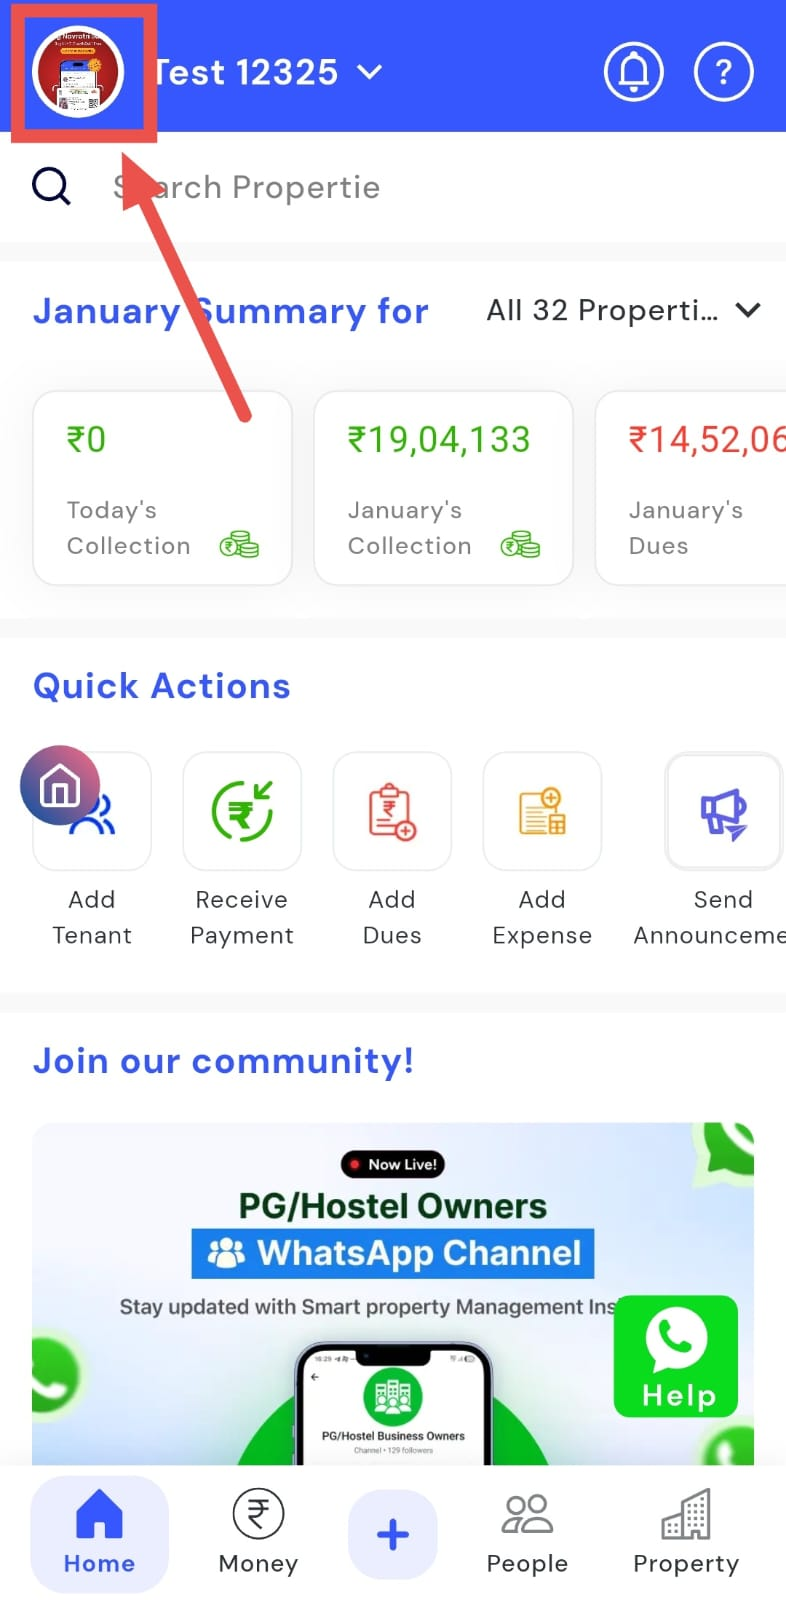
- Step 1: Open your profile Tap on your profile picture in the top-left corner of the screen to open the setting.
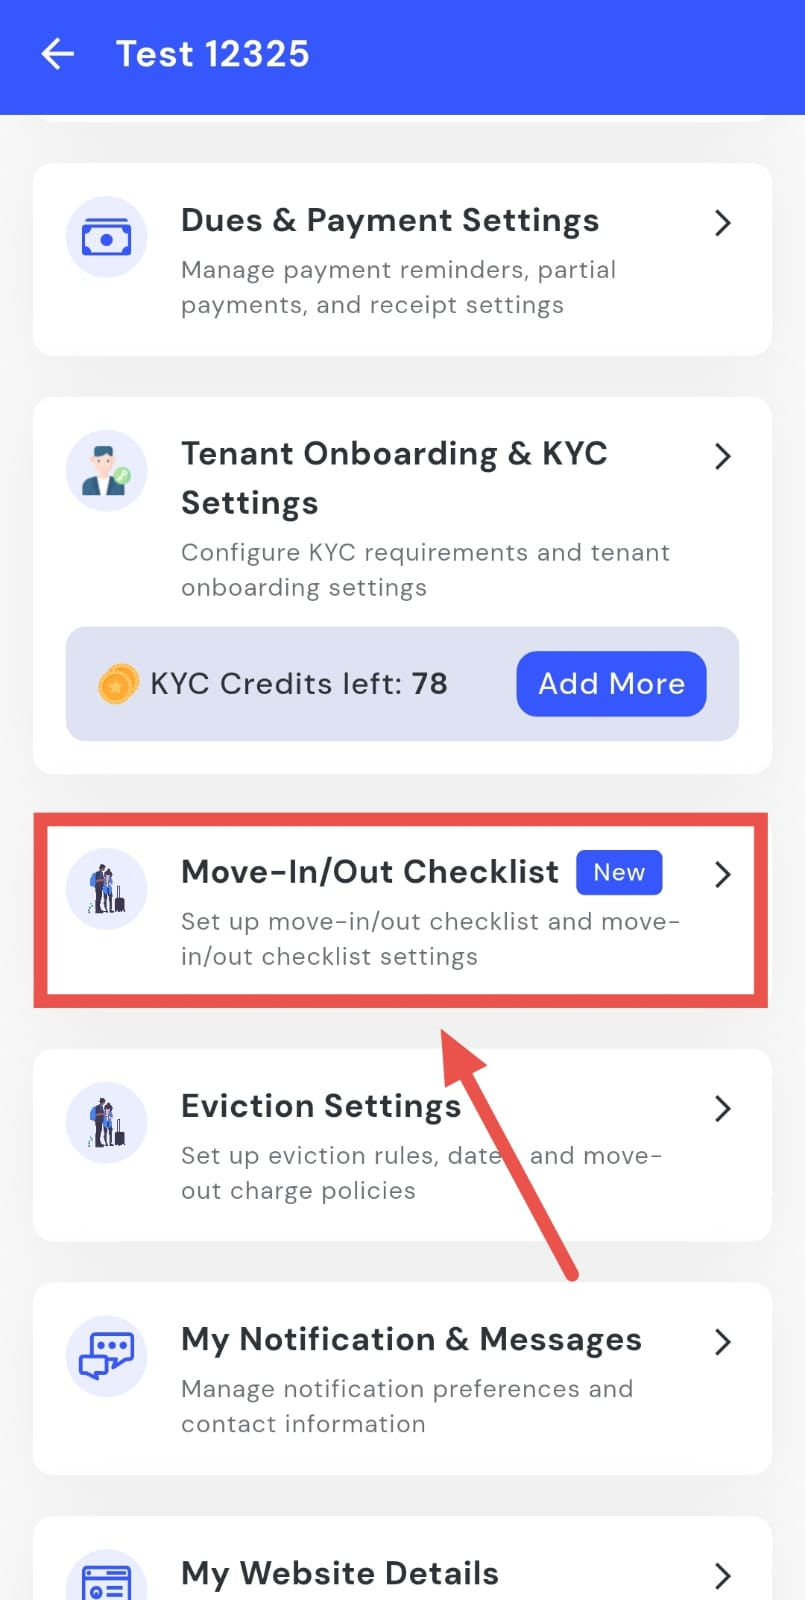
- Step 2: Open Move-in/Move-out Checklist Settings Scroll down until you find Move-in/Move-out Checklist Settings, then tap on it to continue.
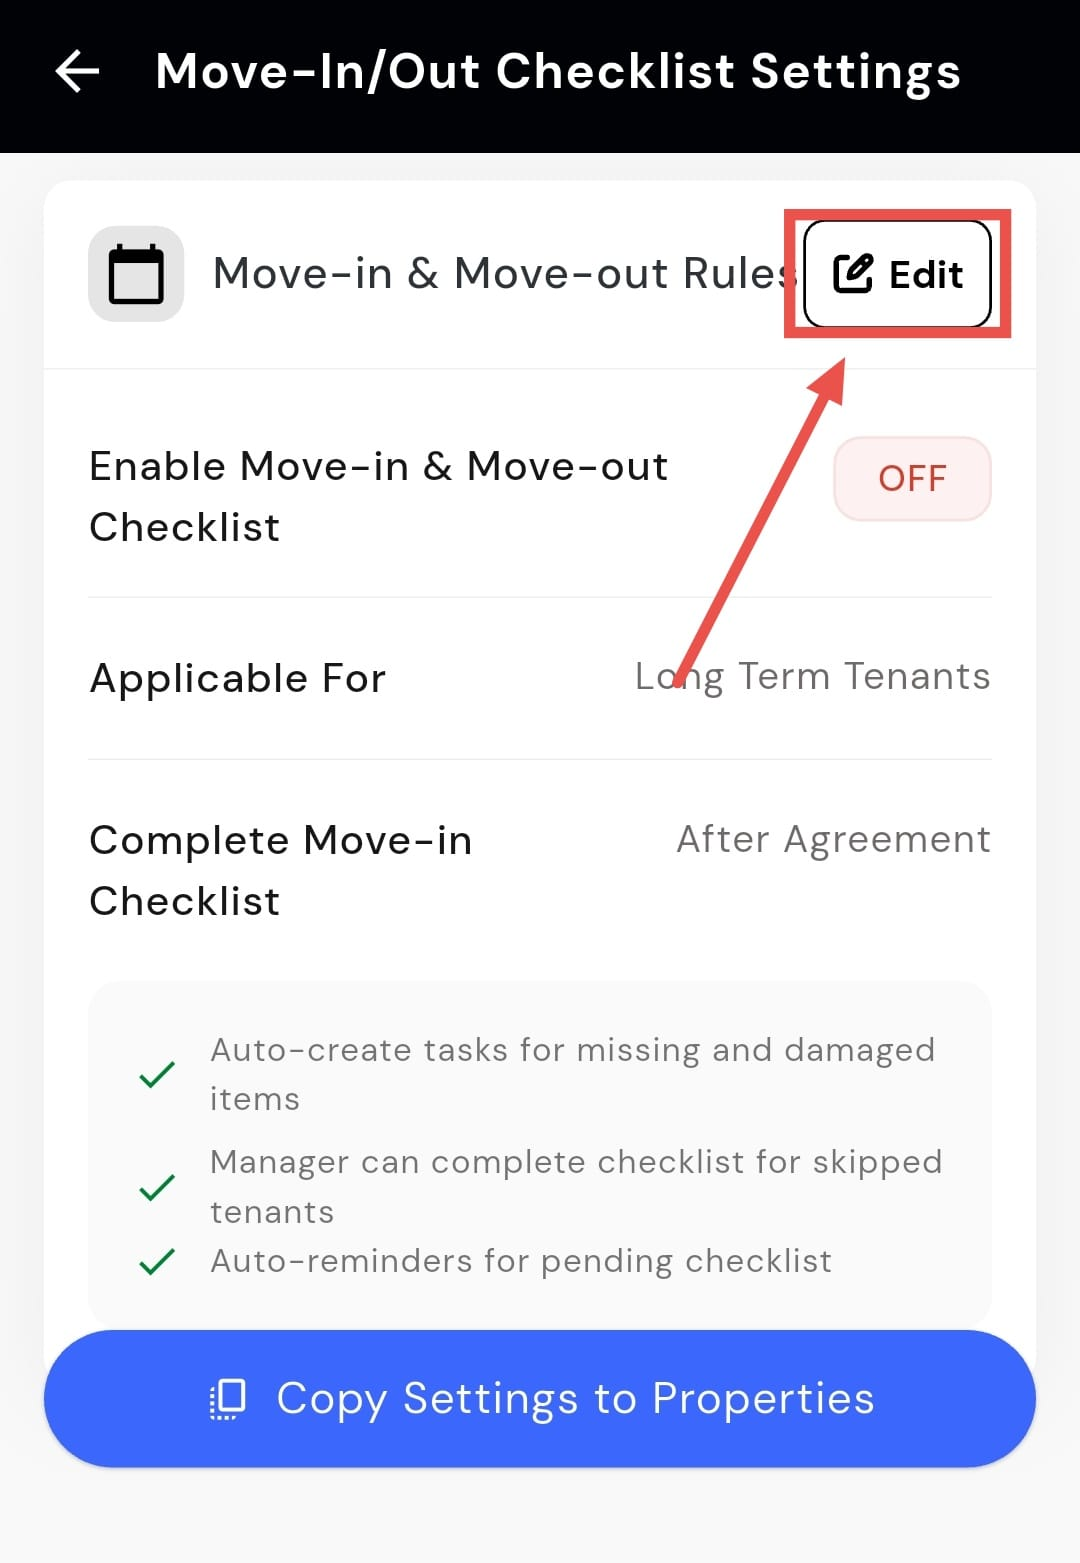
- Step 3: Edit move-in and move-out rules On this screen, you will see the Move-in and Move-out Rules section. Tap on Edit to update it.
- Step 4: Enable or disable the checklists From here, you can turn the Move-in Checklist and Move-out Checklist on or off as required.
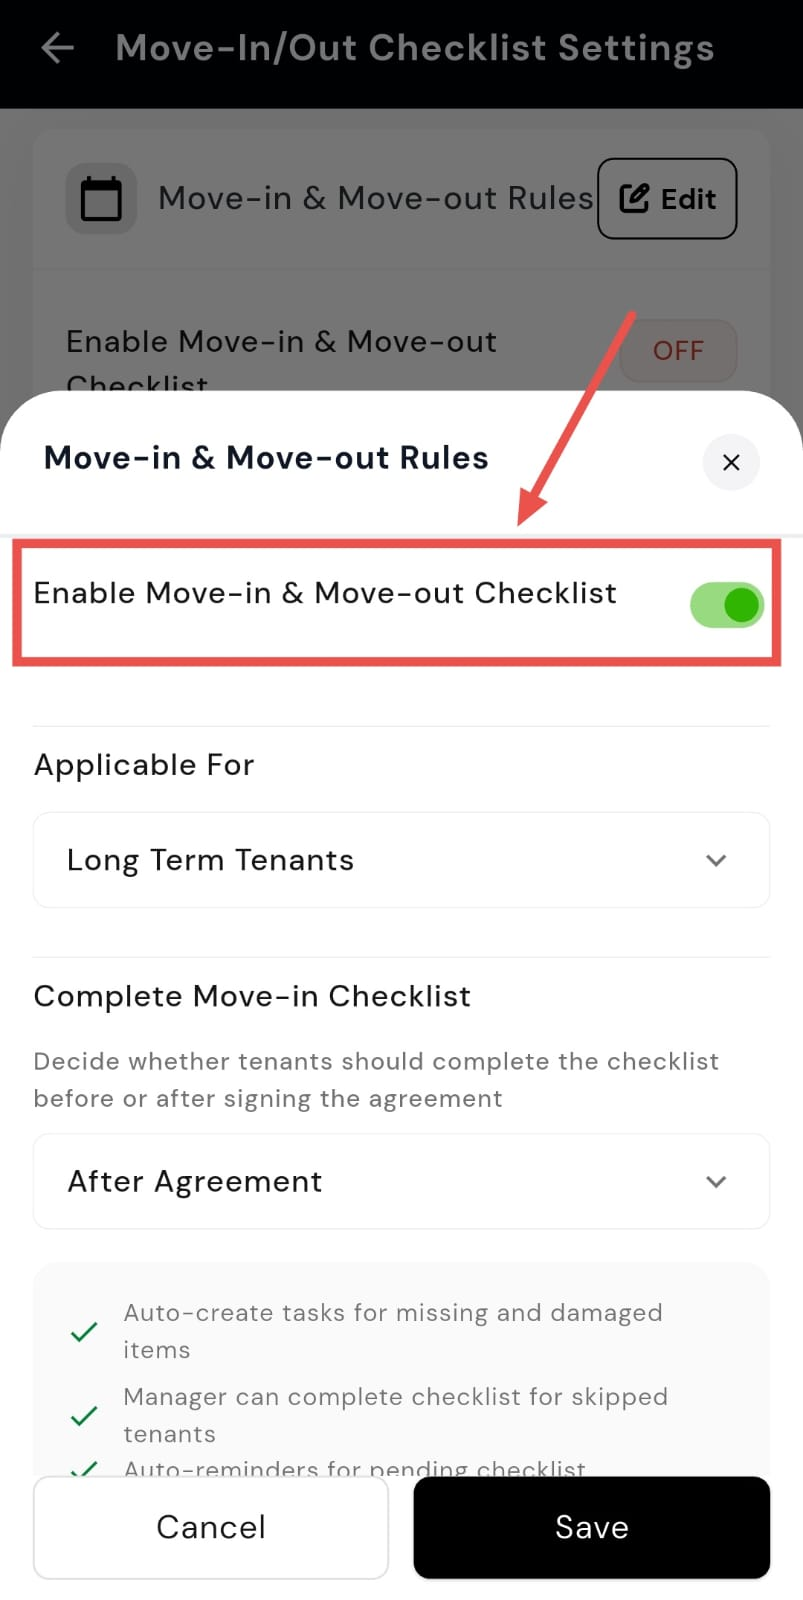
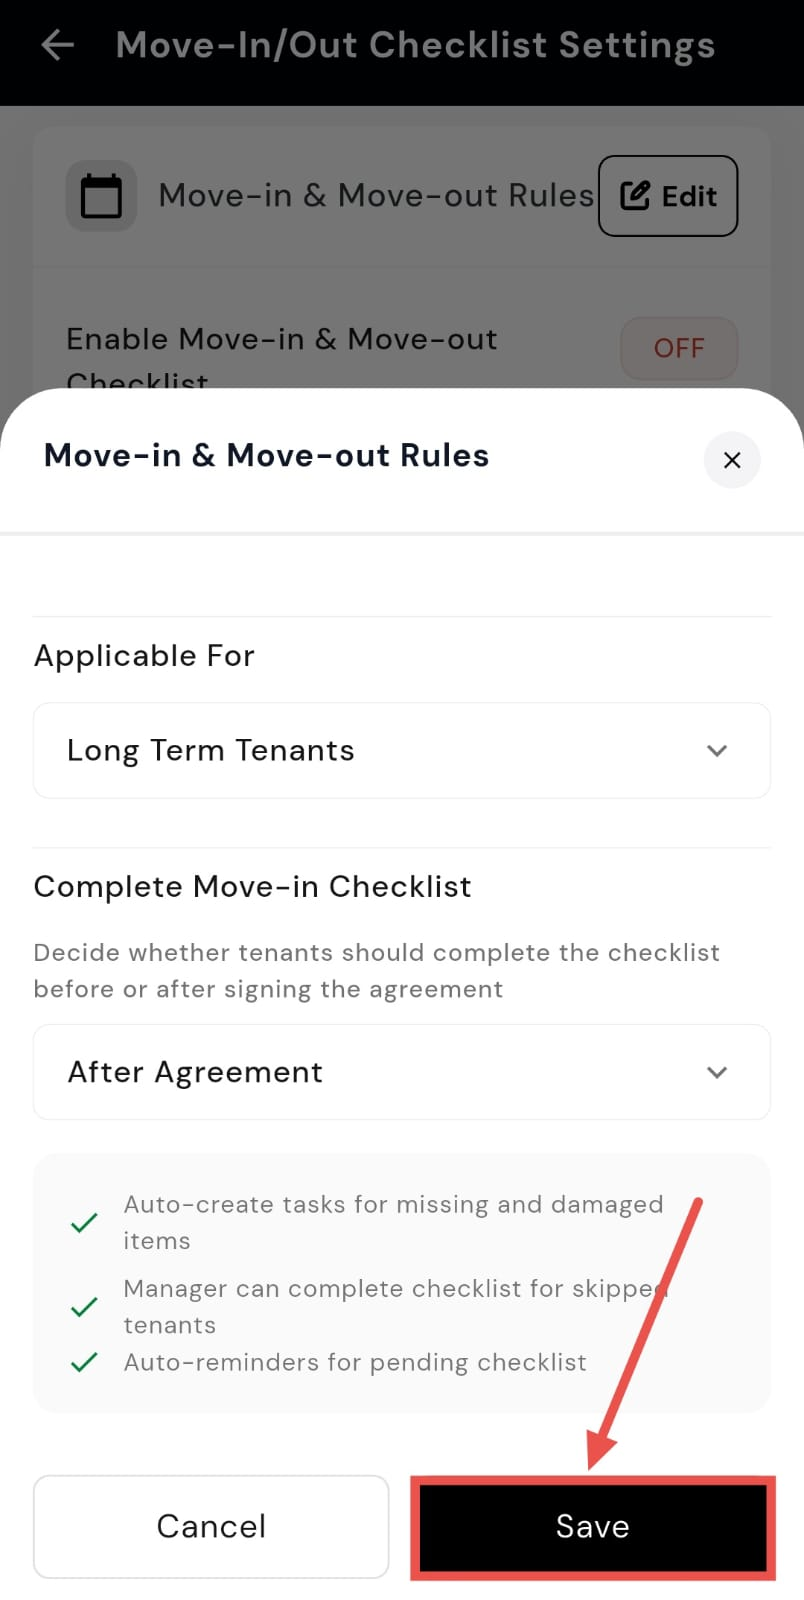
- Step 5: Set who the checklist applies to Use the Applicable For option to choose whether the checklist applies to all tenants, long-term tenants, or short-term tenants.
- Step 6: Set checklist completion timing Use the Complete Move-in Checklist option to decide whether the checklist must be completed before or after signing the agreement.
- Step 7: Save your changes After making all the required updates, tap on Save to apply the changes.
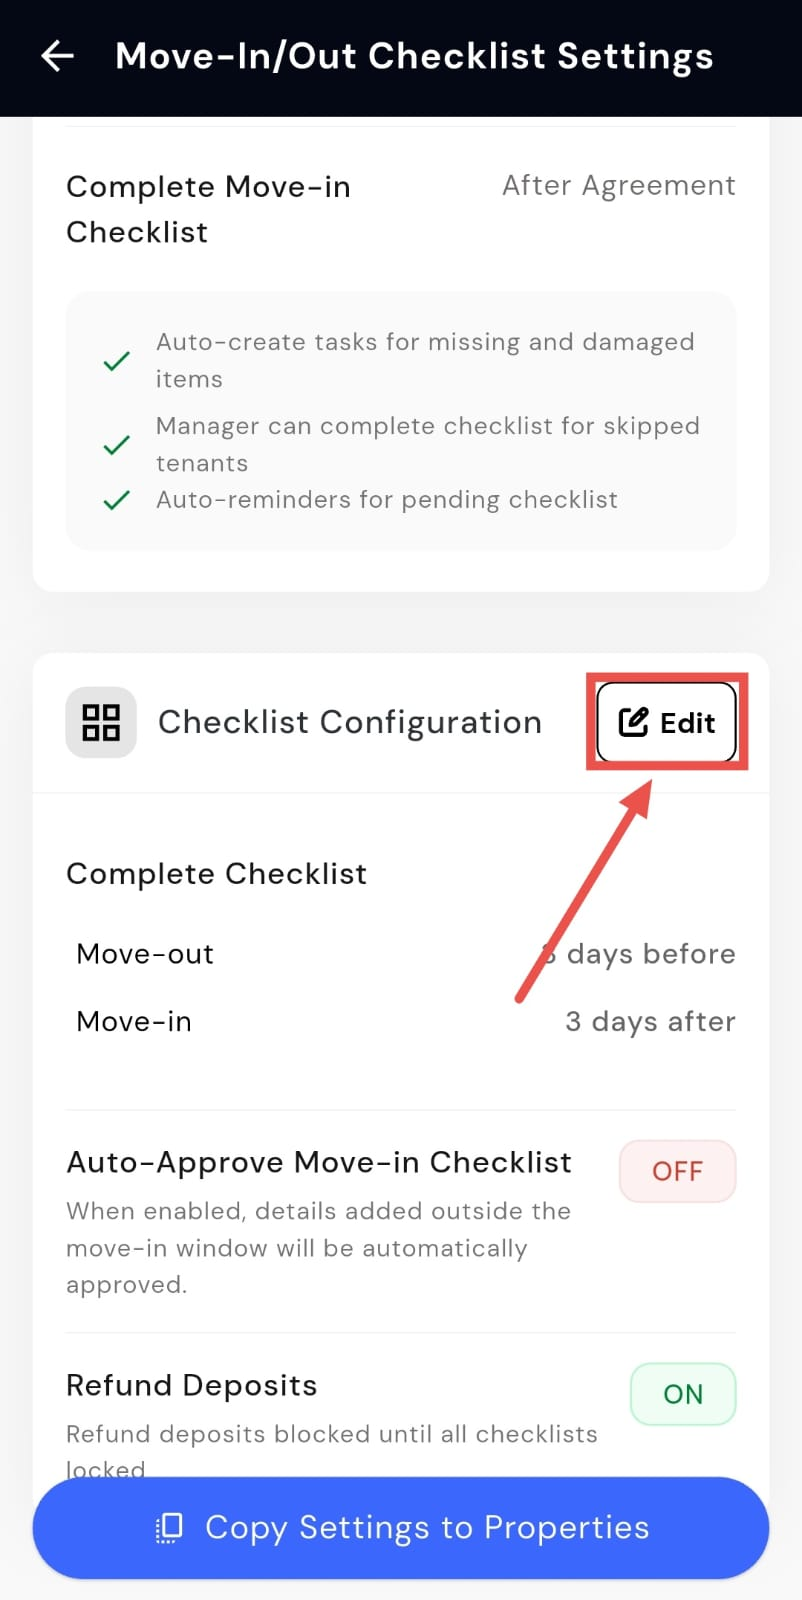
- Step 8: Edit checklist configuration Scroll to the Checklist Configuration section and tap on Edit to update advanced checklist settings.
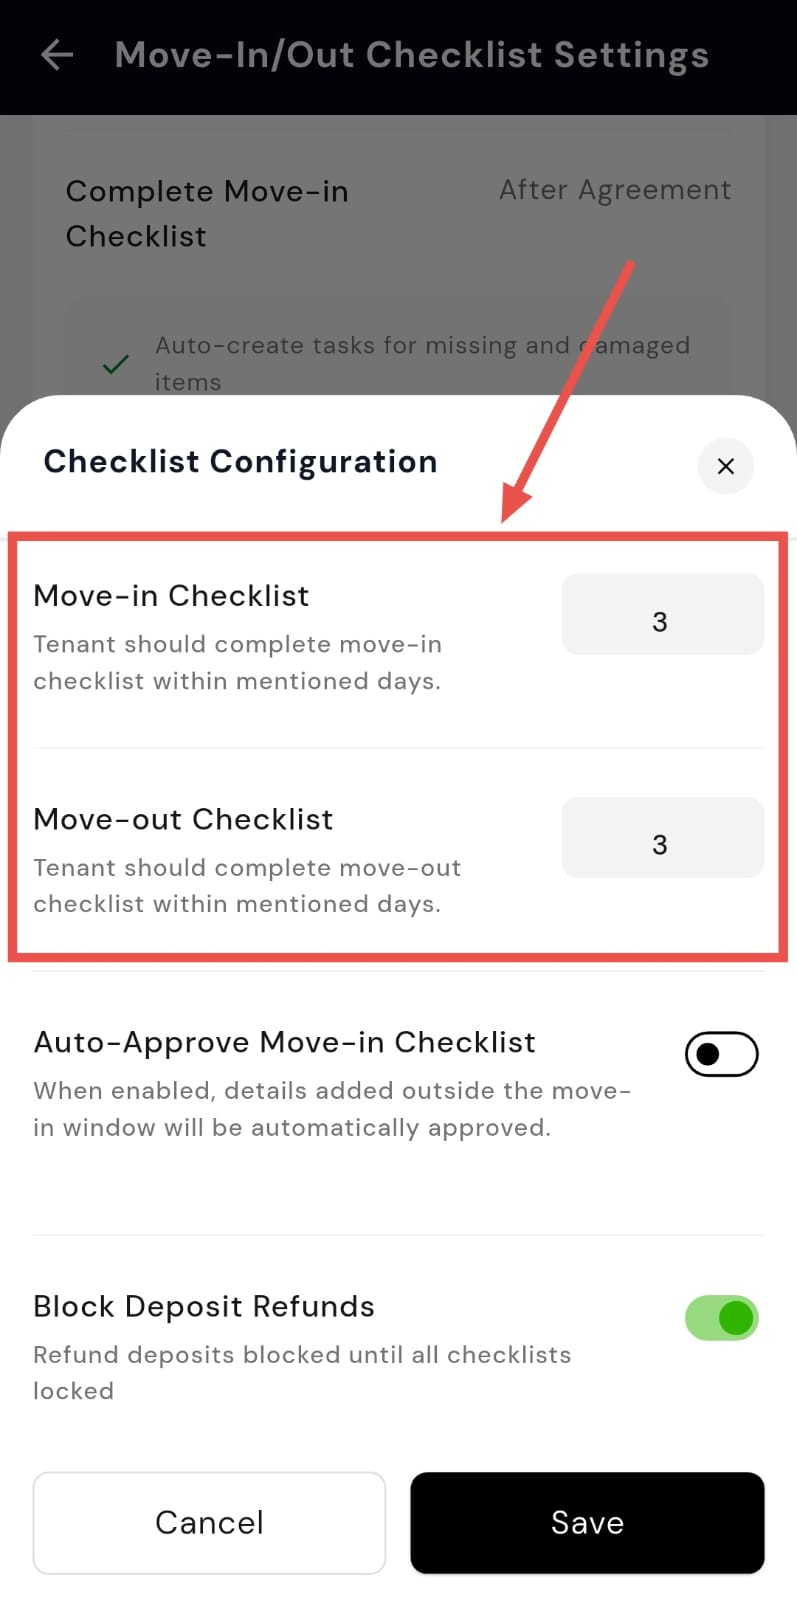
- Step 9: Set checklist completion duration On this screen, enter the number of days within which tenants must complete the Move-in Checklist and the Move-out Checklist.
- Step 10: Enable or disable auto-approve move-in checklist You will see the Auto-approved Move-in Checklist option here. Turn it on to automatically approve checklist details added outside the move-in window, or turn it off if you want to review them manually.
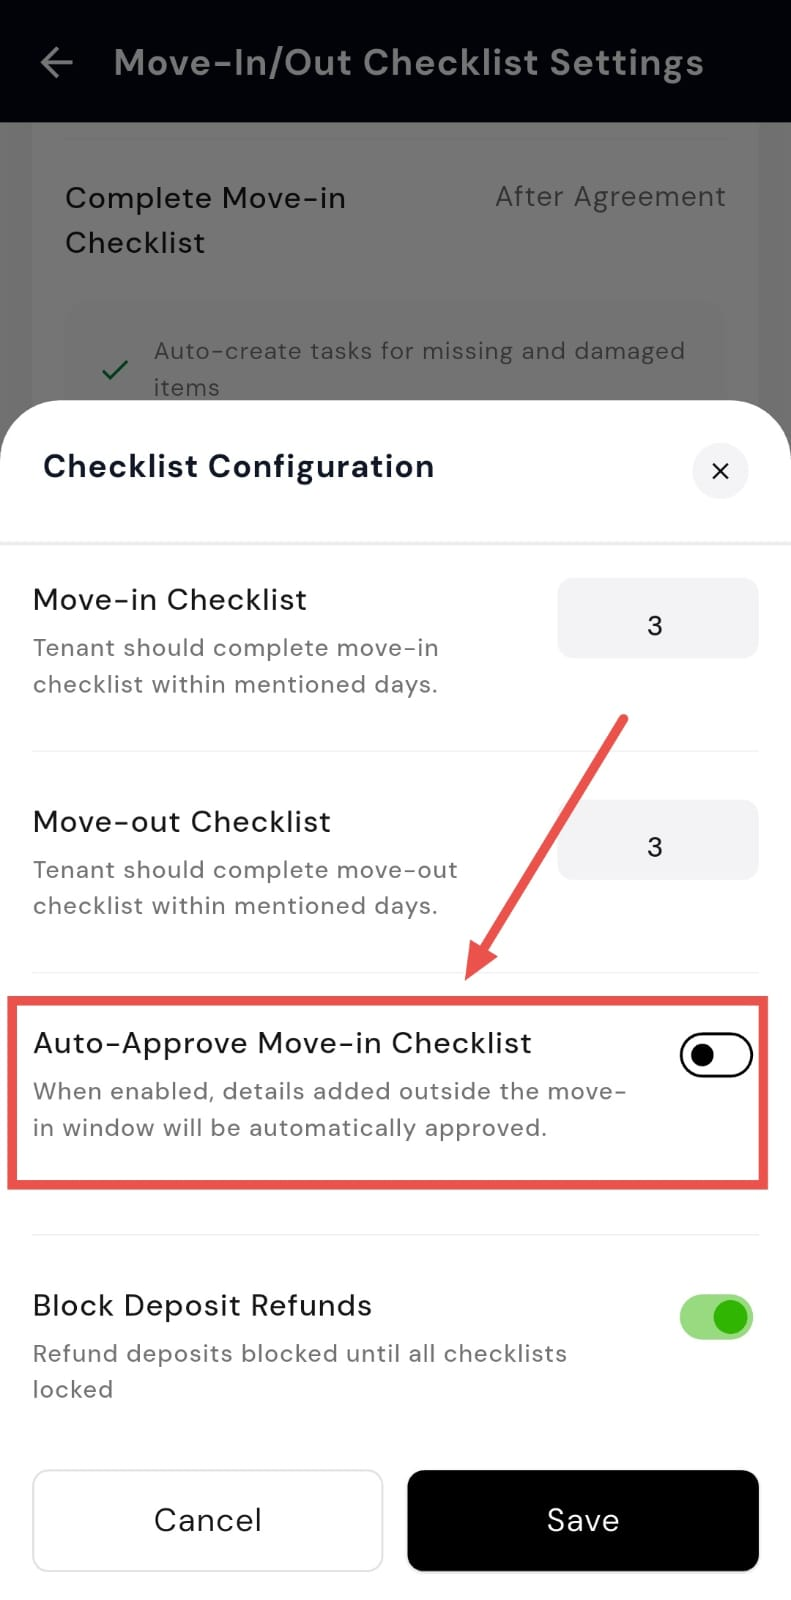
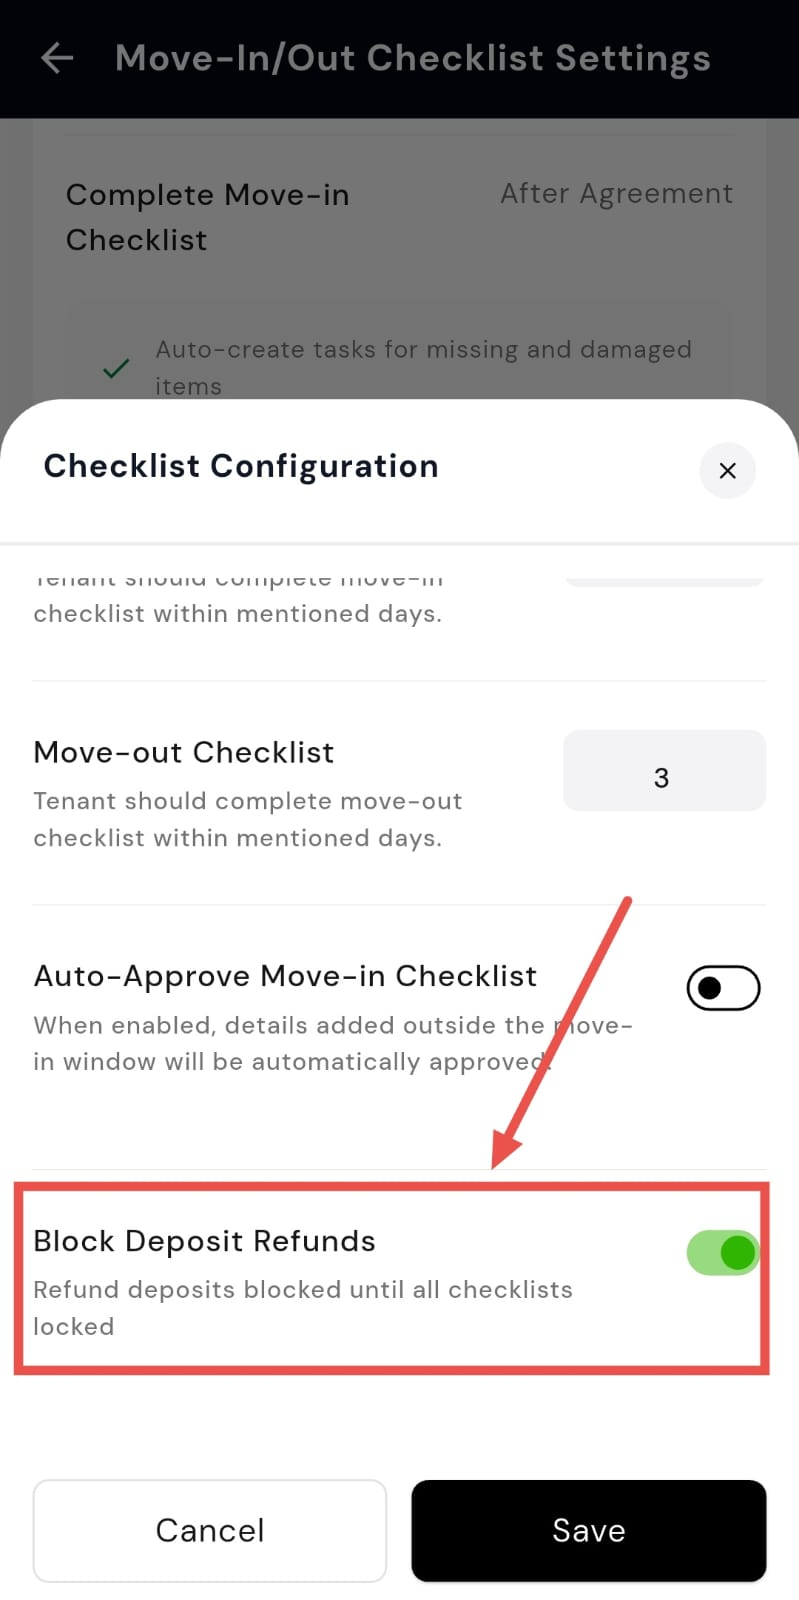
- Step 11: Enable or disable blocked deposit refunds On the same screen, you will find the Blocked Deposit Refunds option. Use this to decide whether deposit refunds should remain blocked until all move-out checklists are locked and completed.
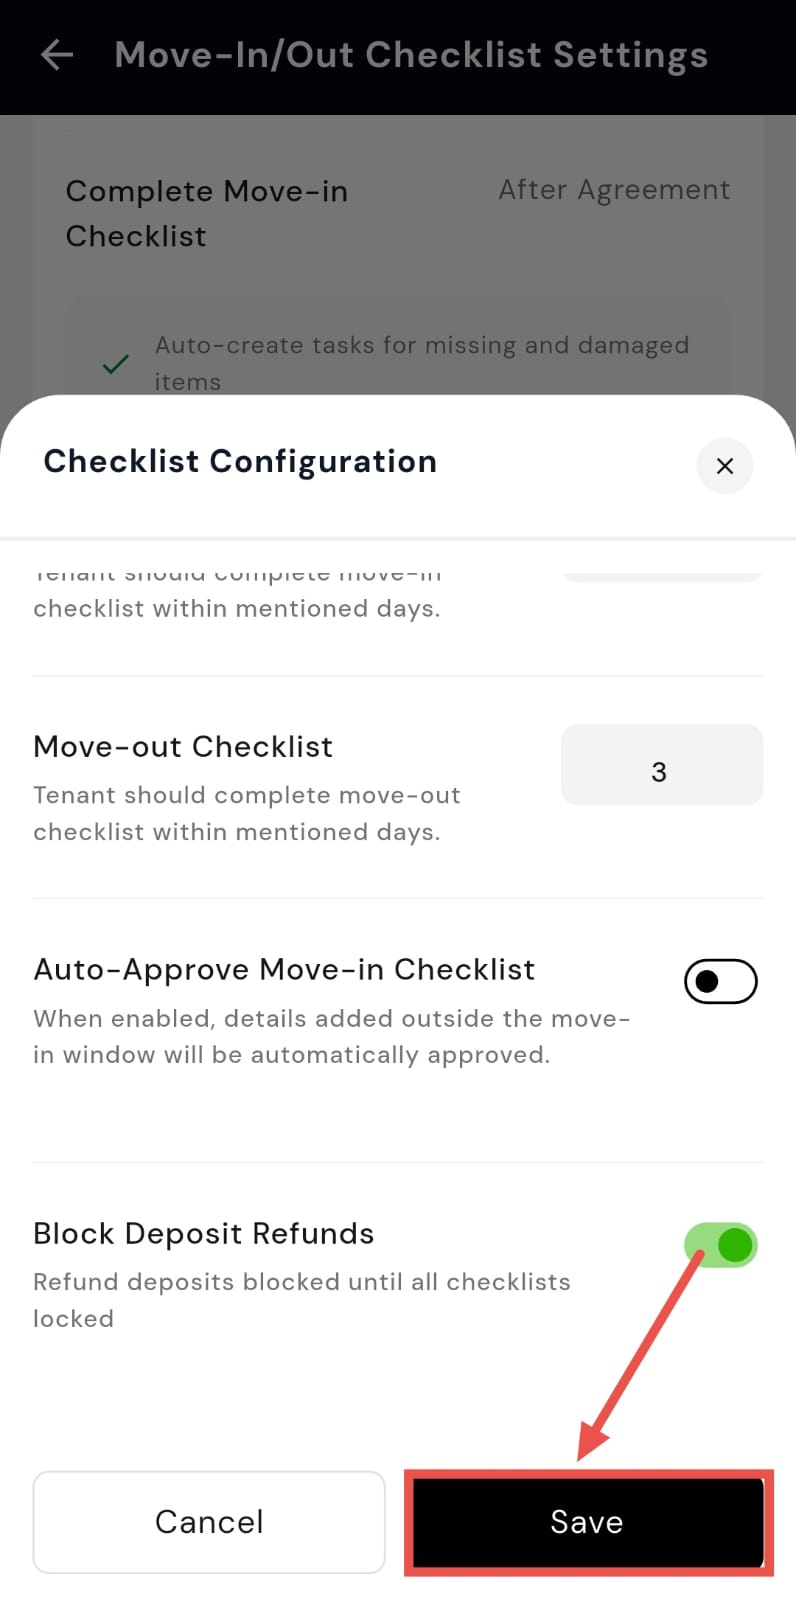
- Step 12: Save your changes Once all settings are updated, tap on Save to apply the changes.
| Why it matters: This prevents "he said, she said" arguments over security deposits. It creates a fair, digitally signed record of asset conditions, protecting both the owner and the tenant. |
|---|
✨ Daily Room Cleaning Checklist - Ensure and track daily housekeeping
We've launched a new checklist feature designed specifically for daily housekeeping. Create a standard cleaning task and assign it to your staff to ensure every room is cleaned and you have a digital record of the work.
Highlights
- Create Custom Templates: Build a standard checklist for what needs to be done during room cleaning (e.g., "Is the bathroom dry?").
- Schedule Daily Tasks: Assign the checklist to your housekeeping staff and schedule it to recur daily at a specific time.
- Live Photo Proof: Staff must upload a live photo from their camera (gallery upload is disabled), ensuring proof of work is authentic.
- Track Completion: Get a clear dashboard view of which rooms have been cleaned and which are pending for the day.
How to try
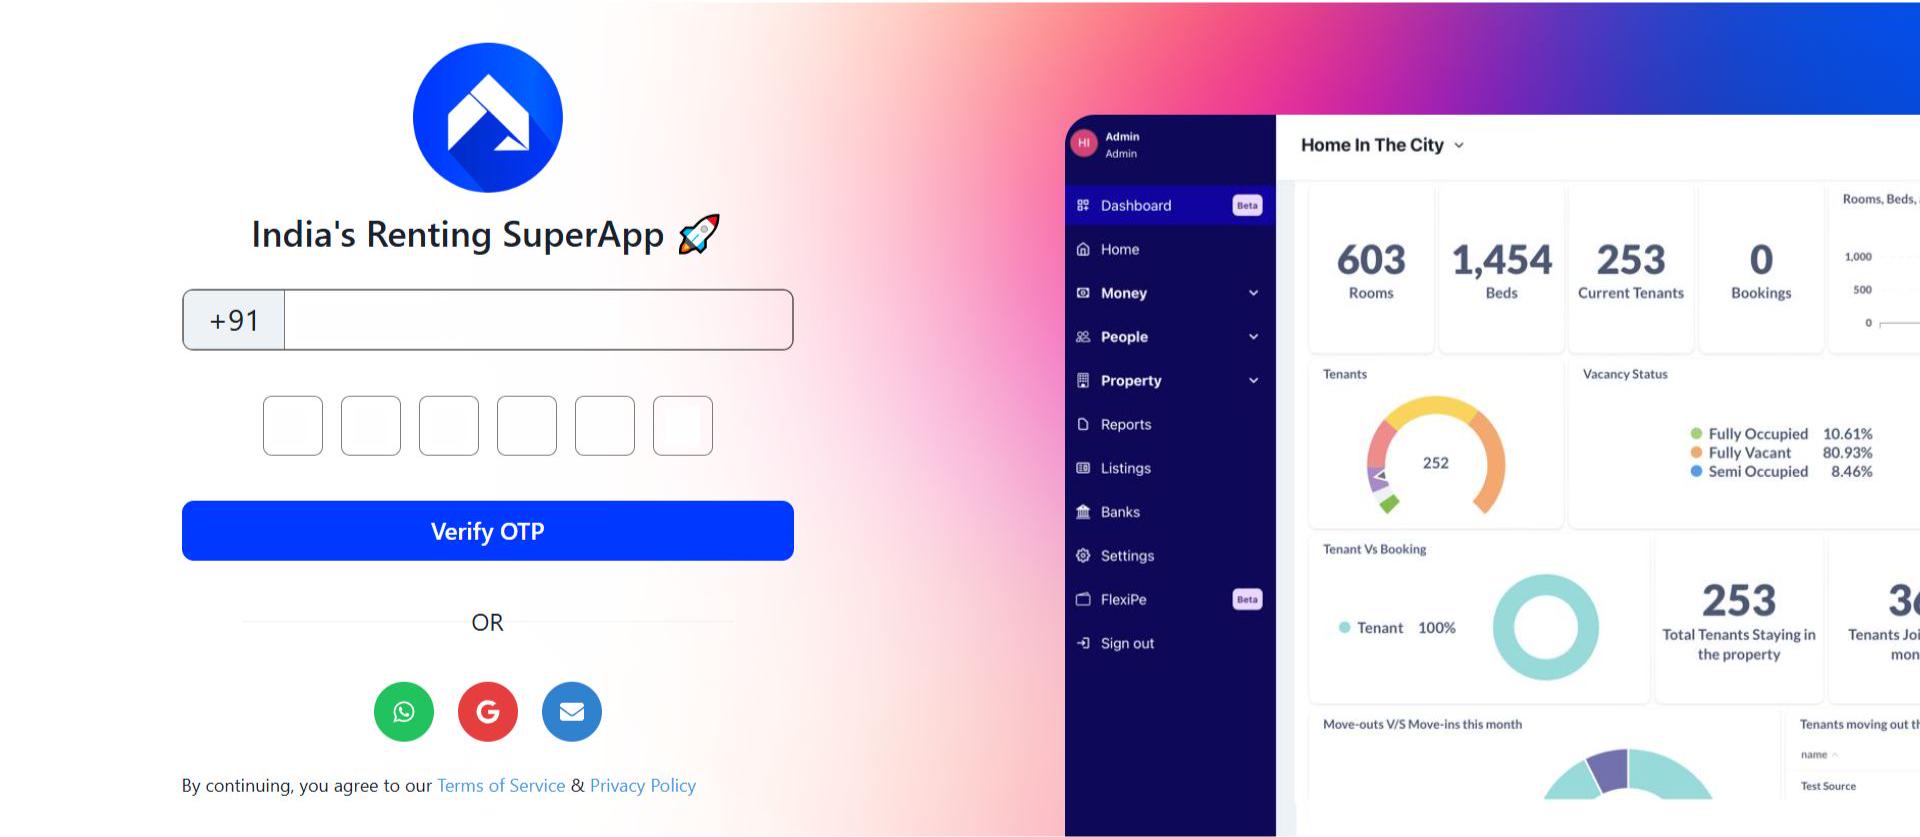
- Step 1: Log in to the Web Version Open the web version of the app in your browser and sign in using your registered credentials.
- Step 2: Go to the Home Page Once logged in, you'll arrive at the Home page, which gives you a quick overview of your account and recent activities.
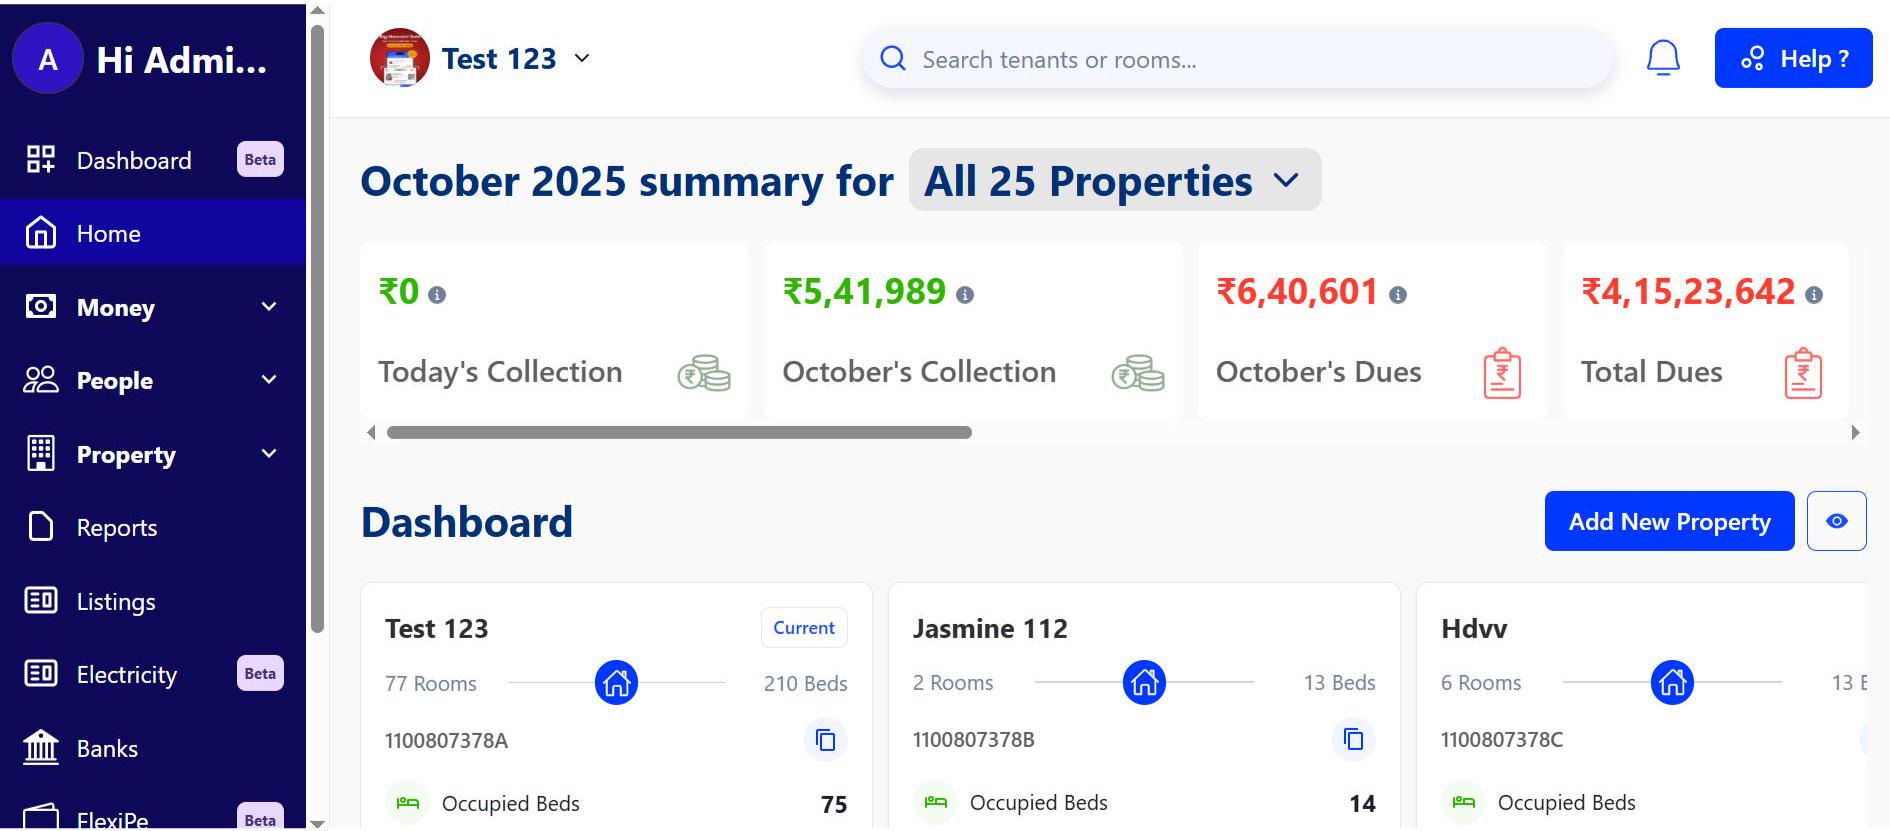
- Step 3: Open the Property Section From the left-hand menu or navigation panel, click on Property to access all property-related options.
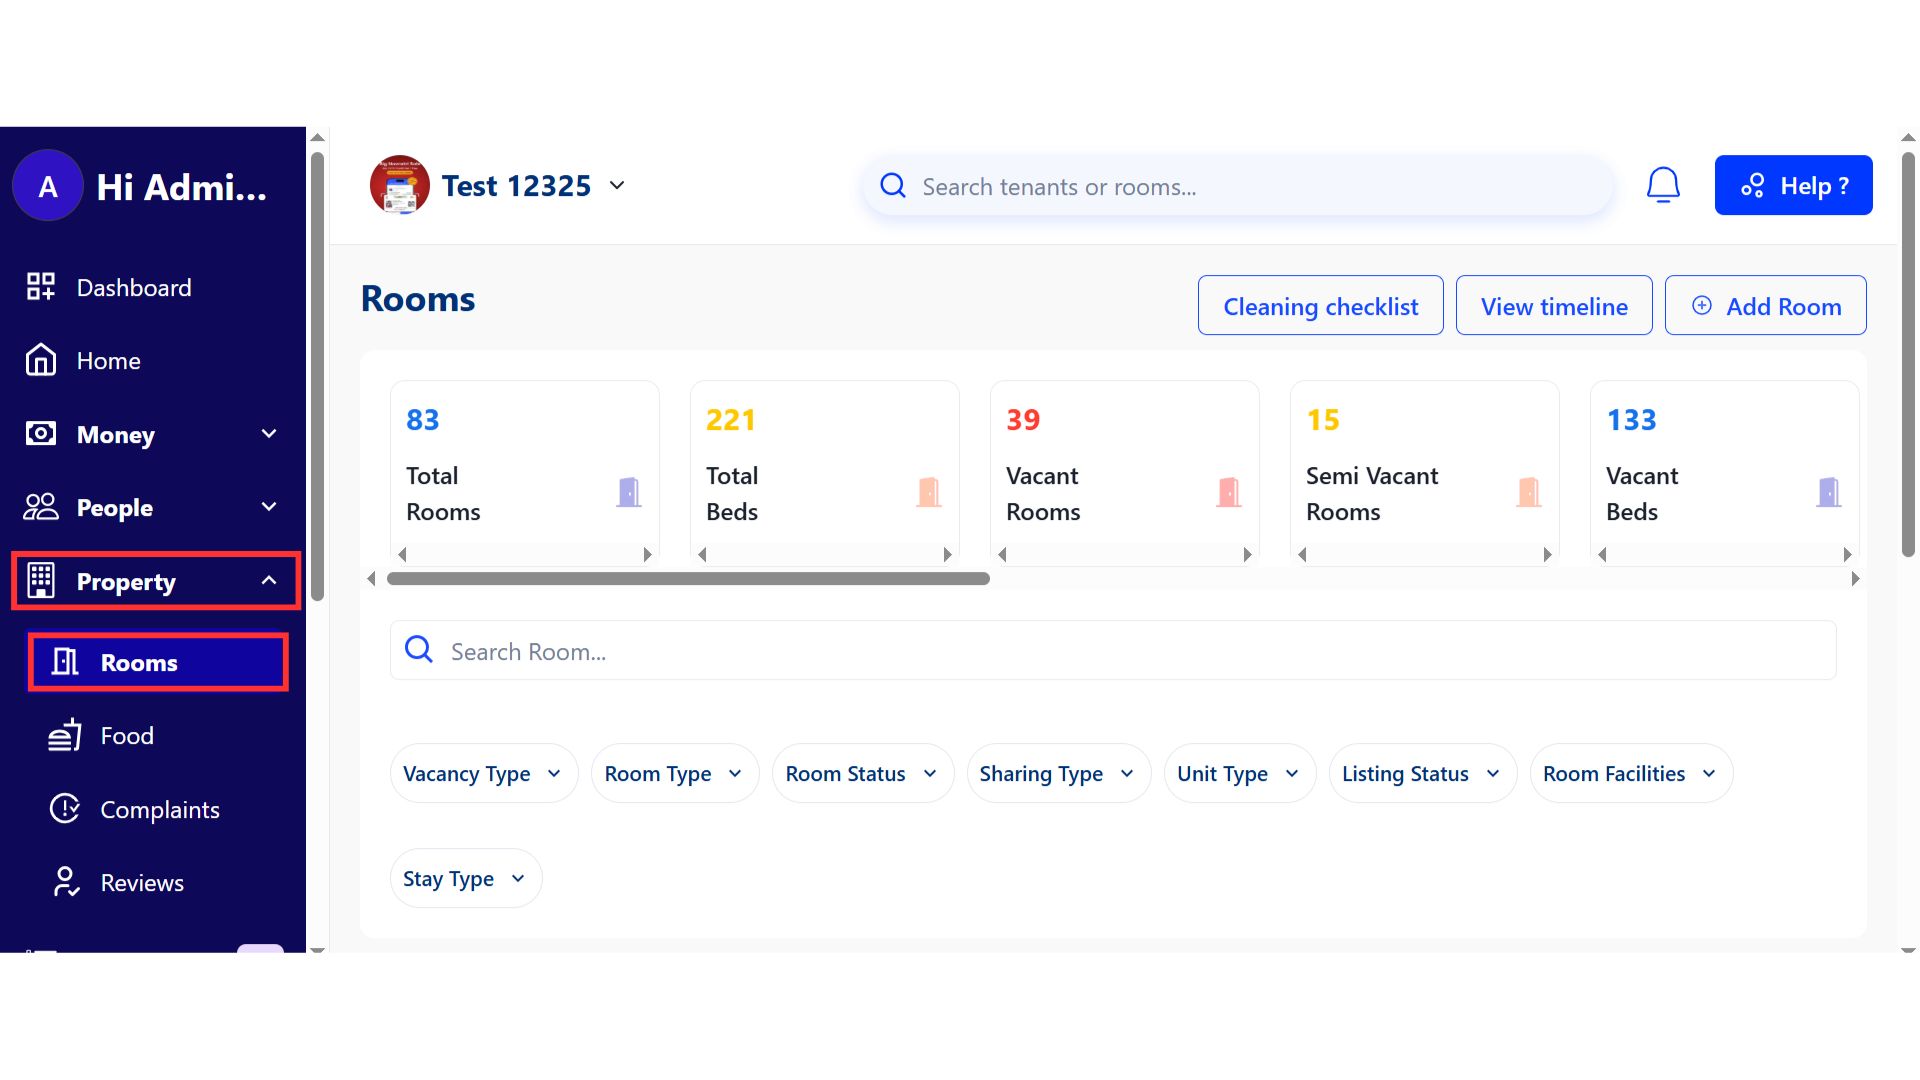
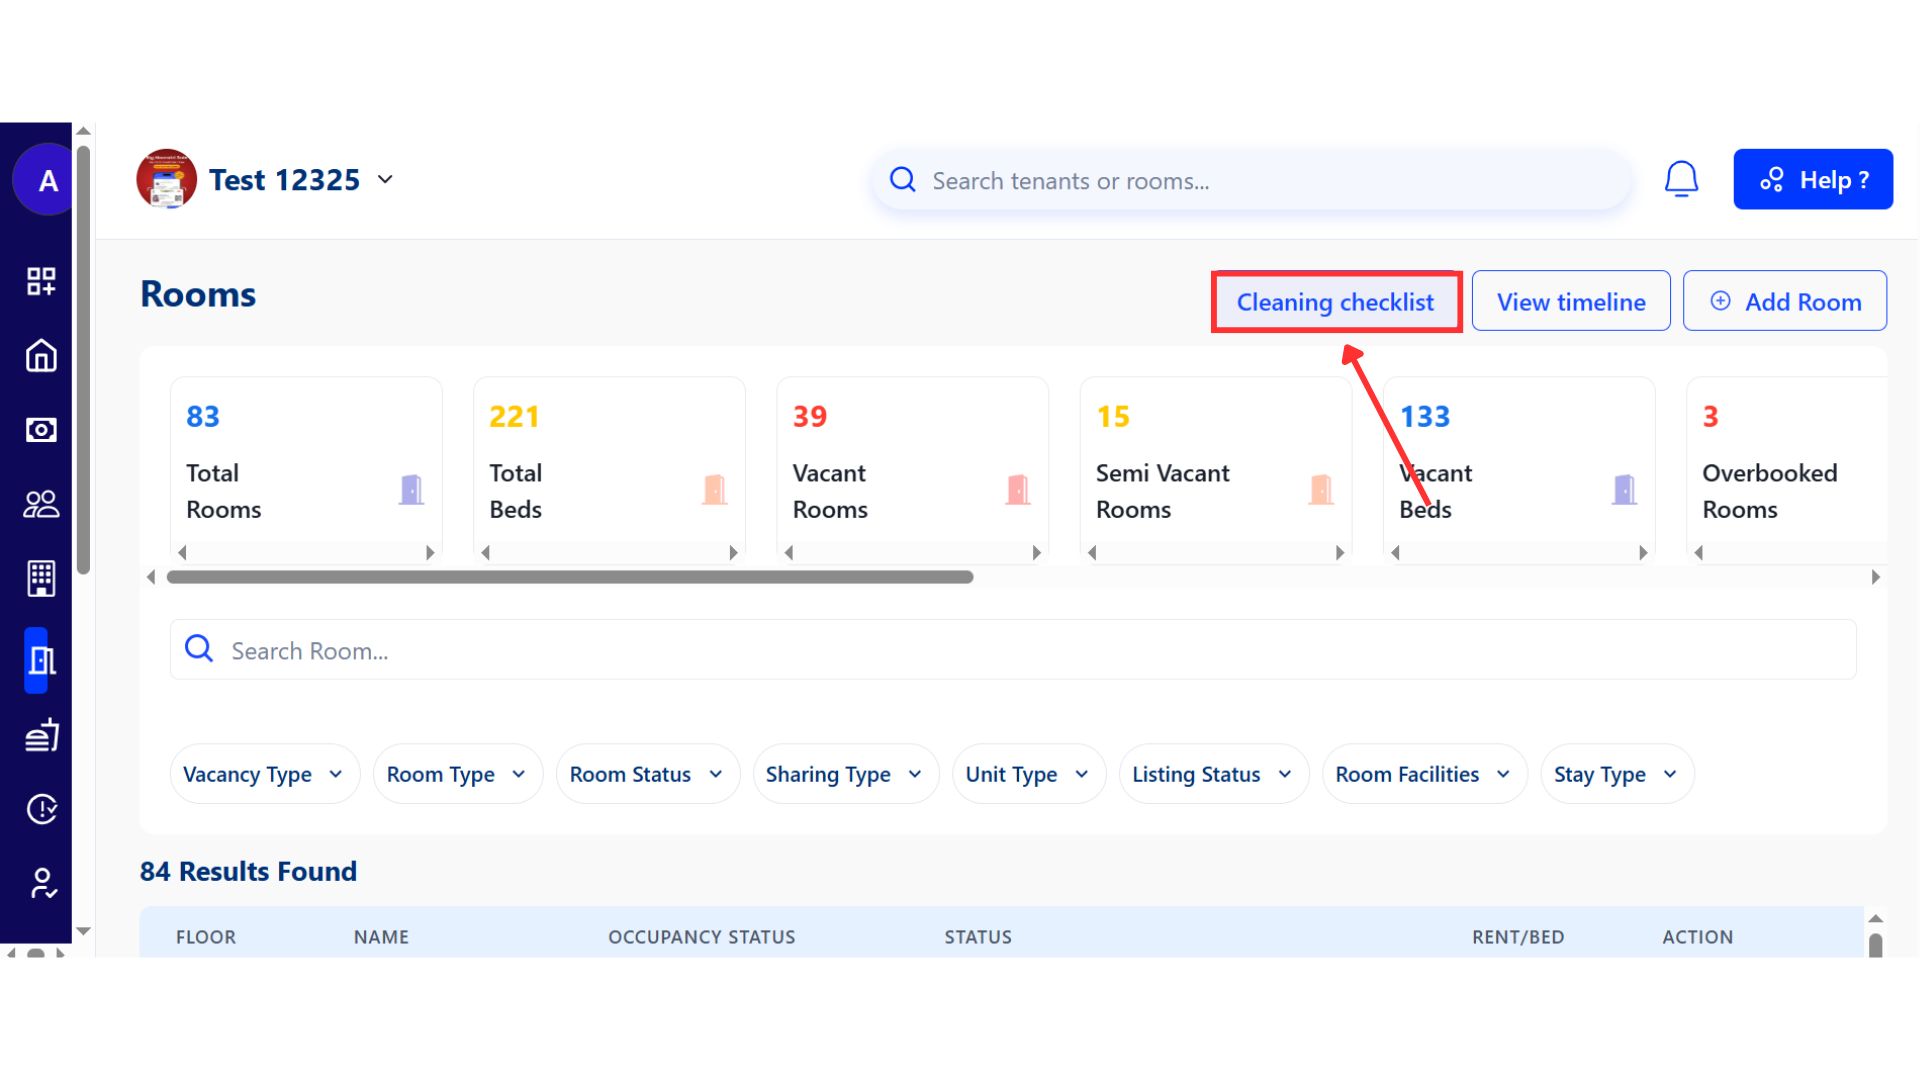
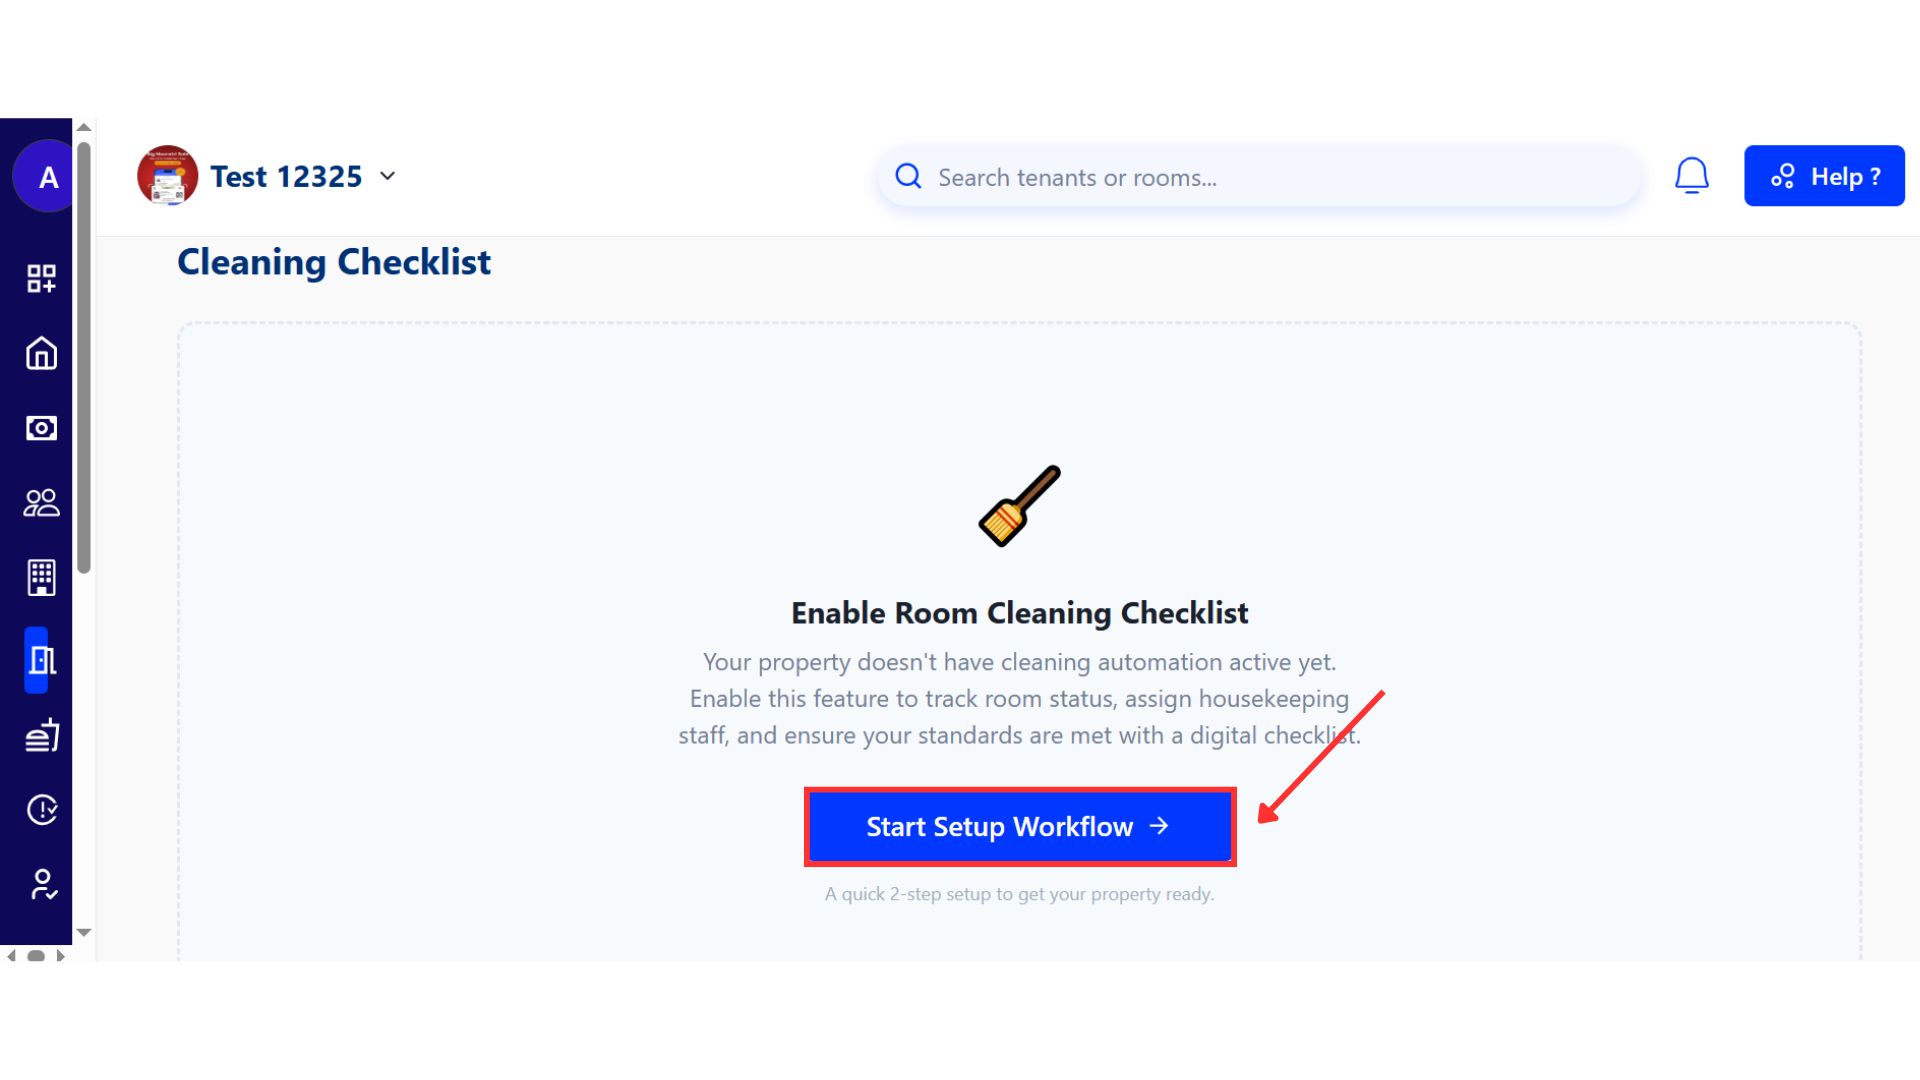
- Step 4: Open the cleaning checklist setup Inside the Property section, click on Cleaning Checklist, then select Start Setup Workflow to begin setting up the room cleaning checklist.
- Step 5: Create the checklist form You will be asked to set up a questionnaire. Enter a template name and add a short description. As you scroll down, you can build the form by adding questions, marking them as required or optional, and choosing whether an image upload is needed.
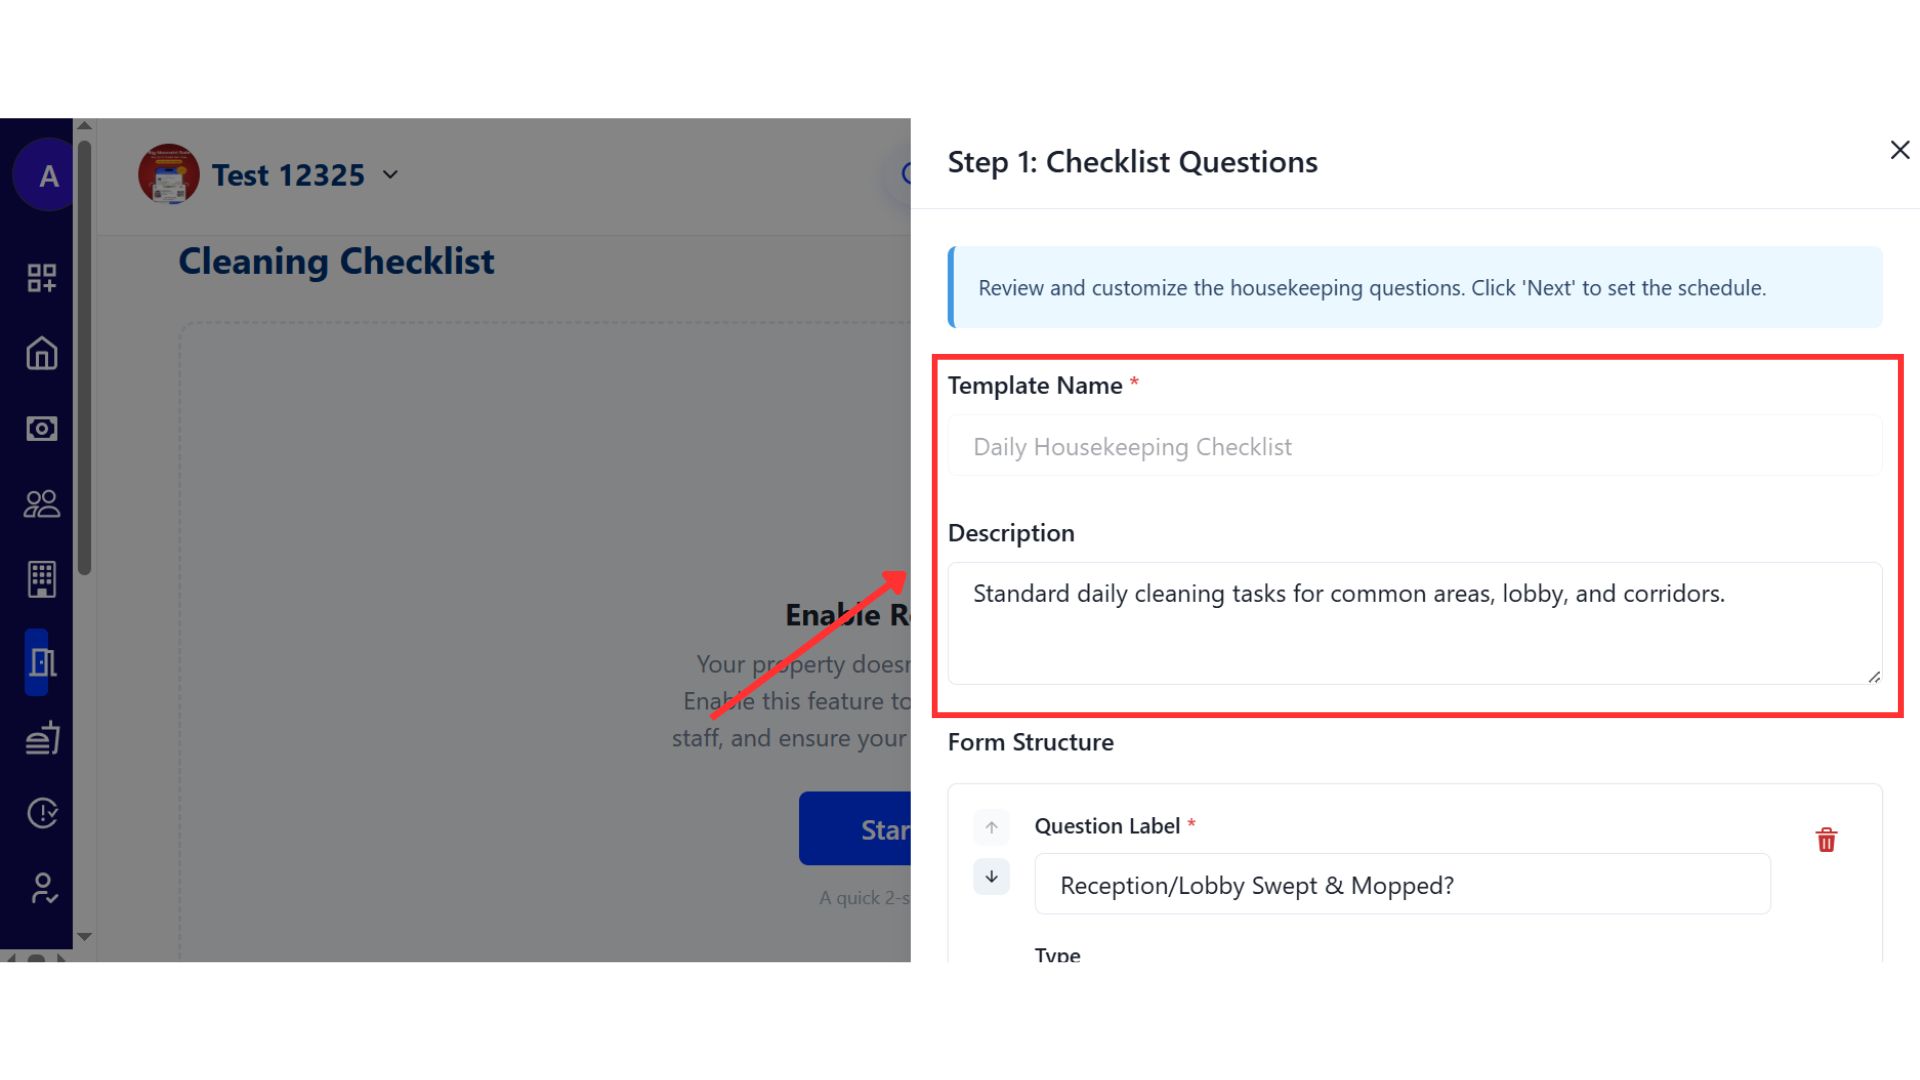
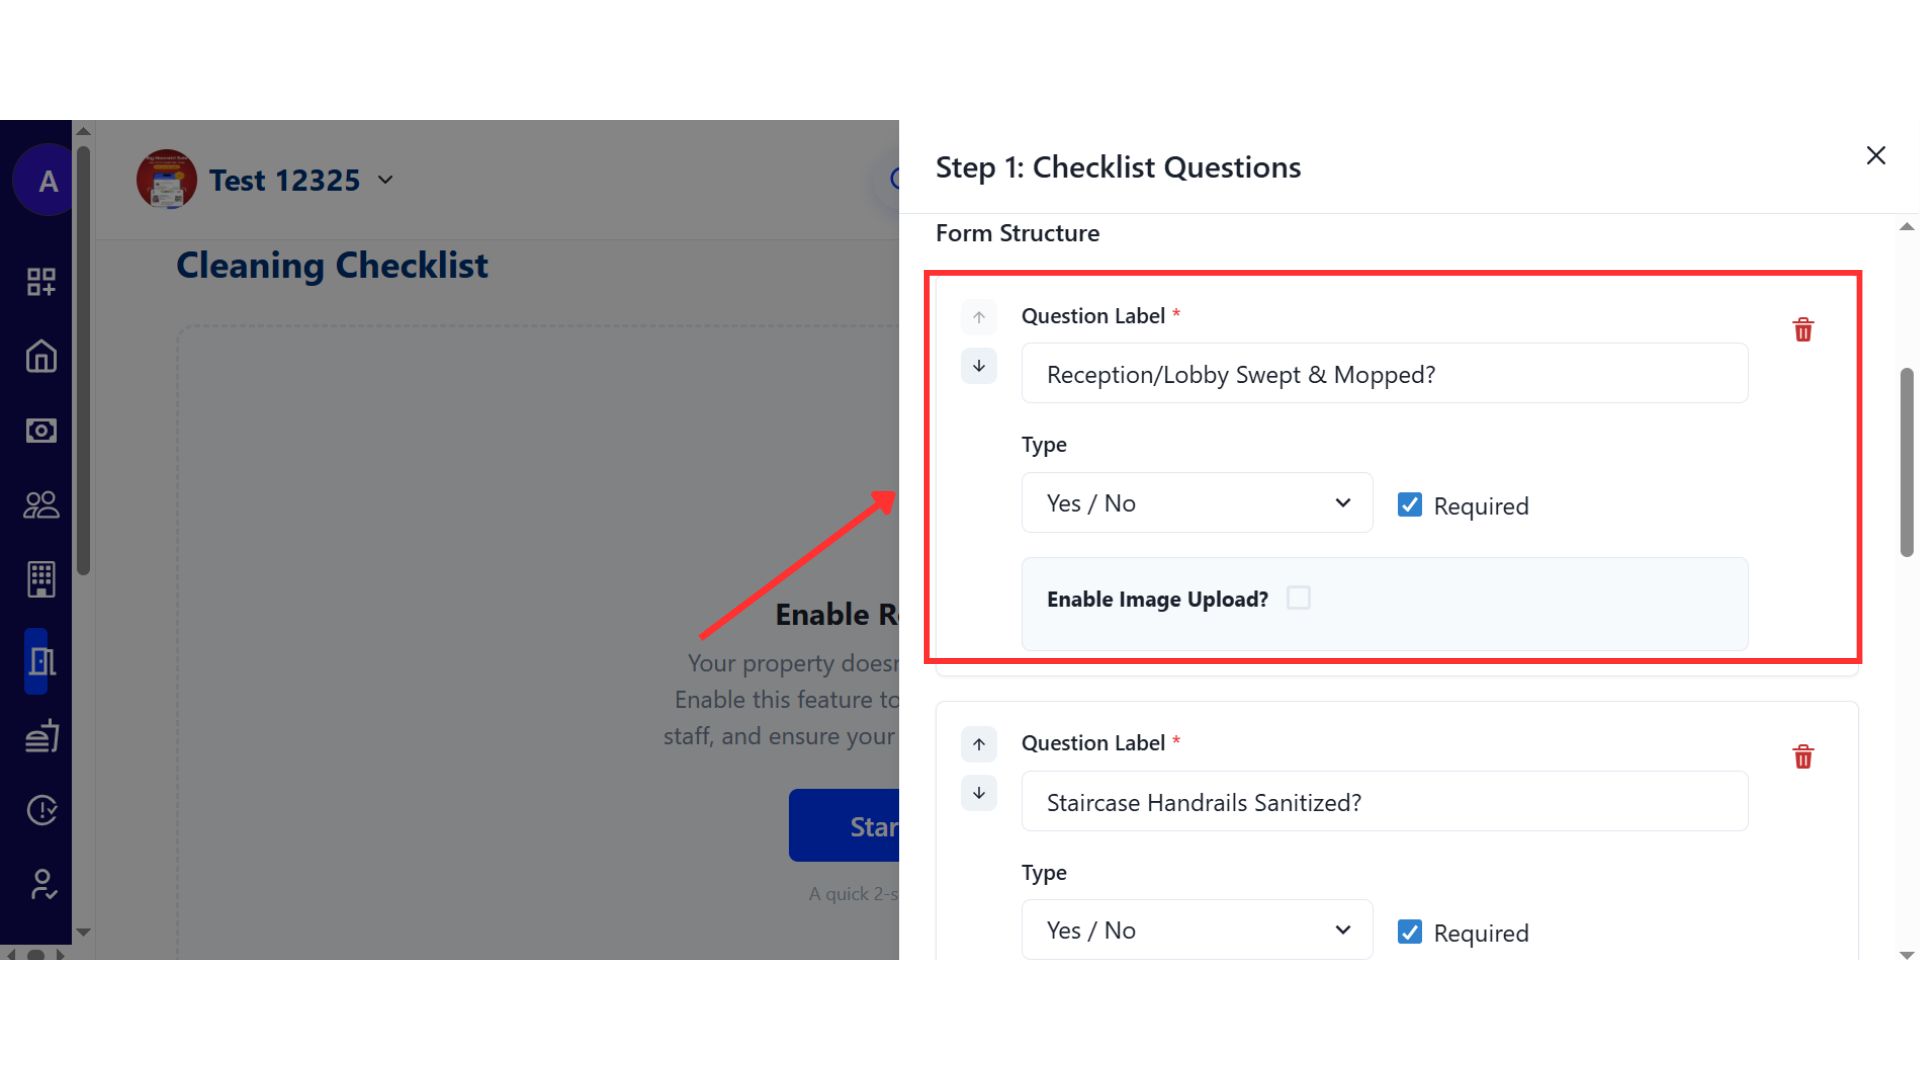
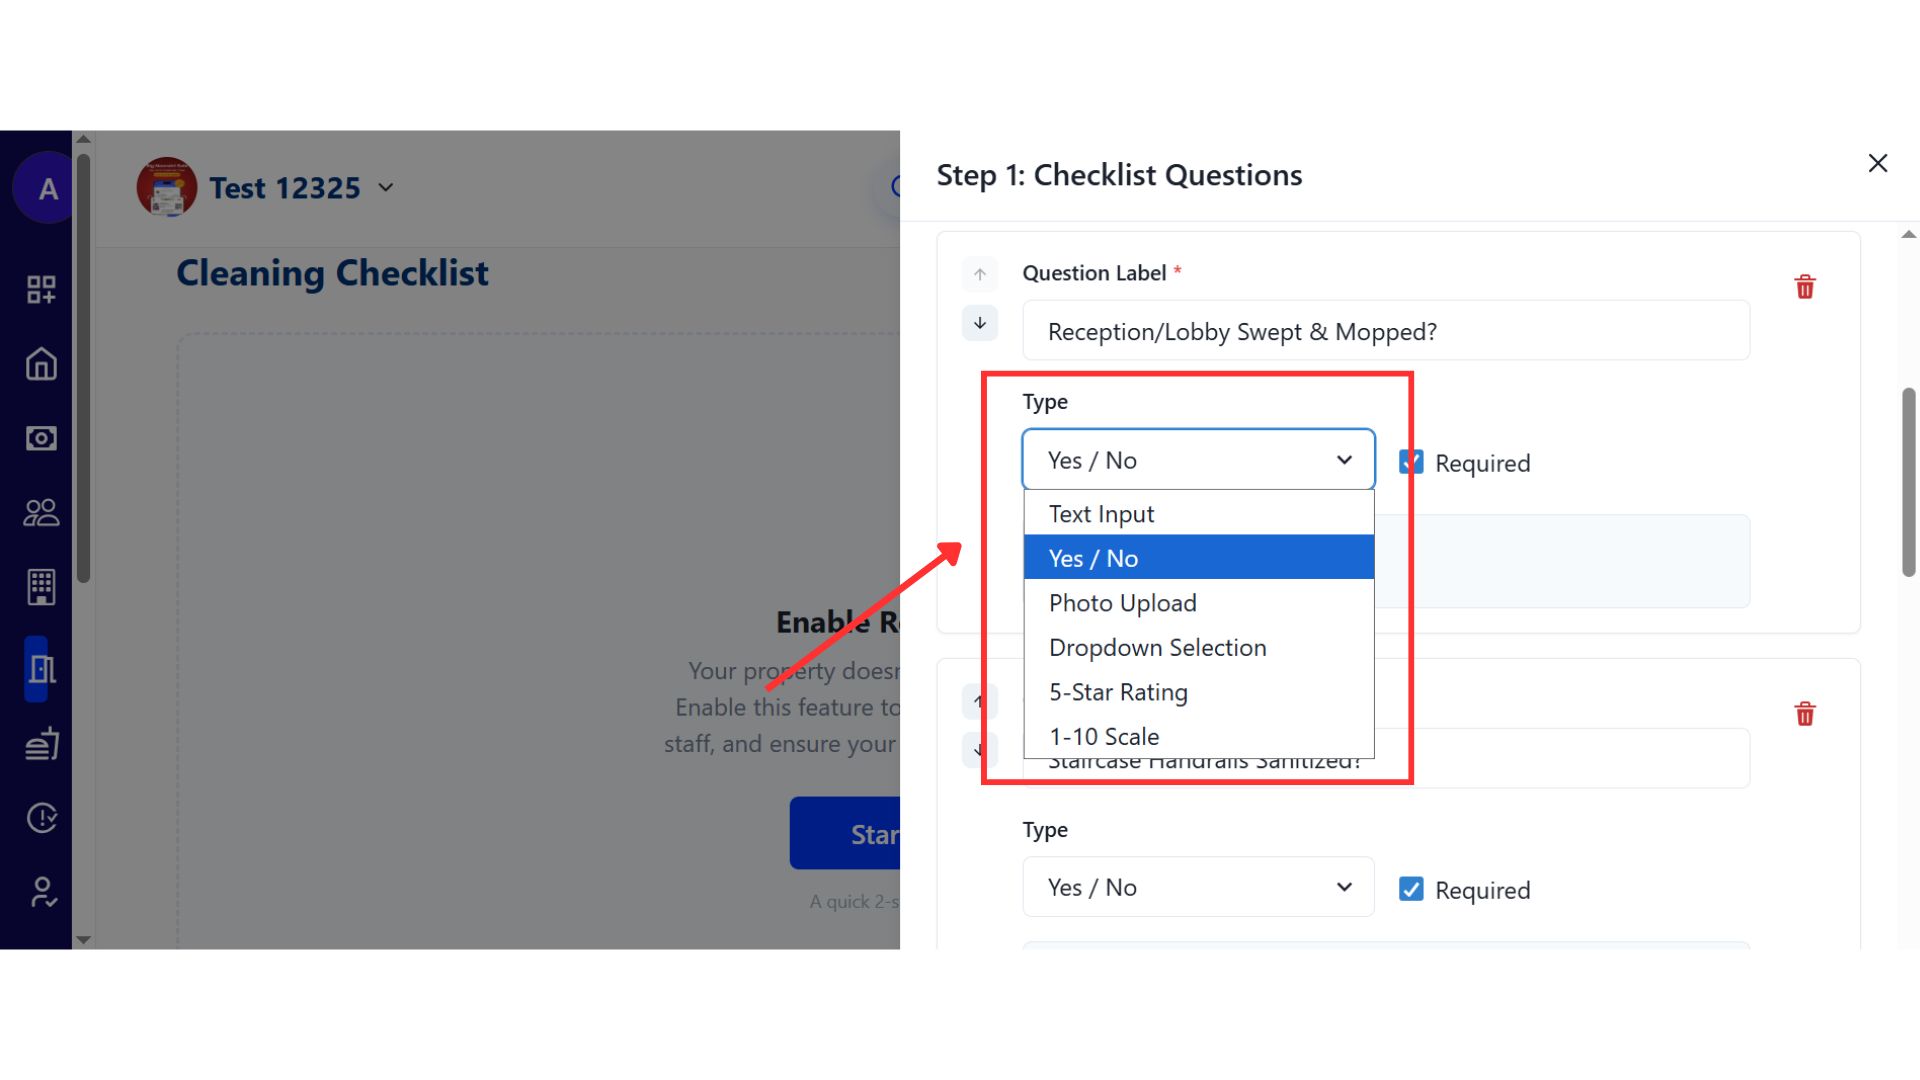
- Step 6: Choose question types and customize For each question, select the response type such as Yes/No, Photo Upload, Dropdown, Rating, or Scale-based. You can use the provided template as a reference, add new questions, or delete any that are not required.
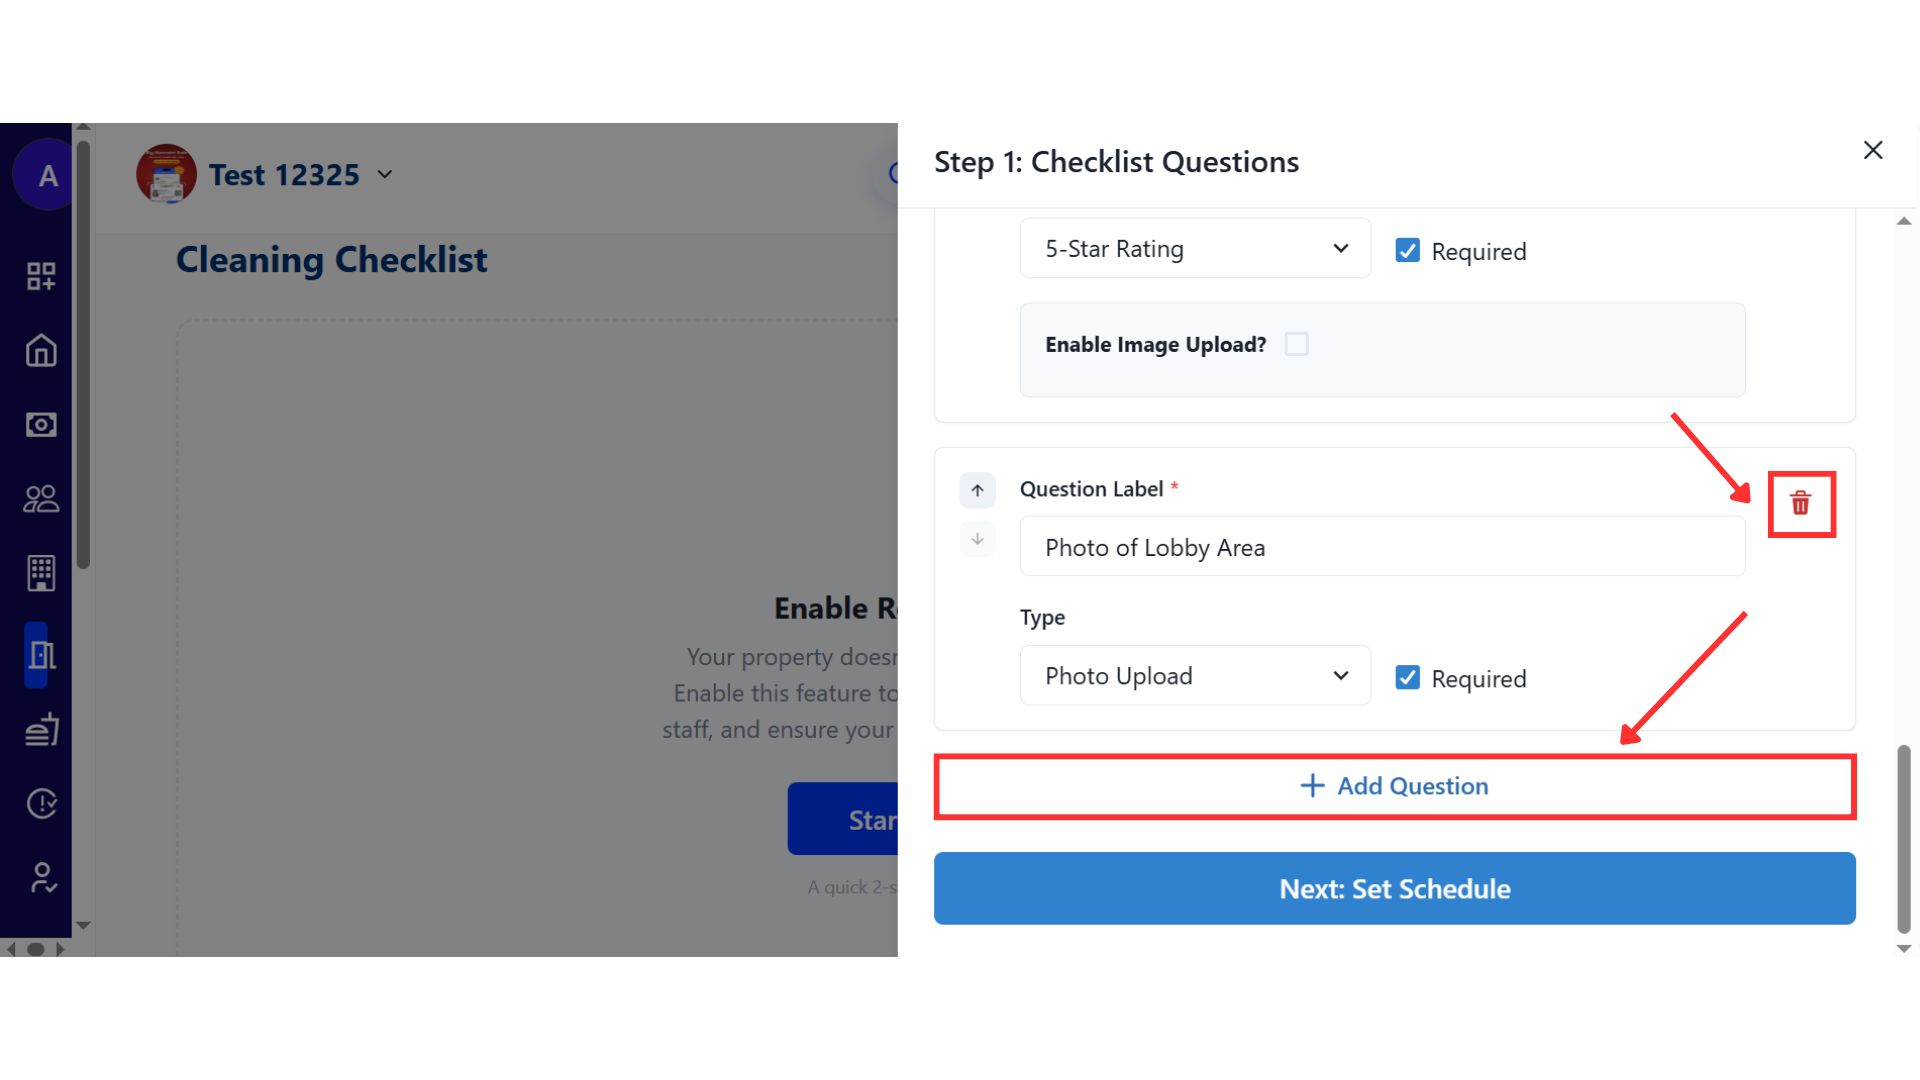
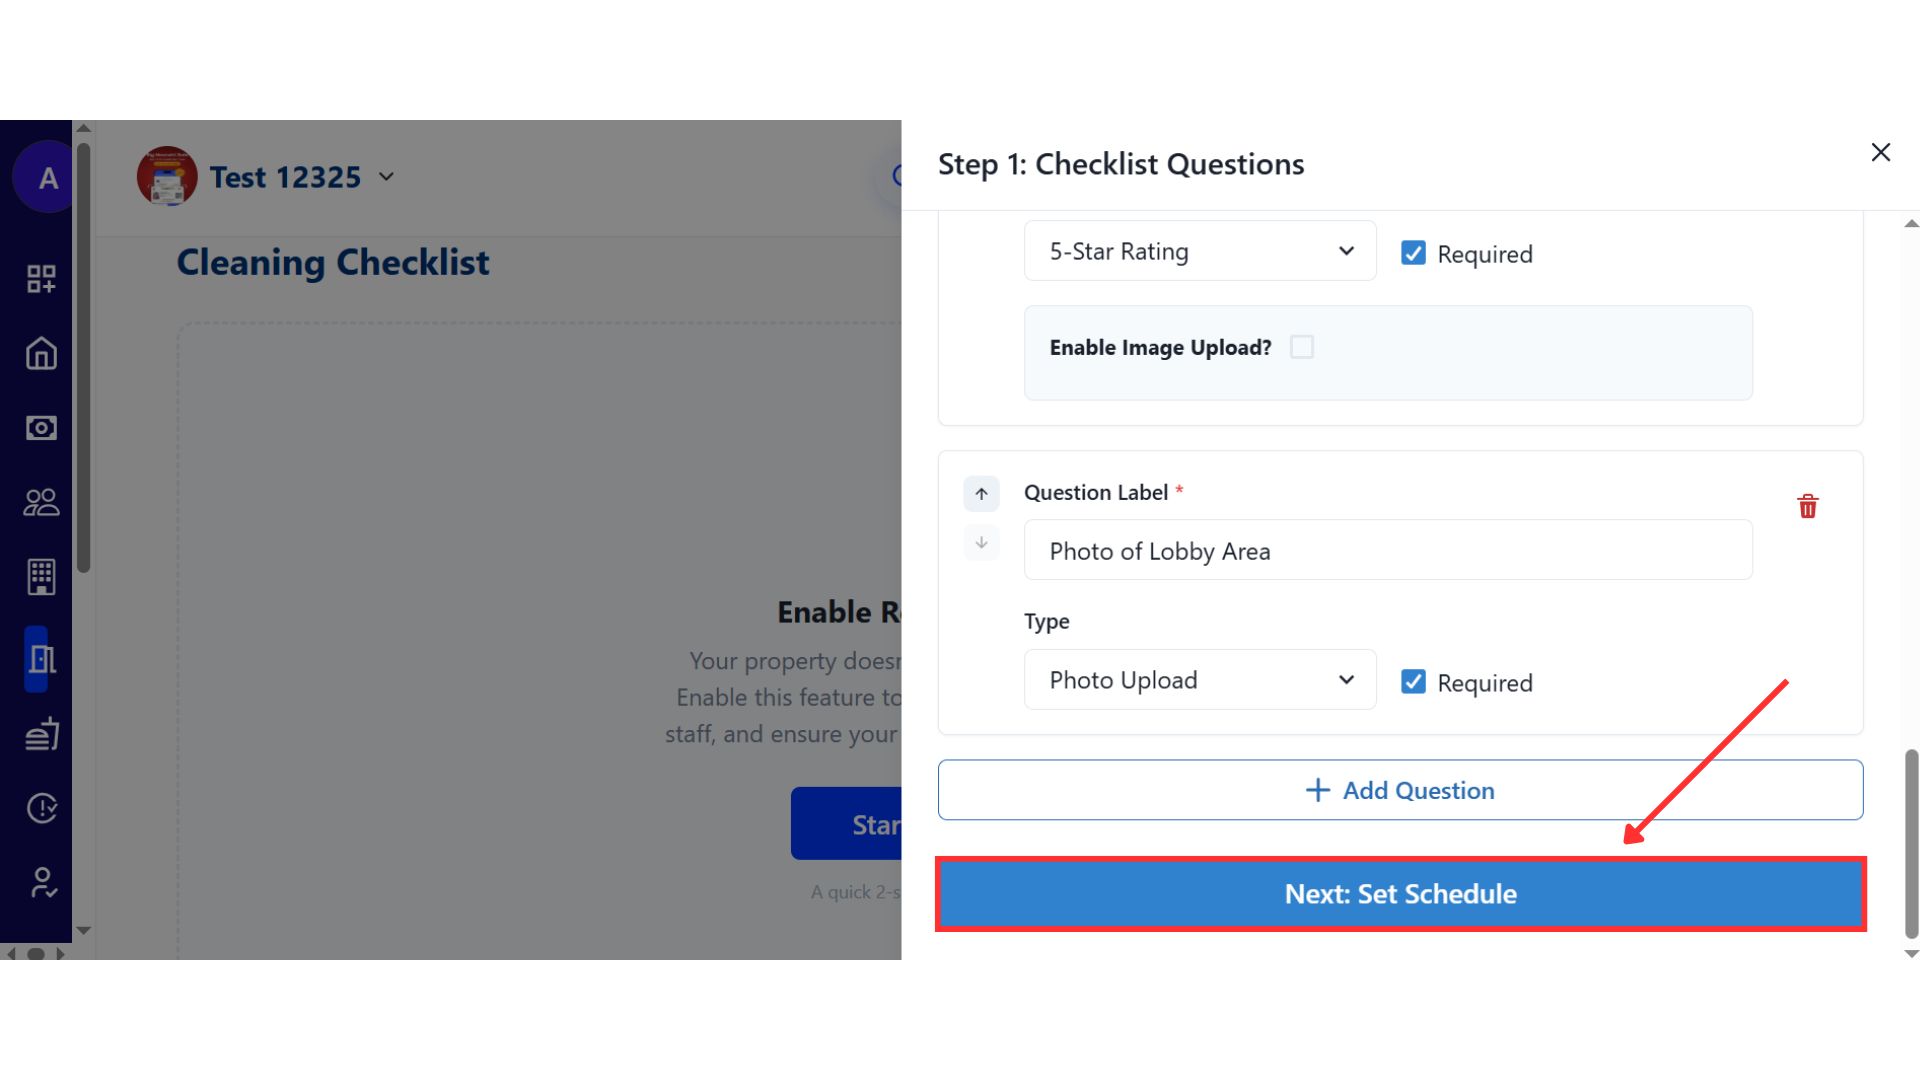
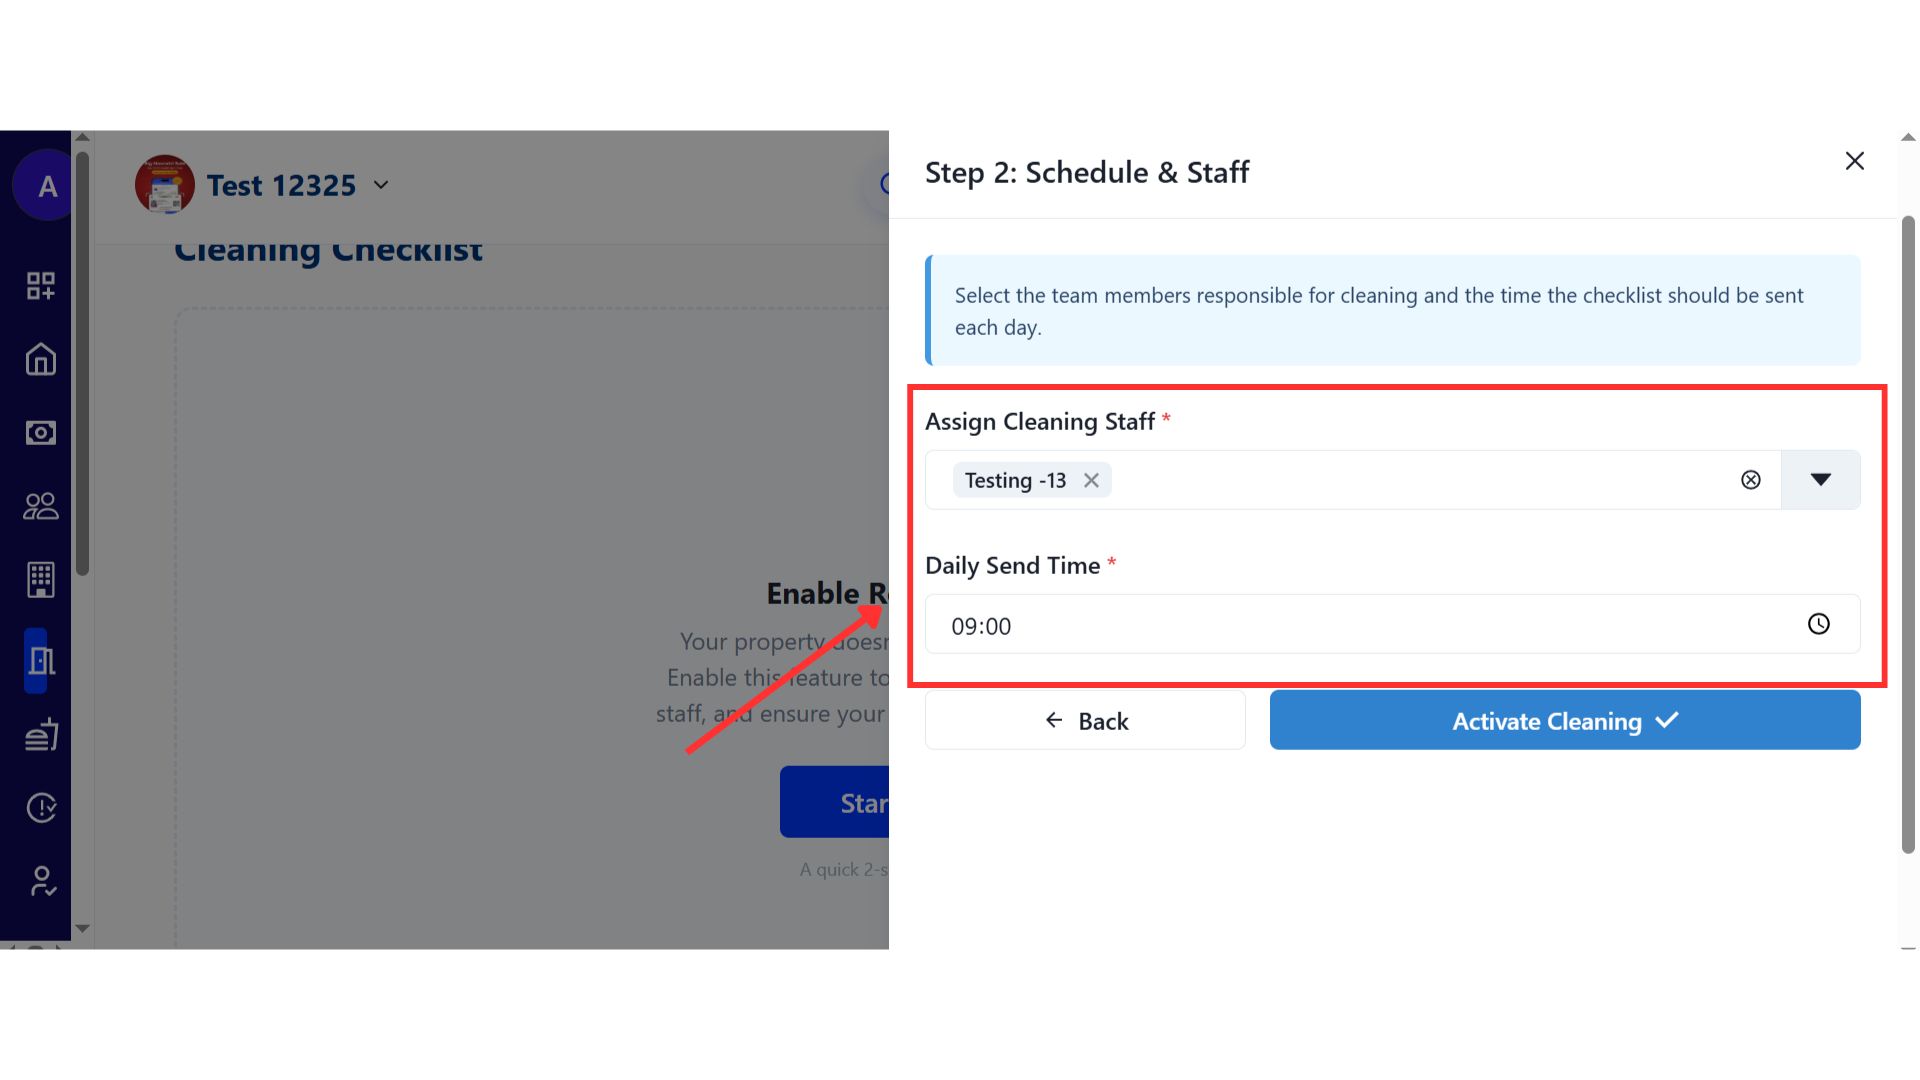
- Step 7: Set schedule and assign staff Once the questions are finalized, click Next to set the cleaning schedule. Then assign the cleaning staff who will be responsible for completing this checklist and the timings for the form to be sent to the particular staff.
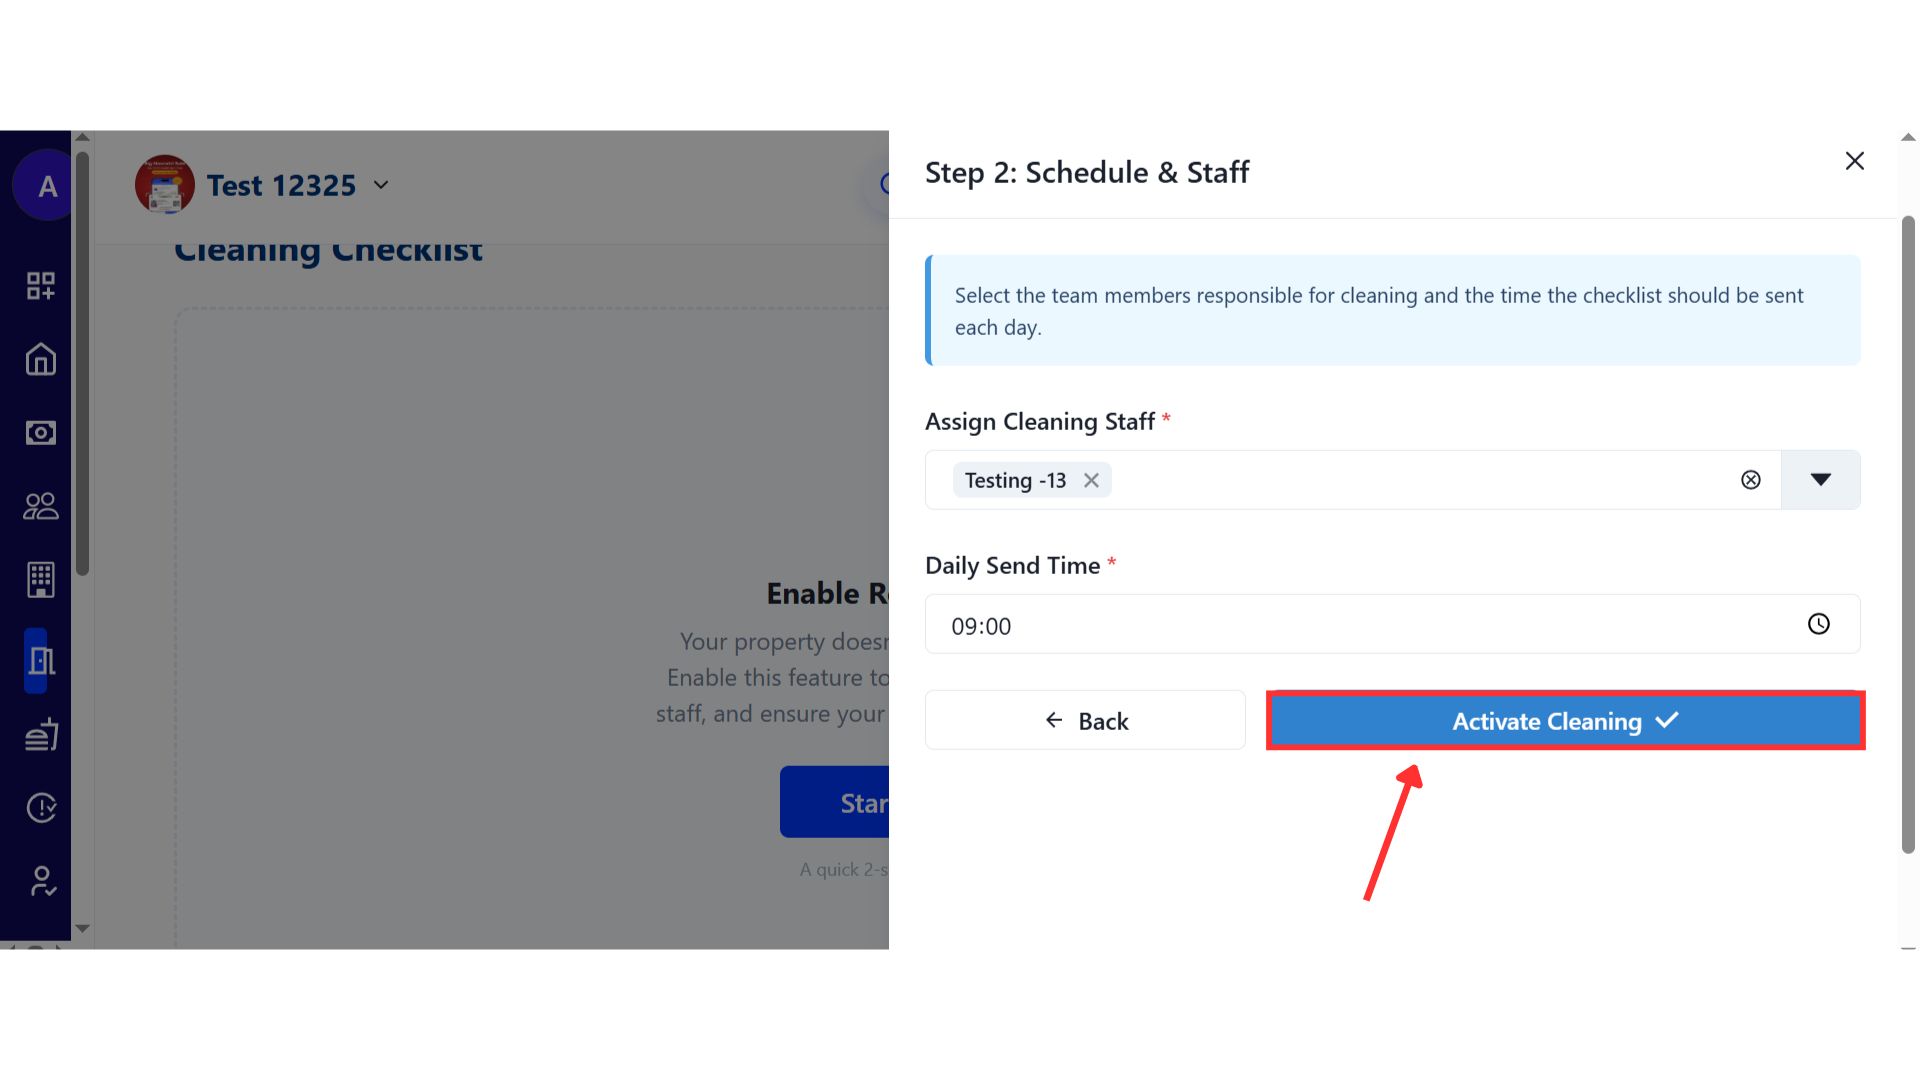
- Step 8: Activate the cleaning checklist After completing all steps, click Activate Cleaning. Your daily room cleaning checklist will now be enabled and ready for use.

| Why it matters: This brings discipline to daily operations, gives owners visibility into whether cleaning is happening on time, and helps build tenant trust by providing proof of service. |
|---|
Fixes & Polish
- Faster Tenant Onboarding The check-in process is now significantly faster, with improved document upload reliability.
- Improved Notifications Push notifications for complaints and payments are now more reliable and timely.
Coming Up Next
- Advanced Analytics Dashboard: Get deeper insights into your property's financial performance.
- WhatsApp Integration: Send automated payment reminders and receipts directly via WhatsApp.
Thank You
Have doubts or any feedback? Chat with us in-app (Help → send us message). We're building for you, and every suggestion counts!
See you in the next update!