Rentok Release Note - 5Th Feb, 2026
RentOk Release Note - 5th Feb, 2026
Hello!
This week, we're bringing more of the powerful features you love on mobile to our web platform, including the complete eviction workflow and a brand new Food Menu module. We're also introducing a major new security feature: the Entry/Exit module.
🚪 New Entry/Exit Module (Web) - Track every movement in your property
We're launching a comprehensive new module to monitor and log the entry and exit of tenants, visitors, and delivery staff. It's a digital, secure replacement for manual registers, designed for properties needing high security, like student housing.
See what’s new →
Highlights
-
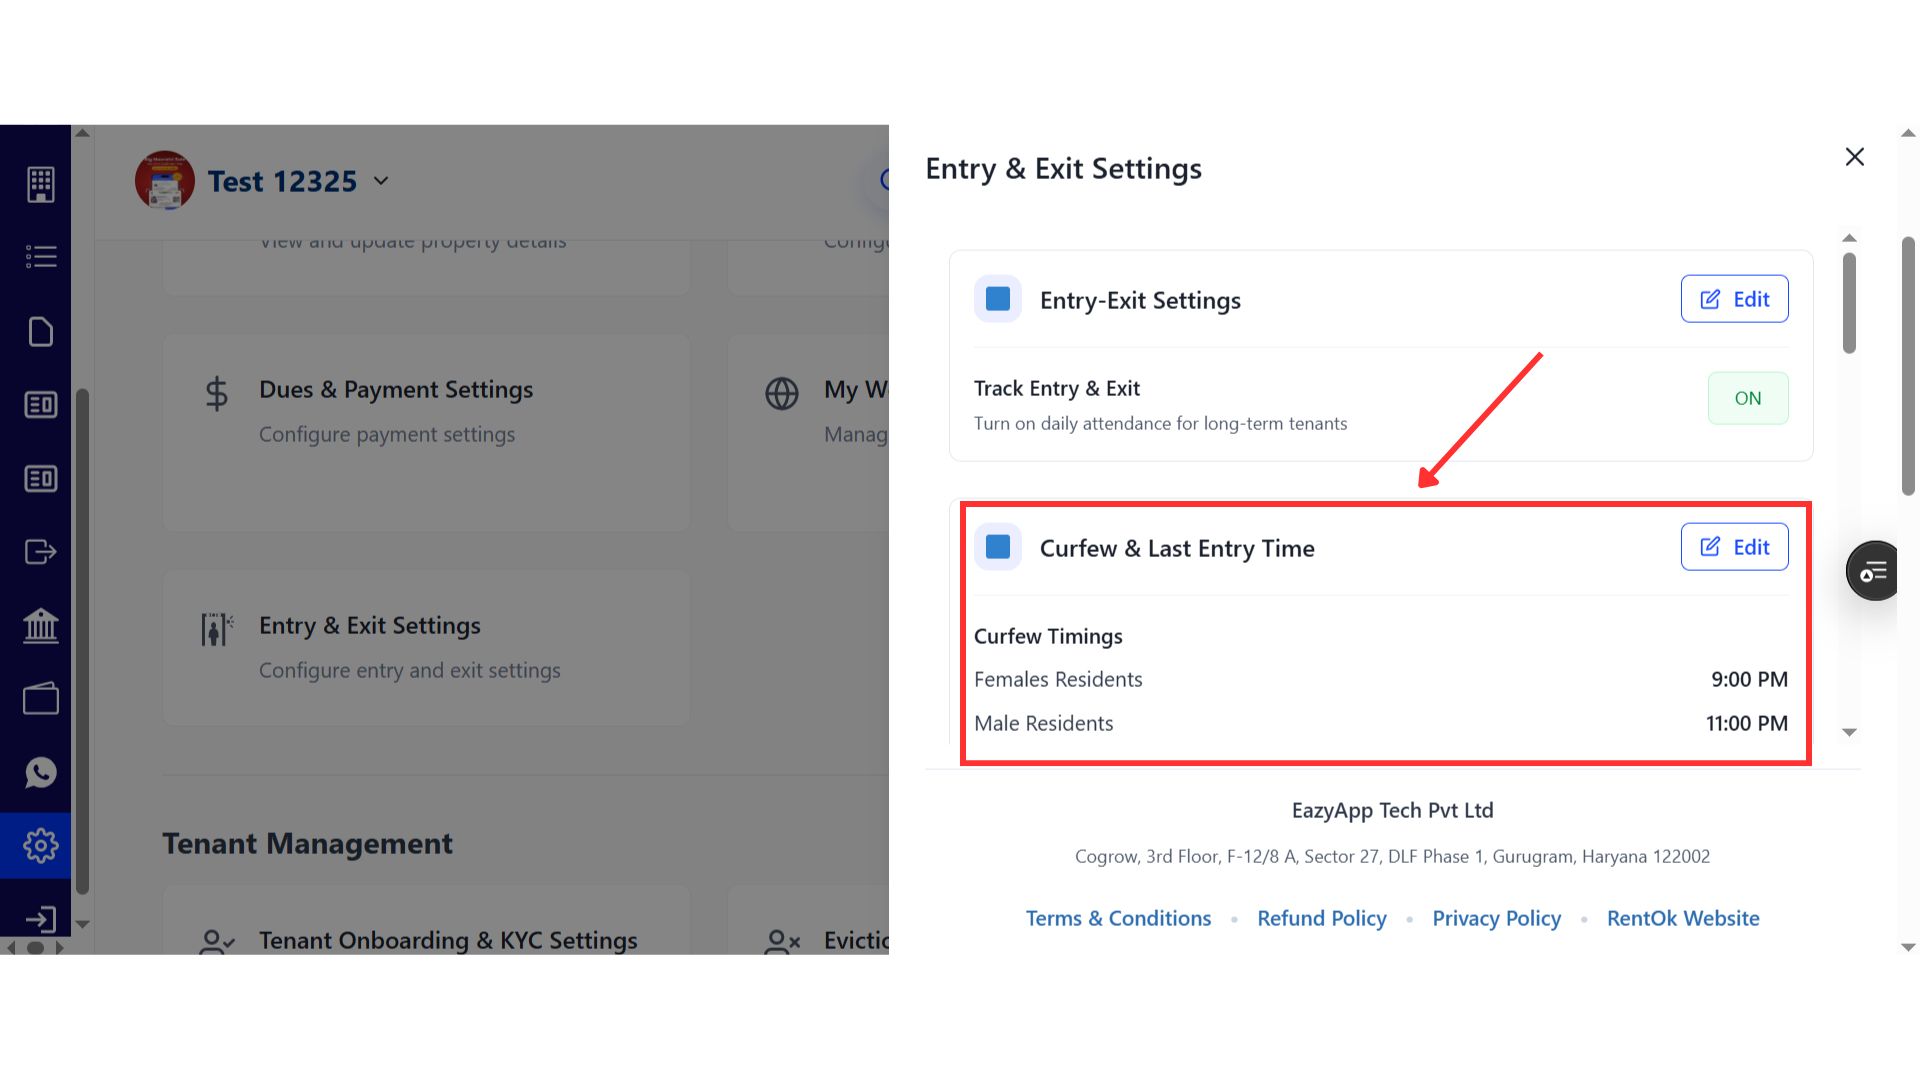
Set Curfew Times: Define separate curfew and last entry times for different resident types (e.g., male/female).
-
Create Digital Gates: Set up multiple gates (e.g., Main Gate, Girls Hostel Gate) with unique QR codes for tenants to scan.
-
Live Dashboard: Get a real-time view of who is currently inside or outside the property.
-
Set Up Approval Workflows: Require parent and/or warden approval for late entry or exit requests to ensure full accountability.
How to try
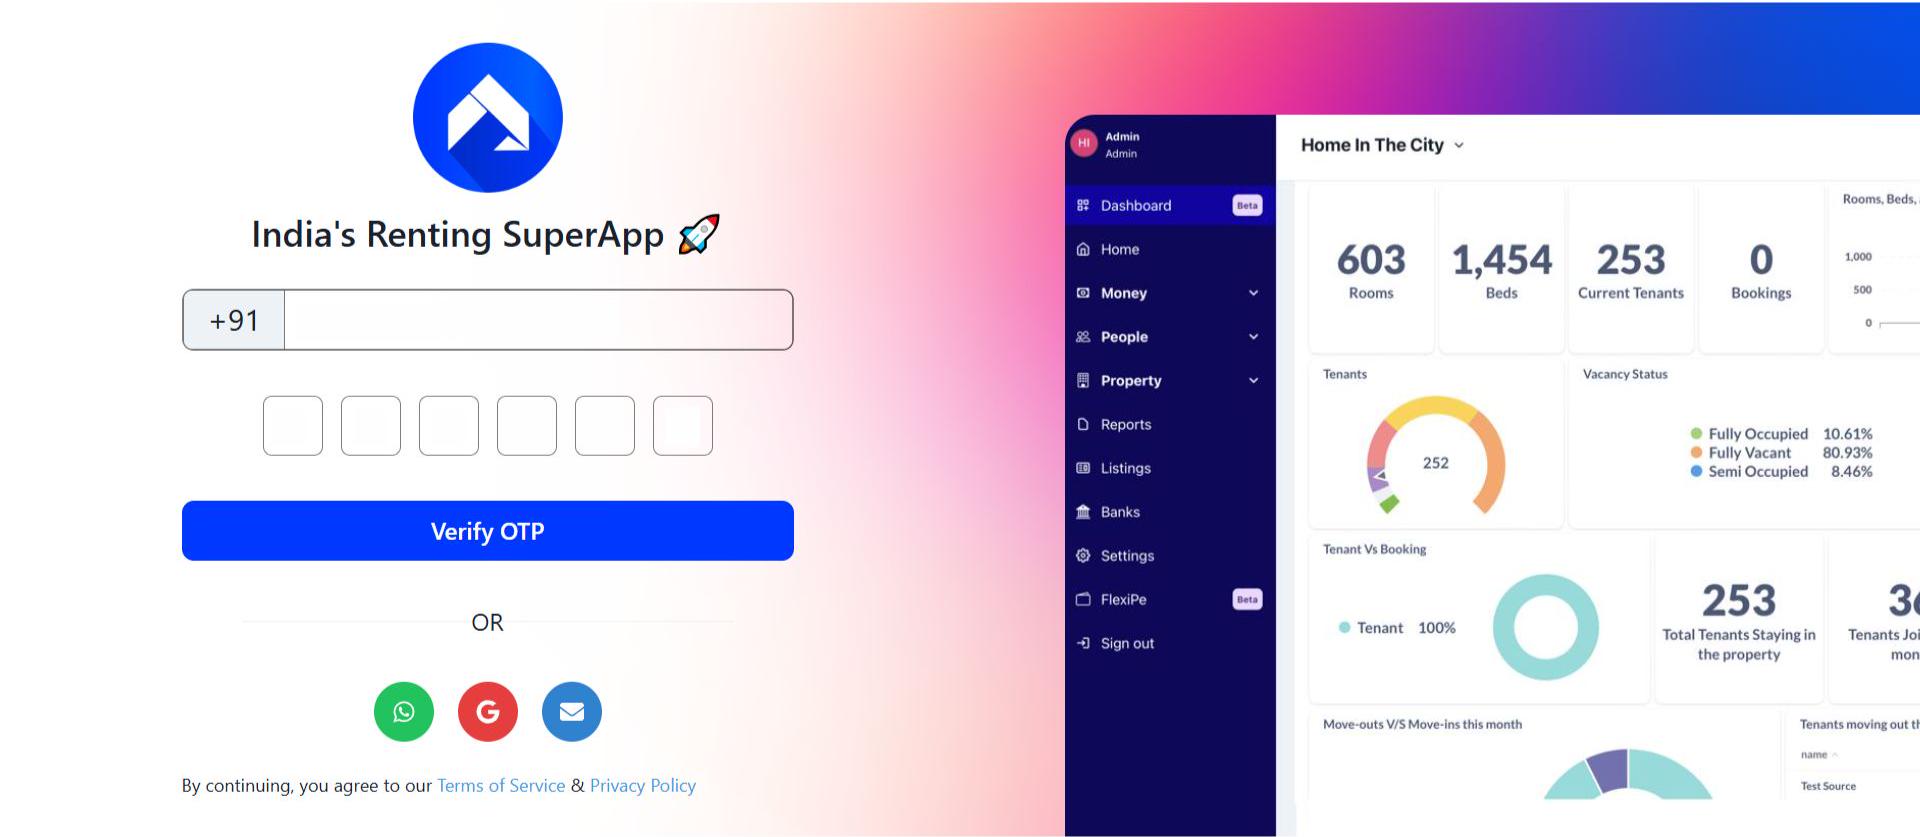
- Step 1: Log in to the web version Open the web version of the app and enter your credentials to log in.
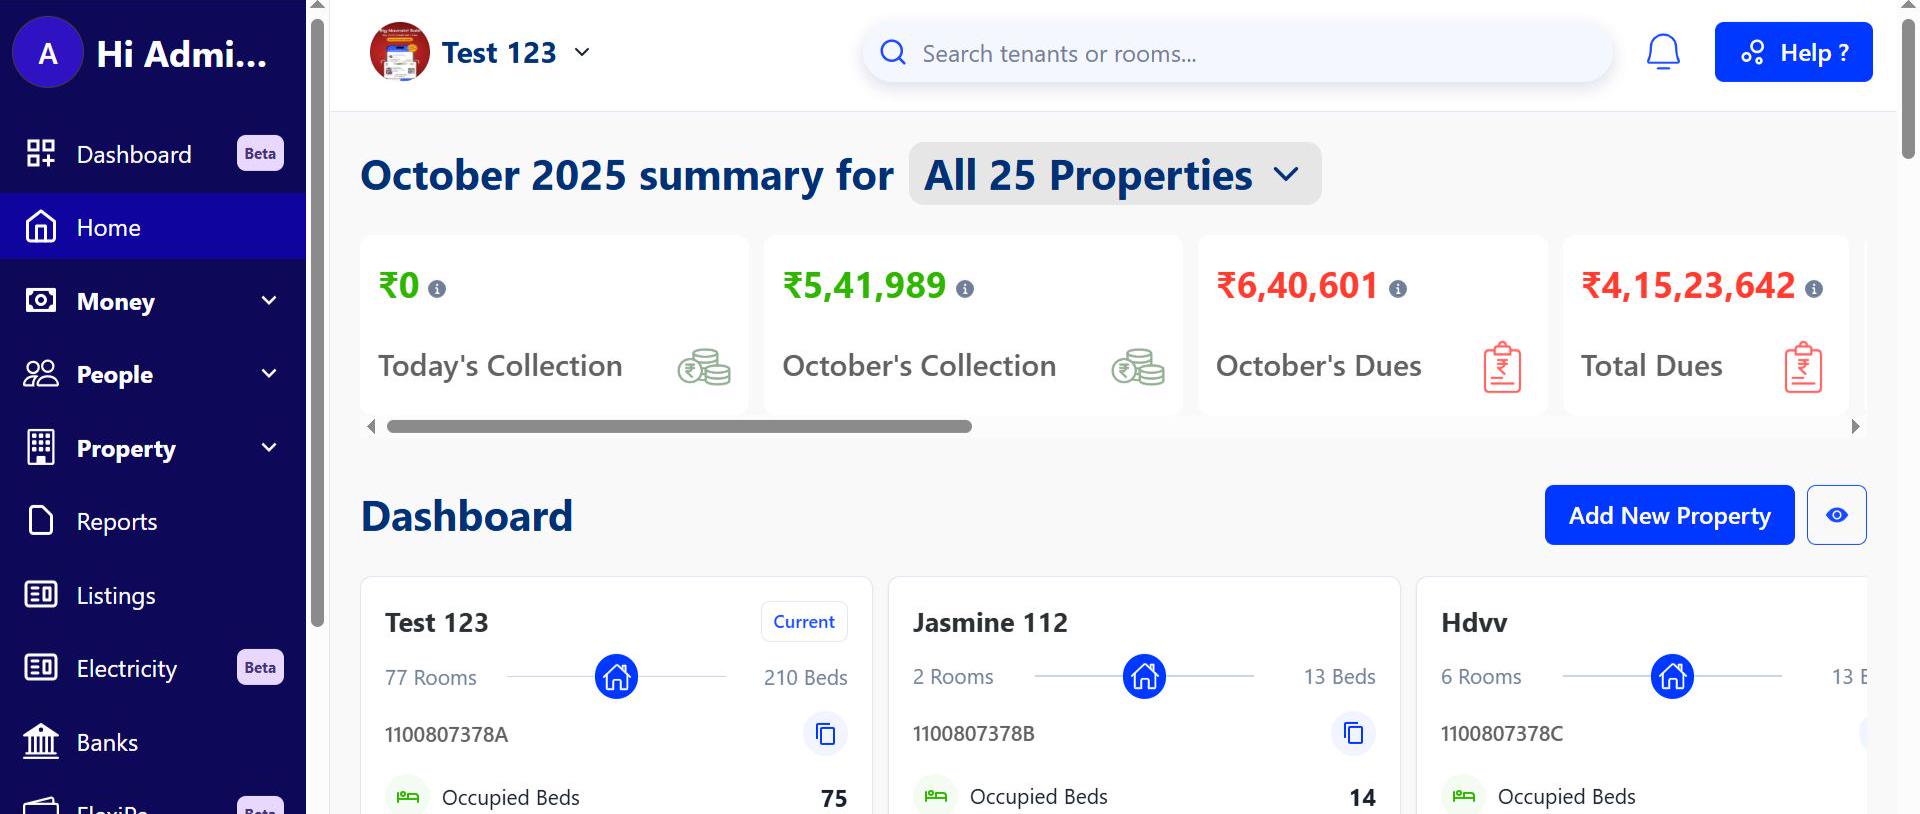
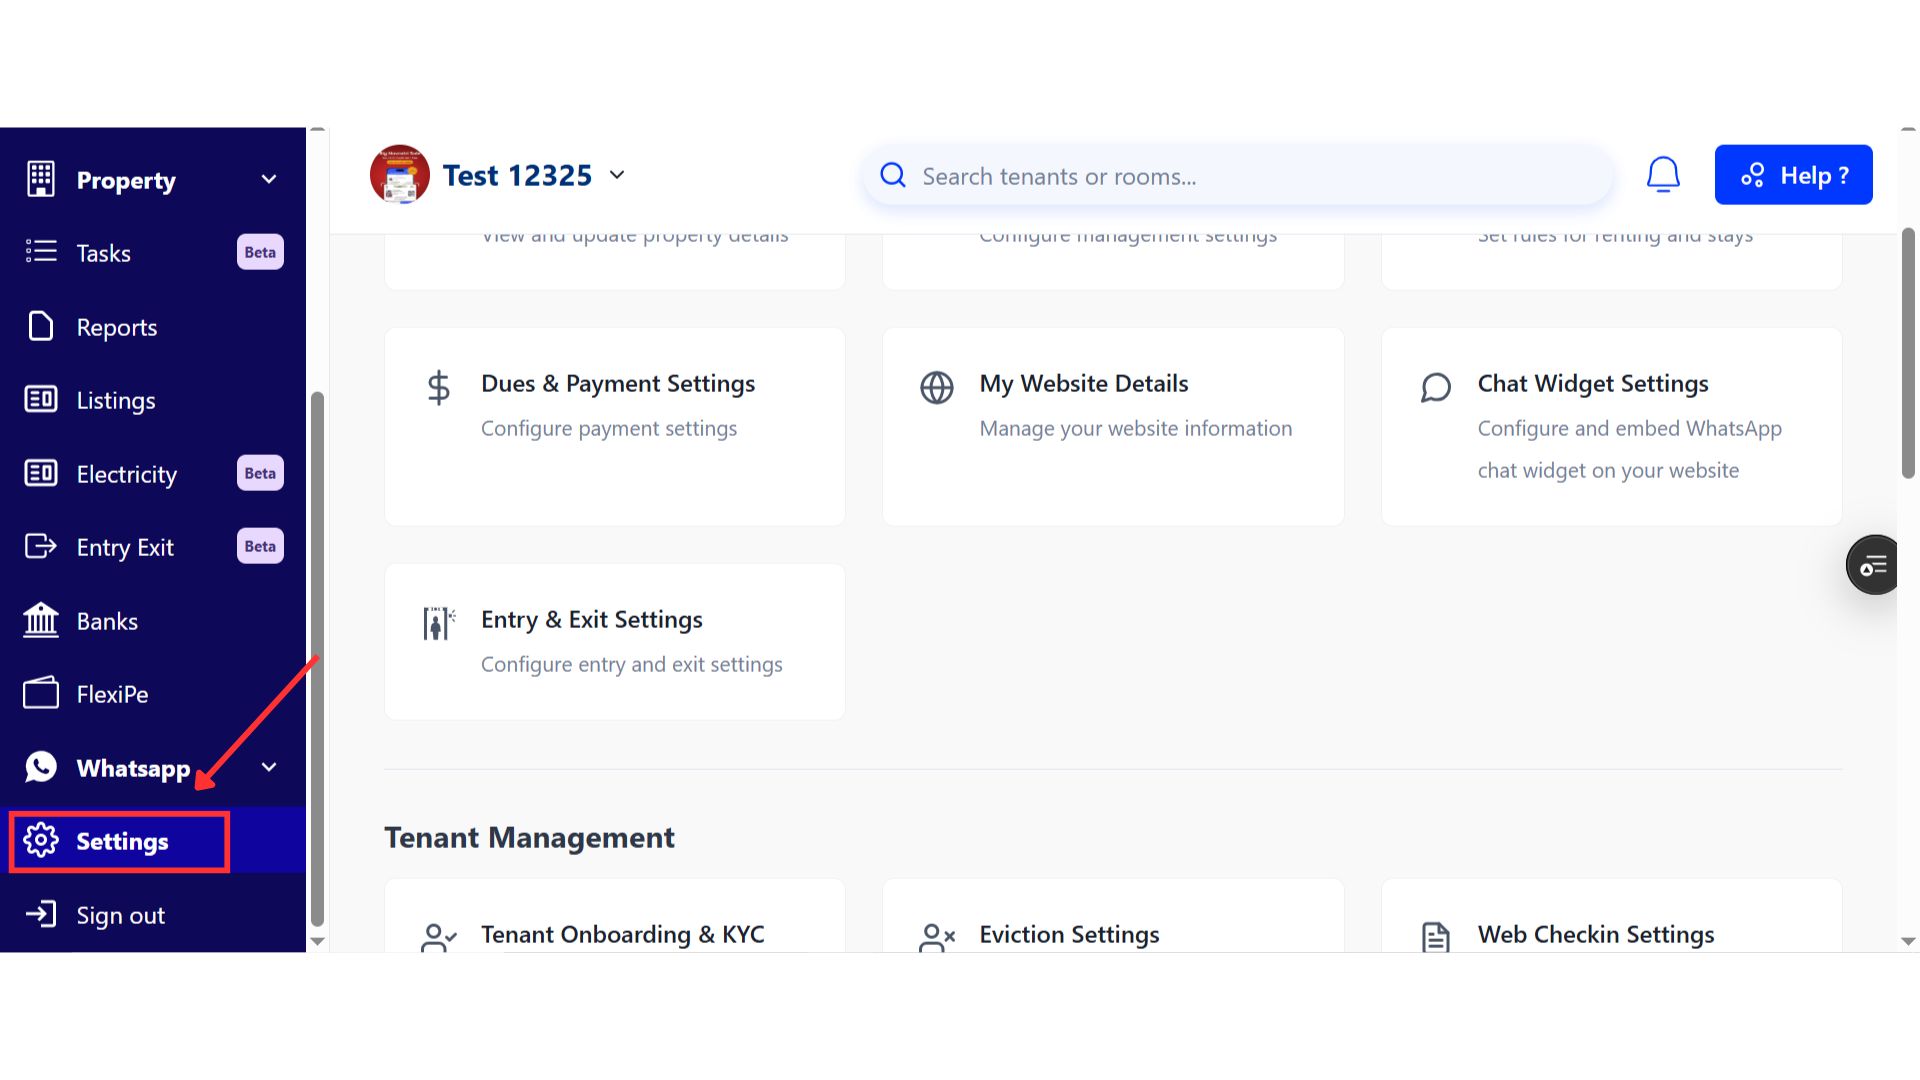
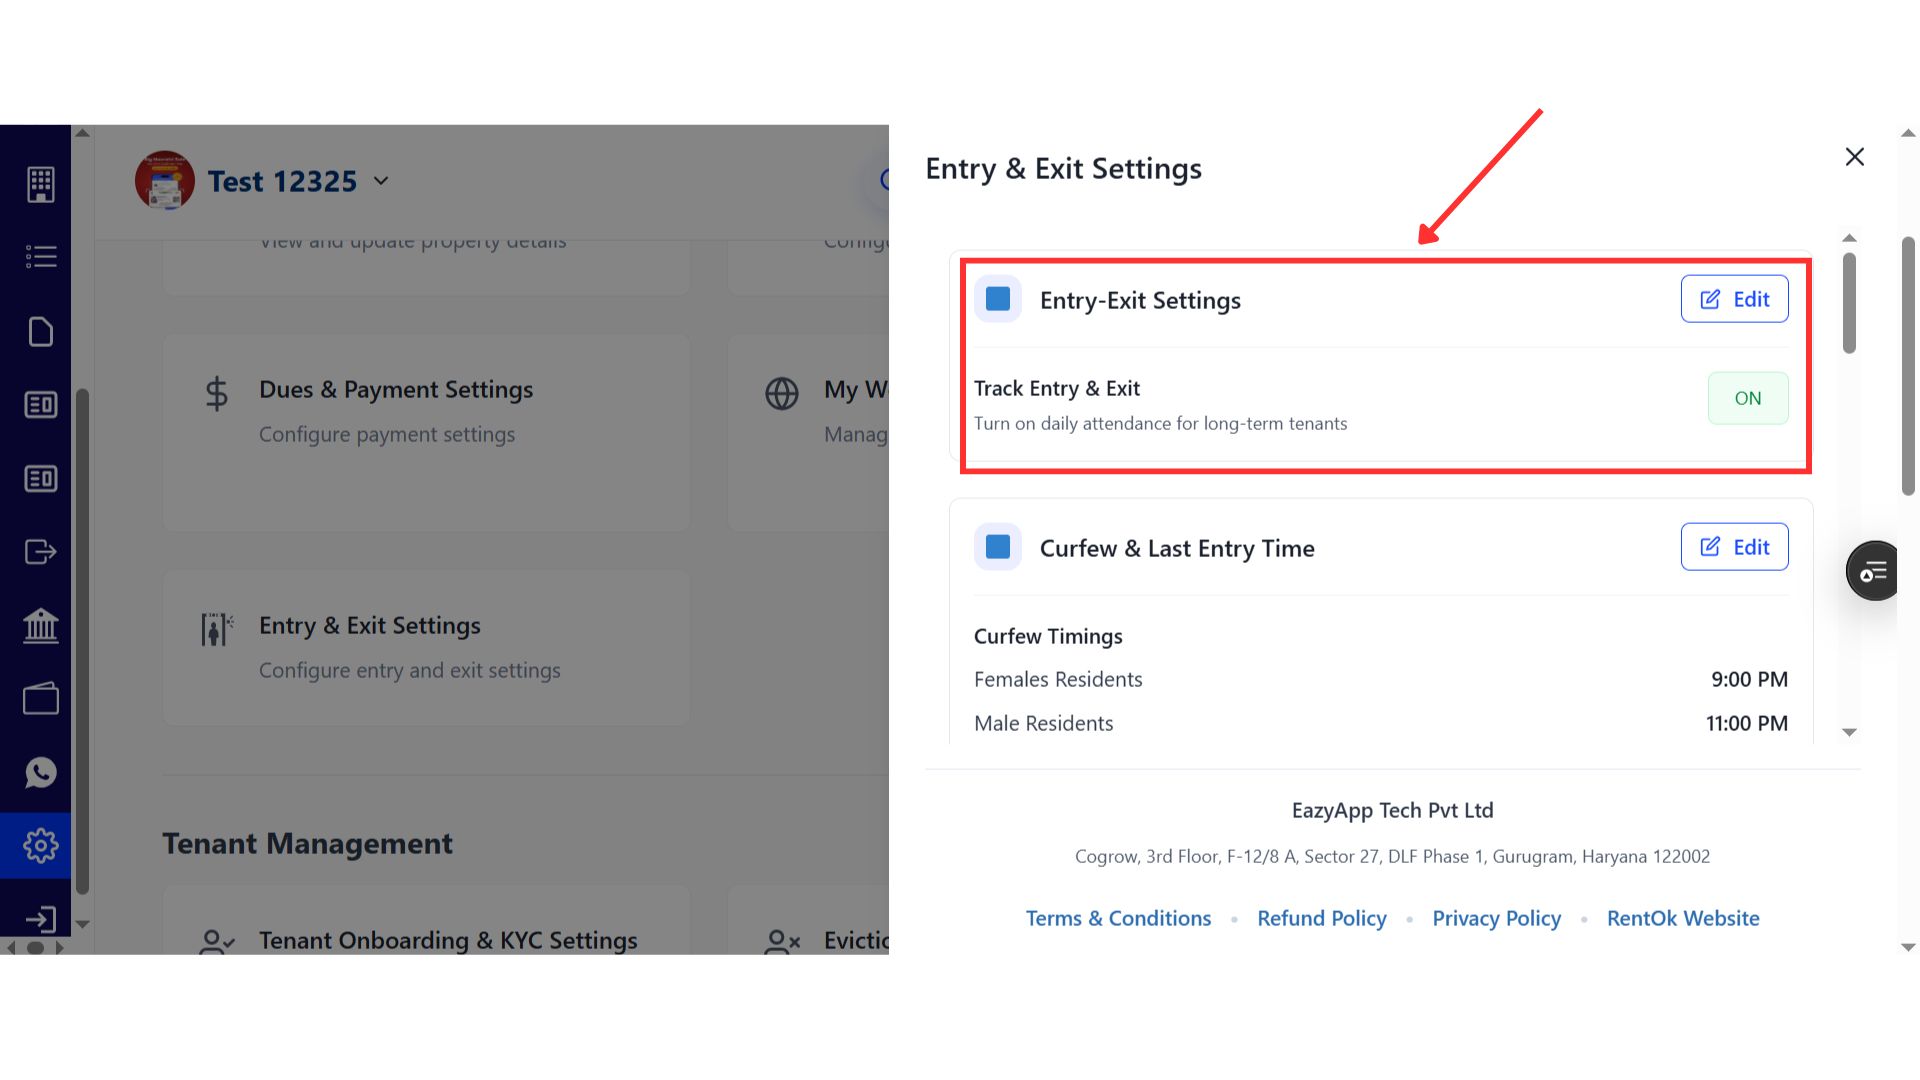
- Step 2: Go to Entry and Exit settings After logging in, go to the Home page and open Settings. On this page, click on settings and then choose Entry and Exit to access all related controls.
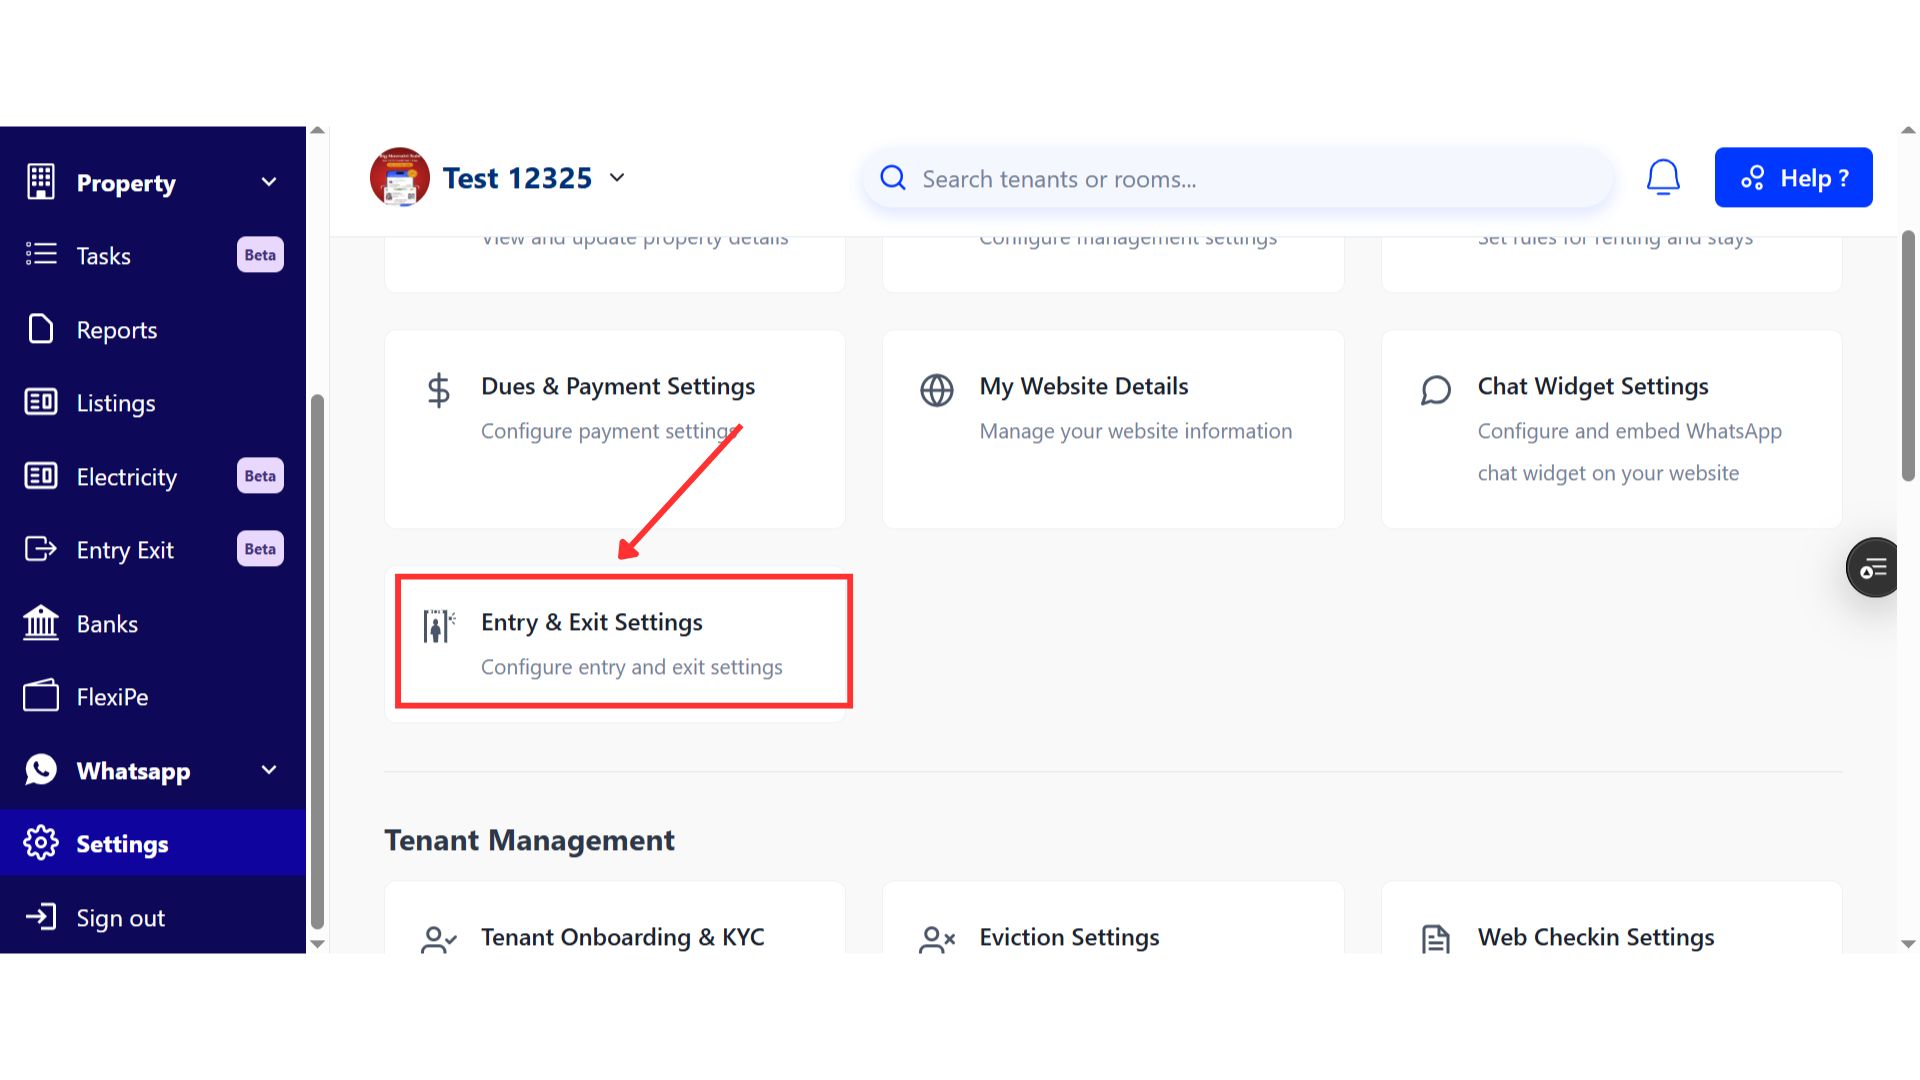
- Step 3: Manage attendance and curfew settings On this screen, you will see Entry and Exit Settings, where you can enable daily attendance for long-term tenants. You can also set curfew timings separately for male and female residents and define the last entry time.
-
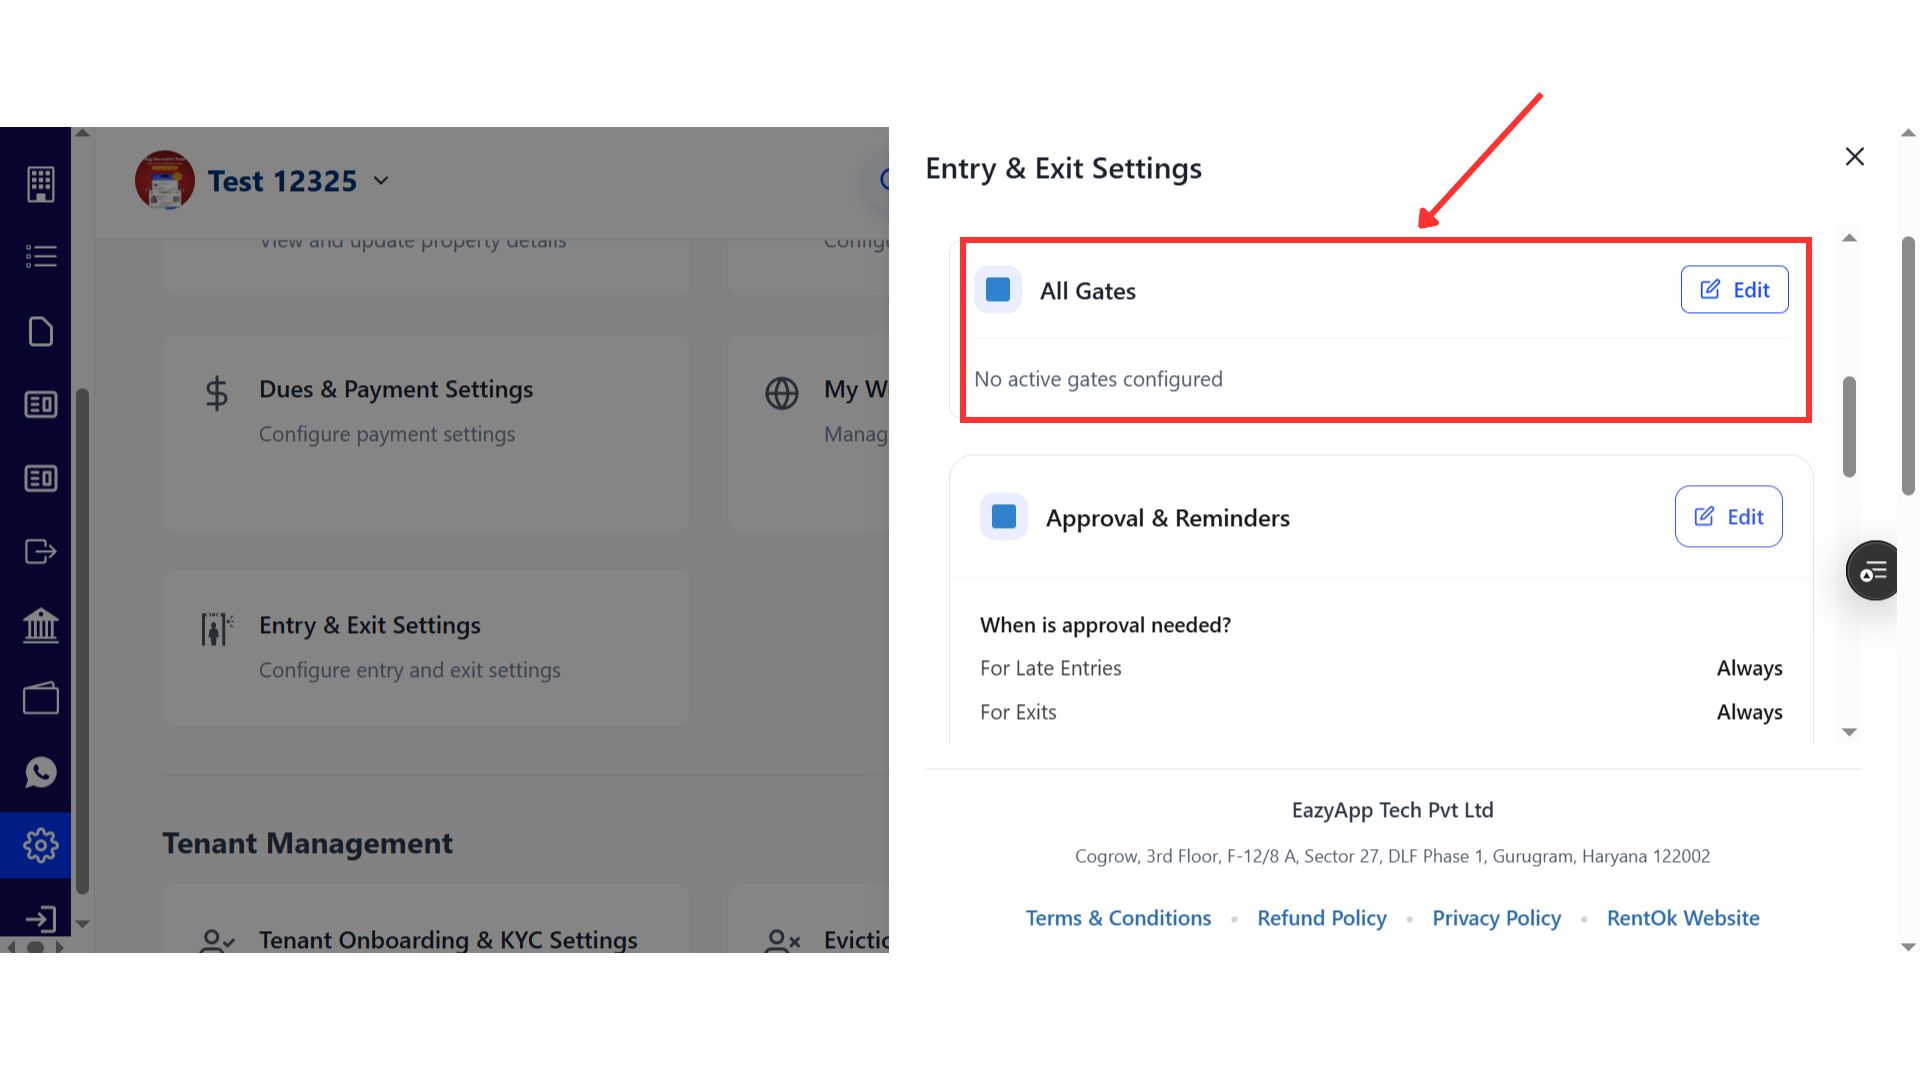
Step 4: Set up gates and access methods Go to the Gates section to manage which gates tenants can use for entry or exit. Here, you can:
-
Create and configure gates with specific timings.
-
Select how tenants will mark their entry or exit by choosing an access method such as Guard App, Tenant App (QR scan), or Lobby Kiosk.
-
Generate QR codes for each gate so tenants can scan and mark attendance.
-
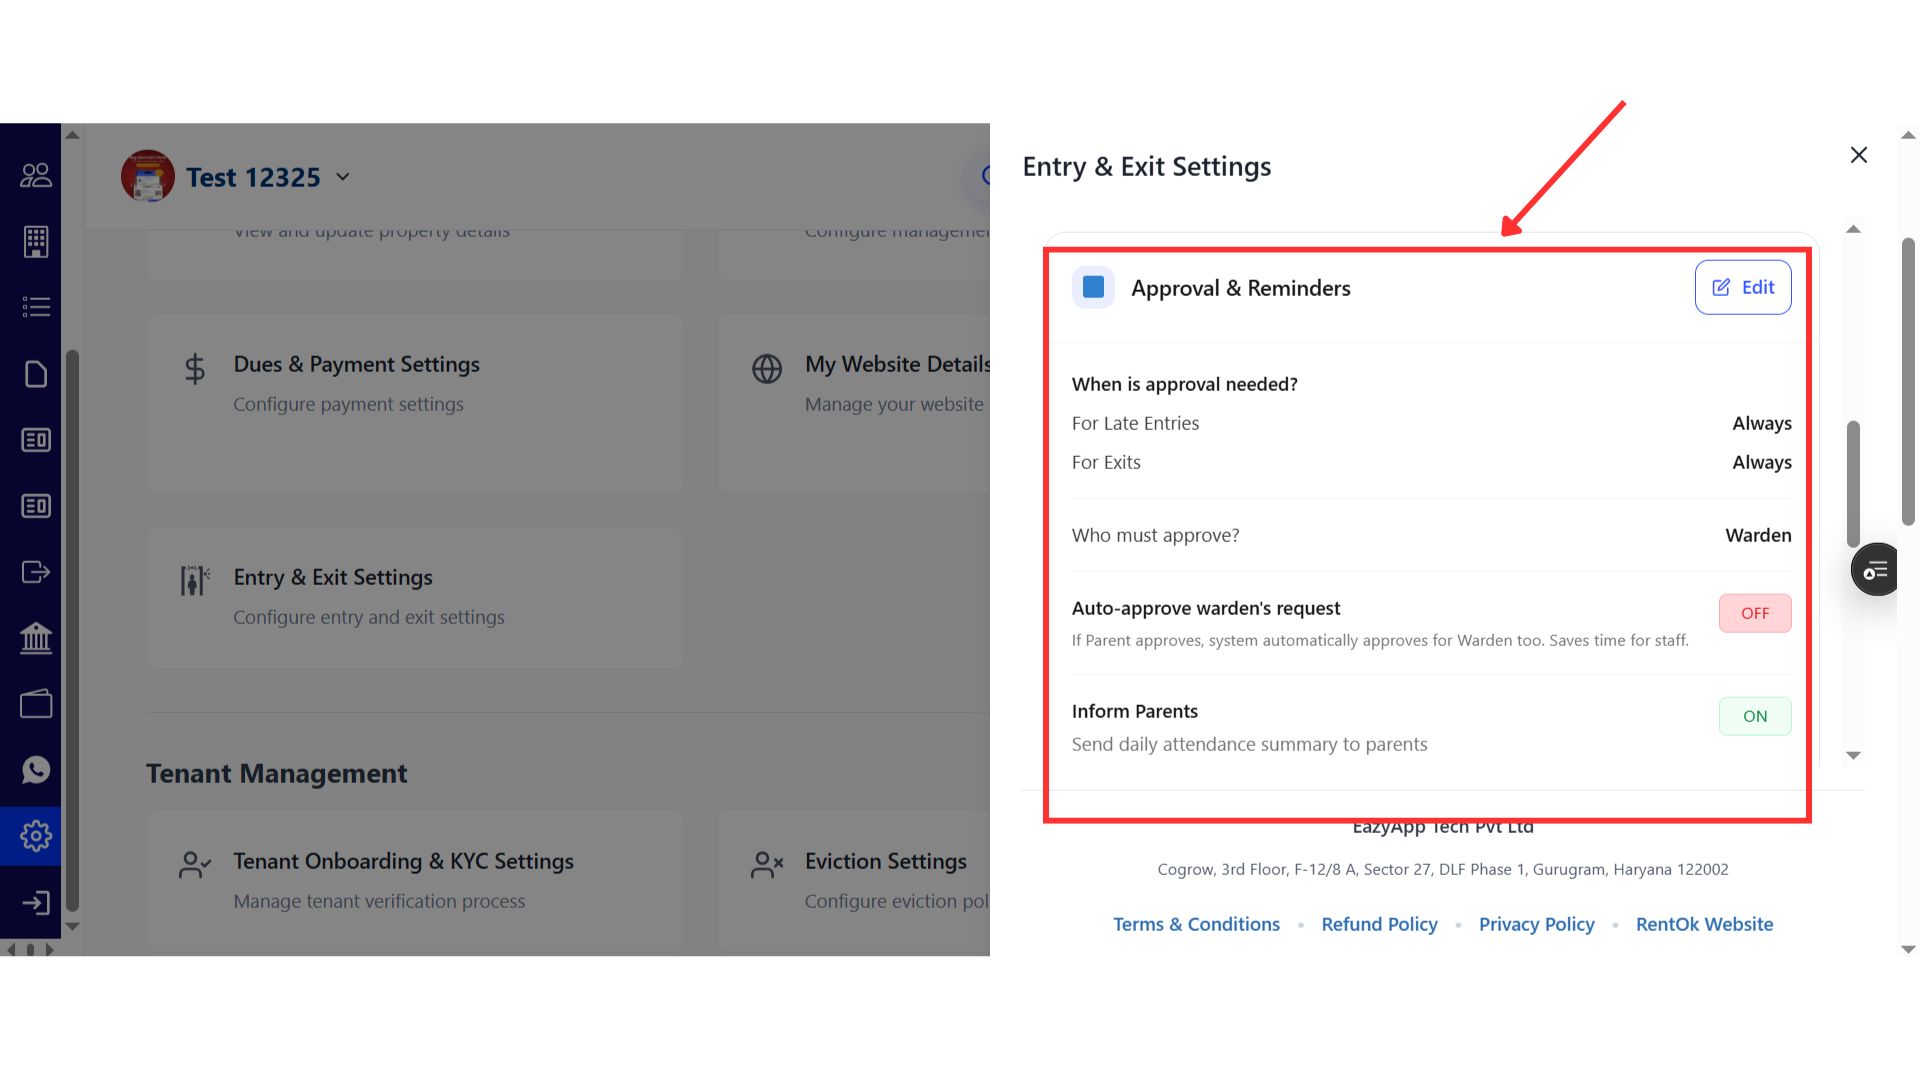
- Step 5: Configure approvals and reminders In the Approvals and Reminders section, you can decide whether entry or exit requests require approval and who must approve them. You can choose options such as auto-approval by the warden or notifying parents, along with sending daily summaries if required.
- Step 6: Assign wardens and guards At the end, assign the respective wardens and guards to manage gate access, approvals, and related responsibilities.
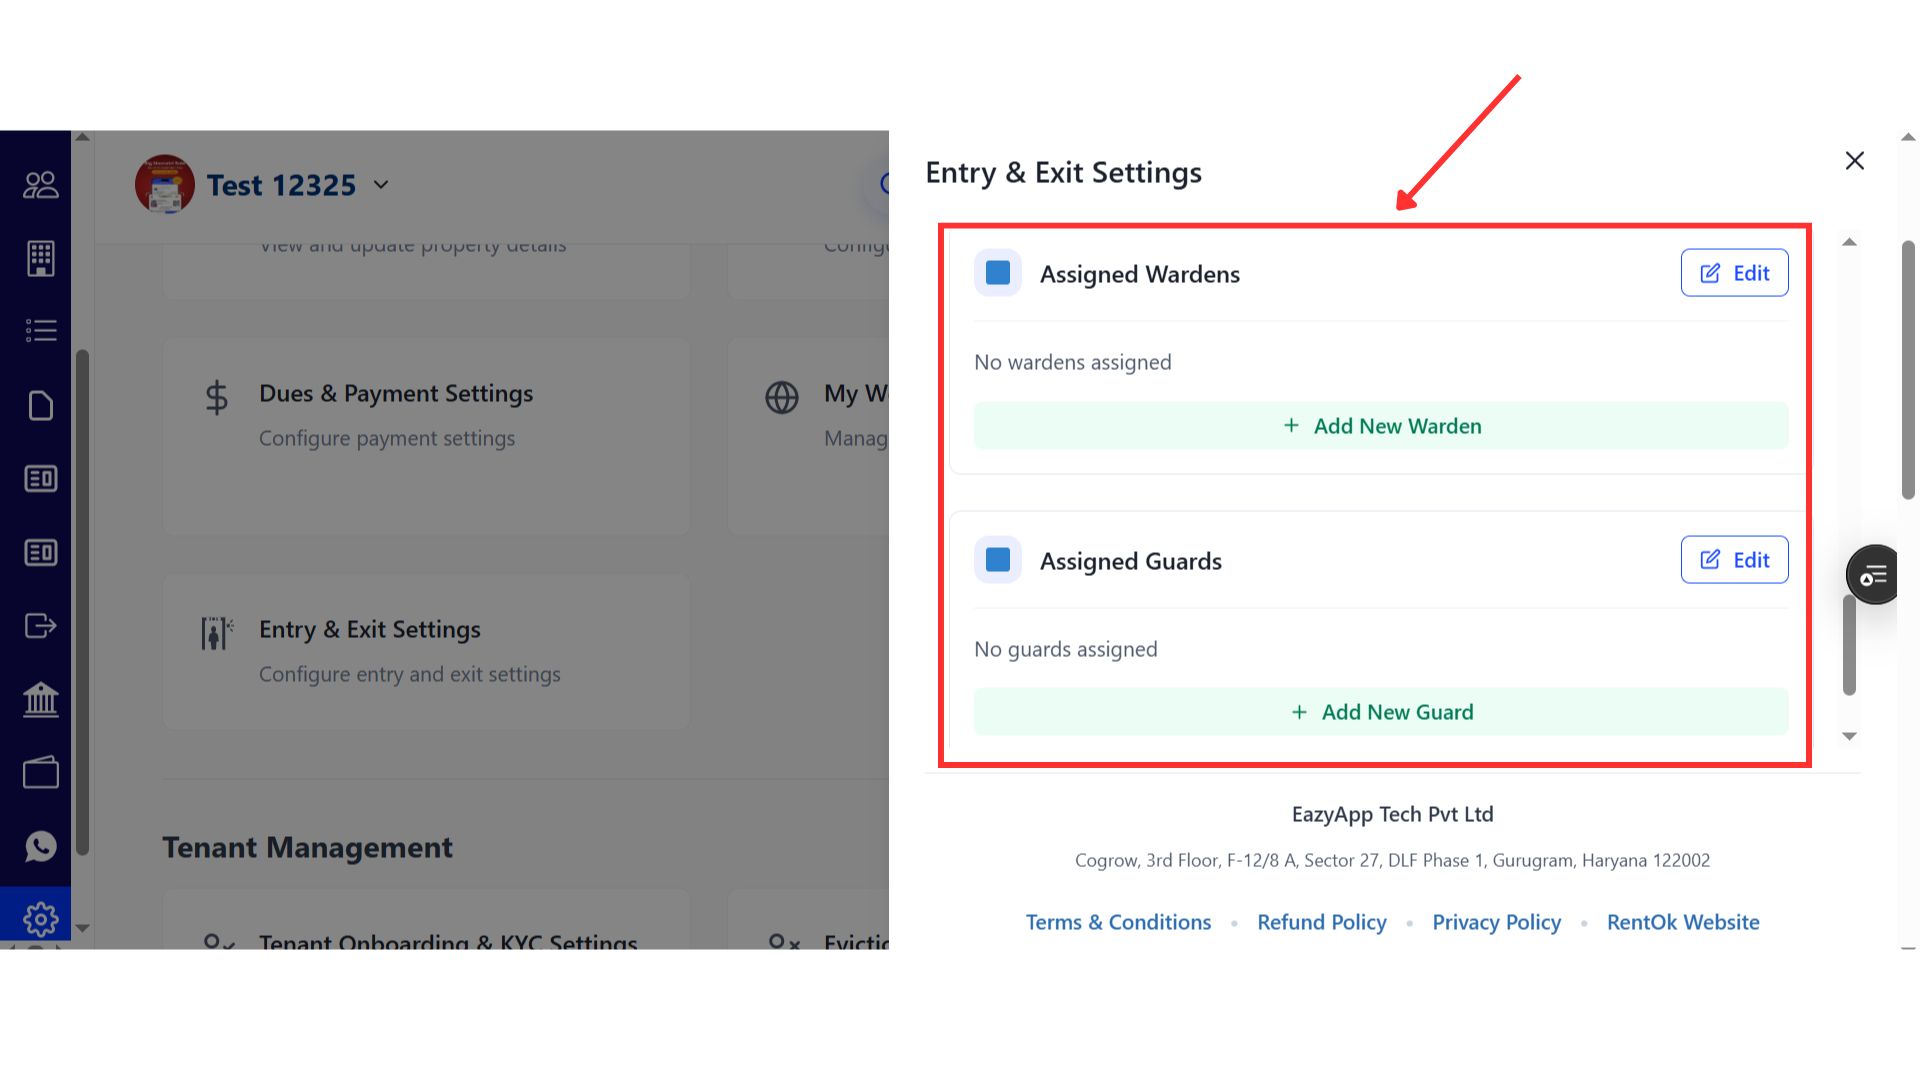
- Step 7: Save the settings After completing the setup in each setup, make sure to save the changes to apply the updated Entry and Exit configuration.
💡 Why it matters: This provides enhanced security, accountability, and peace of mind for property owners and parents. It gives you a complete digital trail of all movement, which is crucial for managing student accommodations.
Ab property mein aane-jaane ka poora record rakhein, digital tareeqe se.
Full Eviction Management on Web - Handle the entire move-out process online
The complete eviction workflow, from giving notice to final key handover, is now available on the web platform, matching all the powerful features of the mobile app.
See what’s new →
Highlights
-
Raise Eviction Notices: Set move-out dates, add reasons, and calculate any applicable charges.
-
Handle Stay Extensions: Review and approve or reject tenant requests to extend their stay directly from the web.
-
Secure Key Handover: Complete the final key handover securely using an OTP sent to the admin or tenant.
-
Blacklist Tenants: If necessary, you can blacklist a tenant during the eviction process.
How to try
- Step 1: Log in to the web version Open the web version of the app and enter your credentials to log in.
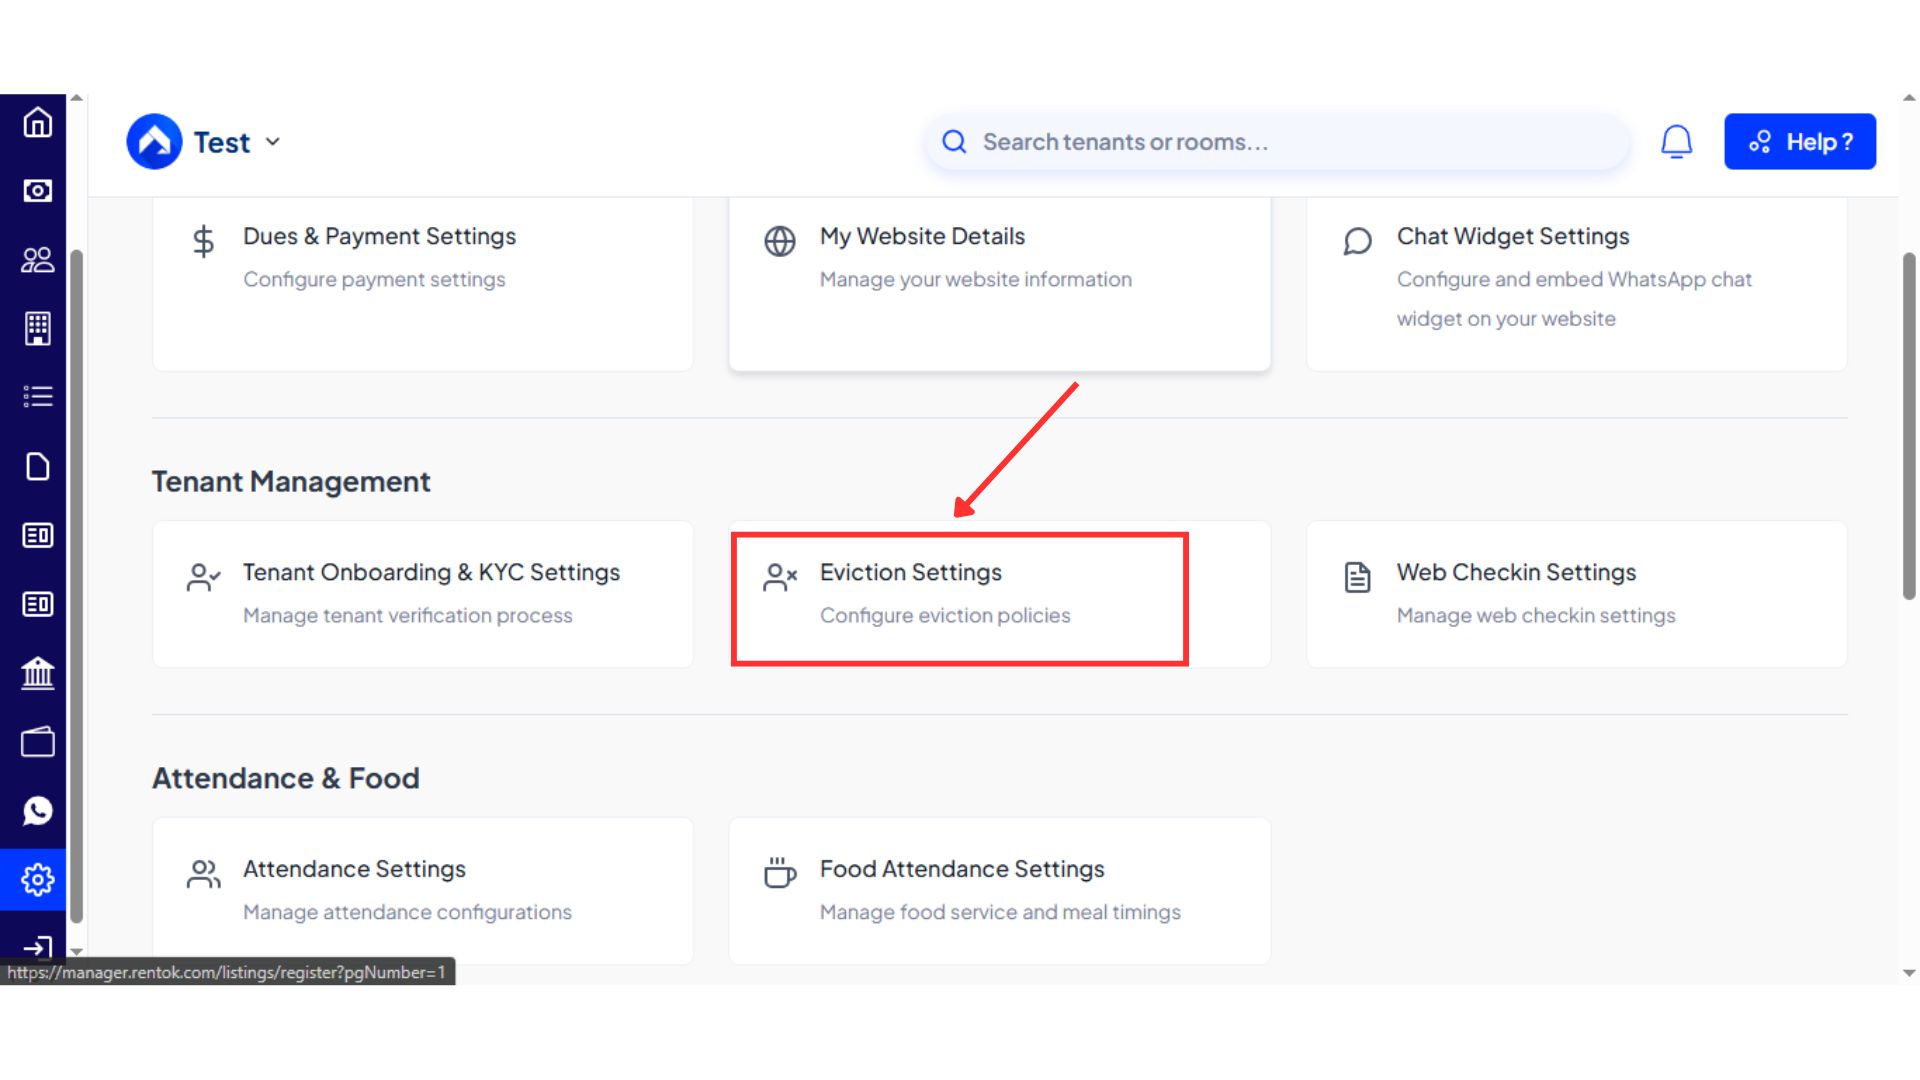
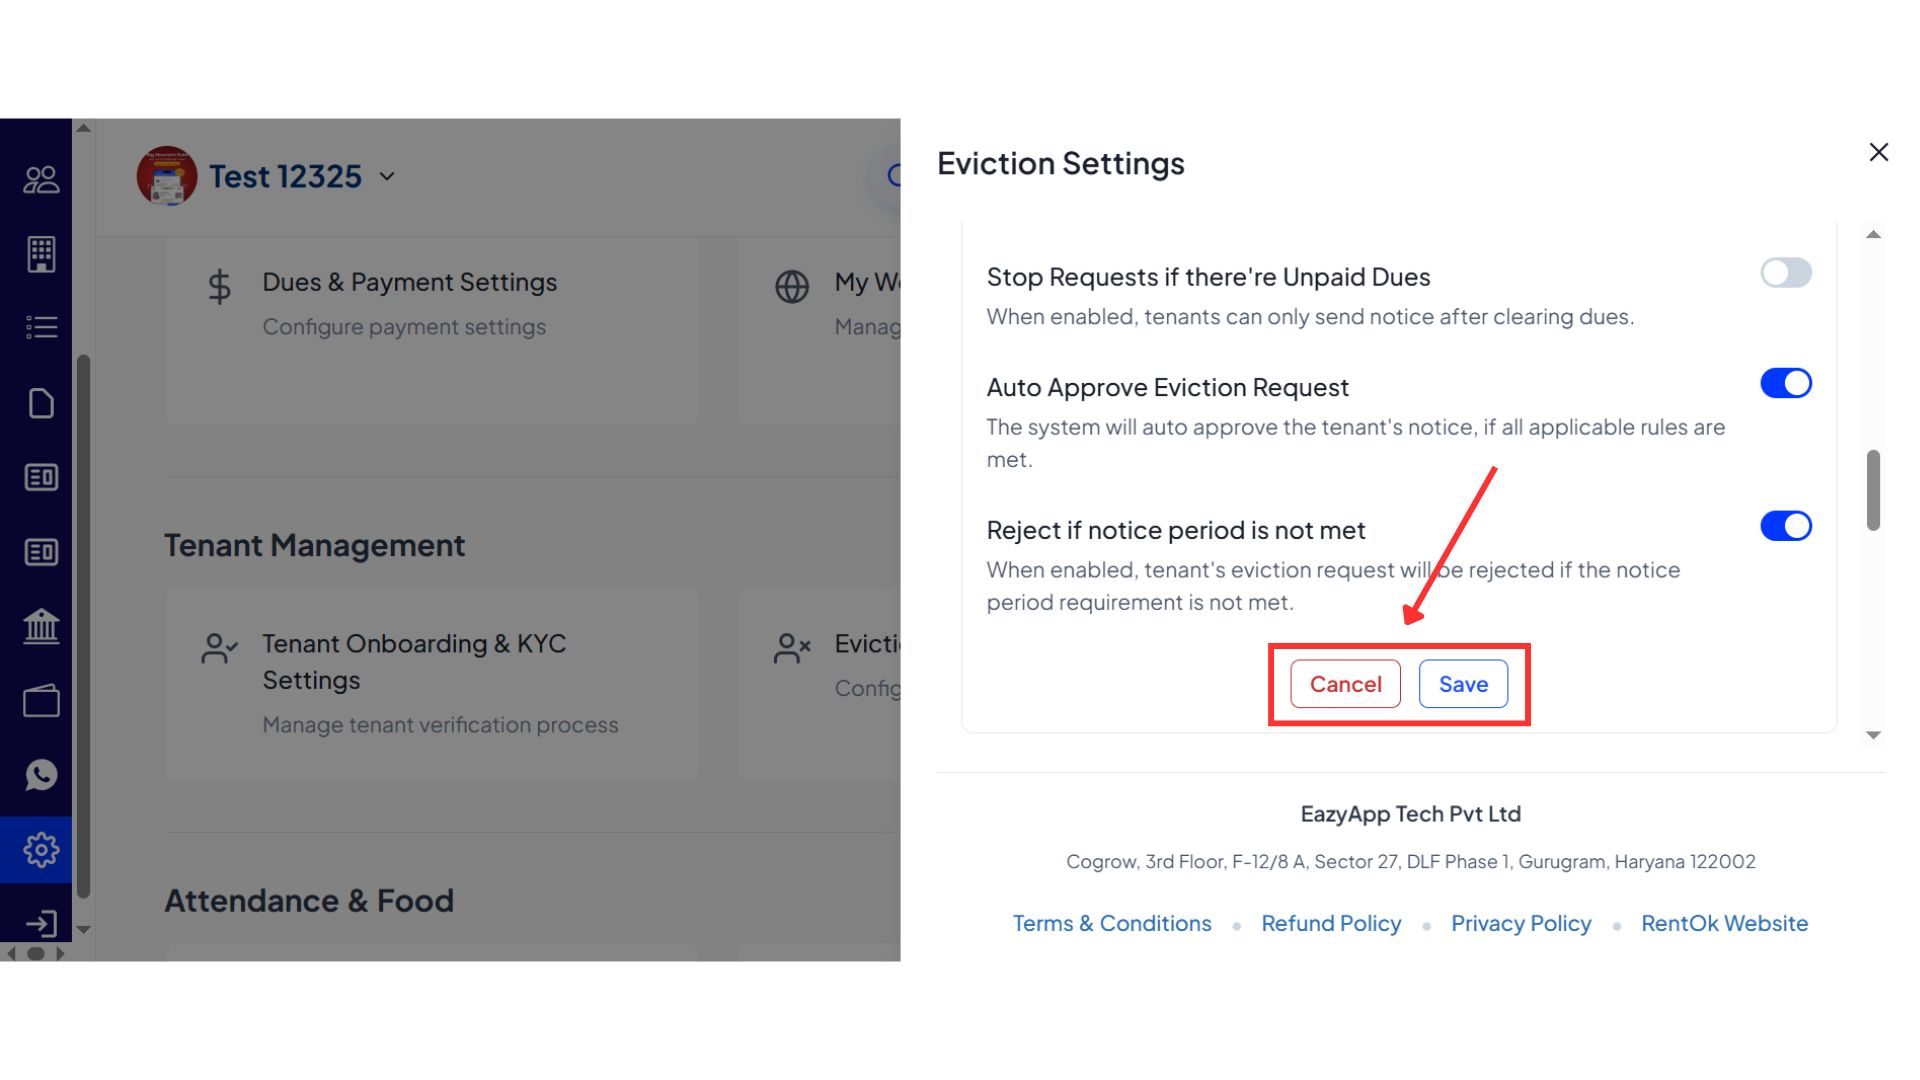
- Step 2: Go to Entry and Exit settings After logging in, go to the Home page and open Settings. On this page, click on settings and then choose Eviction Settings to access all related controls.
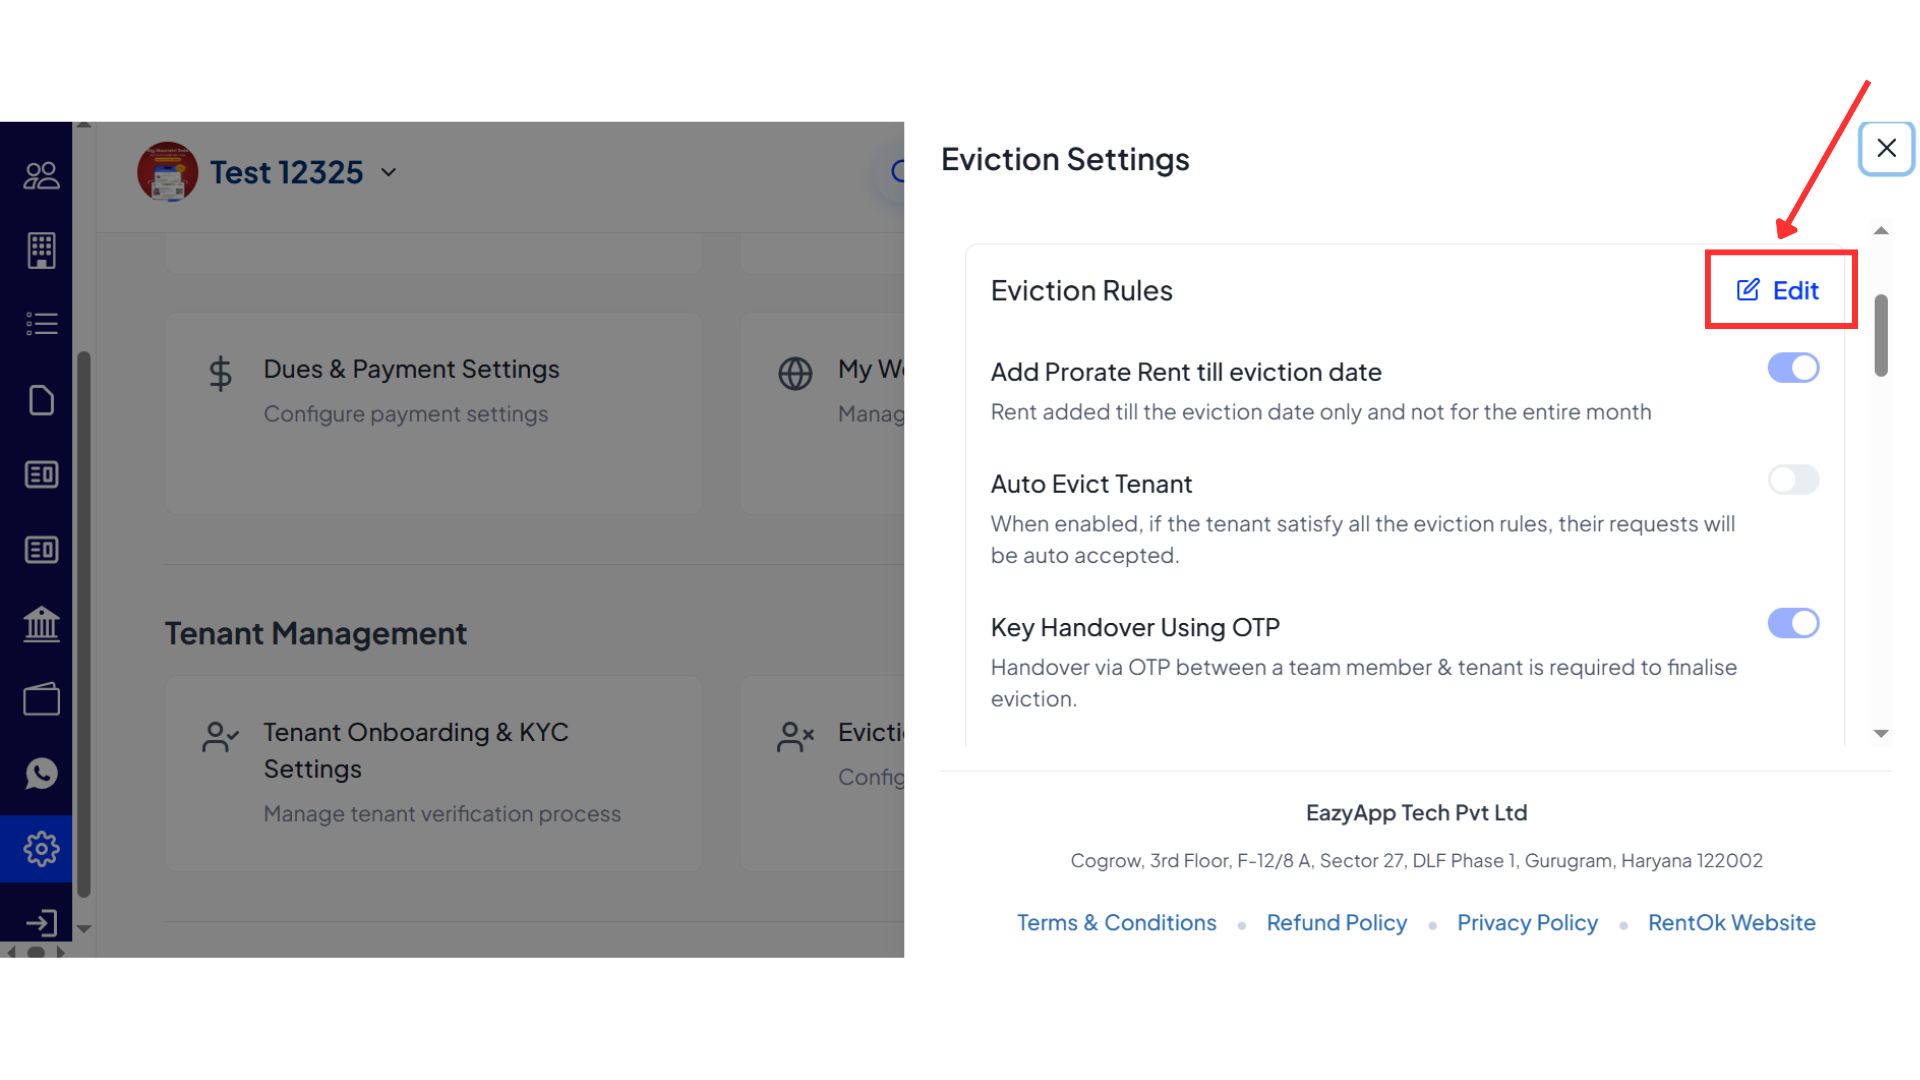
- Step 3: Review eviction configuration On this screen, you will see sections for accepted eviction dates, eviction rules, eviction charges, and Eviction terms and conditions.
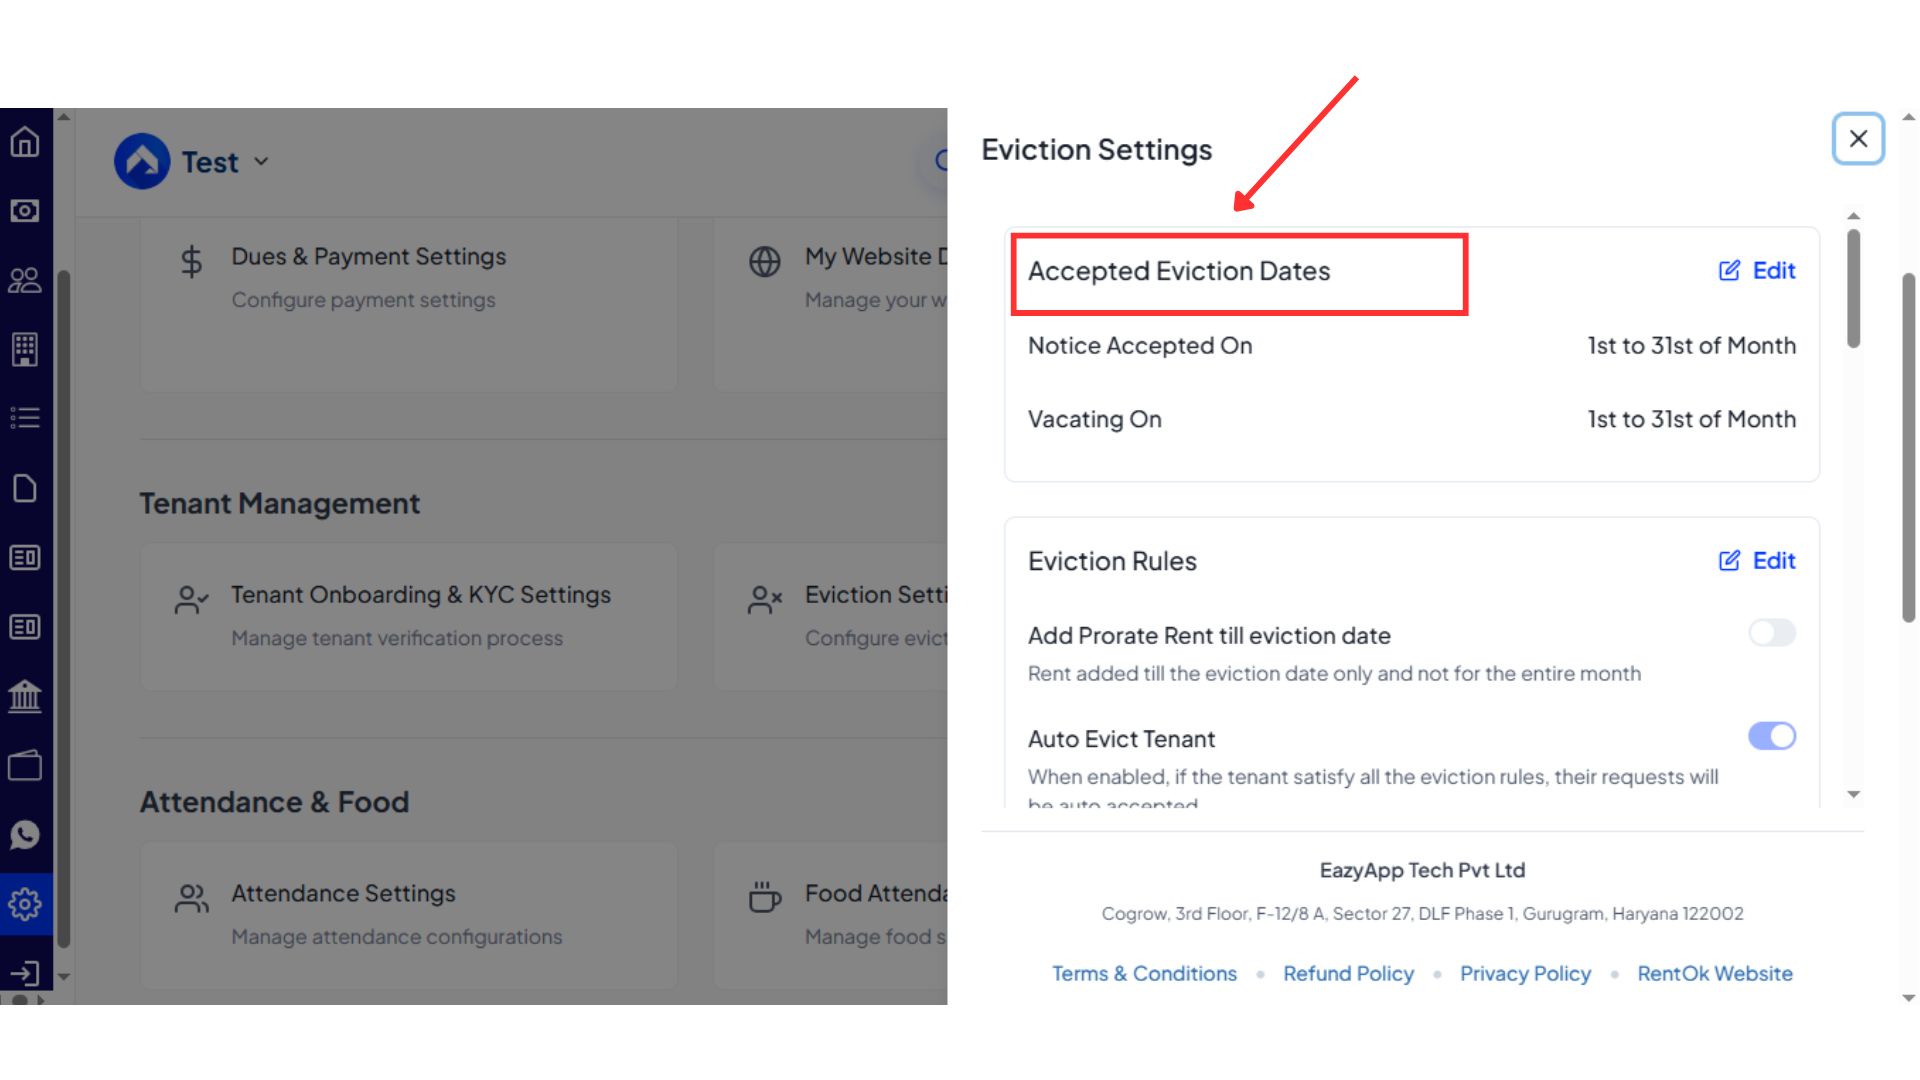
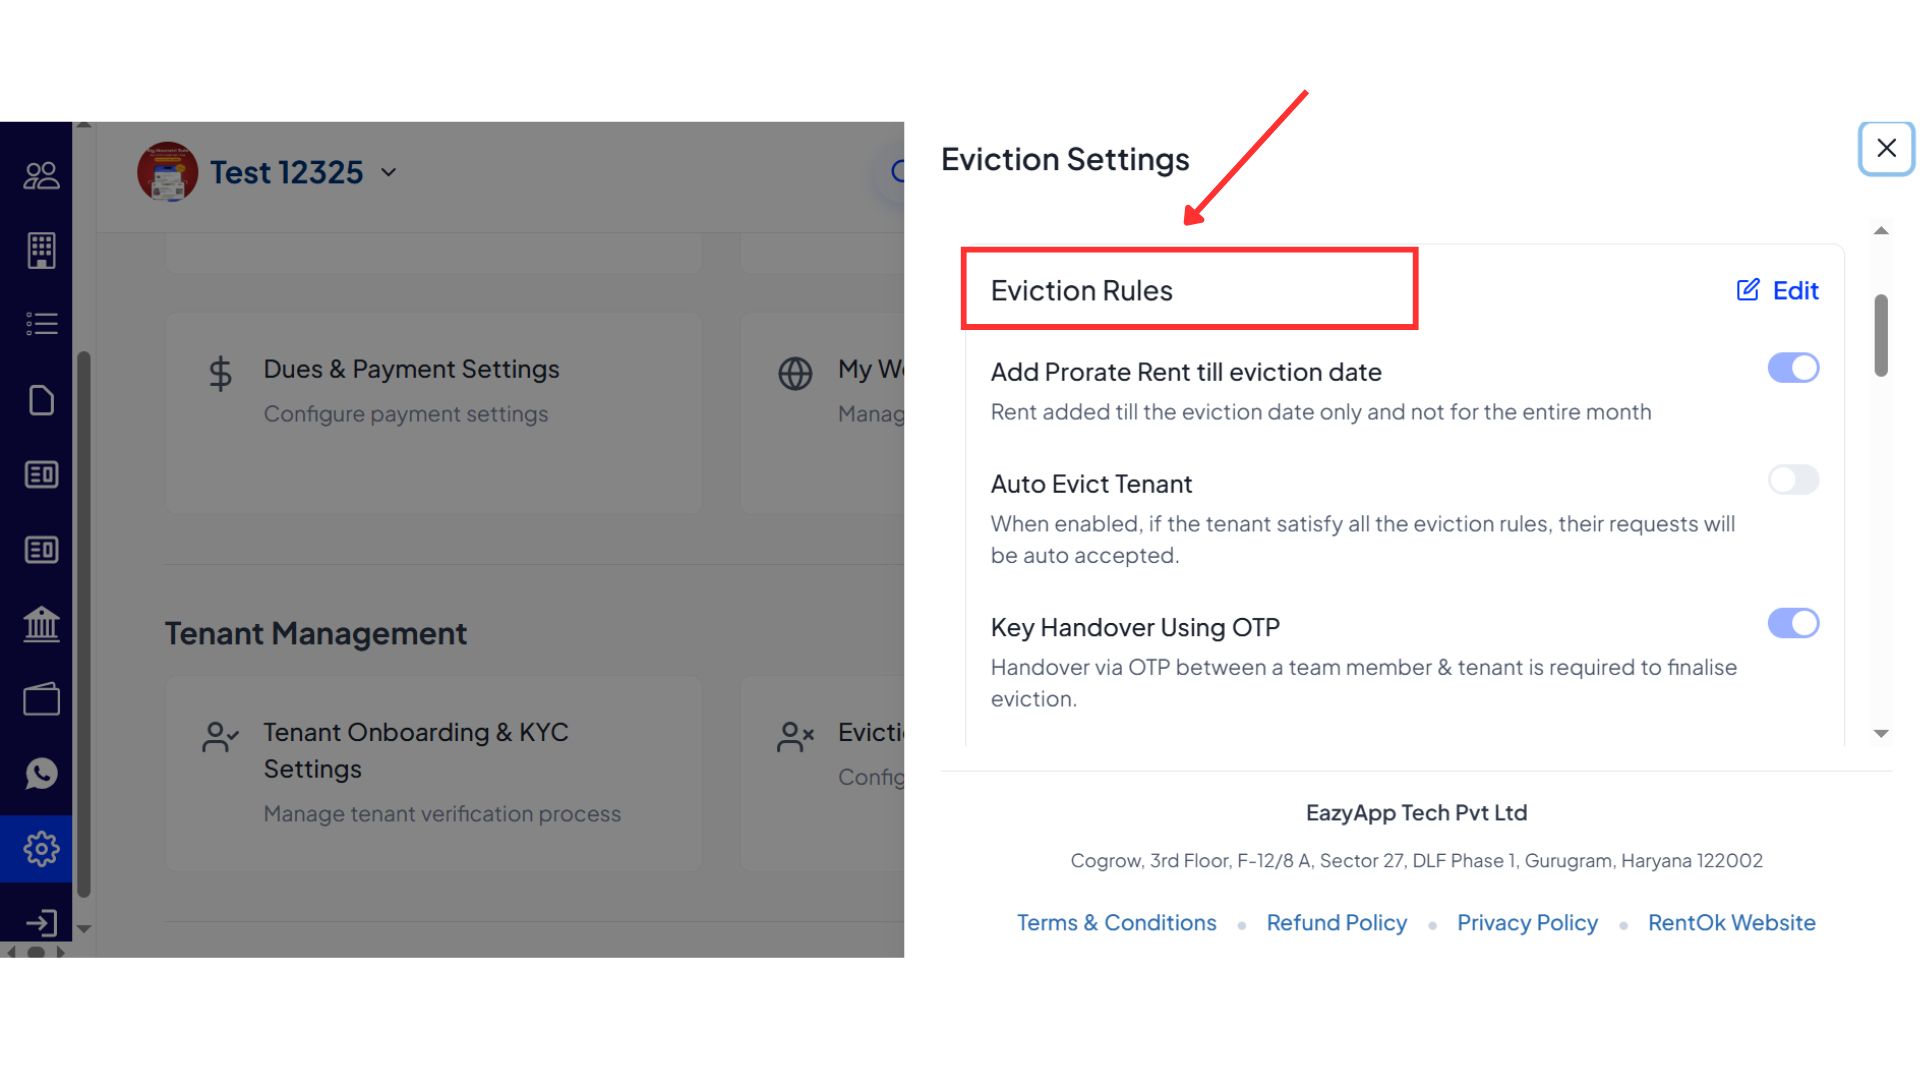
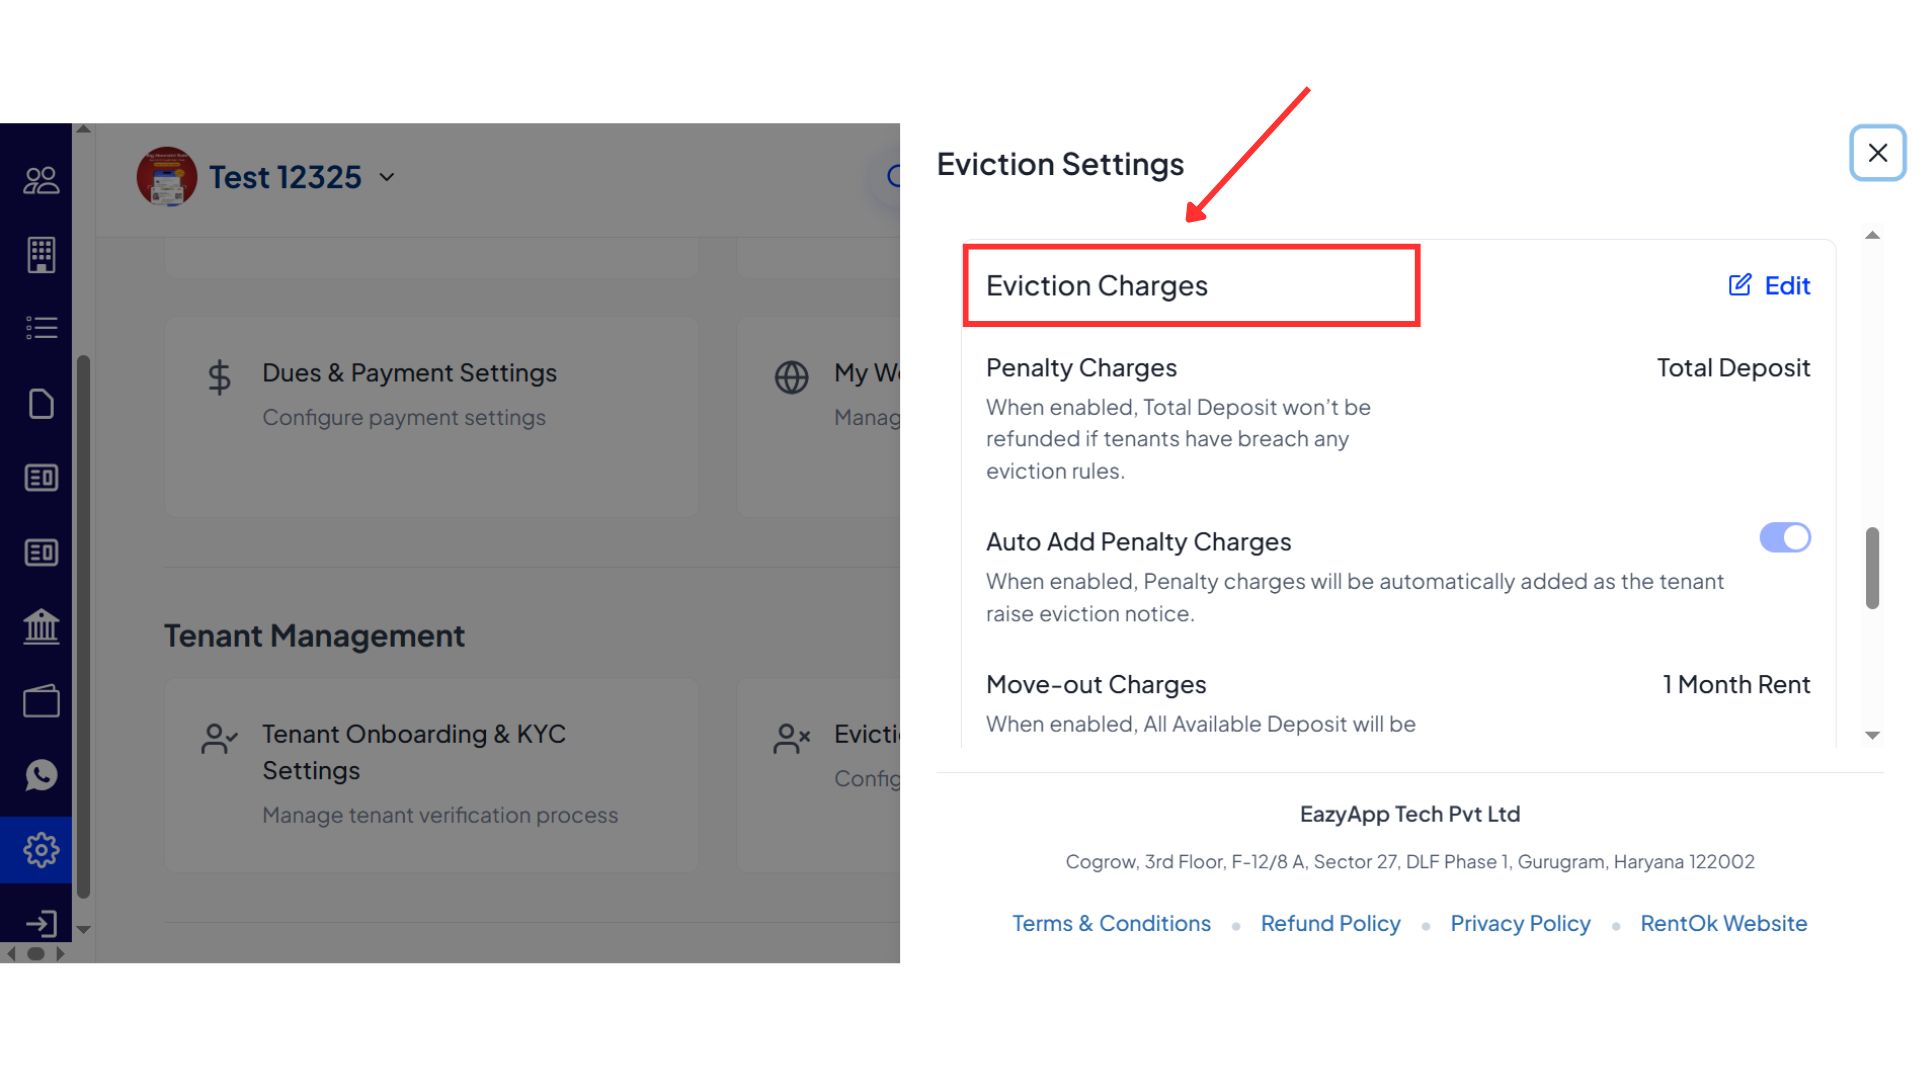
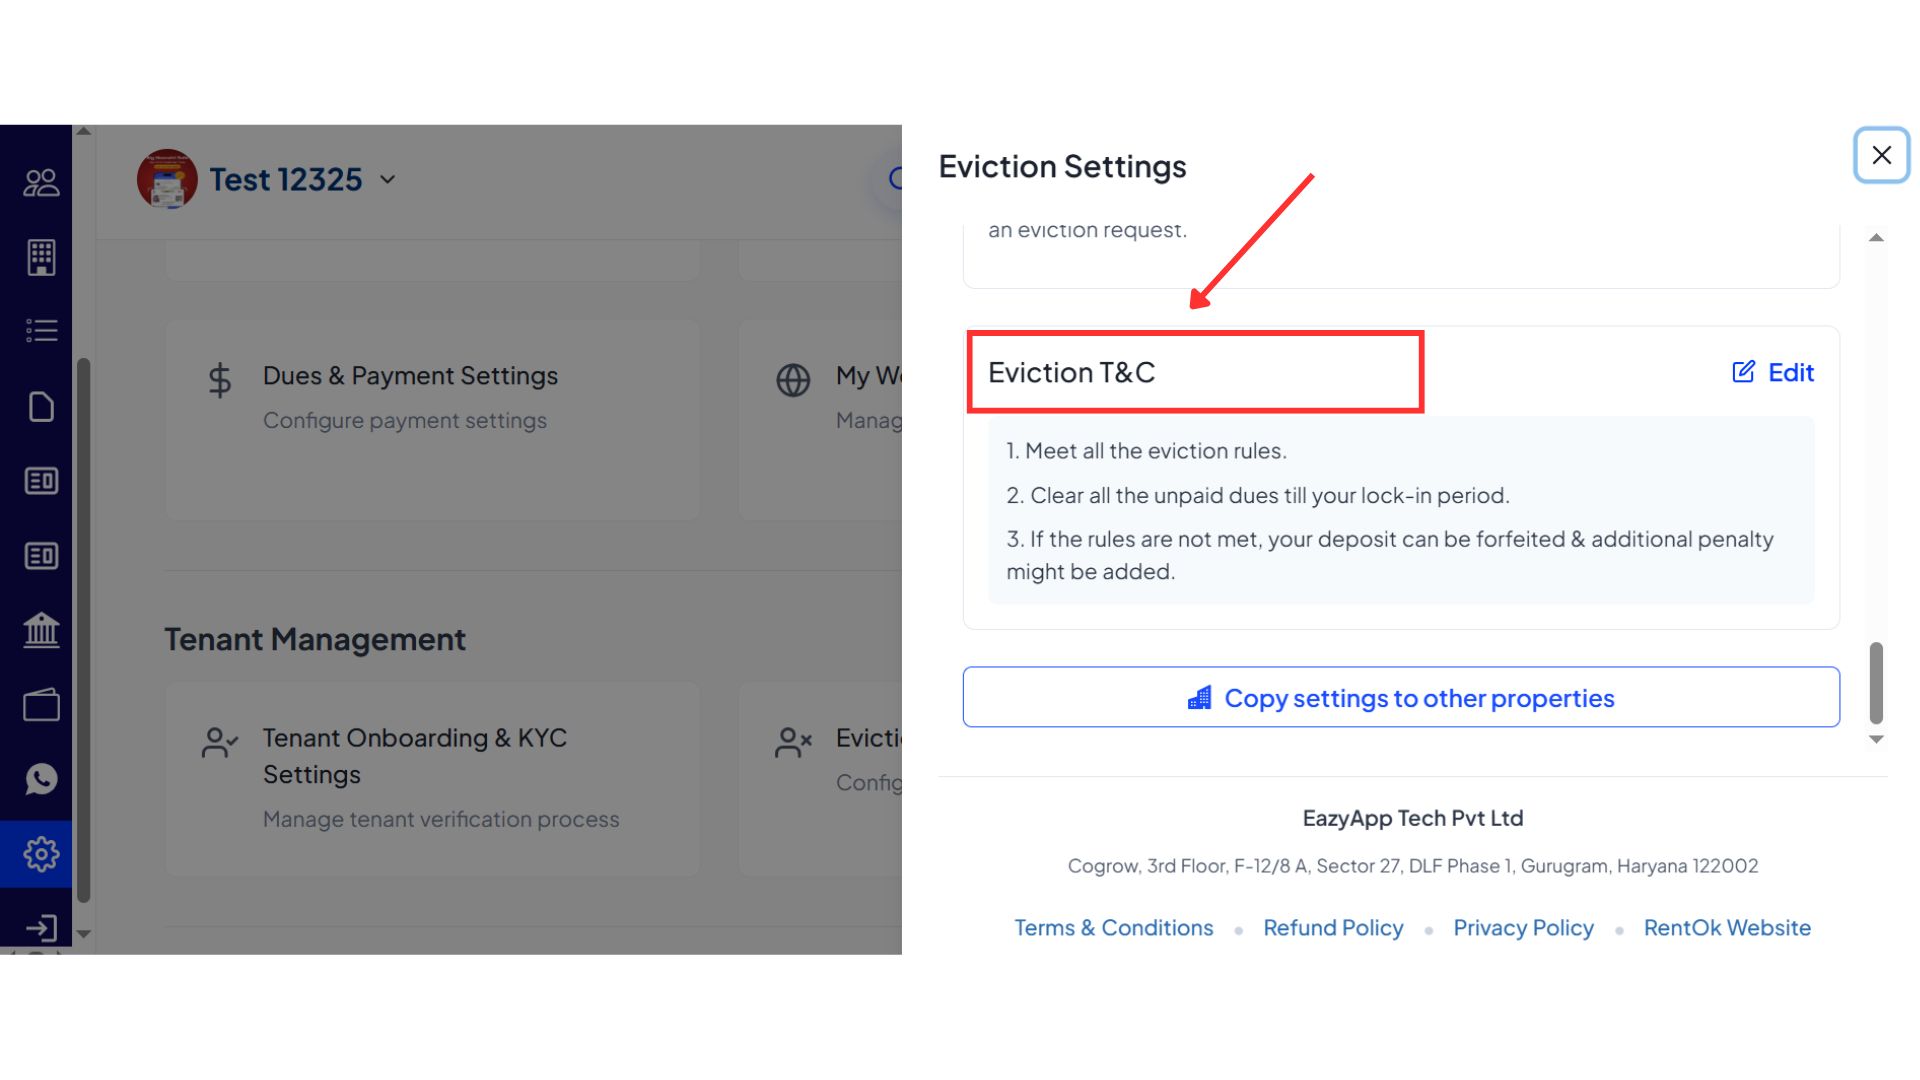
- Step 4: Edit required settings To make changes in any section, click on Edit and update the details as needed.
- Step 5: Copy settings to other properties If required, you can copy the same eviction settings to other properties directly from this screen.
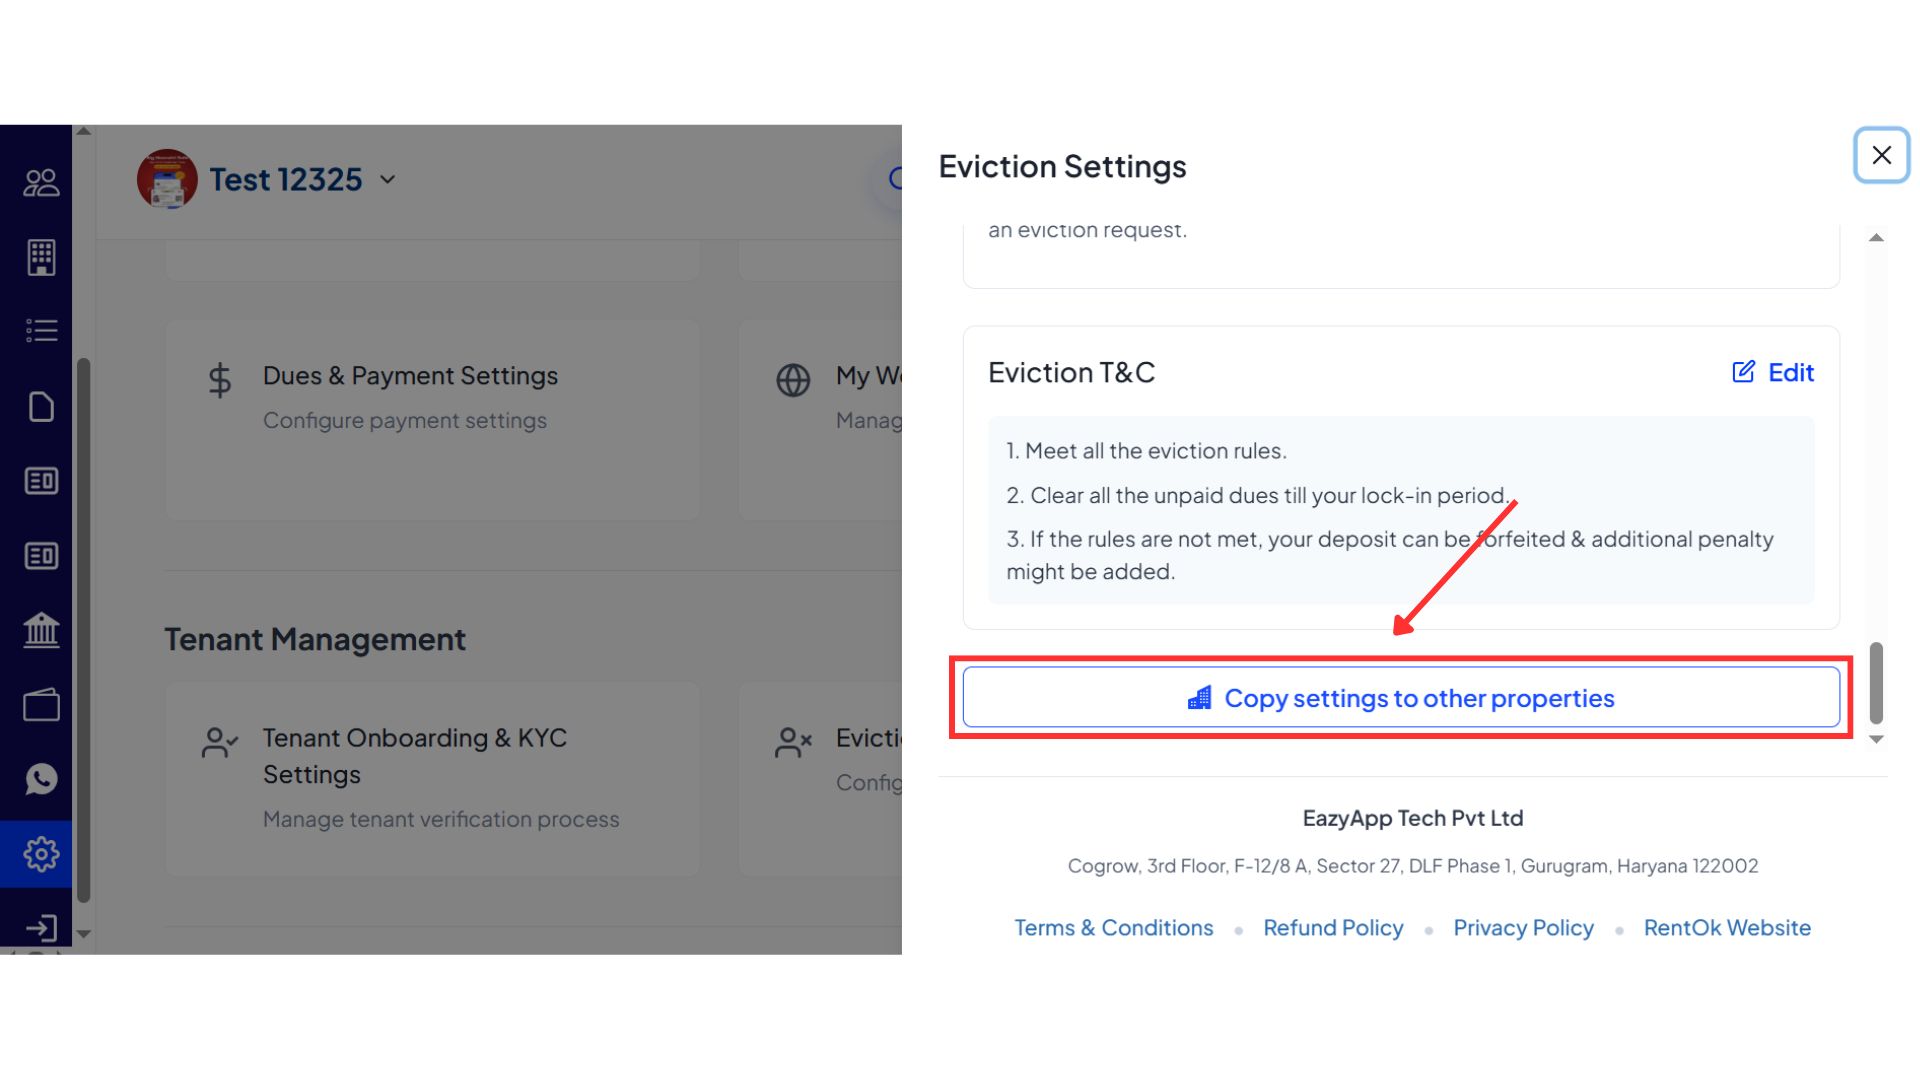
- Step 6: Save the changes After updating the necessary details, save the changes to apply the updated eviction settings.
💡 Why it matters: This allows managers and accountants who work primarily on desktops to handle the entire tenant exit process without needing to switch to the mobile app, making the workflow more efficient and centralized.
🍔 Food Menu Module Now Live on Web - Plan and share your menu with ease
The full Food Menu module is now live on the web, allowing you to set daily menus, track food attendance, and share updates from your computer.
See what’s new →
Highlights
-
Set Daily Menus: Easily plan your menus for breakfast, lunch, and dinner for the entire week.
-
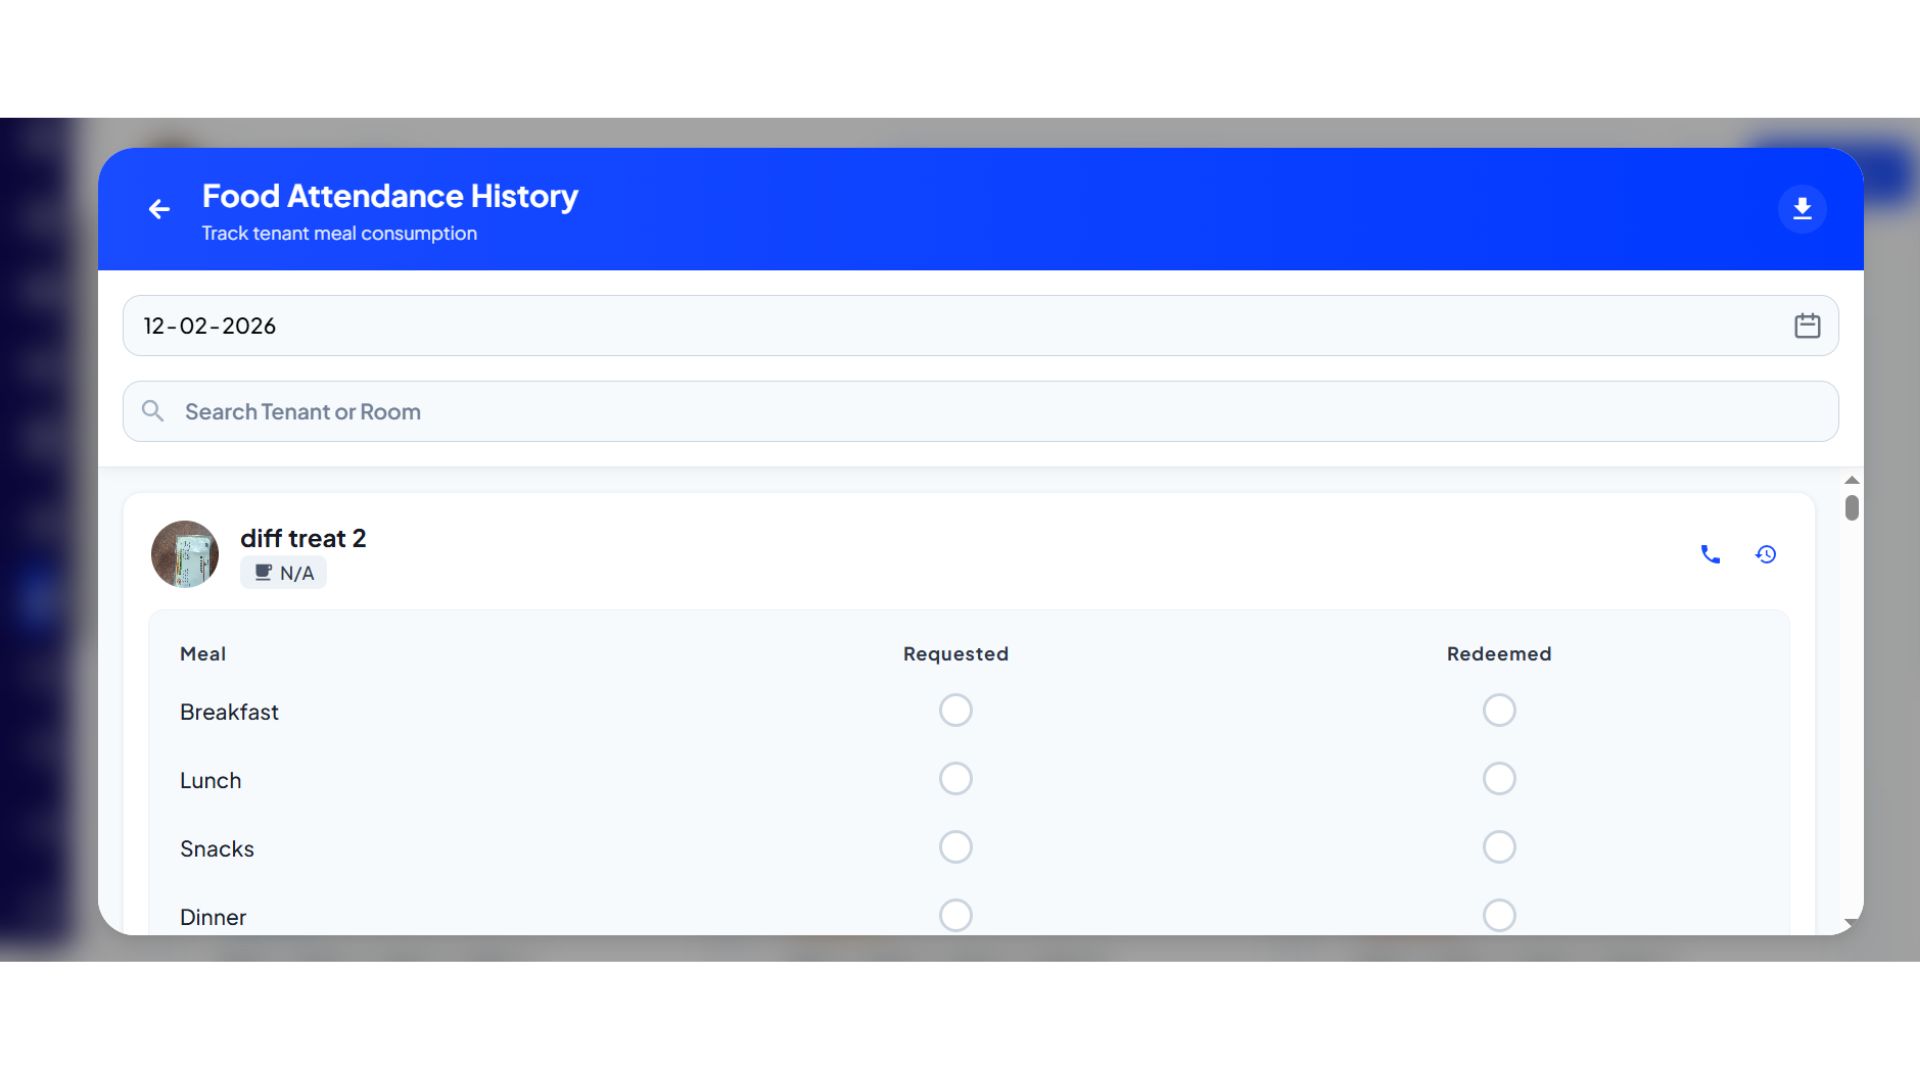
View Food Attendance: Check the food attendance history to see who consumed which meal on any given day.
-
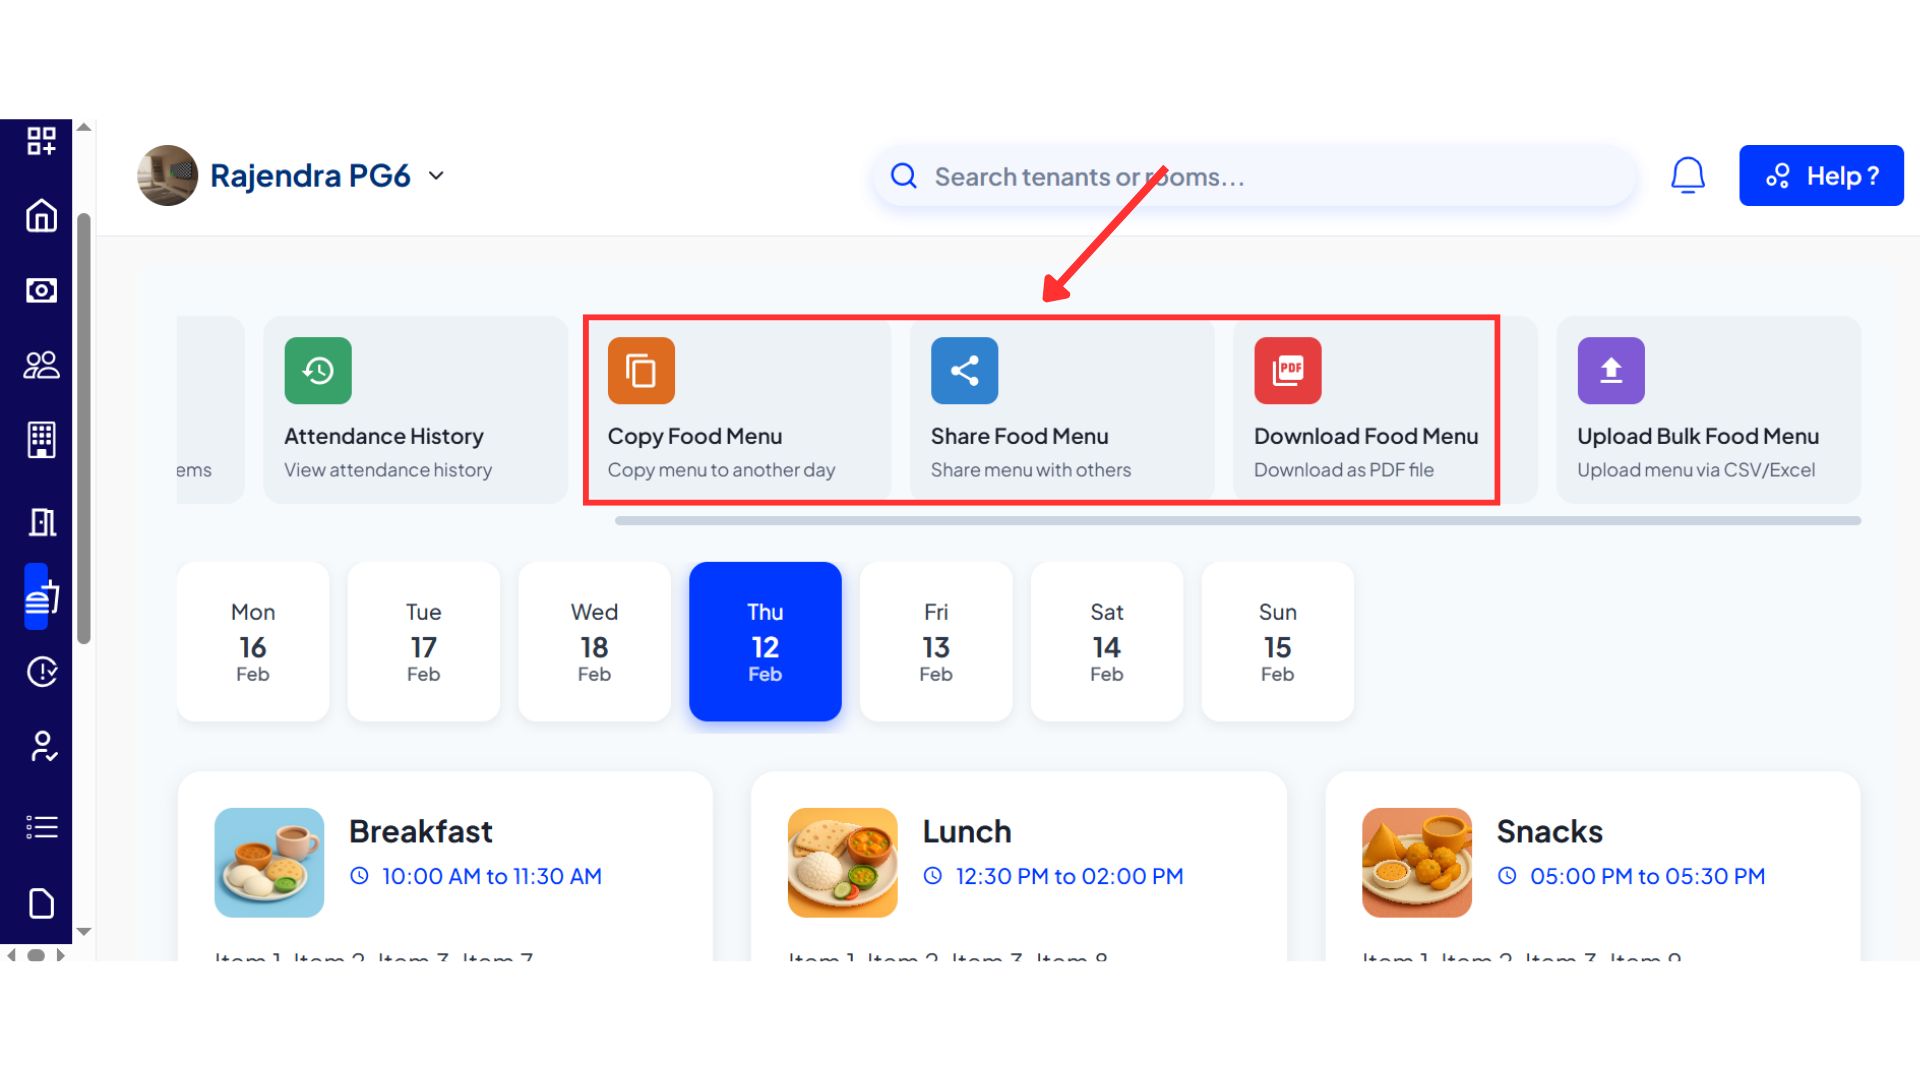
Share and Download: Share the menu with tenants by generating a PDF or download the attendance report.
-
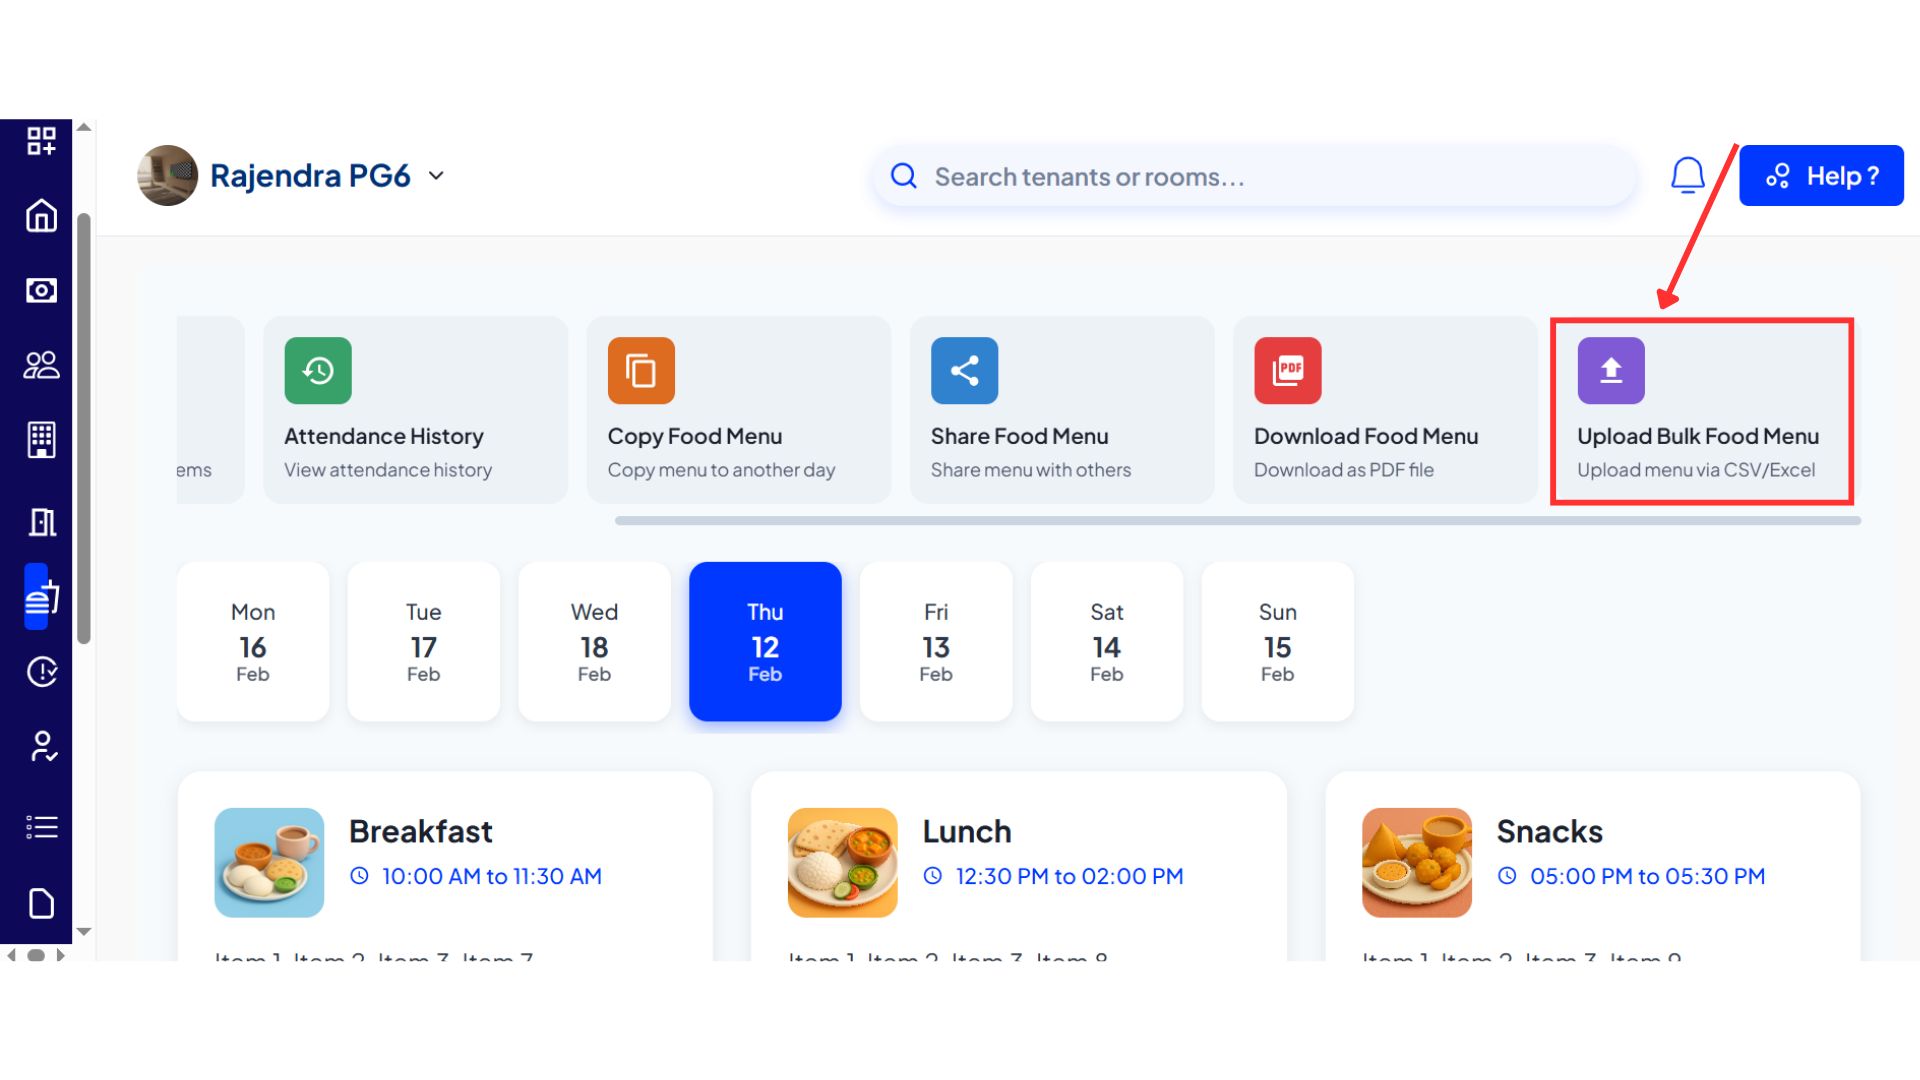
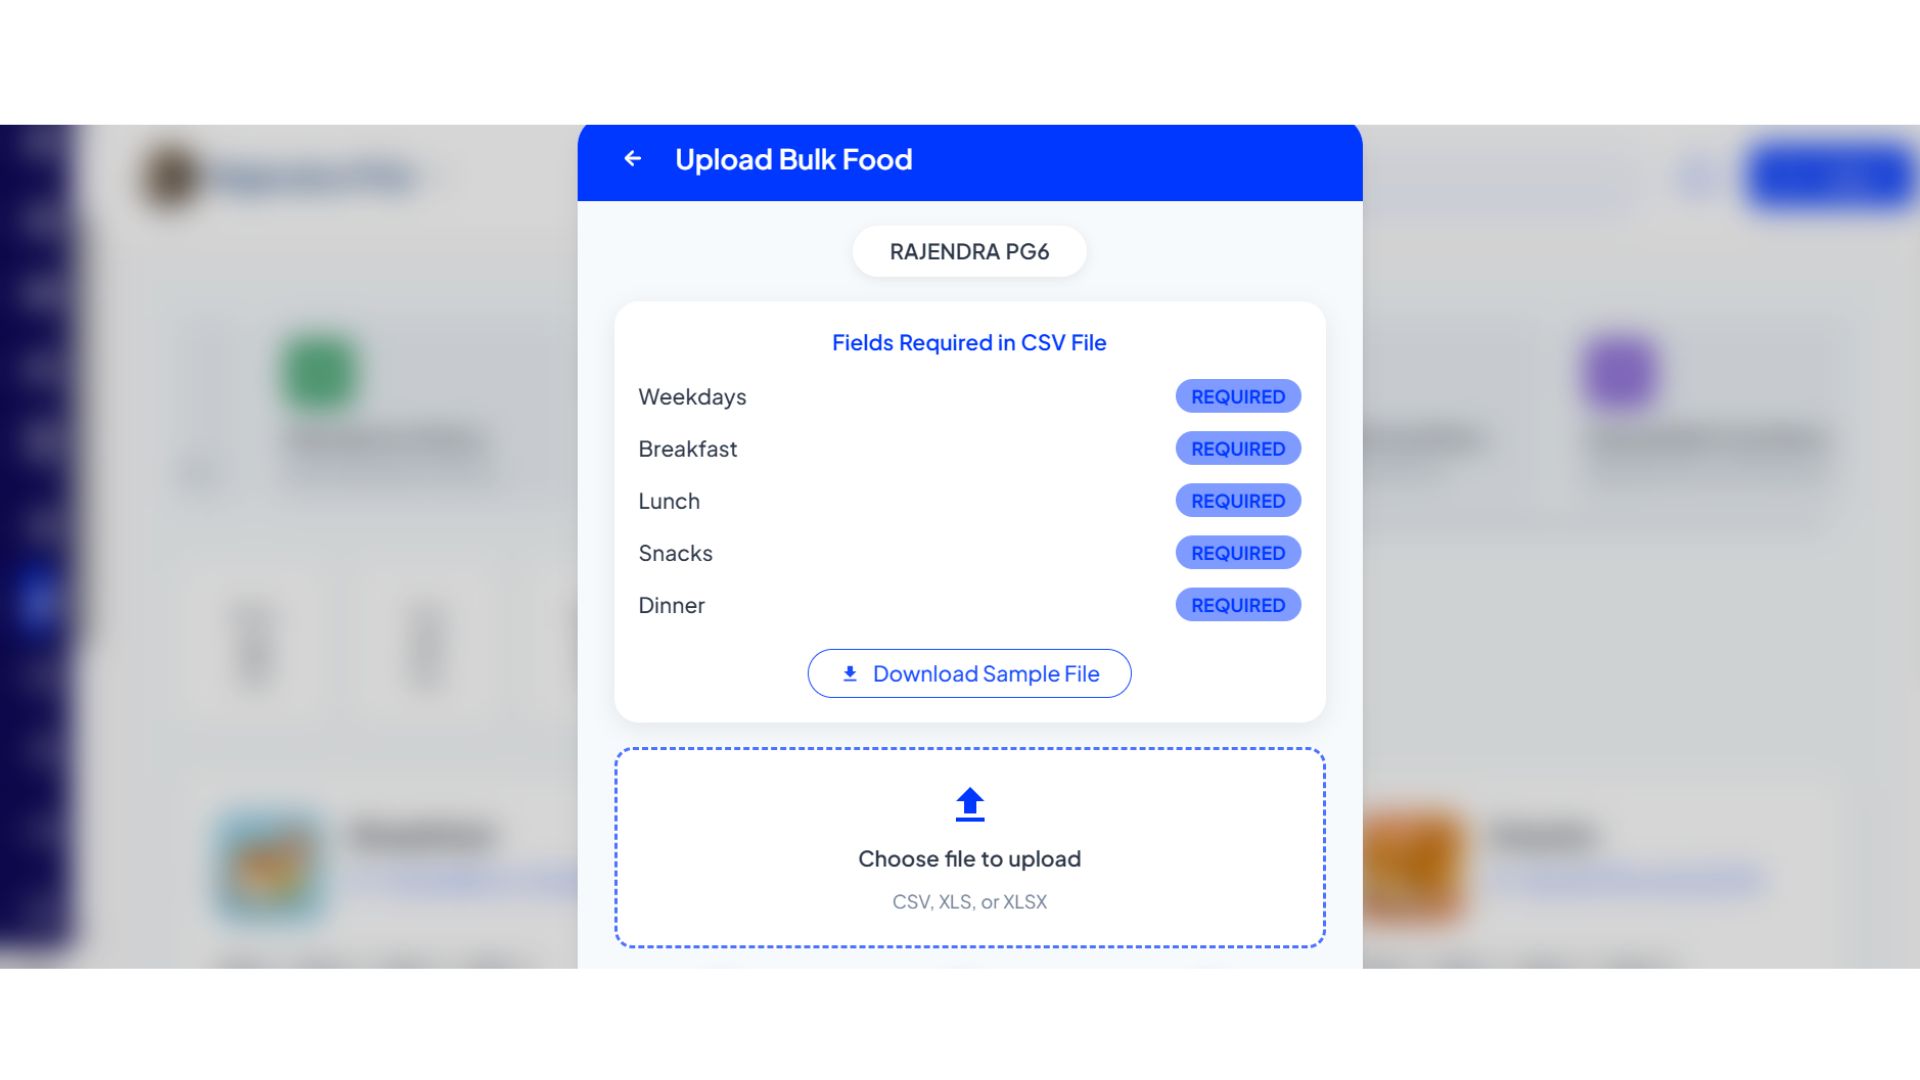
Bulk Upload Menu: Quickly upload your entire menu using a simple Excel file.
How to try
- Step 1: Log in to the web version Open the web version of the app and enter your credentials to log in.
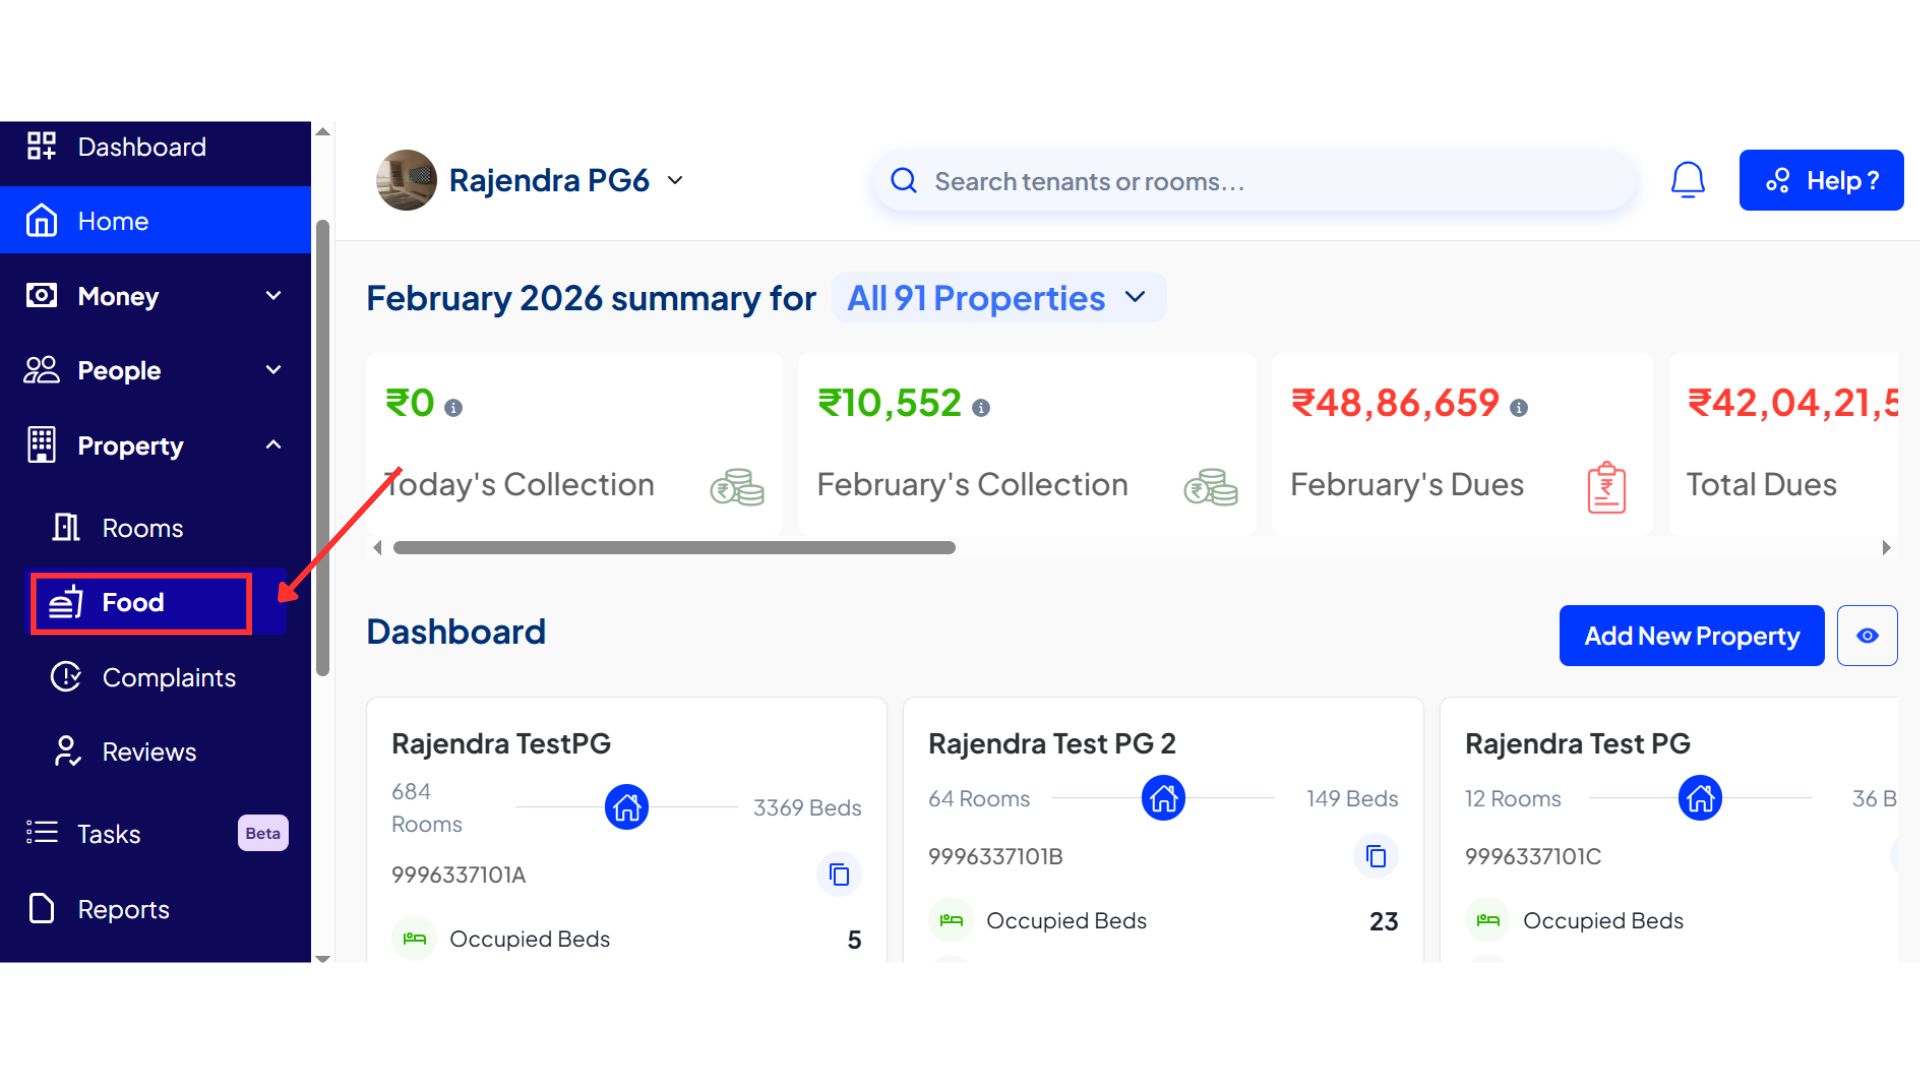
- Step 2: Go to the Home page After logging in, the home page gives you an overview of your account.
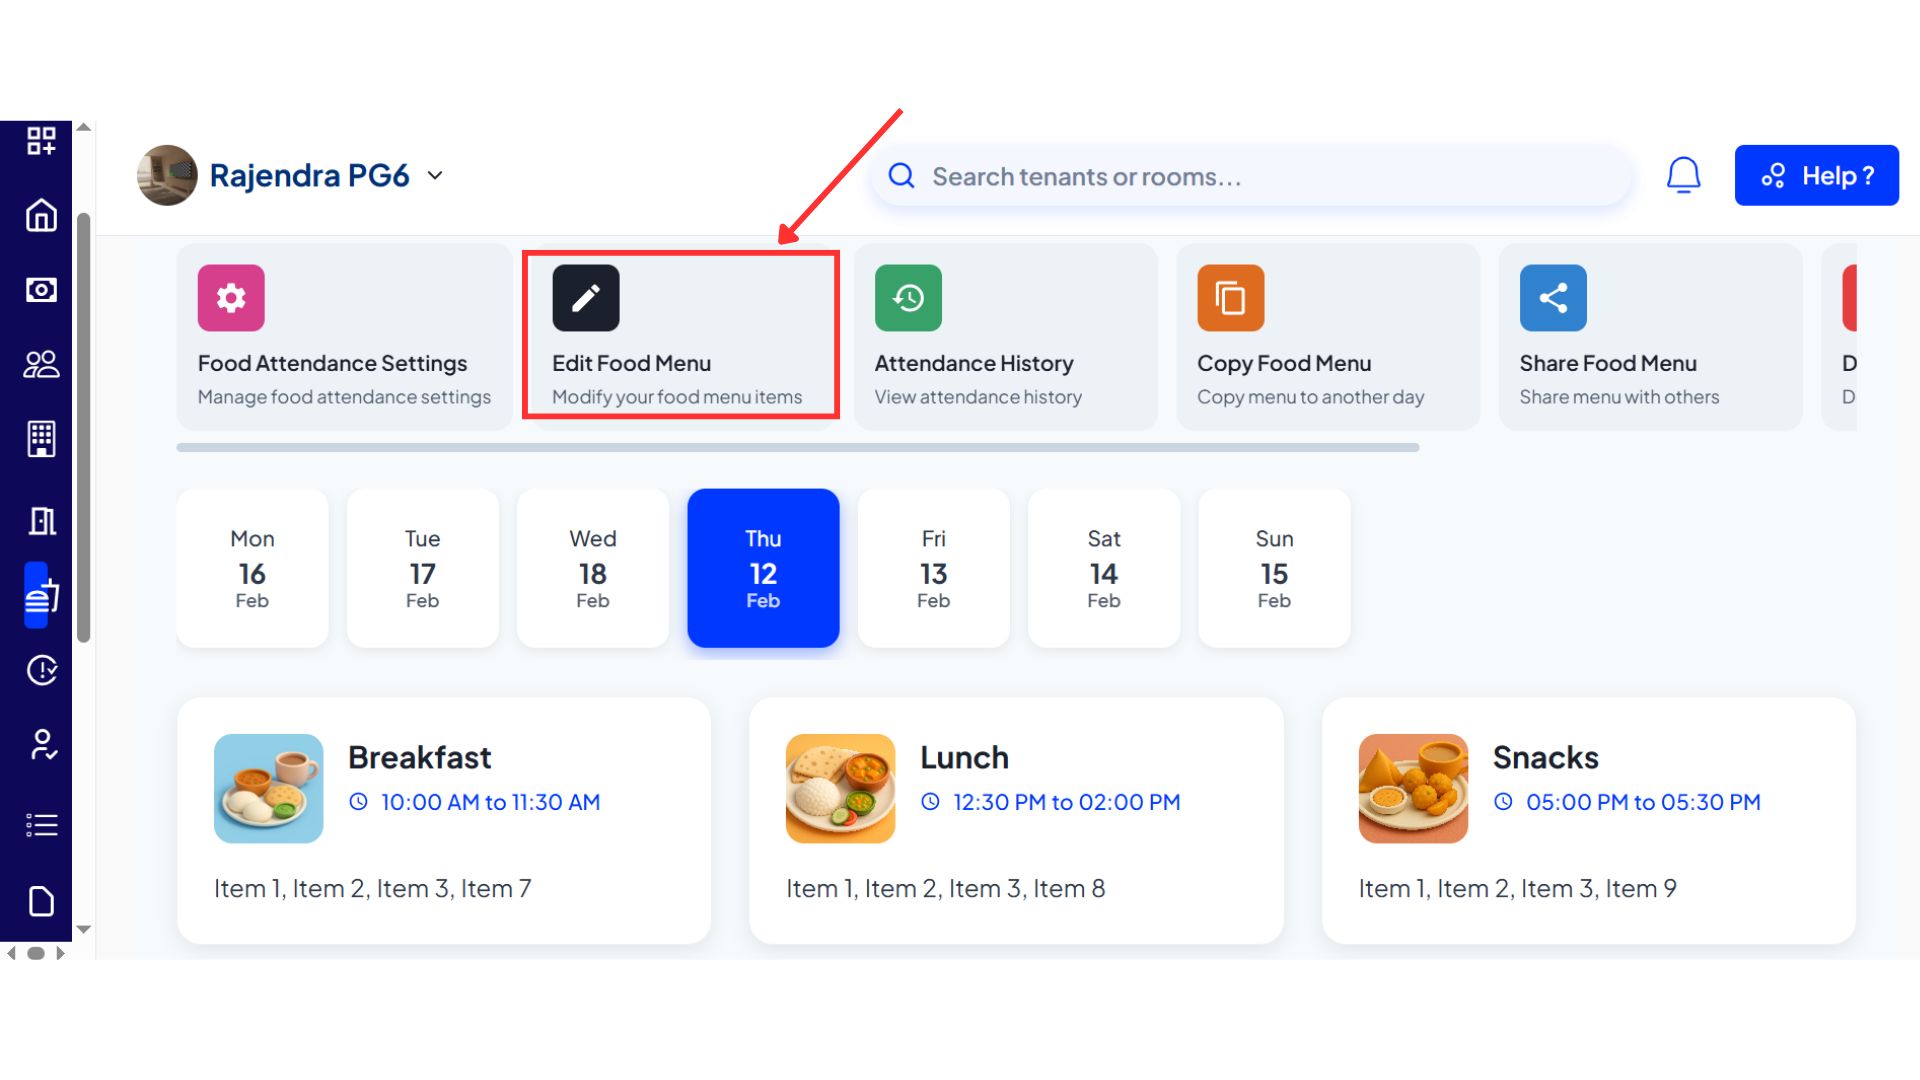
- Step 3: Open the Food Section From the top menu, go to Properties. Inside Properties, click on Food to view the menu for the day on your screen.
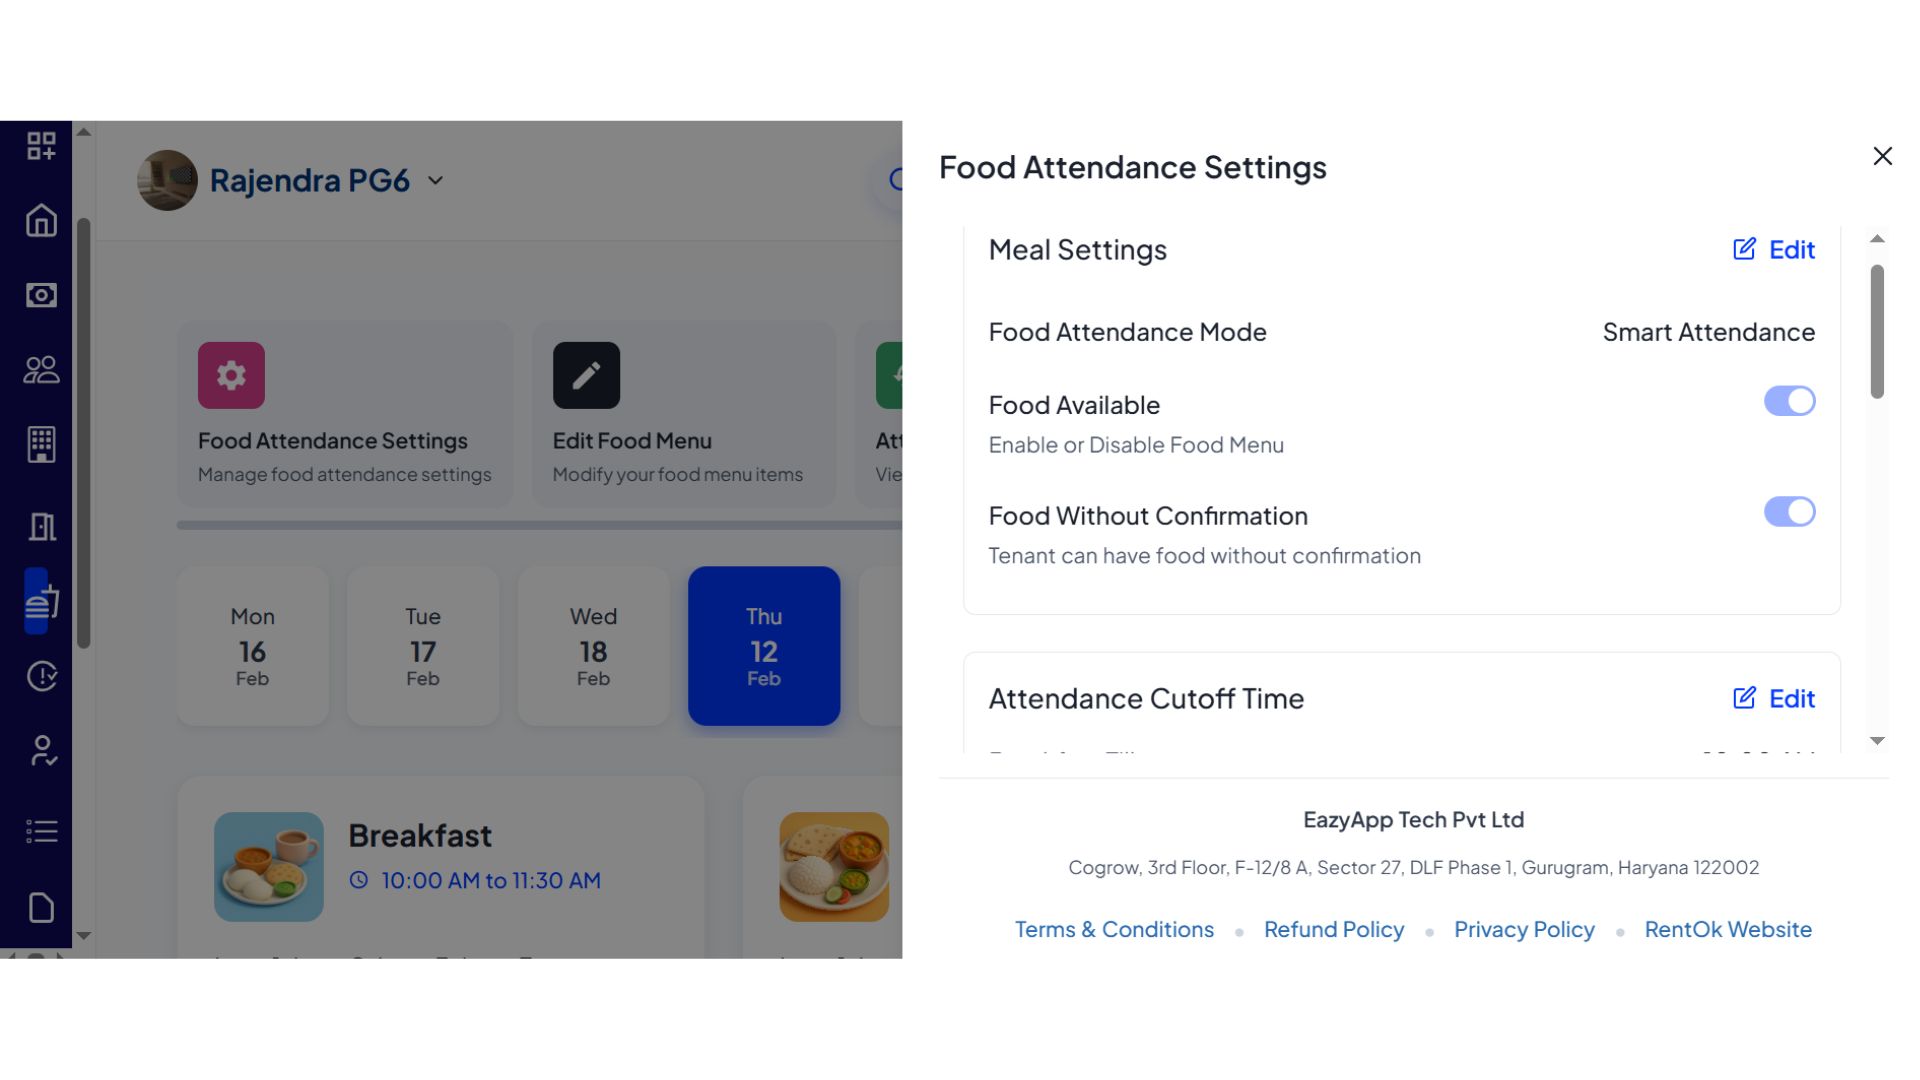
- Step 4: View menu and available options Once you open the Food section, you will be able to see the menu for the day along with all available food-related settings and options.
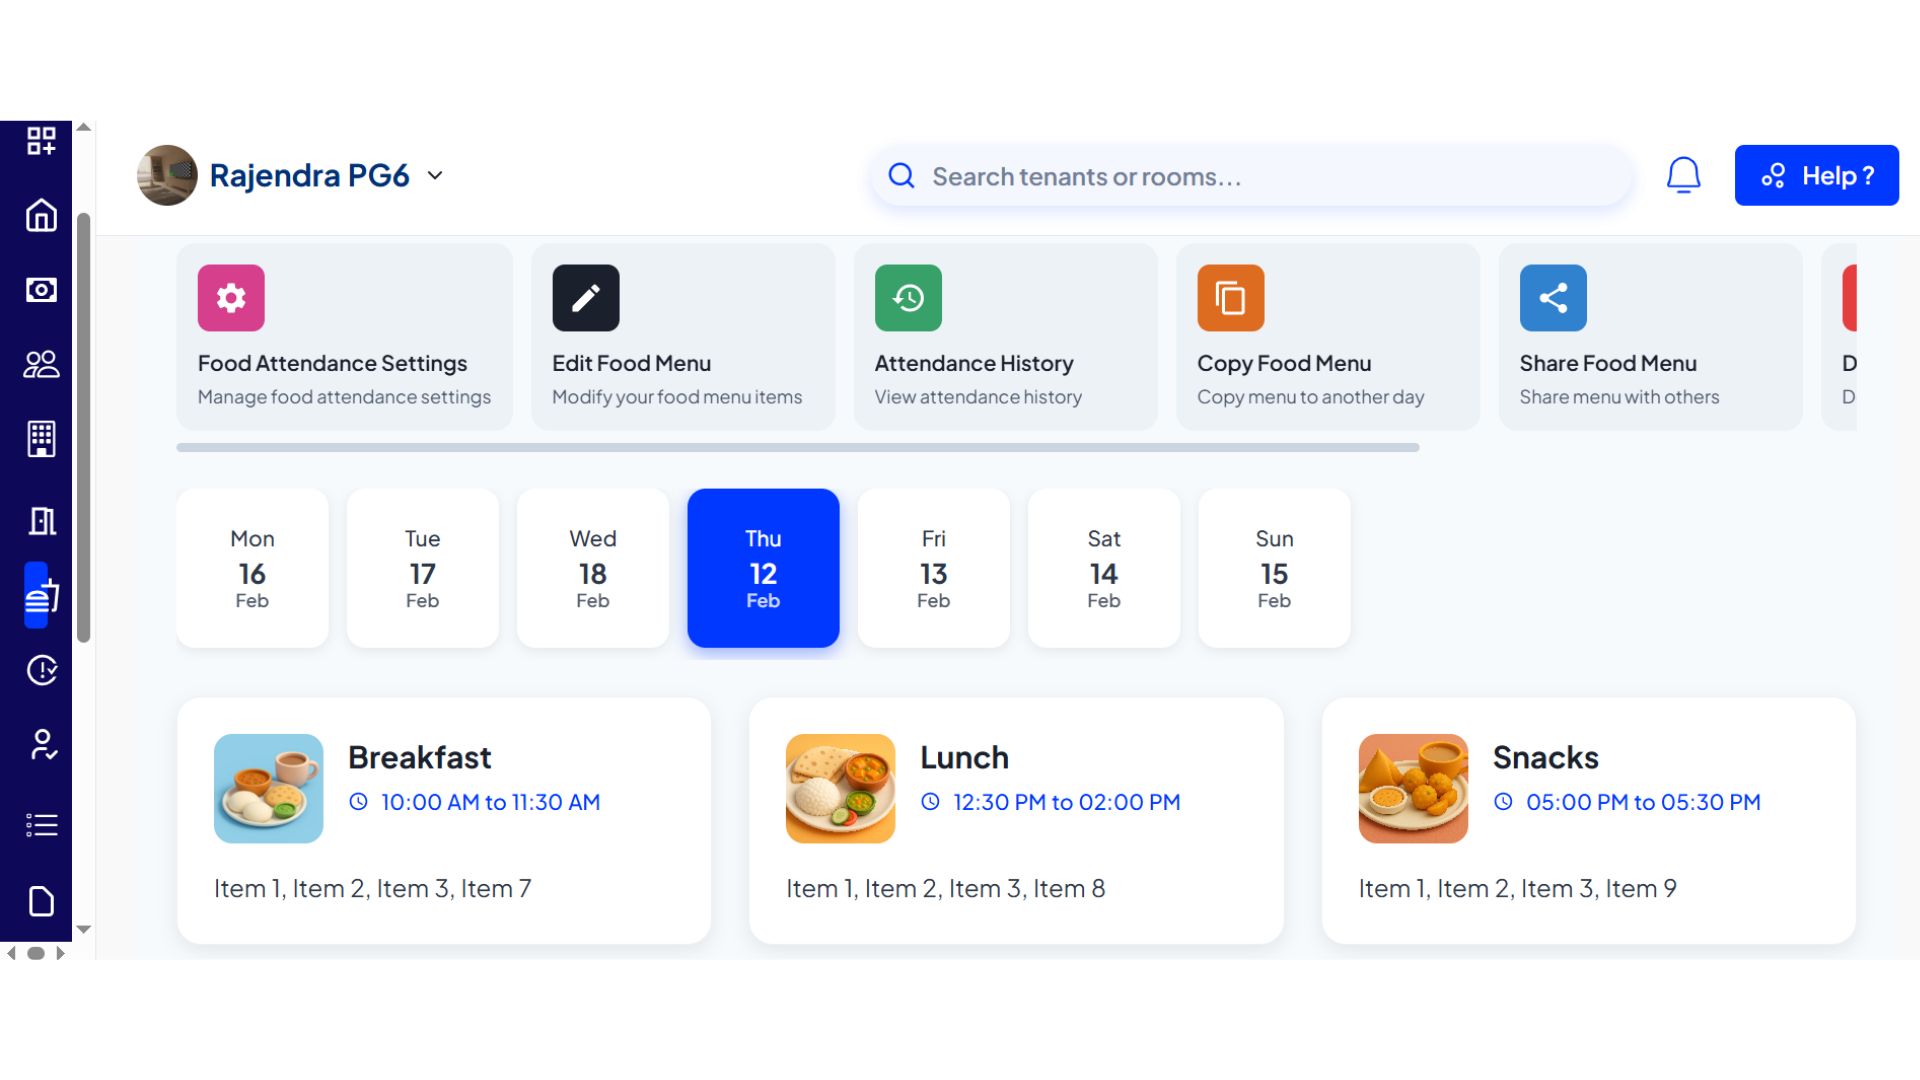
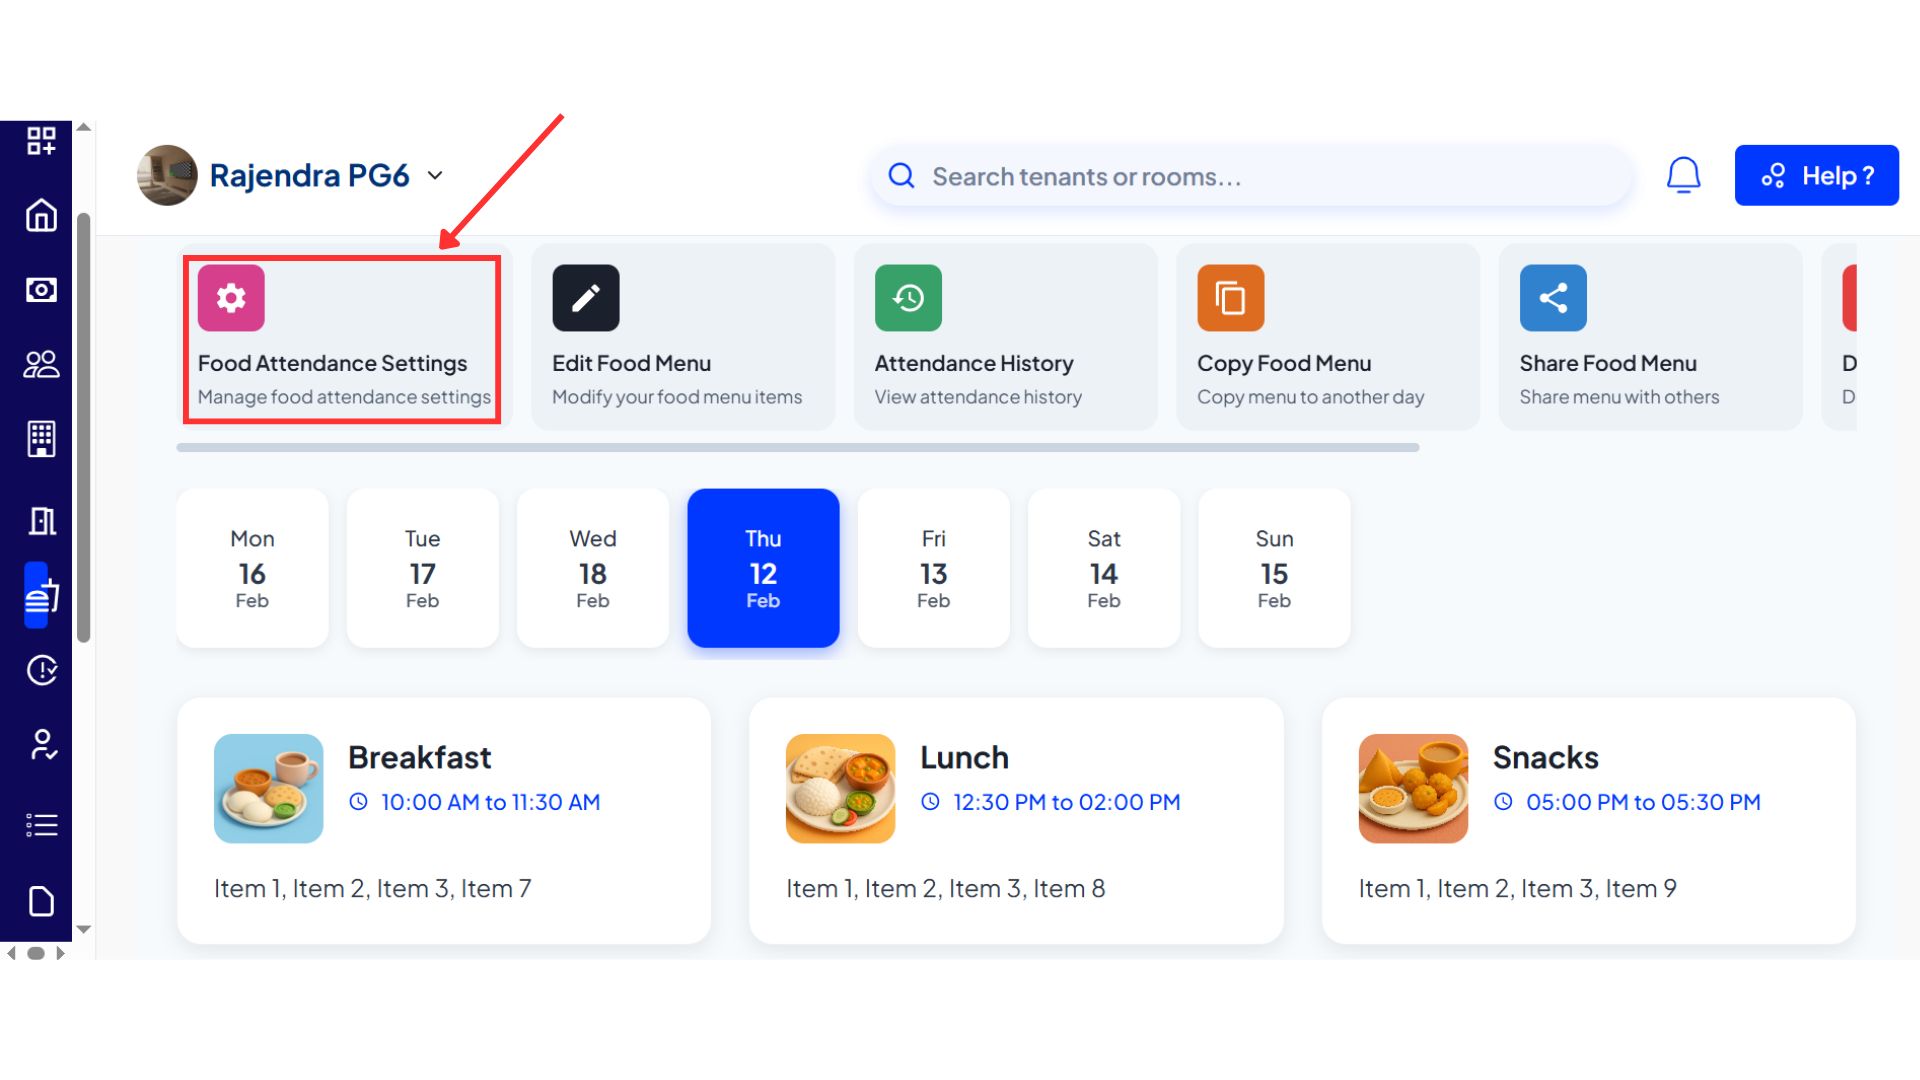
- Step 5: Update food settings Click on Food Settings to manage preferences such as whether food is available, set the attendance cutoff time, and adjust other related options.
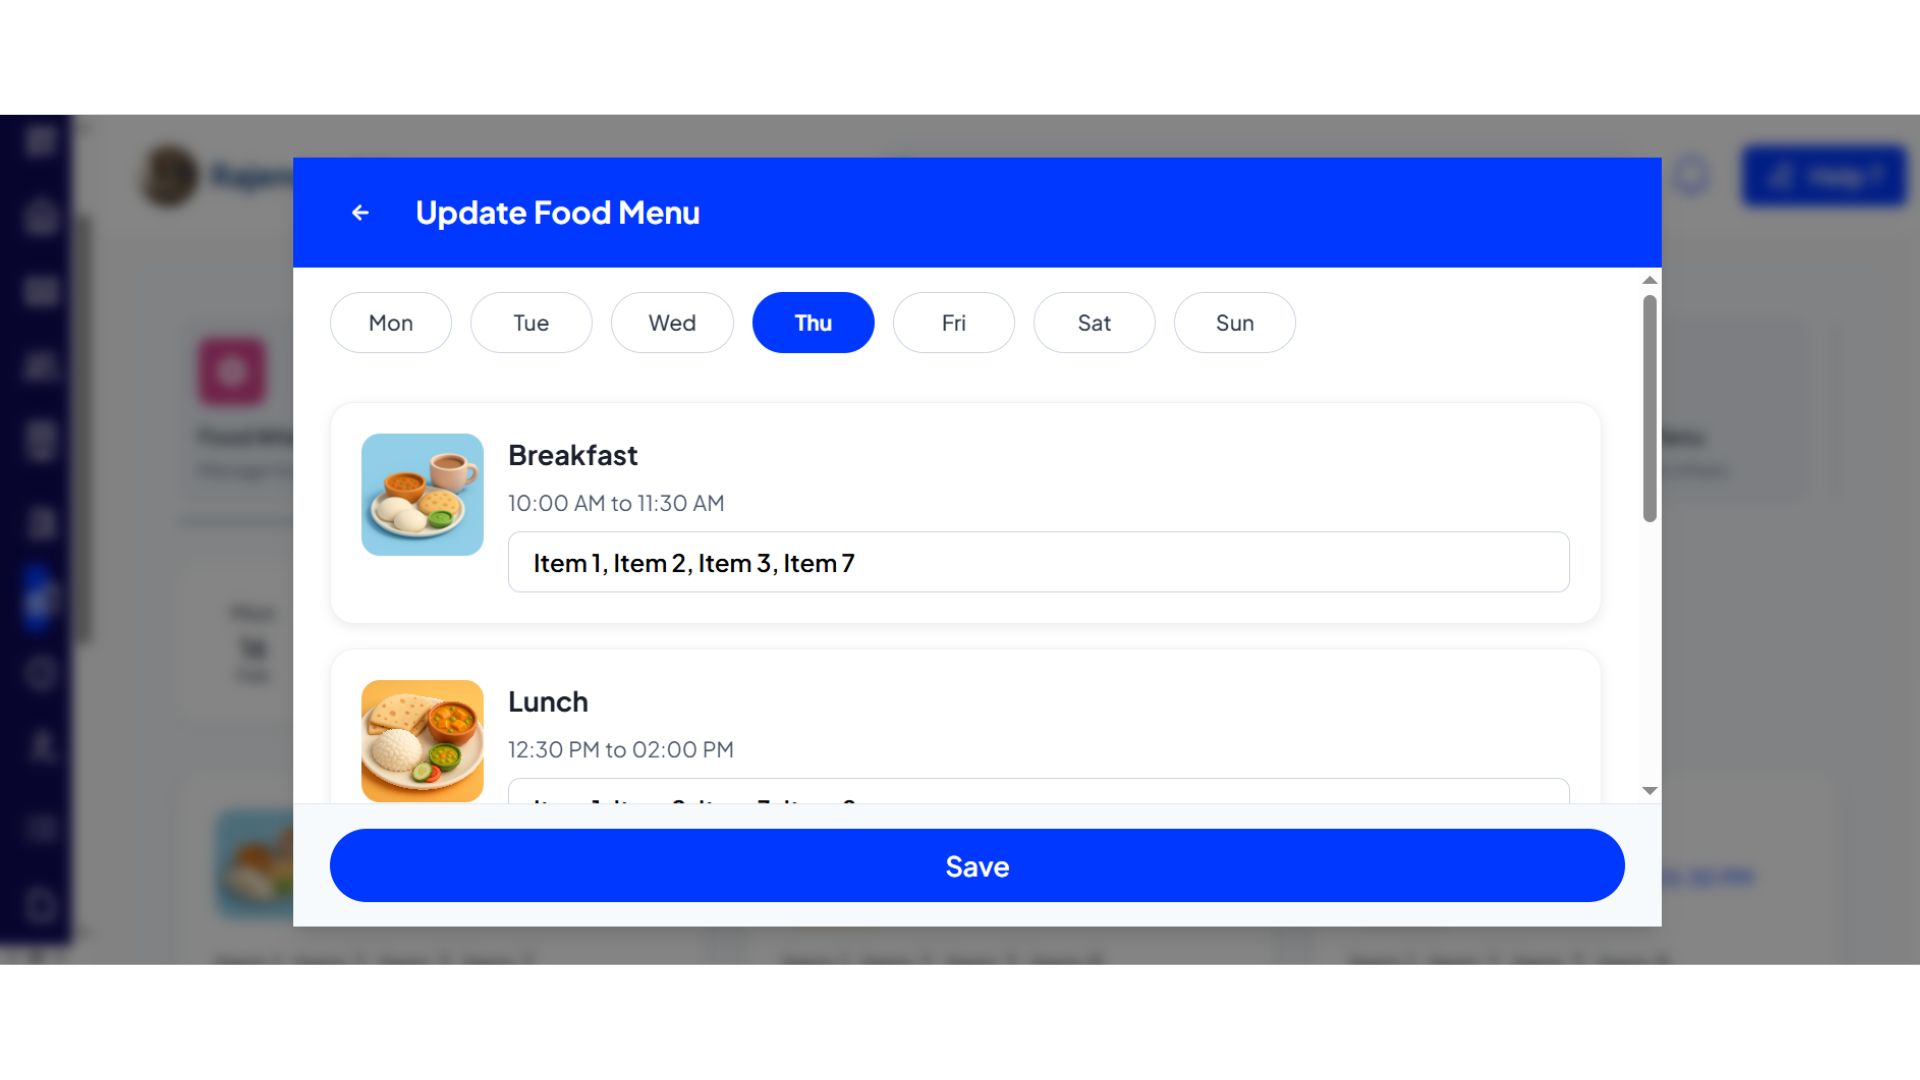
- Step 6: Edit the food menu You can update or modify the menu items for the day as needed.
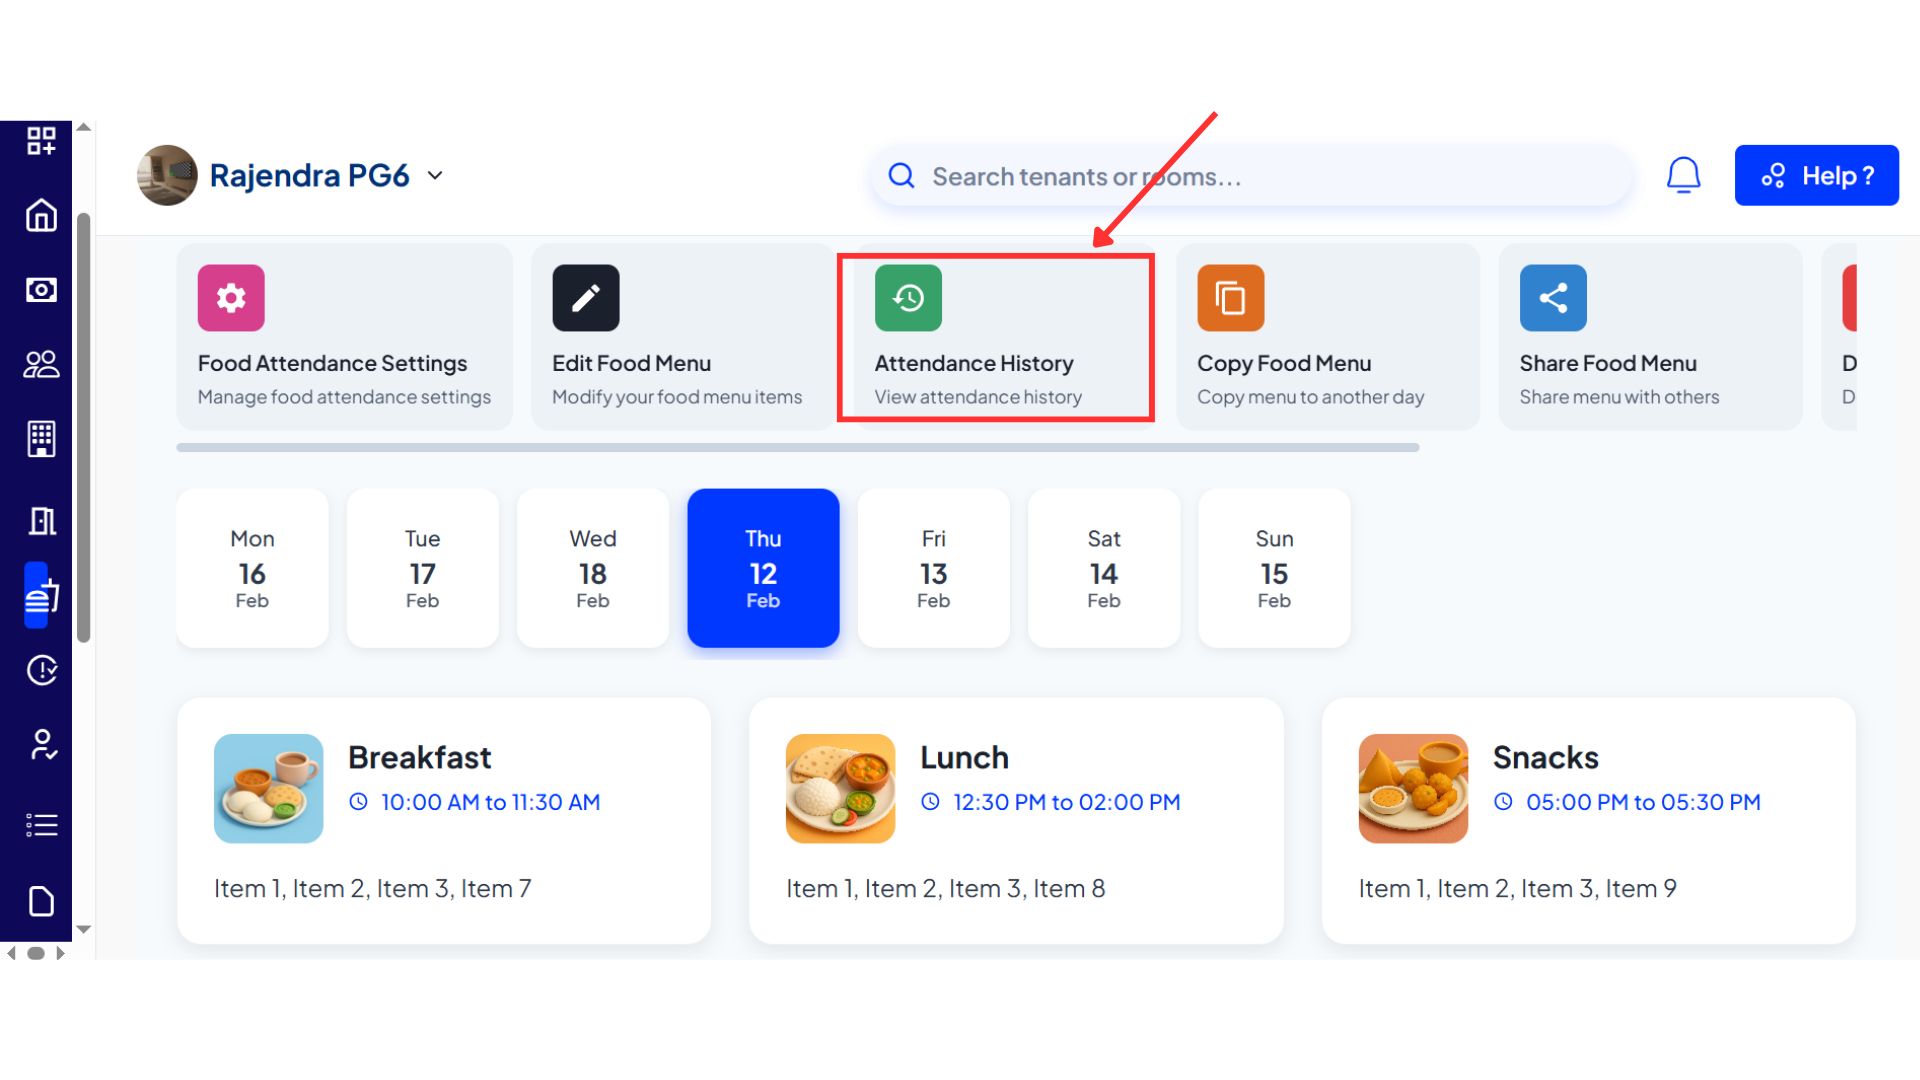
- Step 7: Check attendance history Use the attendance option to see which tenants have marked their food attendance for the day.
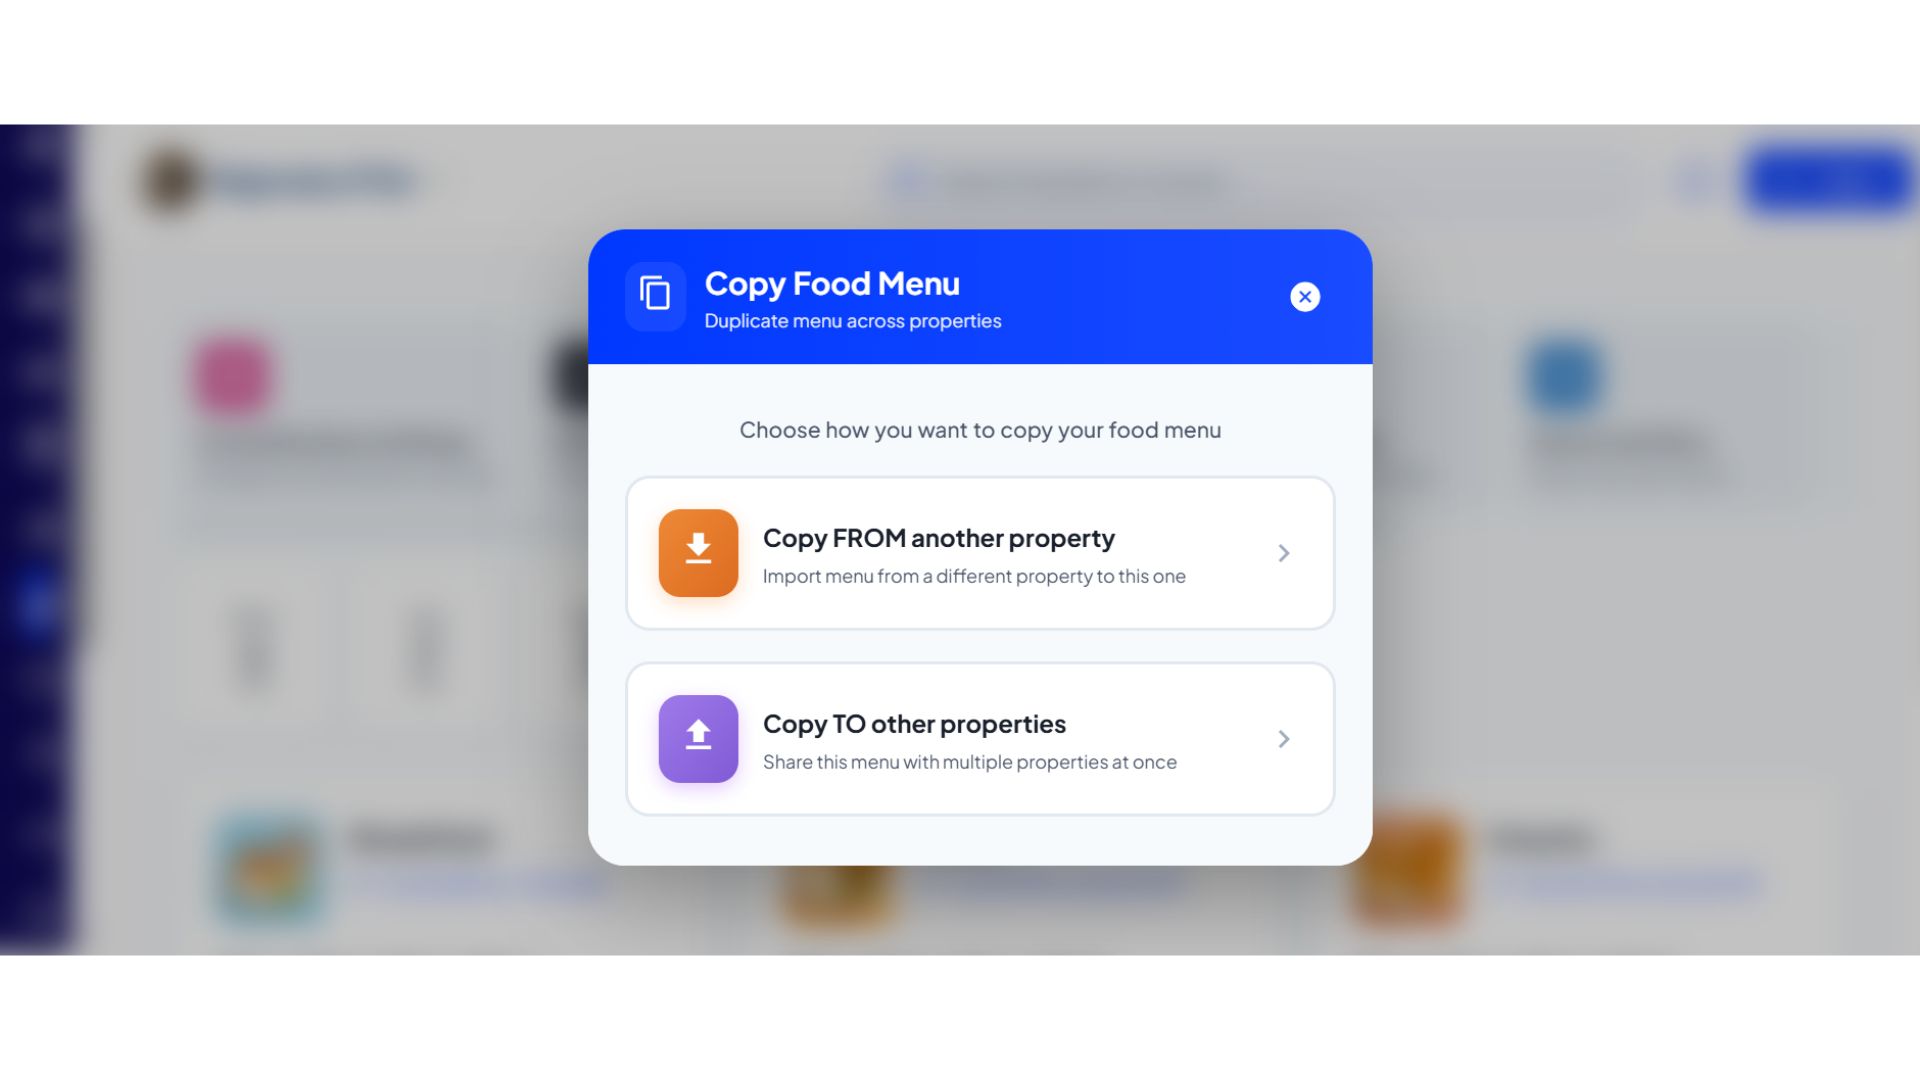
- Step 8: Copy, share, or download the menu You can copy the food menu to or from another property, share it with others, or download it in PDF format.
- Step 9: Upload the menu in bulk If required, you can upload the food menu in bulk using a supported file format such as CSV or Excel.
💡 Why it matters: This makes menu planning and management much easier for mess managers and staff who prefer working on a larger screen, ensuring consistency with the mobile app.
✨ Fixes & Polish
-
New Font & UI Refresh (Mobile): We are rolling out a new, more modern font (Plus Jakarta Sans) and refreshed UI elements, starting with the login screen and tenant profiles for a cleaner look.
-
Review Analytics & Downloads: The Review Module on the web now has an "Analytics" tab with charts and the option to download all responses to an Excel file.
-
Search in Web Reports: You can now quickly find the report you need using the new search bar in the Reports section on the web.
-
Settlement Status Copy: Improved the wording for "Reversed" settlements to "Settlement Failed" in the passbook to reduce confusion.
Thank You
Have doubts or any feedback? Chat with us in-app (Help → send us message). We’re building for you, and every suggestion counts!