Release Note - 19th Feb, 2026
Release Note - 19th Feb, 2026
Hello!
This week's update introduces two of our most powerful modules yet: Team Passbook for complete cash management and the Entry/Exit feature on the Tenant App for enhanced security. We're also launching a new Asset Management system on the web.
Introducing Team Passbook - Manage Your Staff's Cash & Expenses
This is a full-fledged digital ledger to track all cash transactions between you and your team members. From daily collections to expenses and handovers, manage your property's cash flow with complete transparency.
See what’s new →
Highlights
-
Track All Cash: Automatically log all cash collections recorded by your staff in their individual passbooks.
-
Manage Petty Cash: Allocate petty cash to staff members and track how it's spent.
-
Record & Reimburse Expenses: Staff can record expenses paid from their personal cash, and you can easily reimburse them.
-
Secure Handovers: Securely accept cash handovers from staff using an OTP-based verification process.
How to try
- Step 1: Open Settings Tap on your profile icon at the top of the screen. This will take you to the Settings page.
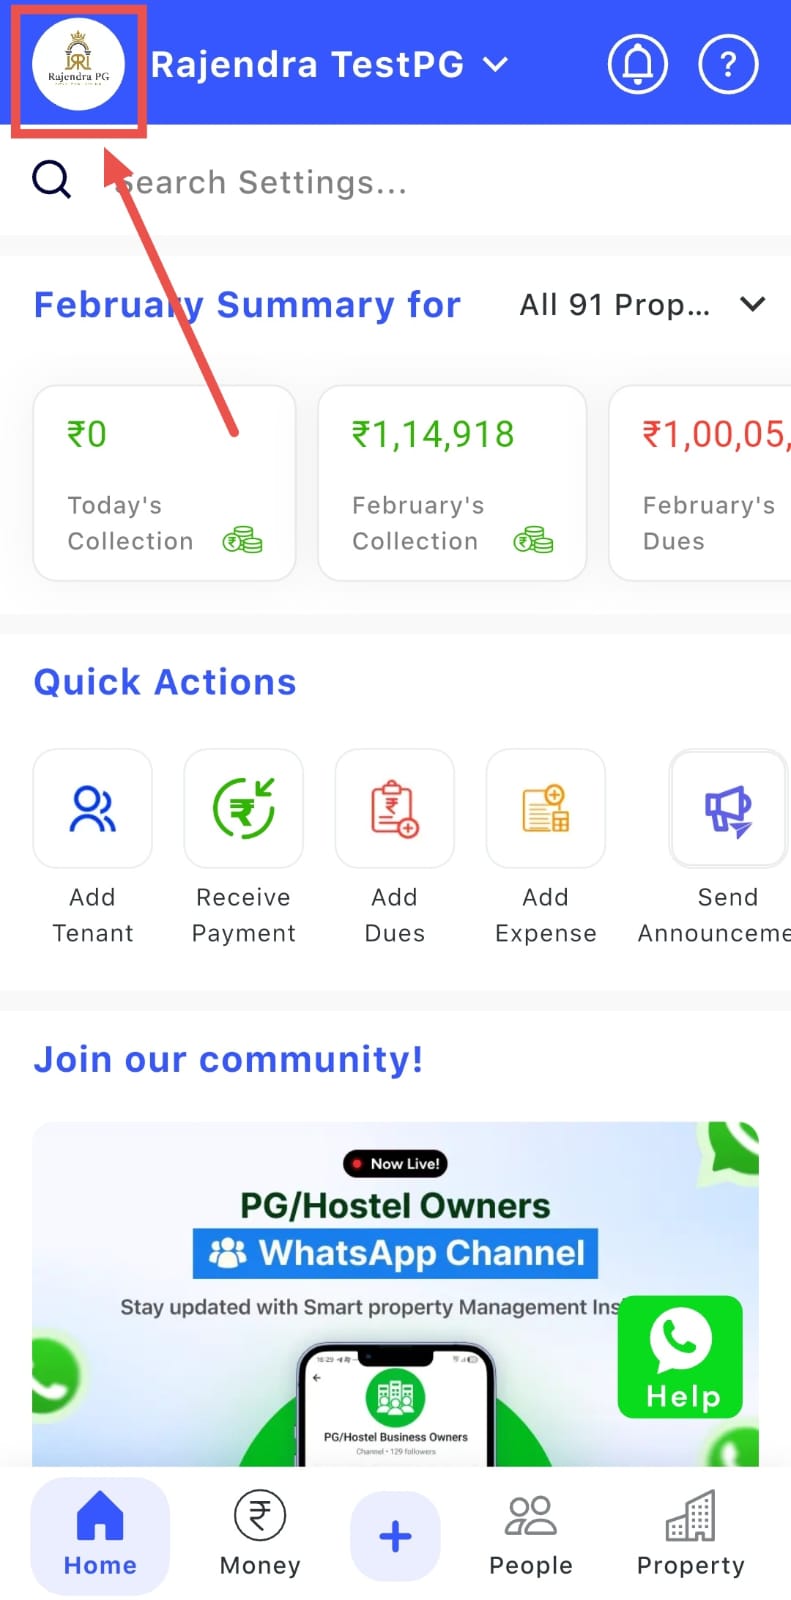
- Step 2: Go to Team Setting Scroll down and select Team Settings. Inside this section, you will see the option to Set Up Your Passbook.
- Step 3: Choose Property Preferenc: Tap on Set Up Your Passbook and select whether you want the passbook to apply to all properties or manage it separately for each property. After making your selection, tap Continue.
- Step 4: Add Team Member Details
Next, tap on Edit. A new screen will open where you can add team members along with their current balance and assigned amount.
- Step 5: Save and View the Passbook
After entering the details, tap Continue to save the information. The next time you open the Team Passbook, you will be able to see the updated balance reflected for each team member.
| 💡 Why it matters: This provides a clear audit trail for all offline cash, helps prevent cash leakage, and brings accountability to your internal financial operations. It removes the need for manual diaries or spreadsheets to track staff cash. |
|---|
New: Asset Management on Web - Track Every Item in Your Property
We are launching a new module on the web to help you create and manage a complete inventory of all the assets in your property, from ACs and furniture to bedsheets and kettles.
See what’s new →
Highlights
-
Onboard Assets in Bulk: Quickly add hundreds of assets at once using a simple Excel sheet template.
-
Link Assets to Rooms: Assign specific assets to individual rooms to know what belongs where.
-
Track Asset Status: Keep track of whether an asset is "Active" (in a room), "In Storage," "Broken," or "In Repair."
-
Filter and Search: Easily find any asset by filtering by category, room, or status.
How to try
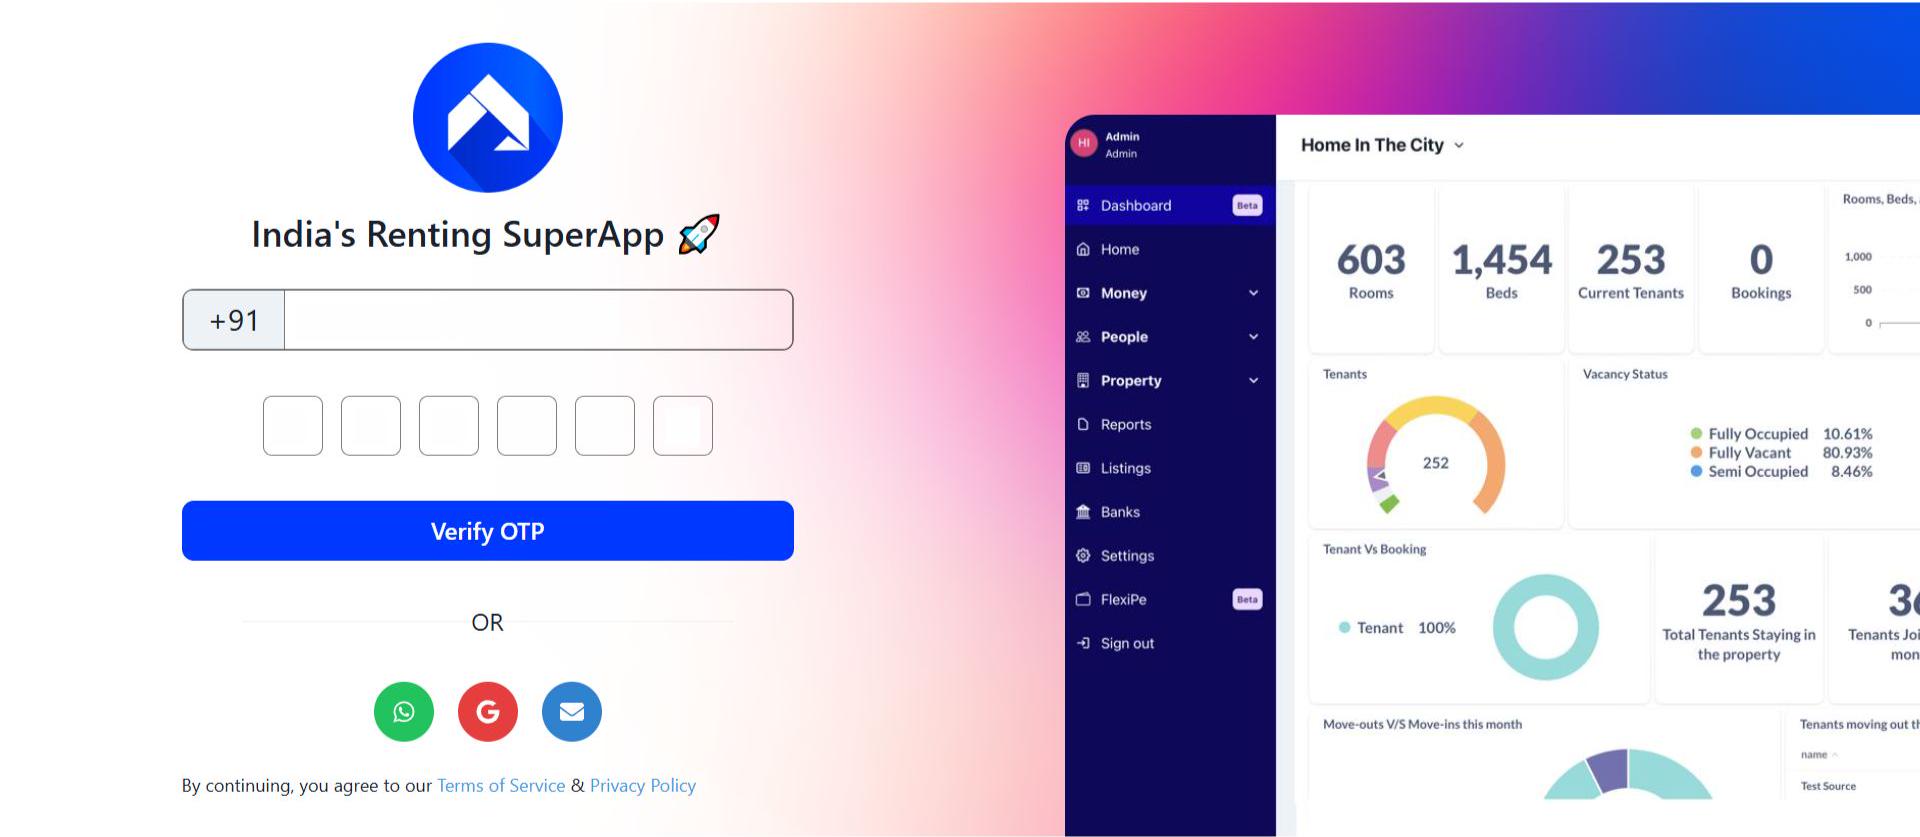
- Step 1: Log in to the web version Open the web version of the app and enter your credentials to log in.
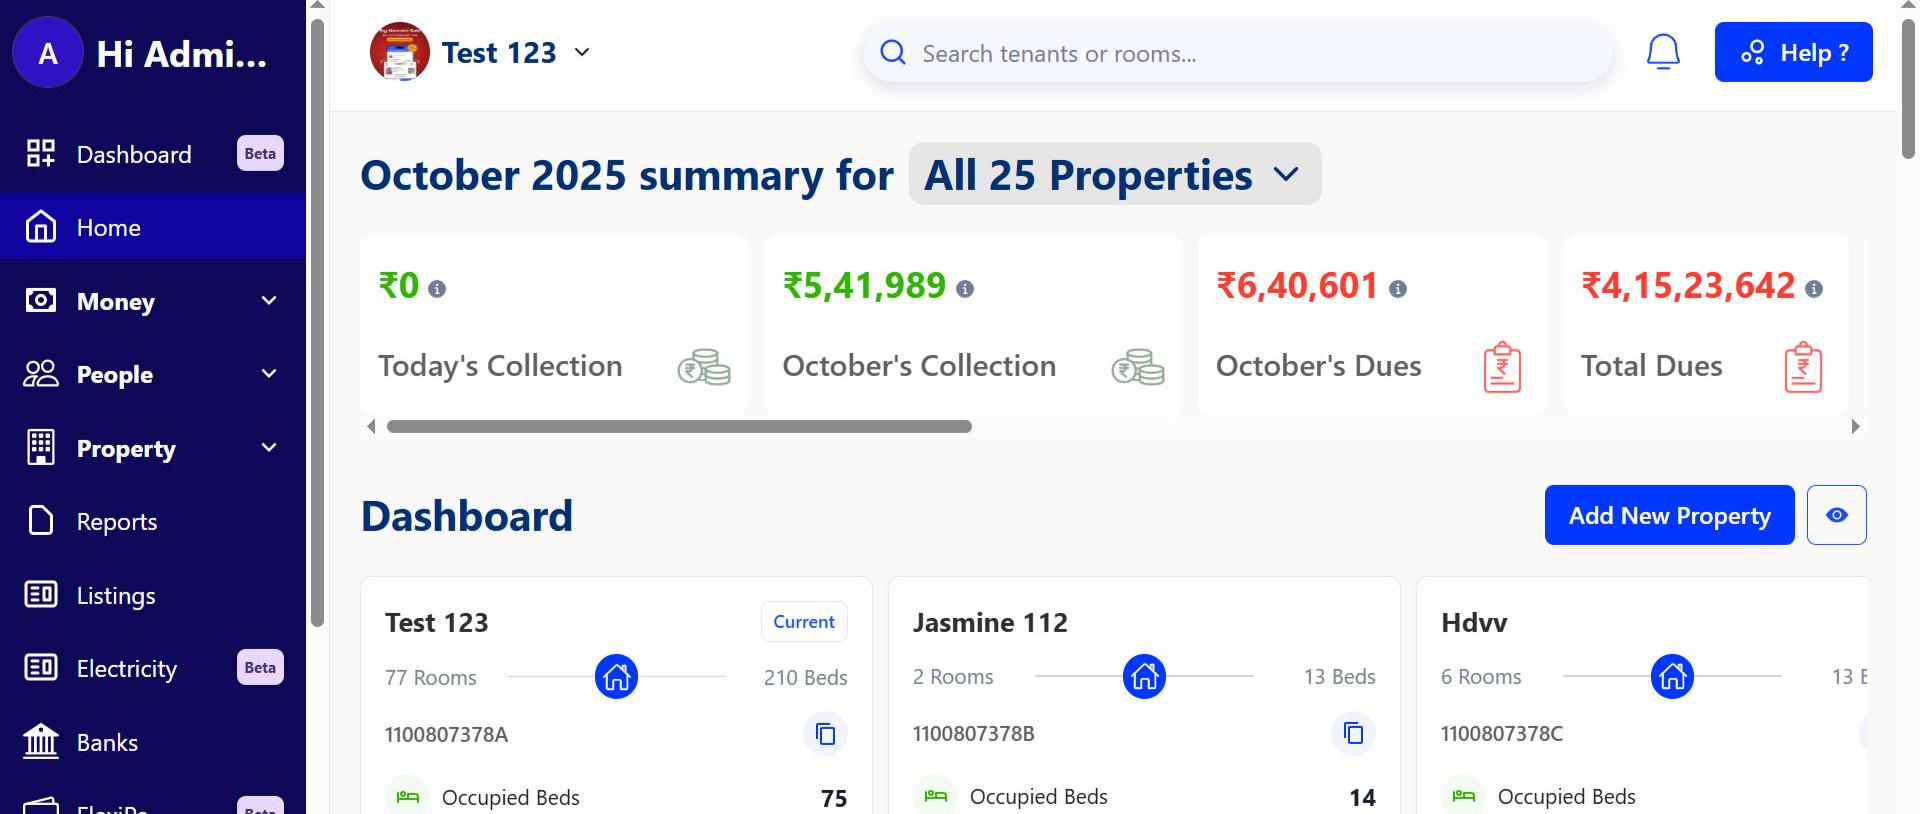
- Step 2: Open the Assets section After logging in, go to the Home page and click on Assets to continue.

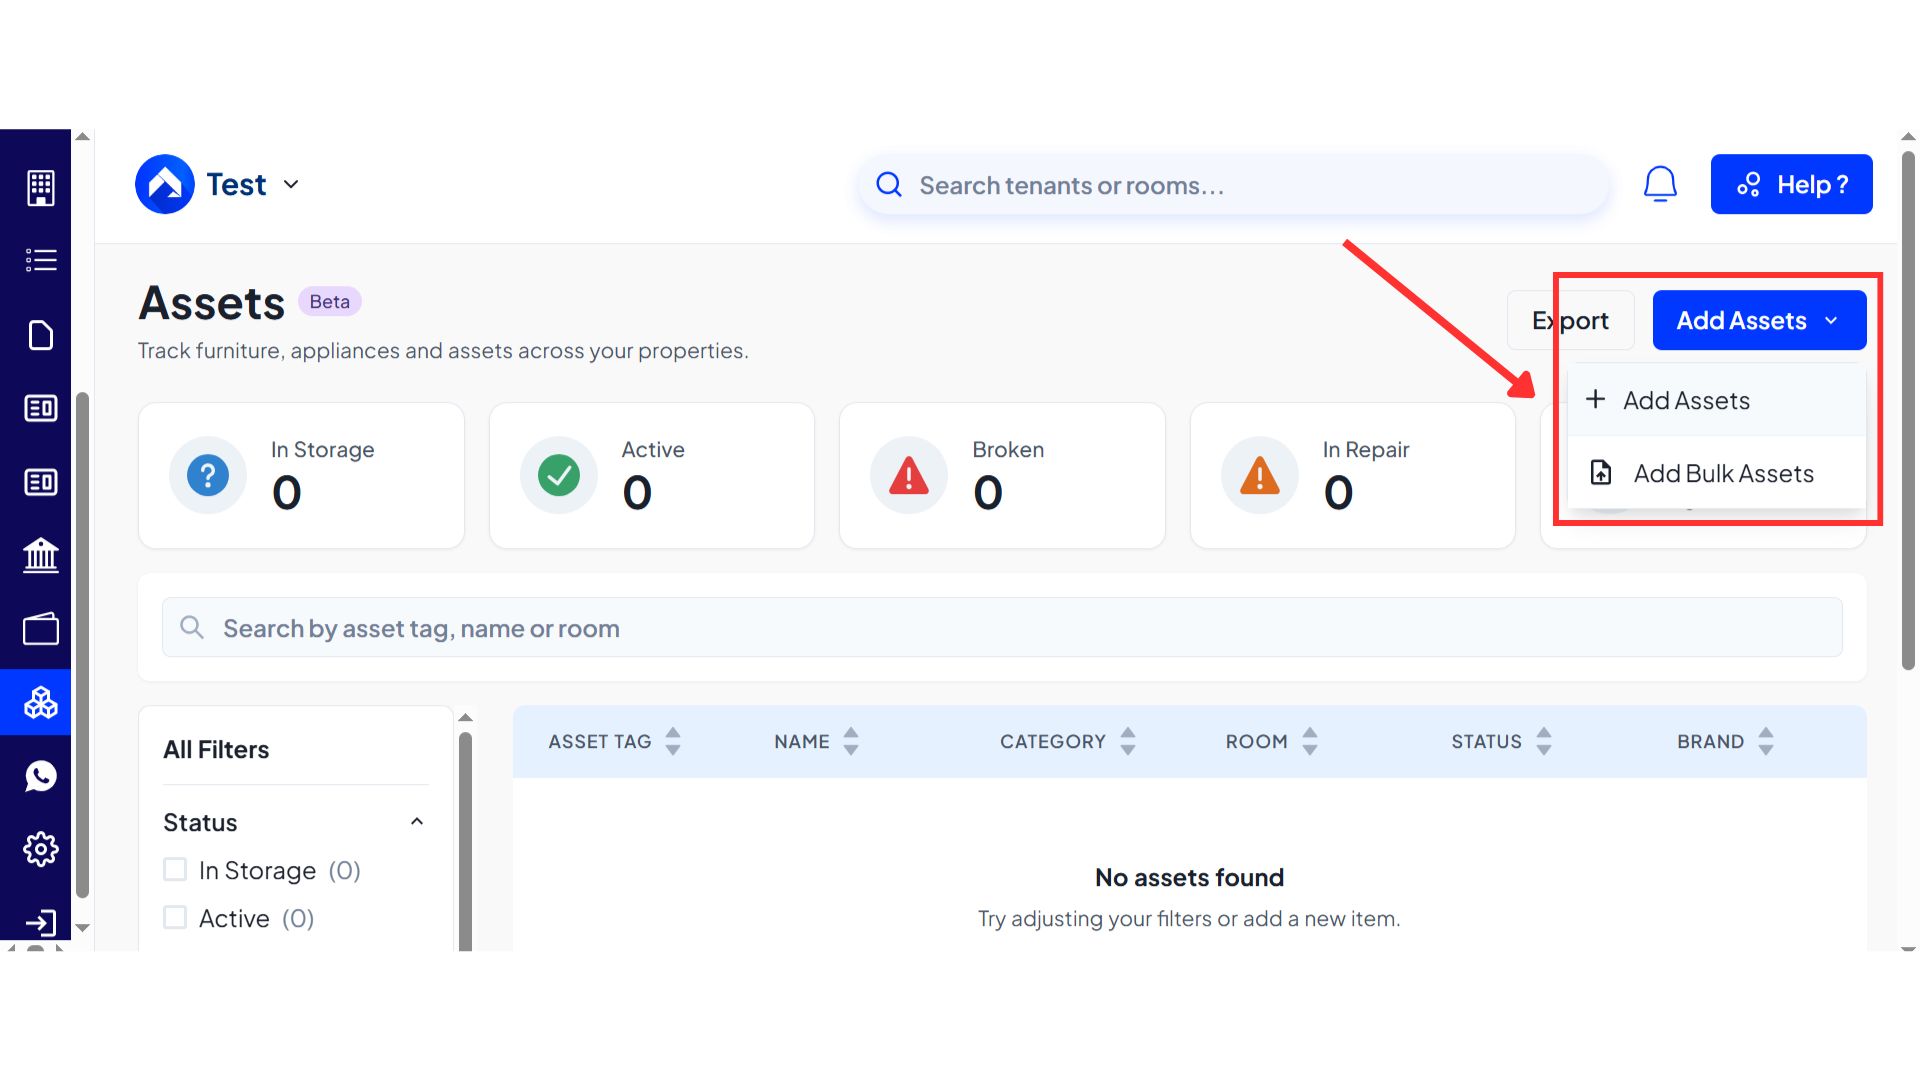
- Step 3: Choose how you want to add assets On the Assets page, click on Add Assets. From here, you can either add a single asset or choose the Add Bulk Assets option.
To Add a Single Asset:
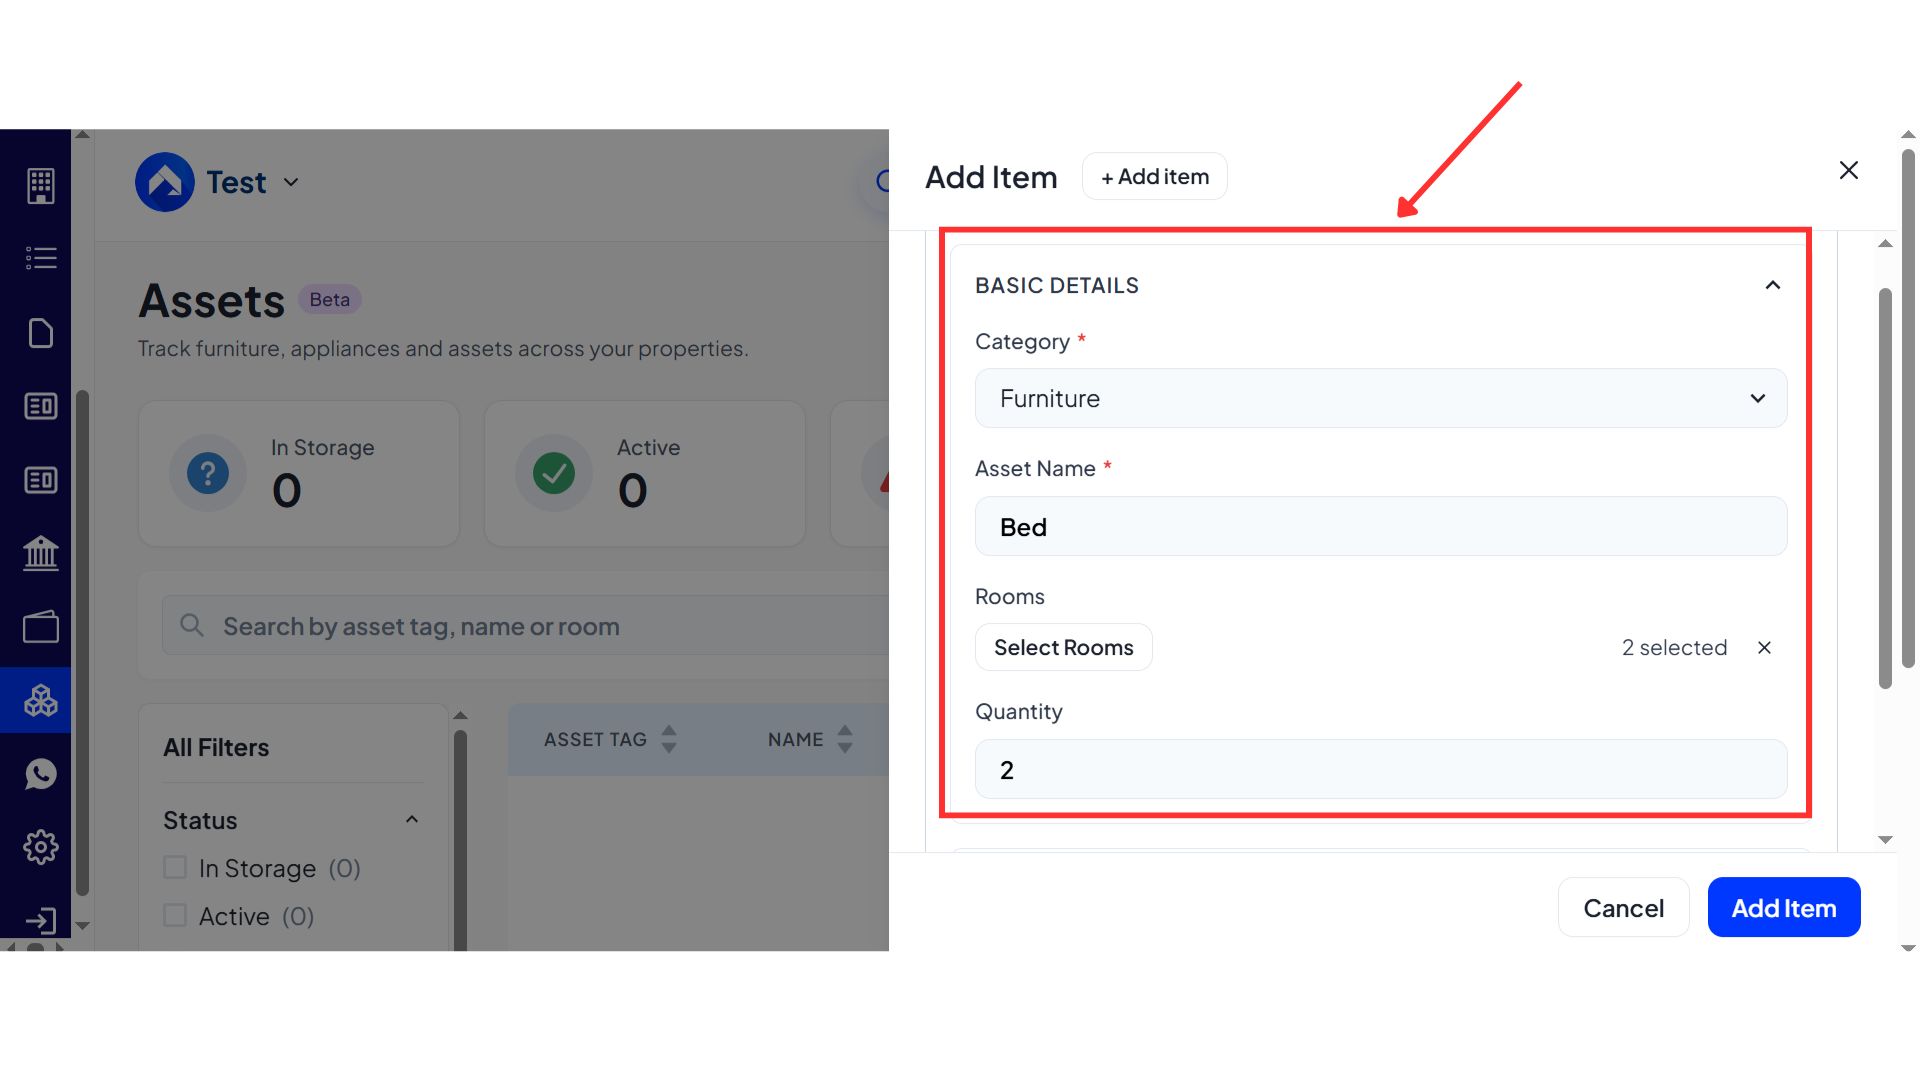
- Step 4: Enter basic details After clicking Add Asset, fill in the basic details such as category, asset name, and the rooms where the asset will be assigned. The quantity will be auto-selected based on the rooms chosen, but you can edit it if required.
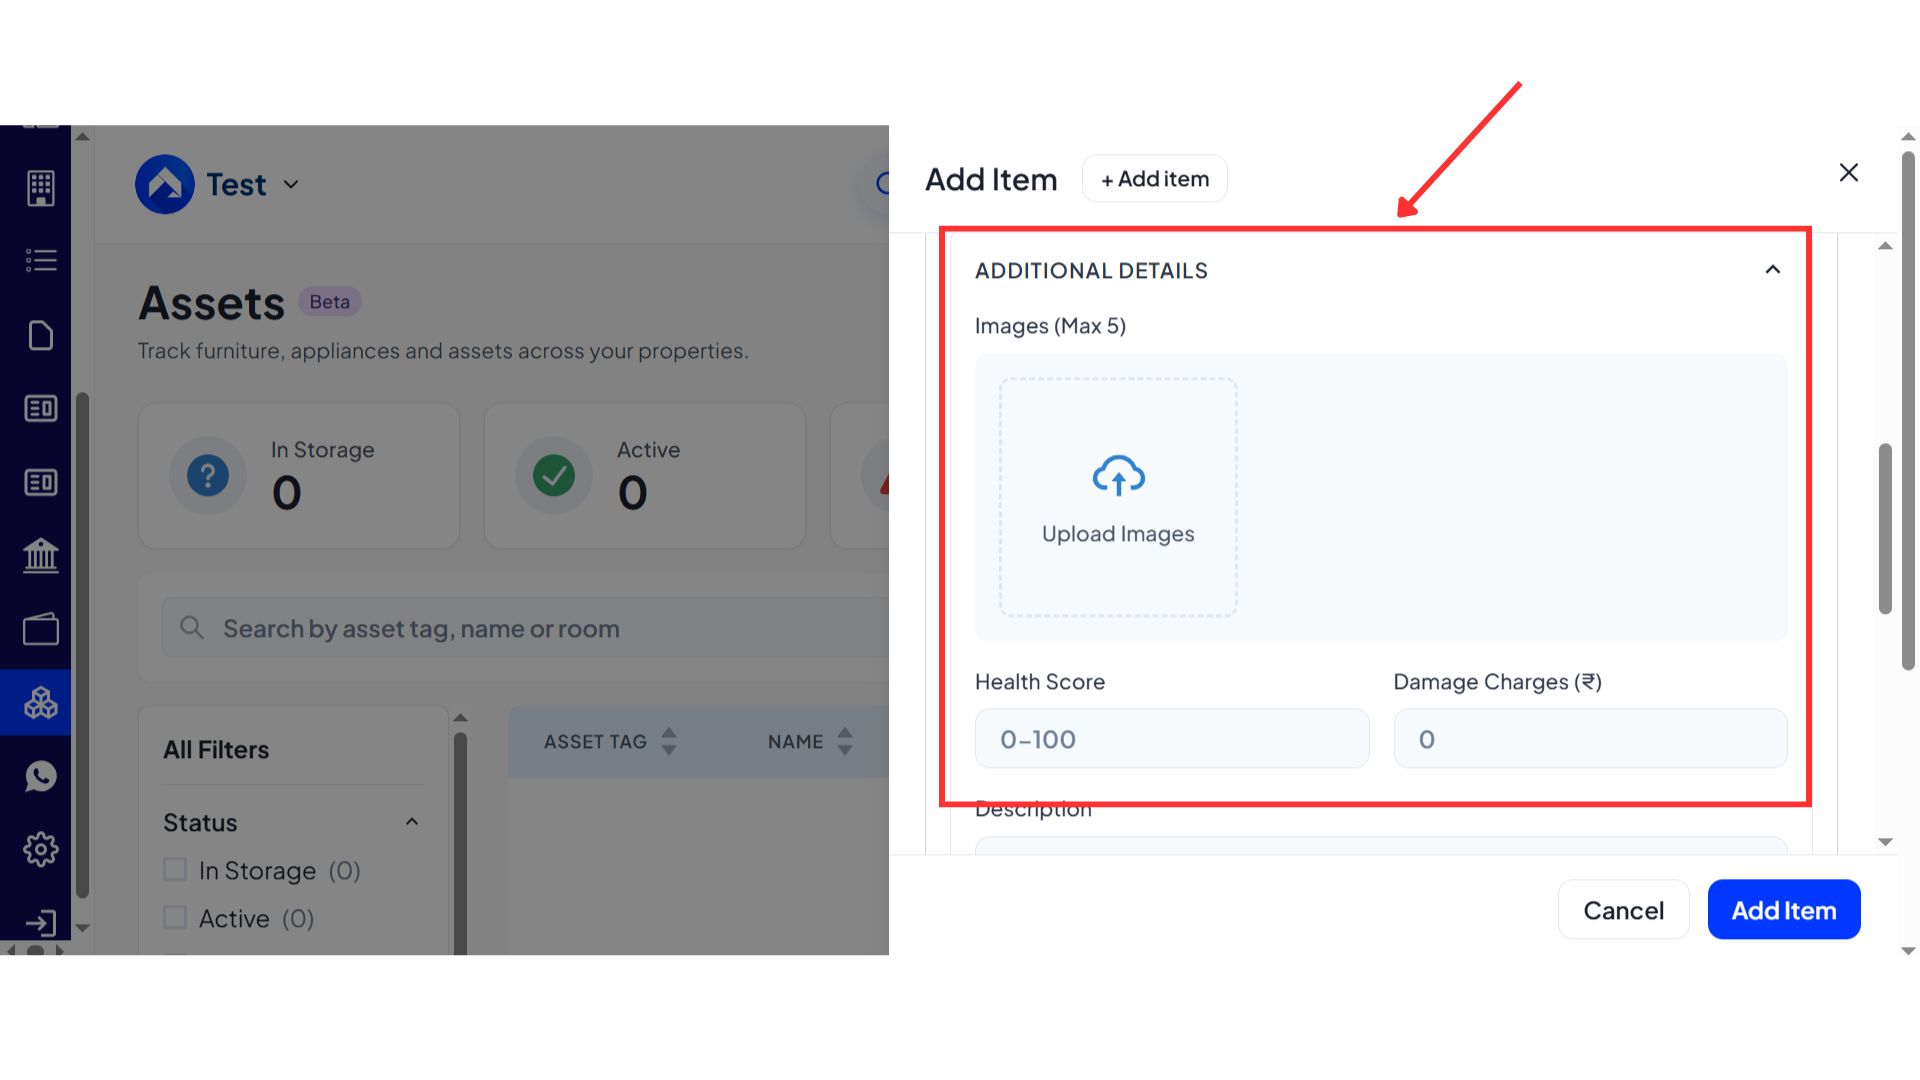
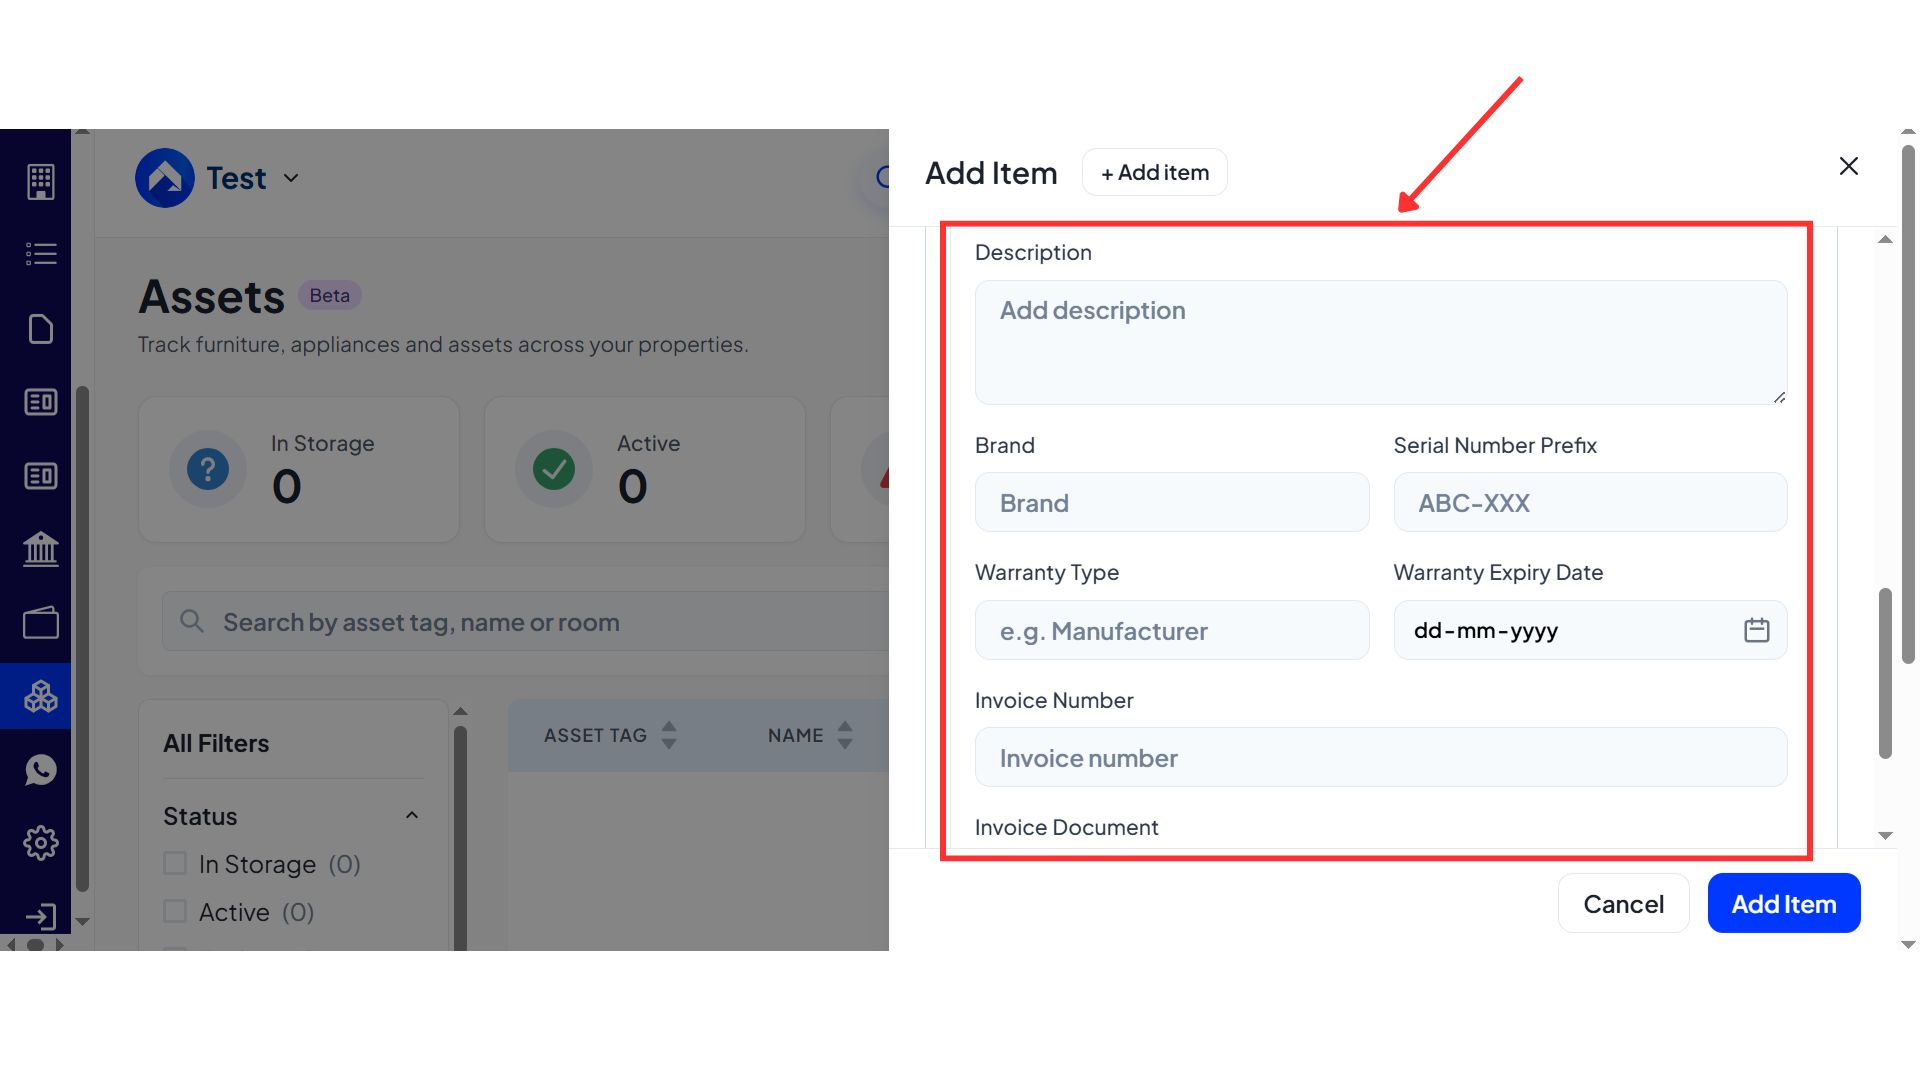
- Step 5: Add additional details (optional) You will also see an Additional Details section. Here, you can upload an image and enter details like health score, damage charges, description, brand, serial number prefix, warranty type, warranty expiry date, invoice number, and invoice document. These fields are optional and can be added for future reference.
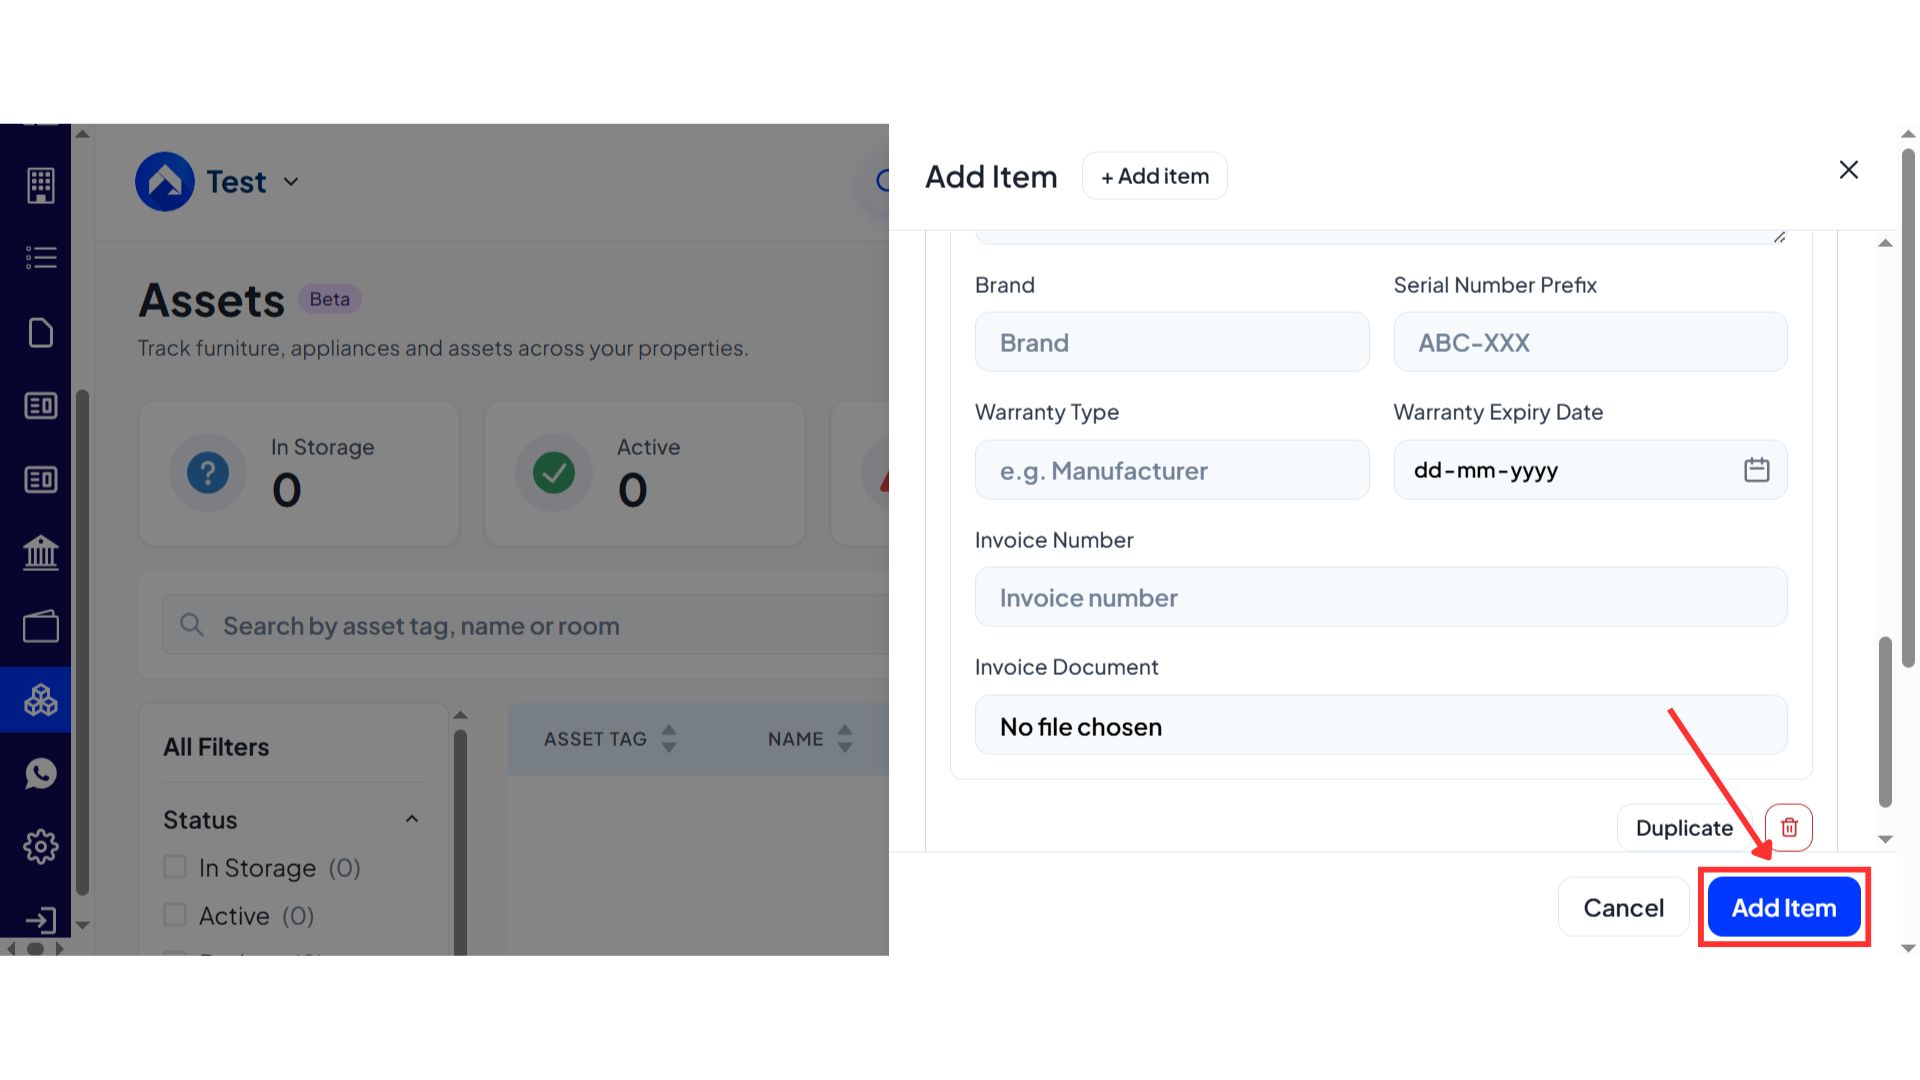
- Step 6: Save the asset After entering the required information, click on Add Item to save and add the asset to your list.
To Add Assets in Bulk:
- Step 7: Upload bulk file Click on Add Bulk Assets, then upload a file from your system or connect a Google Sheet.
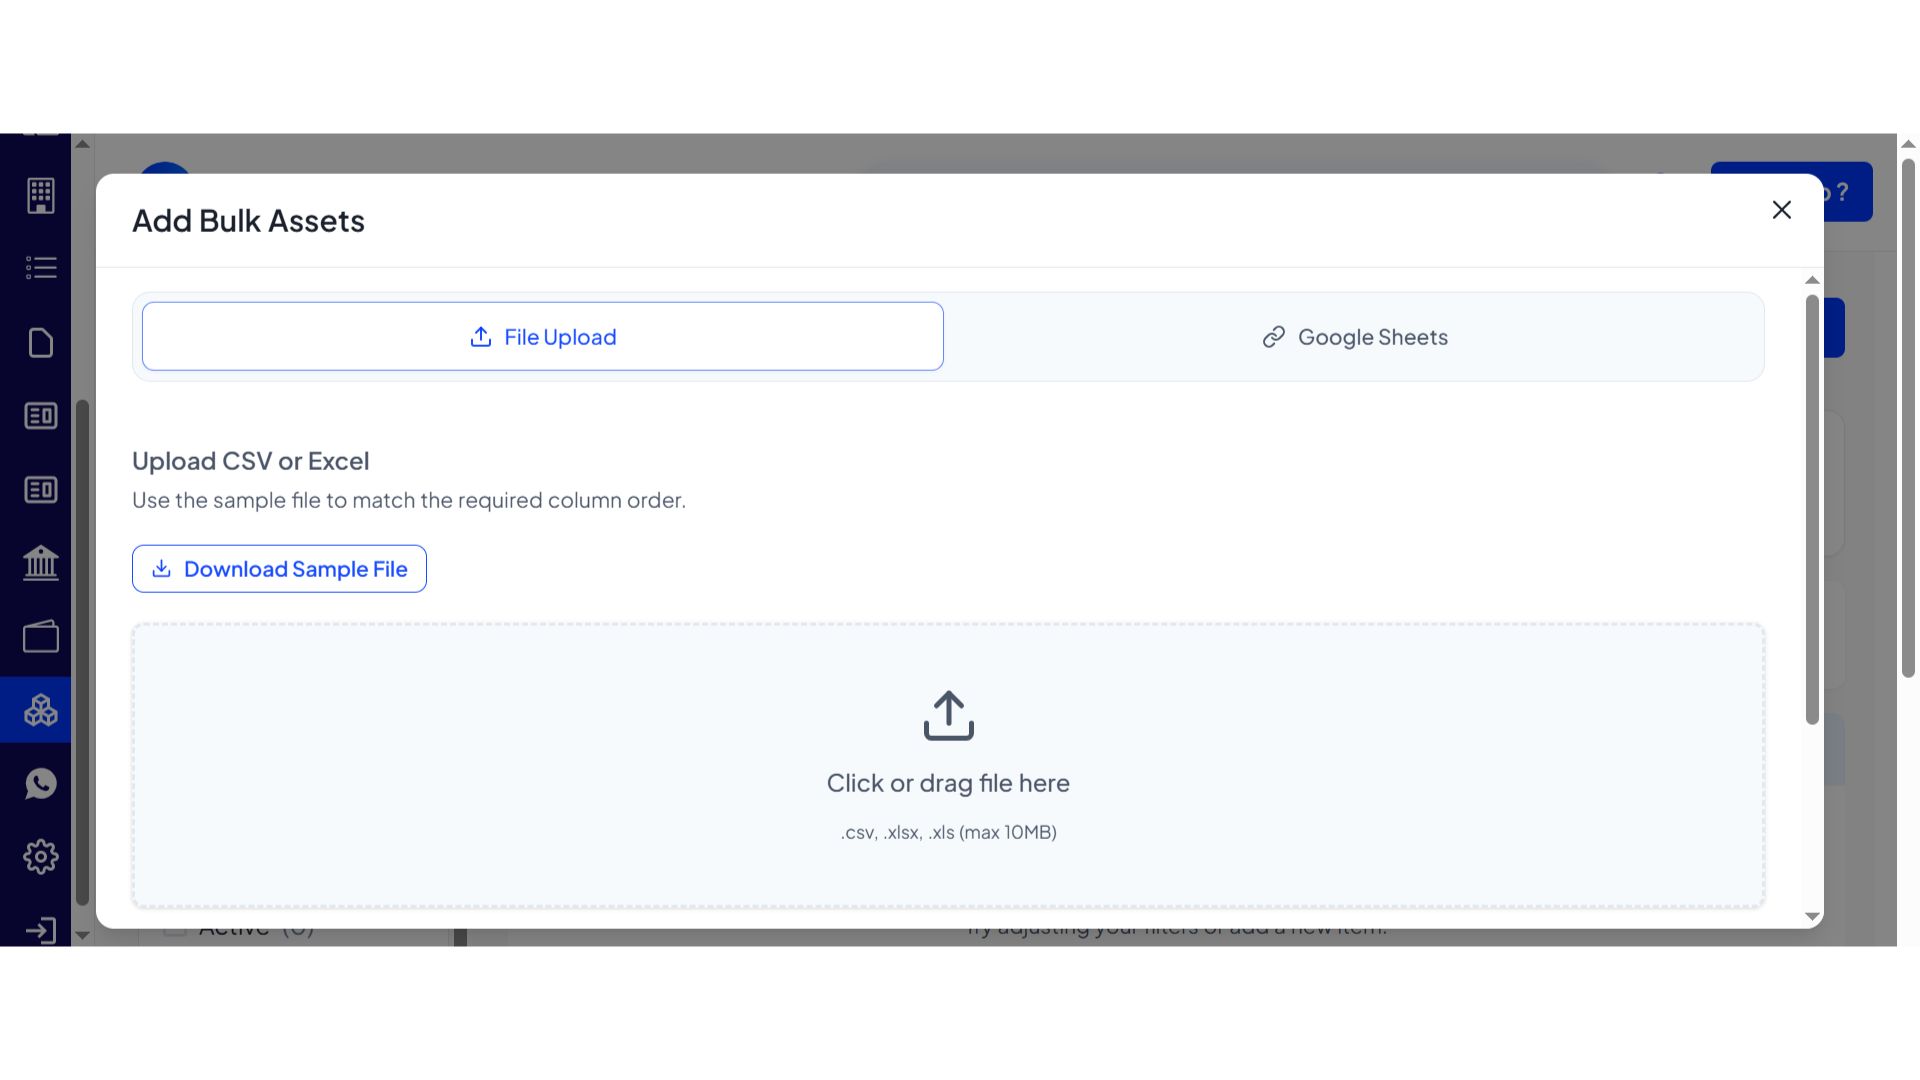
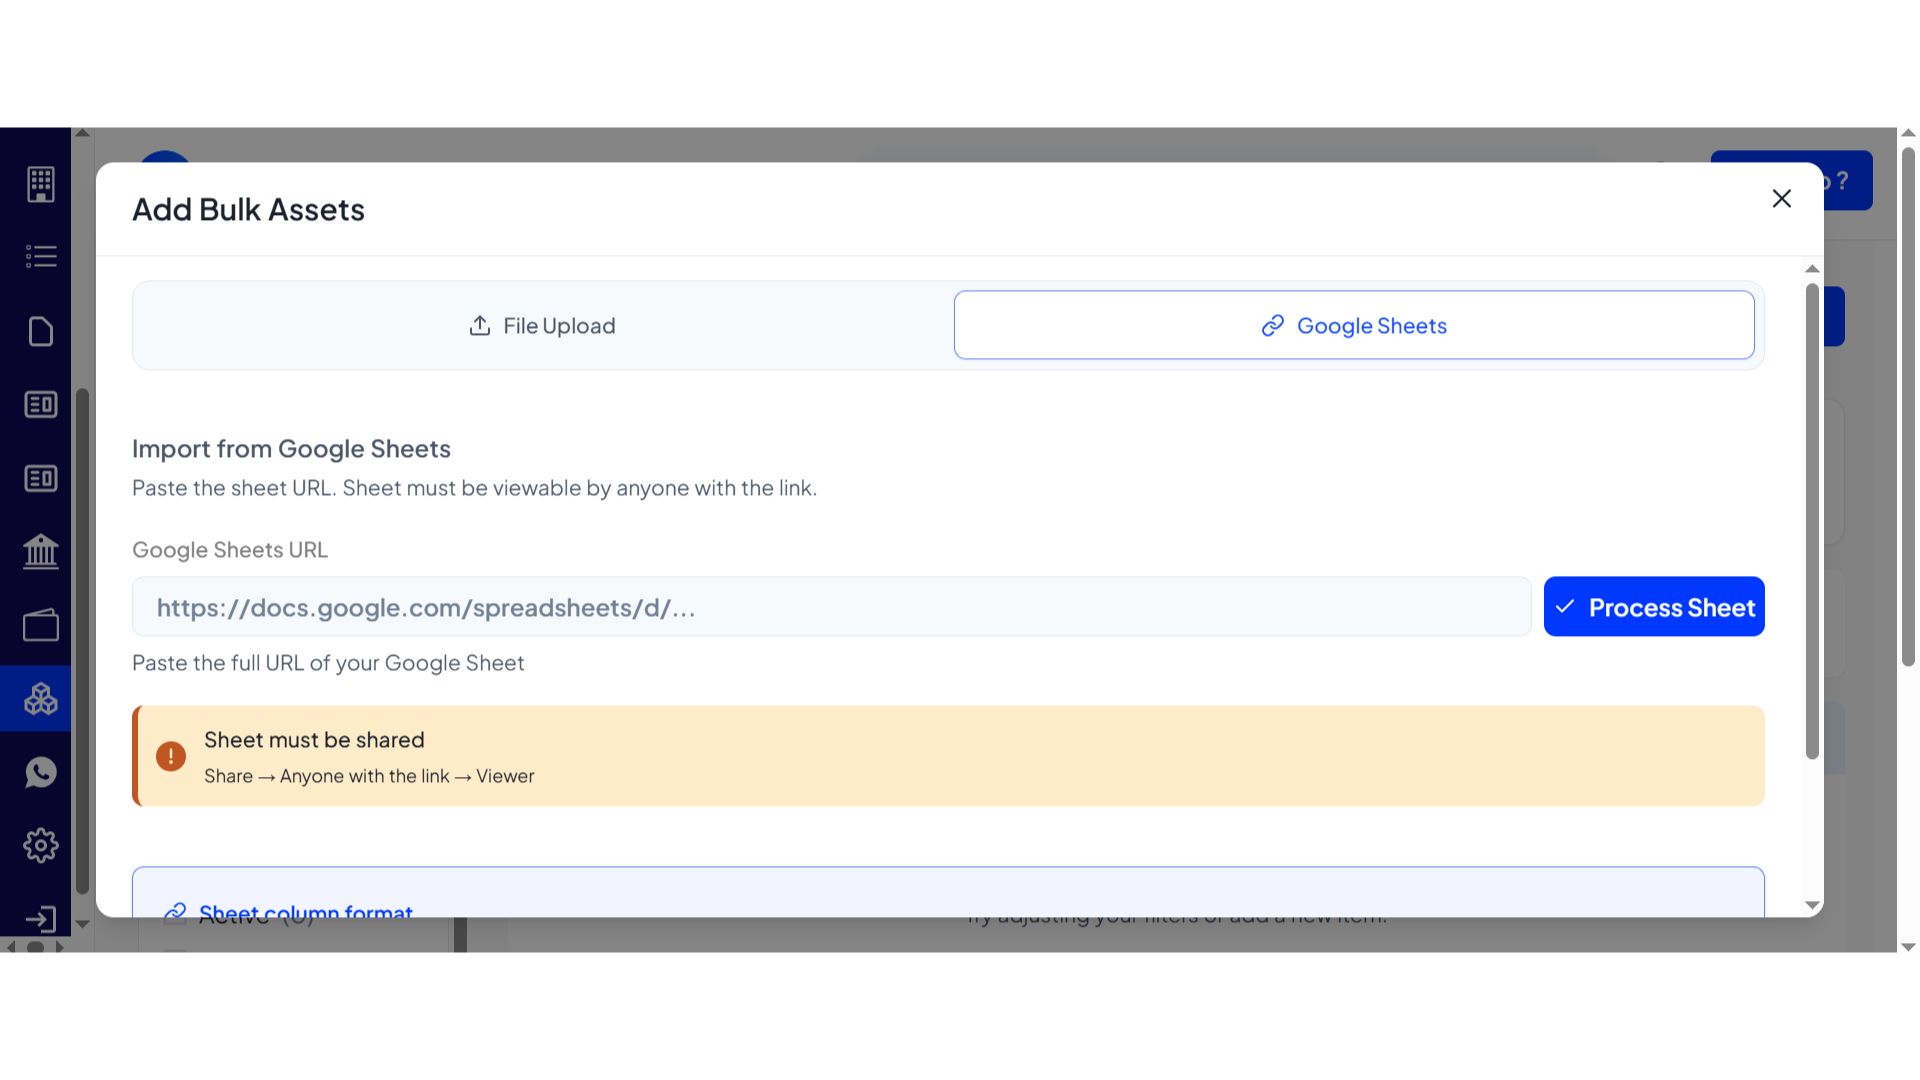
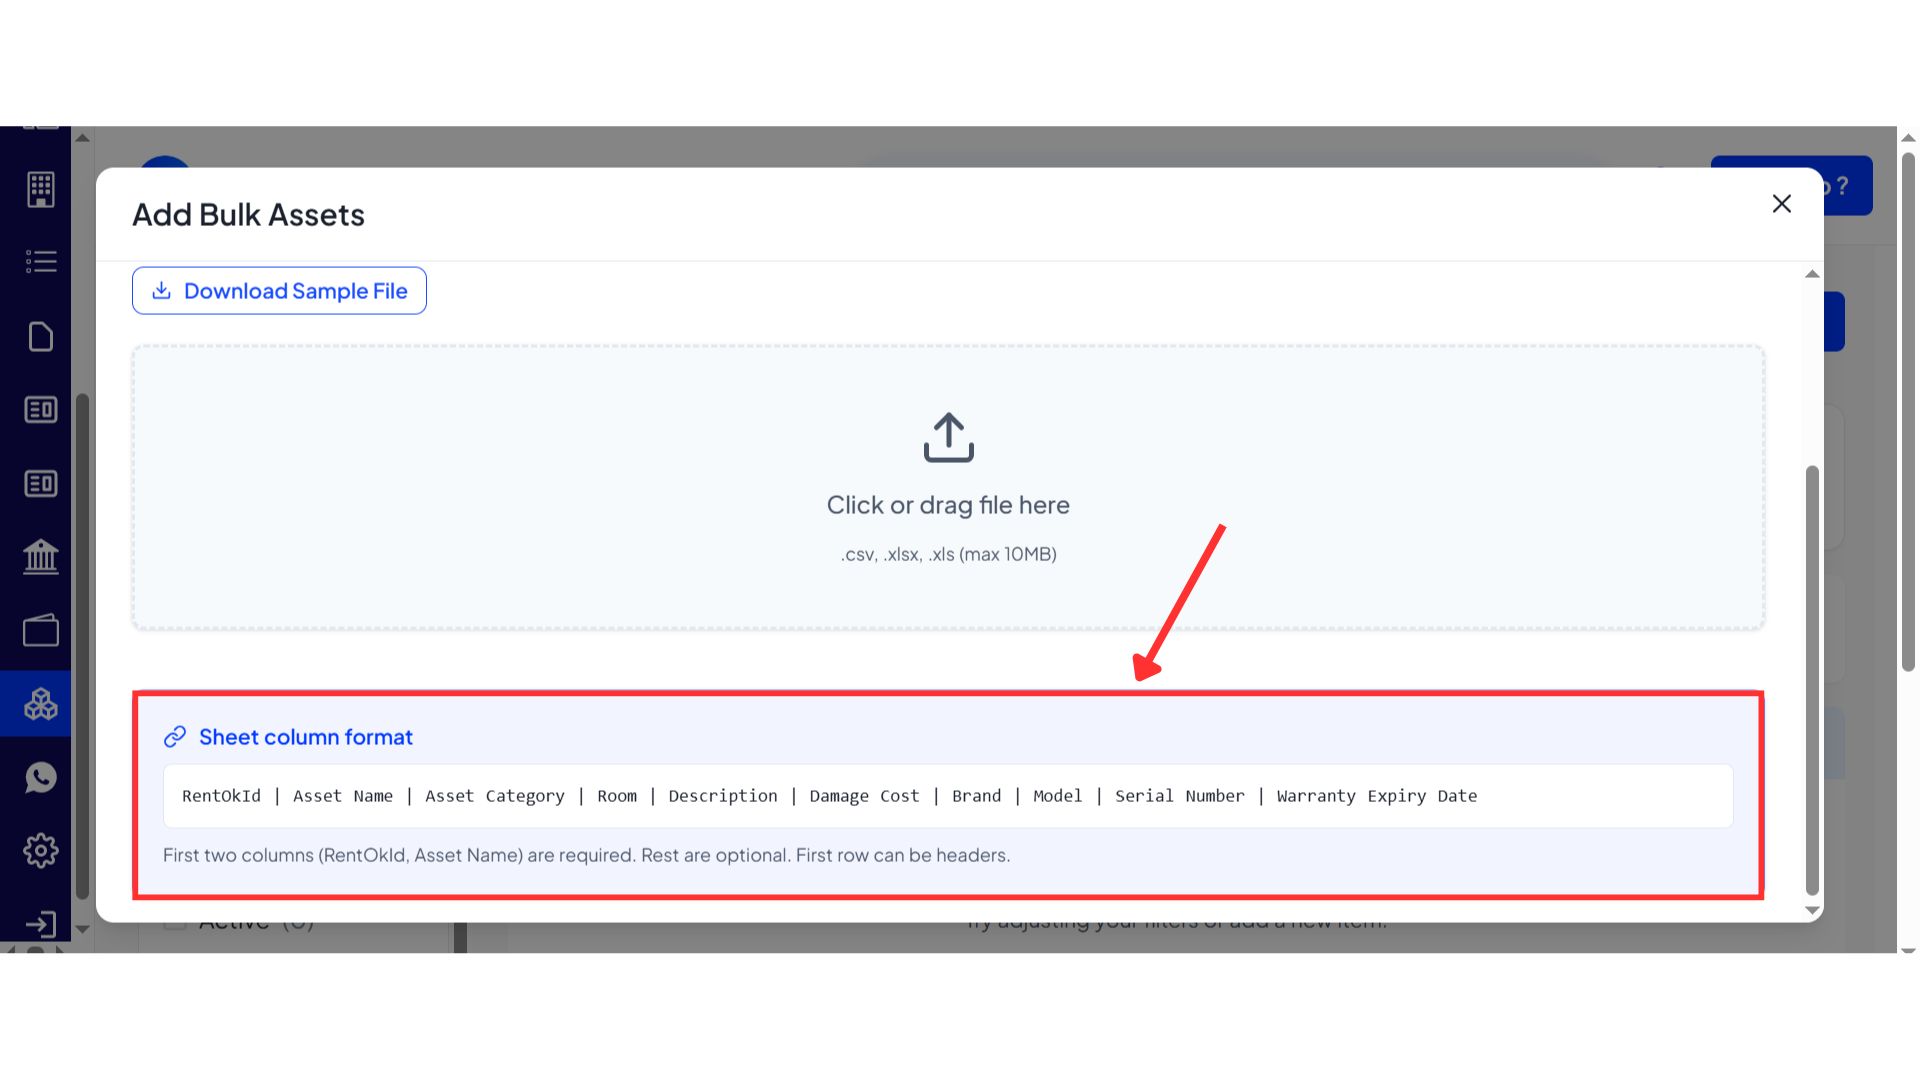
- Step 8: Follow the sheet format Scroll down to view the provided column format and prepare your sheet accordingly. Once your file matches the format, upload it to add multiple assets at once.
| 💡 Why it matters: This creates a central inventory for your property and is the foundation for our Move-in/Move-out checklists, helping you prevent disputes over damages and losses. |
|---|
Entry/Exit on Tenant App - Securely Track Tenant Movement
Tenants can now mark their entry and exit from the property using the Tenant App, providing a digital, secure replacement for manual registers.
See what’s new →
Highlights
-
Schedule Exits: Tenants can schedule a planned exit and request approval if required by the property.
-
QR Code & OTP: Tenants can scan a QR code at the gate to mark their movement, with an OTP option as a secure fallback.
-
Request Late Entry: If a tenant is running late, they can send a "Running Late" request directly from the app to extend their entry time.
-
View Logs: Tenants have a complete history of all their entry and exit logs in their app.
How to try - Entry–Exit flow work
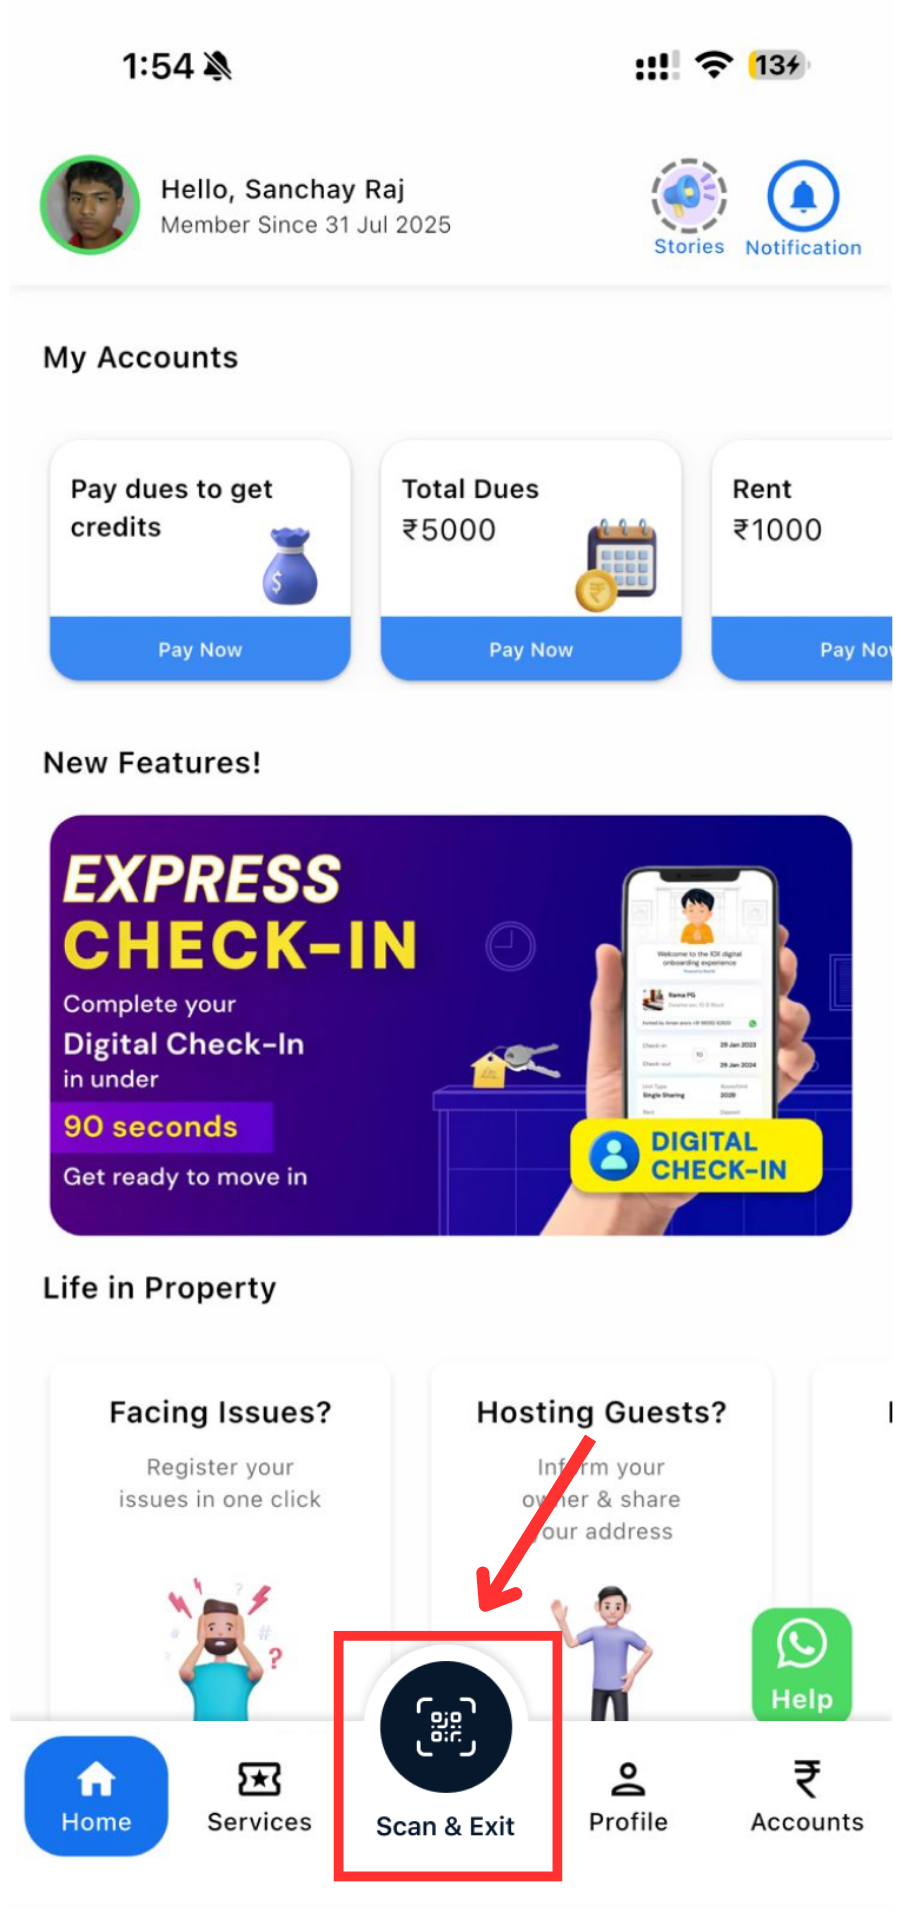
- Step 1: Open the Scanner Go to the Tenant App. On the home screen, you will see the Scan & Exit option below. Tap on it to begin.
- Step 2: Scan the Gate QR Code After tapping Scan & Exit, use the scanner to scan the QR code placed at the property gate. Once scanned successfully, the system will automatically record the entry or exit.
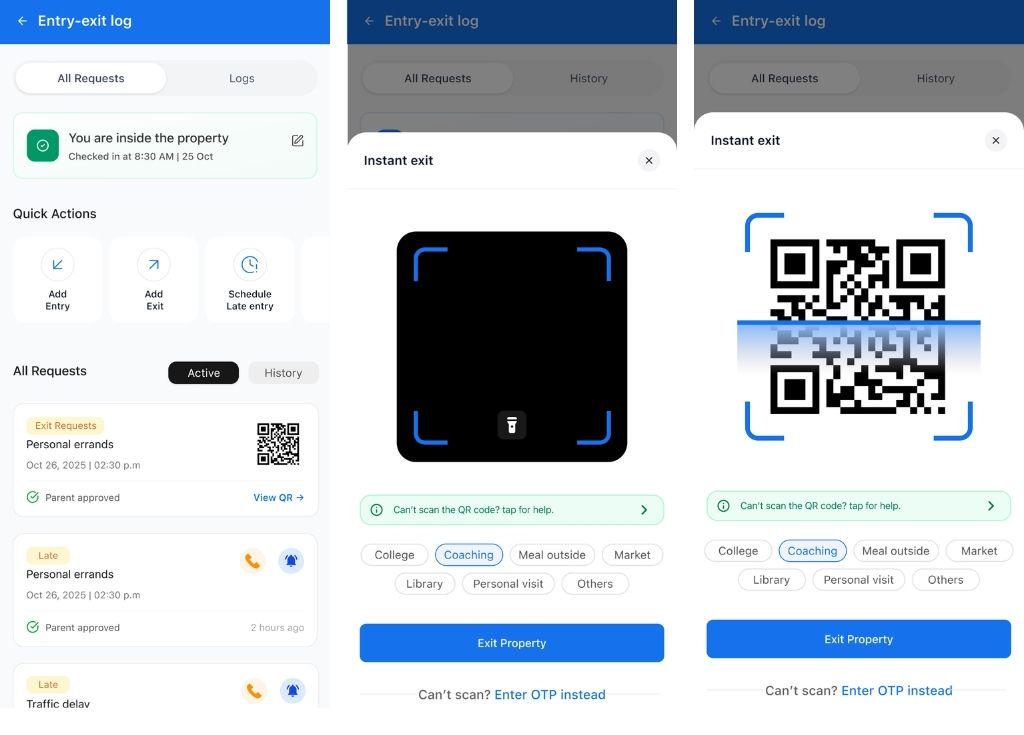
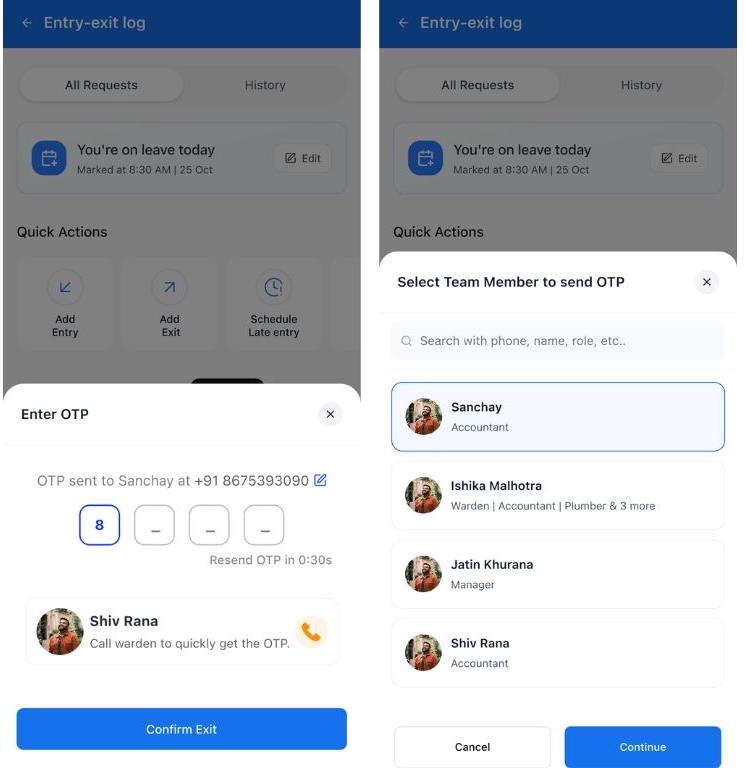
- Step 3: Fallback Option (If QR Doesn’t Work) If the QR code cannot be scanned due to camera or technical issues, the tenant can use the OTP option. The guard or warden can share the OTP, which the tenant enters in the app to record the movement.
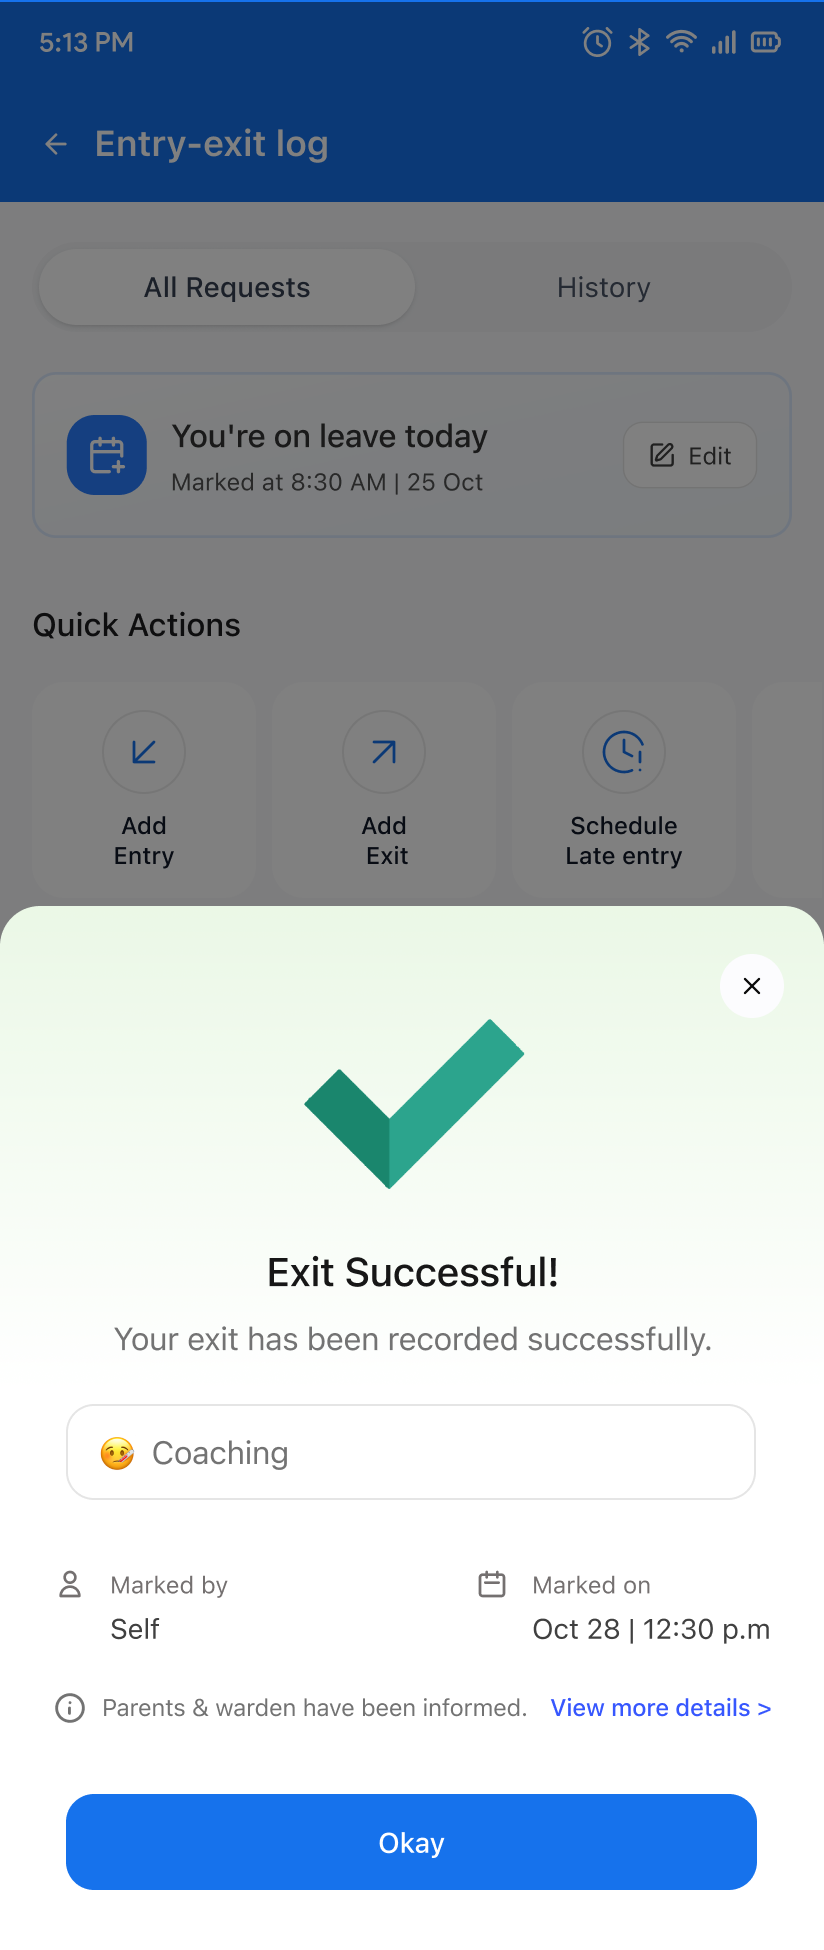
- Step 4: Enter - Exit logged in successfully Once completed, the movement is updated instantly in the system.
How to try - Scheduled Exit flow work
- Step 1: Tenant Creates a Request The tenant submits an exit request in the app. They must enter the purpose of going out, the exit time, and the expected return time.
- Step 2: Request is Sent for Approval Once submitted, the request is automatically shared with the assigned approver, this could be the warden, the parent, or both, depending on the setup.
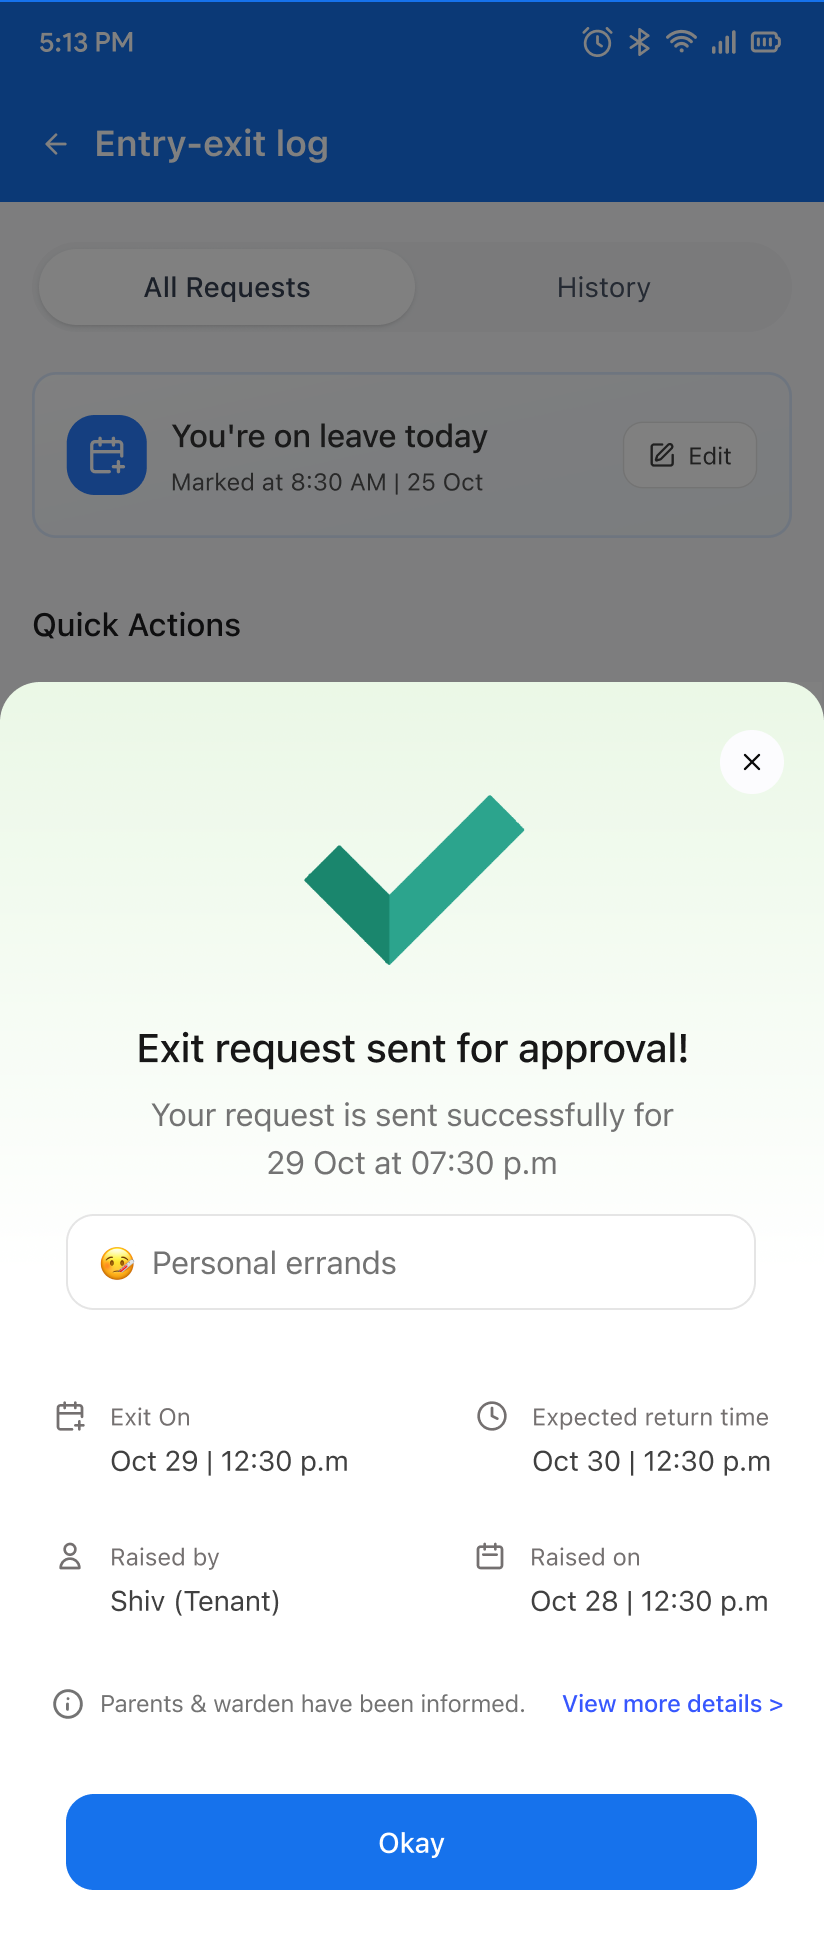
- Step 3: Approval or Rejection The approver reviews the details and either approves or rejects the request. The decision is updated in the system accordingly.
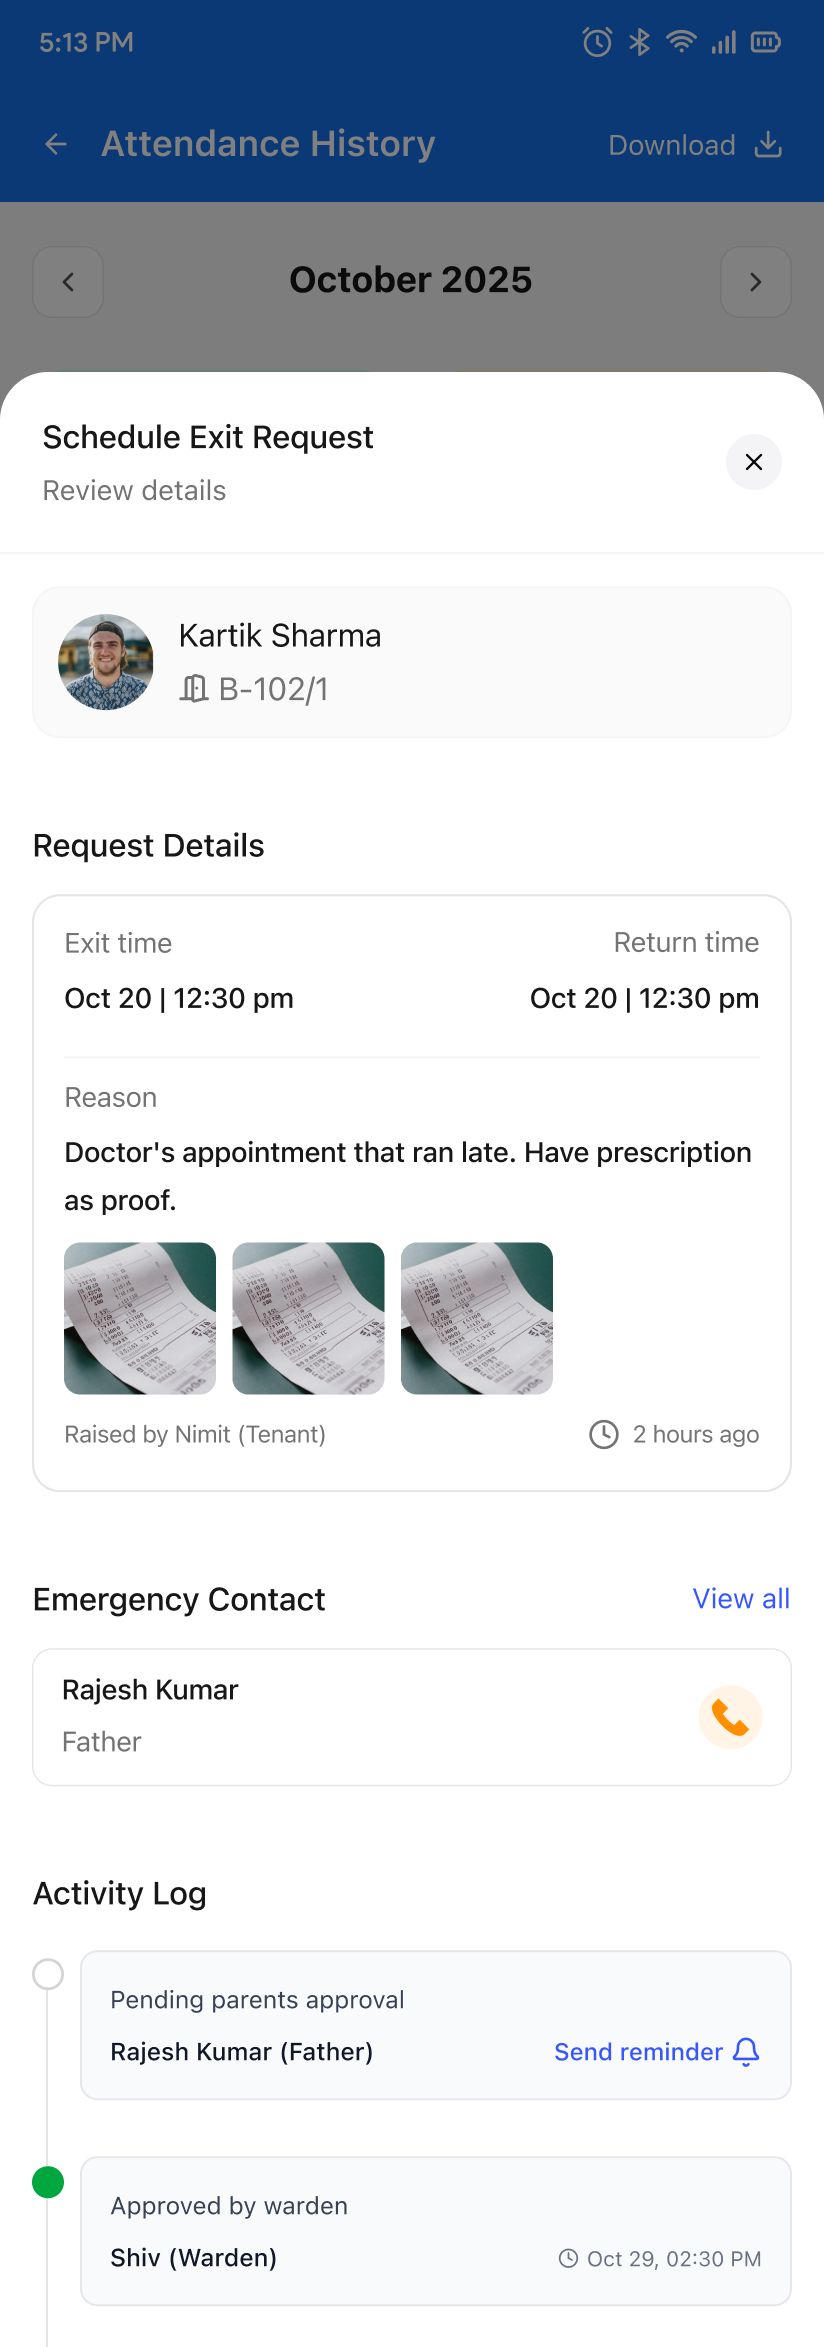
- Step 4: Exit Pass is Generated If all required approvals are received, the exit pass is created. The pass remains valid only for the time duration mentioned in the tenant’s request and is active until the tenant returns within the approved time.
| 💡 Why it matters: This provides enhanced security, accountability, and peace of mind for property owners and parents. It gives you a complete digital trail of all movement, which is crucial for managing student accommodations. |
|---|
✨ Fixes & Polish
-
Faster Complaints on Web (V2): The web Complaints section has been completely optimized. It now loads much faster, especially for properties with a large number of tickets.
-
Cleaner Tenant Profile (Web): The tenant profile page on the web has been redesigned with better fonts and a cleaner layout, making it easier to read.
-
Preview Documents on Web: You can now preview documents (like Aadhaar or PAN) directly on the web without having to download them first.
-
Refreshed Login Screen (Mobile): The mobile app login screen has a new, modern look and feel.
Availability & Rollout
-
Platforms: Manager App, Manager Web, & Tenant App
-
Rollout: Immediate
-
Who gets it: All properties
-
Need help? Message us on WhatsApp from inside the app.
👀 Coming Up Next
-
A new, revamped UI for Team Access control, making it easier to manage staff permissions.
-
The ability to bulk-upload assets with different quantities assigned to different rooms.
Thank You
Have doubts or any feedback? Chat with us in-app (Help → send us a message). We’re building for you, and every suggestion counts